Preparation for making Metroid Plushies
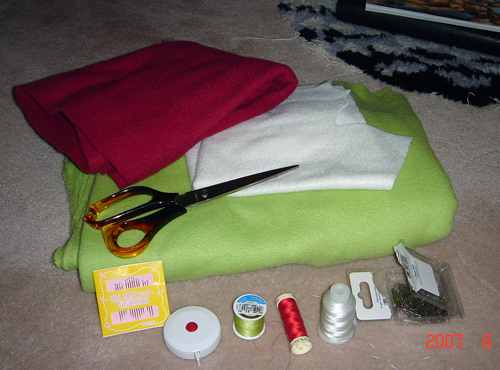
Things that you will need:
Fleece, or some other fabric, in white, green and red. Try to get cloth that doesn't fray at the edges. Cloth is usually sold in bolts of 1 meter or more in width and you choose how much length you want. 20cm should be plenty for each color.
Thread in red, white and green. If you're super cheap, then just go for green thread.
Sharp scissors.
Sewing pins. They will make your life easier.
Sewing needles. Don't use ones that are too thick.
stuffing. I use this for stuffing the main body but you can spare the expense by using scraps of cloth. Stuffing is often sold in large bags so unless you are breeding an army of metroids, you might not want to go out and buy some. Or, you can dissect an old toy or pillow for their fluffy innards.
Optional stuff:
Sewing machine. If you know how to use one and what parts are appropriate for using it, then be my guest. I personally don't use them.
Needle threader. Ham-handed gamers might have a problem threading a needle, but this nifty tool makes the job easy. You first push the wire part of the threader through the needle's eye, and then take one end of your string and thread it through the loop of wire. Then you pull the threader back through the eye of the needle, and it will take the string through the eye.
The pattern
THE PATTERN
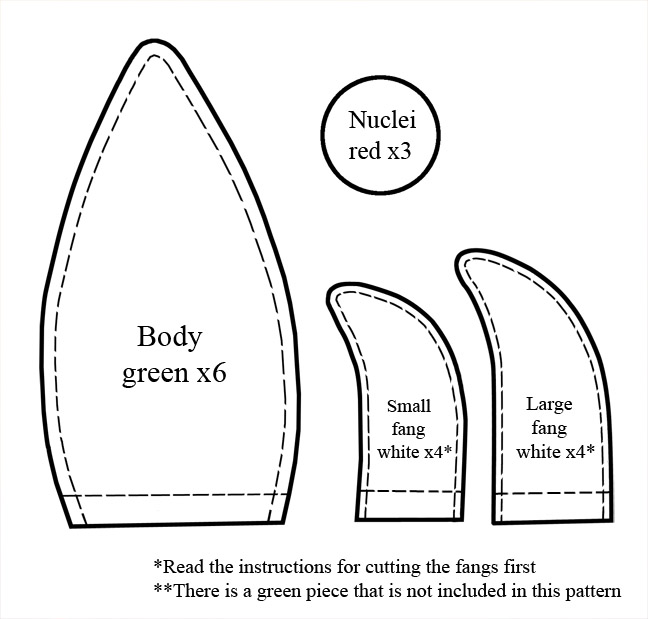
I've provided a sewing pattern here in .JPG form. It's recommended that you resize the image and print it out to your desired size. For reference, I like the nuclei to be 1 inch in diameter. The solid lines you cut along and the dotted lines provide suggestions as to where the pieces are supposed to be sewn. The color of each piece and how many you should cut are also provided. Do not cut any cloth pieces at this point.
Next: Making the Body
Back to Plushie main page

|