Starman
I didn't take a lot of pictures of the first few steps, so pay attention... First, cut out the required pieces from the pattern provided in the Methods and Materials section. However! Do not cut the slits under the arms or between the legs just yet. You may notice that your cloth has different textures/colors on each side. That's because most cloth has a 'good' side and a 'bad' side; usually it's obvious which one is which, but it'll be fine so long as your consistent. Match up the two Body pieces with their good sides facing each other, bad sides visible to you. Pin a few of the edges together so they don't slide around.
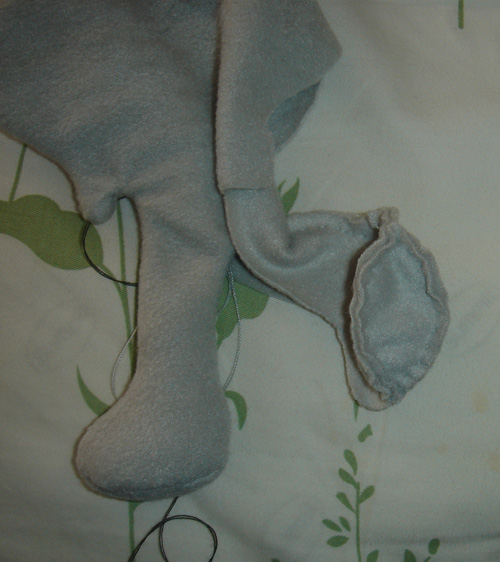
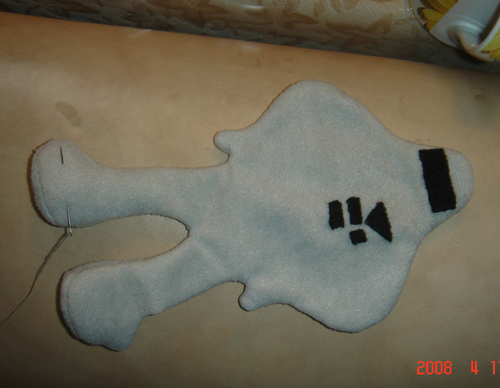
Pin together the front and back of the ankle of one leg, but leave the bottom of the foot open. Take one of the Feet pieces and pin it in the opening as shown in the above image (it's been sewn together in the image, but hopefully you can see what I'm getting at here). You'll want the 'good' side of the Feet piece hidden on the inside of the Starman with the 'bad' side facing outwards. The more tapered part of the Feet piece is the toe. Make sure that every edge of the Feet piece is against an edge of the Body piece.
Now you start sewing the bottom of the foot. Starting at the heel, sew around the Feet piece using the basic stitch until you end up at the heel again. Remove pins when you approach them so you don't stitch warped cloth. You'll want to keep about a 5 mm distance from the edge of the Feet piece at all times. The above image shows what it should look like afterwards. Note how the ugly, visible stitched edges all appear on the 'bad' sides of the cloth. They'll be hidden in the finished product.
Now starting from the heel, stitch along the back of the leg of the two Body pieces, keeping a 5 mm distance from the edge. Try to keep your stitches small and even. When you reach the crotch, sew along as normal, but snip the edge of the cloth as shown in the pattern. Don't snip too deeply; just enough so that the cut barely meets your line of stitching. This is done to release the tension in that area when the plushie is stuffed. If that's not done, then it looks like the Starman has a permanent wedgie.
When you reach the second foot, give it the same treatment as the first.
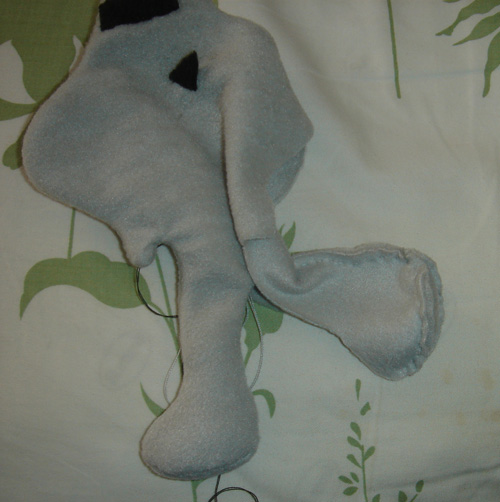
From the tip of one toe, begin sewing up the leg of the Body piece. Take care around where the waist meets the hand; try to make a sharp turn at that point so the distinction between the hand and body are clear in the final product. For the tip of the hand(tentacle?), try to make the curve gradual or else you'll have trouble turning it inside out later.
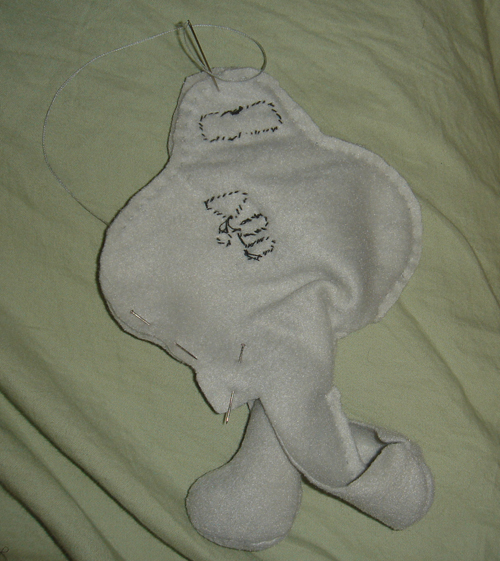
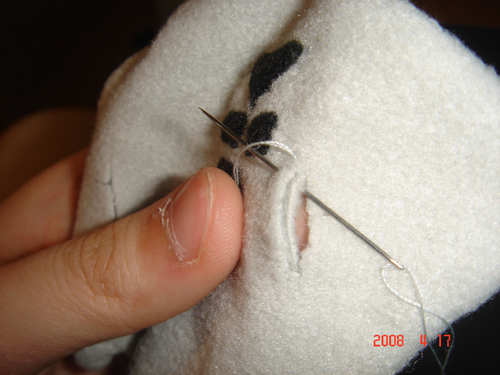
When you are sewing the head area, it's time to think about sewing on the eyelens piece and chest decal pieces. You could technically do this step earlier, but now that you have half the body sewn, it's easier to see where those pieces are supposed to go. Turn the Starman inside out. Now's a good time to check to see if you've made any errors. Is your stitching has been crooked? Are there any 'bad' sides of the cloth visible? Place the eye piece and decals where they look the best and pin them down if you need to. Now, using the whipstitch technique, sew the pieces to the front of the Starman. Take care not to accidentally pass the needle through the Starman's back as well.
Turn the Starman inside out again and continue sewing around the body from where you left off before. Stop at around where the hand meets the waist, leaving an unsewn section along one leg.
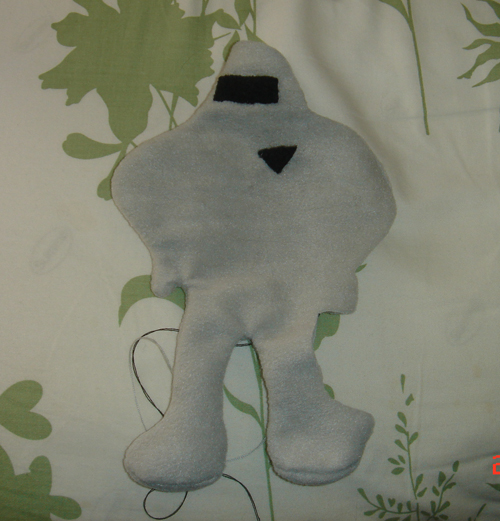
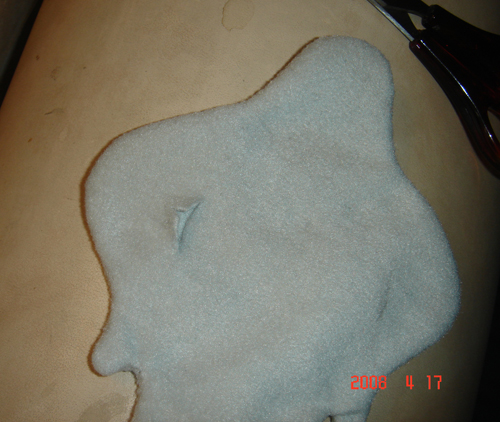
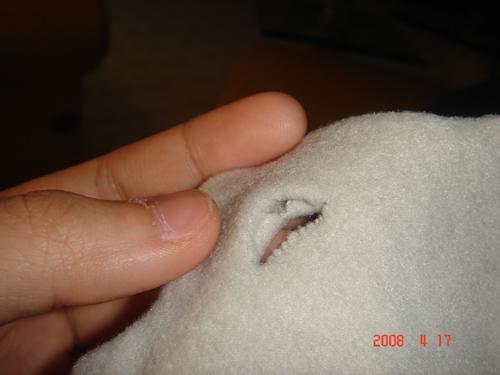
Using the hole in the leg, turn the Starman inside out. Use a pencil or something if you need help with some narrow regions like the Starman's hand. Looks nice, hmm?
Make careful slits under the arm in the shape shown on the pattern. It's important for the two Body pieces to have their cuts match up. It may be helpful to fold in the little triangles of protruding cloth so that they're out of the way for the next step.
Starting from the side closest to the body, stitch together the edges of the Body pieces. The stitch used here is similar to the whipstitch, but different in that you are you are sewing directly on the edges. First, pass the needle from the inner 'bad' side of one piece of cloth so that the knot on the thread is hidden. Then bring it around so you can make a second stitch through both cloth pieces in the same direction as the first. In other words, you should not poke the needle through the same side as the side it emerged from. Hopefully the image above makes that clear. Try to make your stitches small and neat because they'll show. But don't make the stitches too shallow; that area will be under pressure once the plushie is stuffed.
This shows the finished stitching and the triangles of cloth folded inwards.
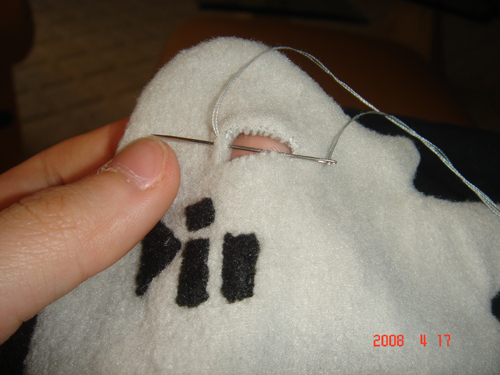
Using the same stitching method described before, stitch up the remaining sides along the Starman's arms. Except instead of following the absolute edges of the cloth, you're following the folded edge you've made. The fold gives extra strength in case your cloth decides to fray. Once you're done, hide the remaining thread by tying a knot, poking the needle into the plushie's body near the knot, passing the needle out somewhere nearby, and then cutting the thread where it appears against the body. That way the loose thread is on the inside of the plushie.
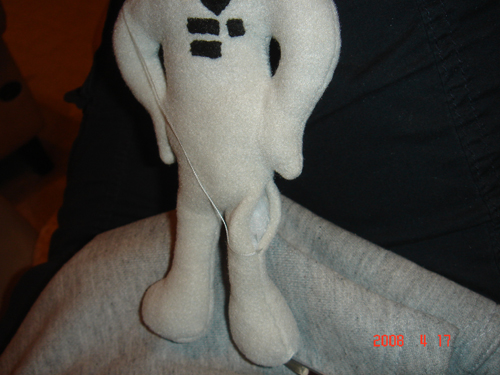
Now comes the fun part: stuffing the Starman! Starting from the hole in the leg, stuff it using cotton filling. You don't have to stuff it too thickly; just to your desired squishyness. Use a pencil or something to get at the narrow areas. Squeeze the body once in a while to see if there are any areas stuffed unevenly. For a bit of a special touch, start by filling the bottom of the Starman's feet with small beads or rice or something like that to give it a bit of weight. And when you proceed to stuff the legs using cotton filling, push a bunch of it in there until it is stiff and thick. That way, it may be able to stand by itself when it's done.
You're gonna wanna close the remaining hole in the leg. To do that, you'll have to use the hidden stitch. Remember to make your first stitch on the inner 'bad' side of the cloth so the knot doesn't show. As you sew upwards, continue stuffing the leg now that you are able to. When you finish the hole, tie a knot and hide the thread as I described earlier. Now admire your work.
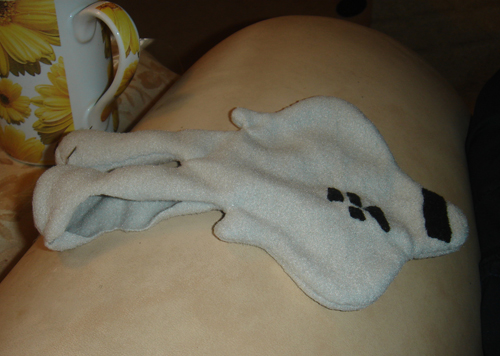
Isn't it beautiful? Be sure to show all your friends and threaten to dominate the world.
Previous: Materials and Techniques