I Take Responsibility For the Curly Plushie
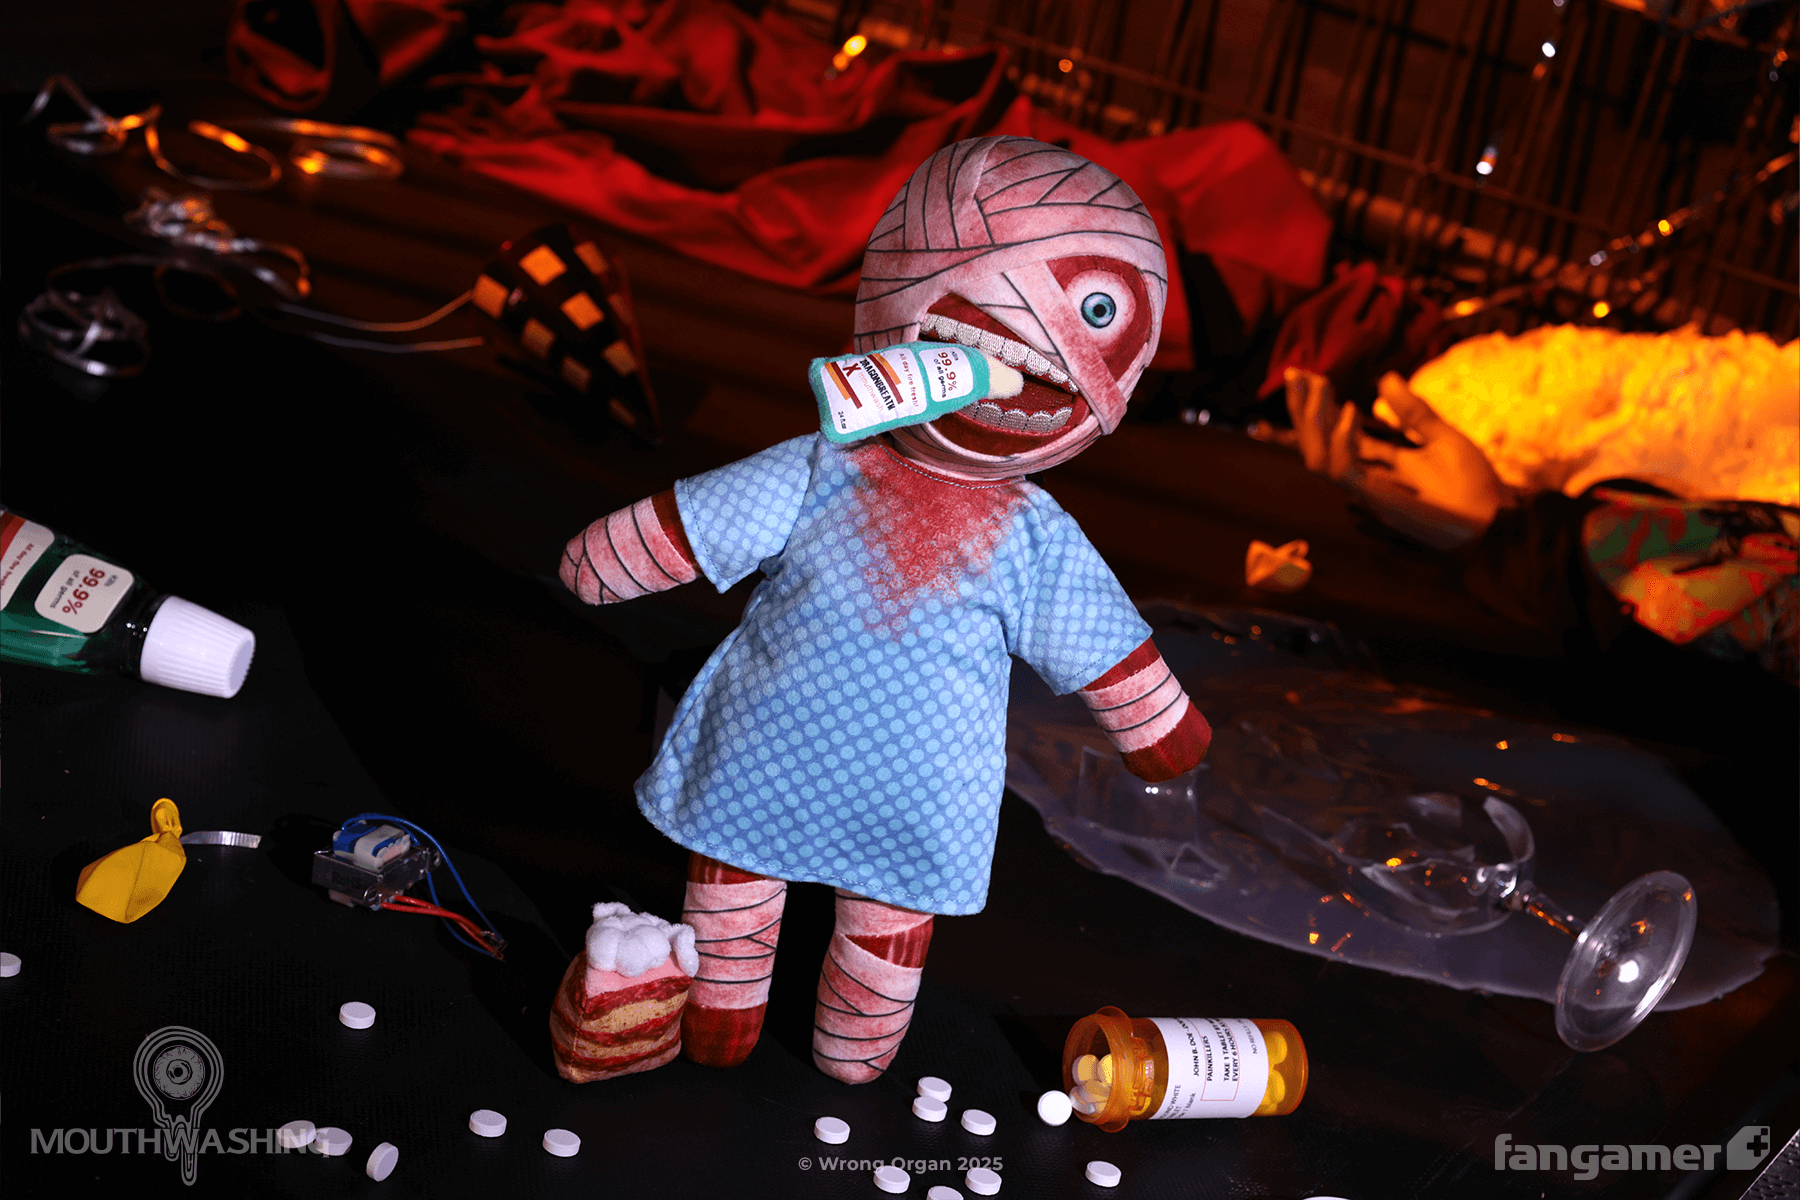
Photo from Fangamer
Welcome, gentle viewers, to the making of the Curly plushie! Curly is a burn victim (and a victim of other things) from the game Mouthwashing. I didn't techincally prototype this sad fellow, but I designed him, created and tested all his patterns, and drew all the print work on him. It all came together really well, and I'm very pleased with the result! You can buy the official Curly plushie at Fangamer.
The difference between "prototyper" and "designer" at Fangamer is that the designer draws the initial turnarounds to present to the developers for their approval, which is then sent to the factory. The prototyper is the one who translates that artwork into a 3D plushie. The factory often does the prototyping work, but I will handle it if it looks too complicated for the factory (or if I think it'll be fun to do!). This time, the factory did most of the work while I devised techniques for them to use.
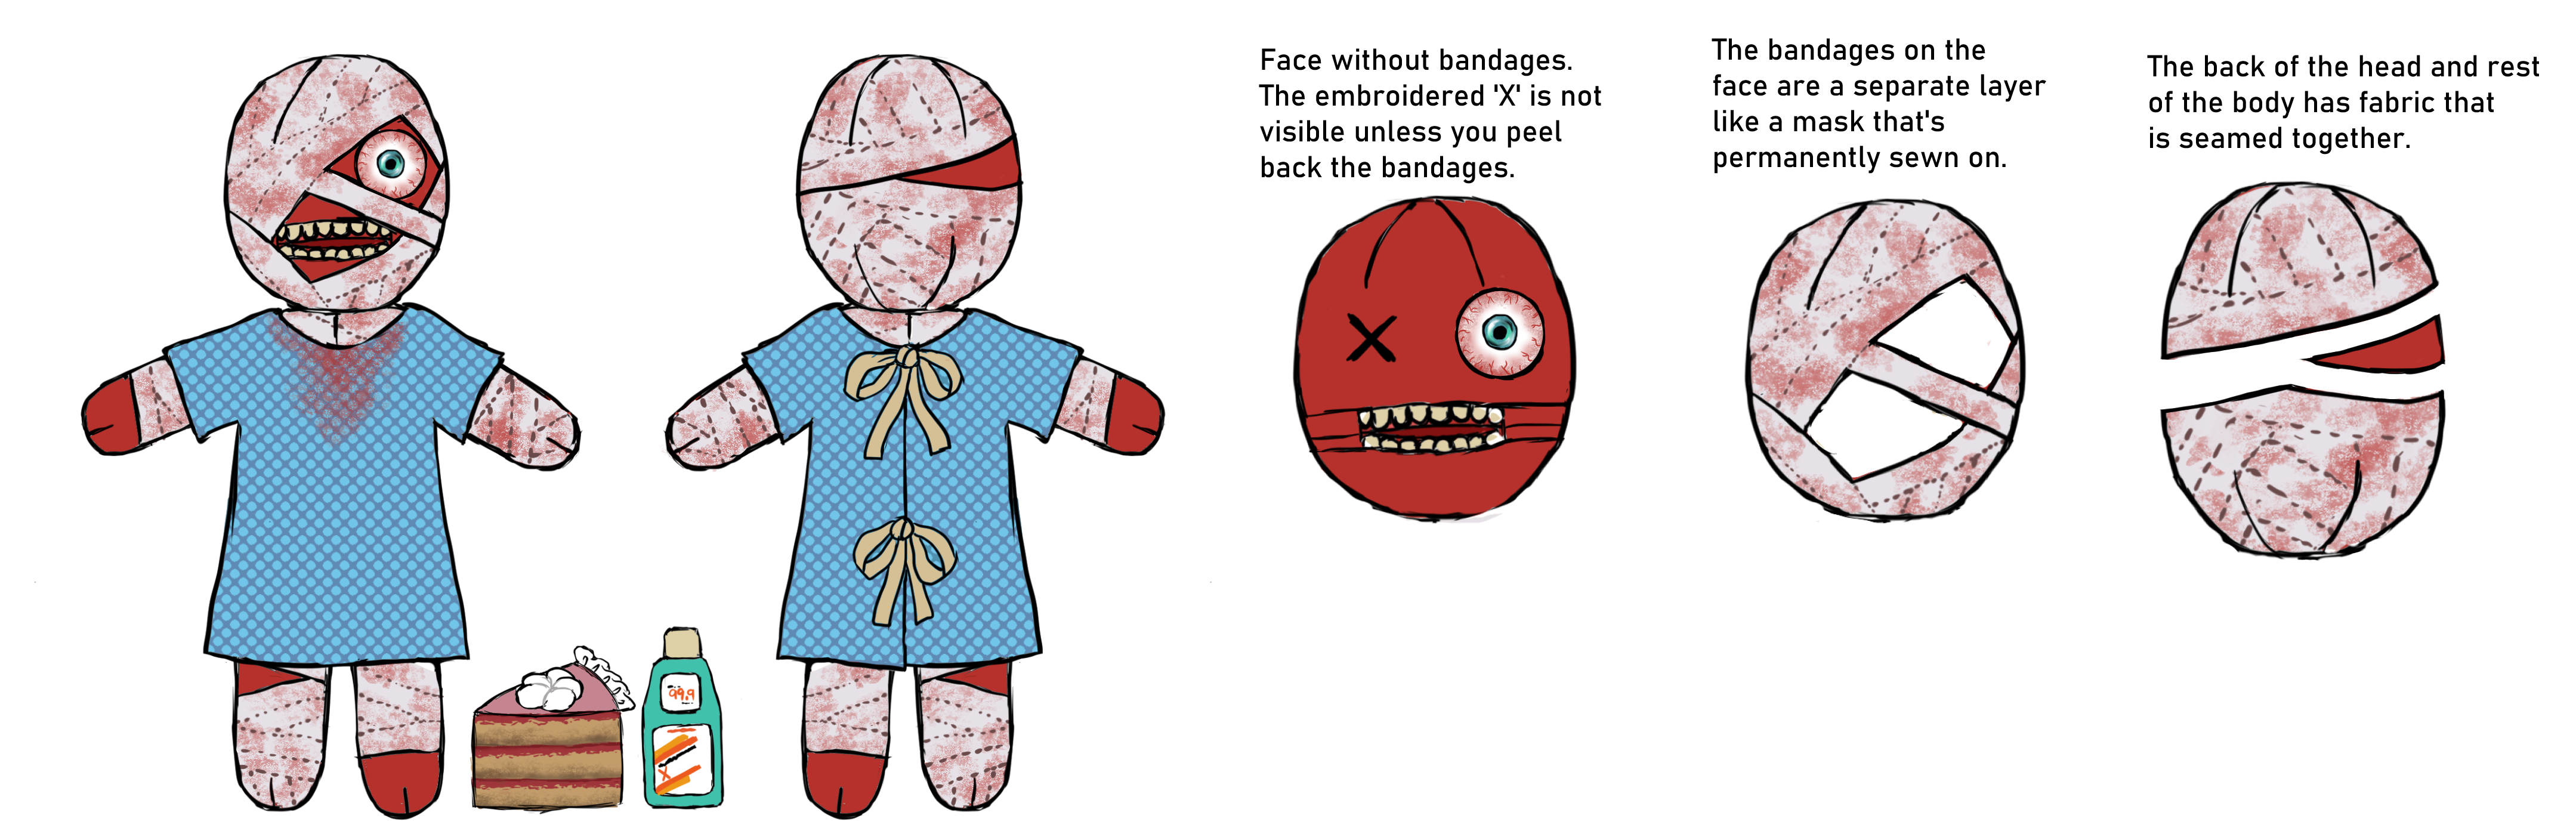
Here's a portion of Curly's turnaround art. In the turnaround stage, the front, sides, and back of a plushie are presented and other details are considered. I wanted to capture some of the character's most iconic attributes, such as the bandages, the exposed teeth, and bulging eye. For the bandages, I wasn't about to make the factory meticulously sew on endless strips of fabric, nor did I want to make them entirely appliqued onto the body of the plushie. I wanted to give them some dimension, especially on the face. So the bandages on the face are a separate layer on the head that's constructed like a mask, while the bandages everywhere else are sewn in. As for representing each individual bandage strip, my first idea was to topstitch lines onto fabric with a printed texture. The topstitching would give a tiny bit of dimension to the otherwise flat fabric.
An early Curly prototype. Photo from Gravim
In this first prototype from the factory, the topstitching wasn't working out, so we pivoted to print. All of Curly's printed fabric on every part of his body was drawn by me, and some of it I had to redo, like, four times. It was a challenge because I couldn't see what the print quality was or how things lined up until after a sample was made.
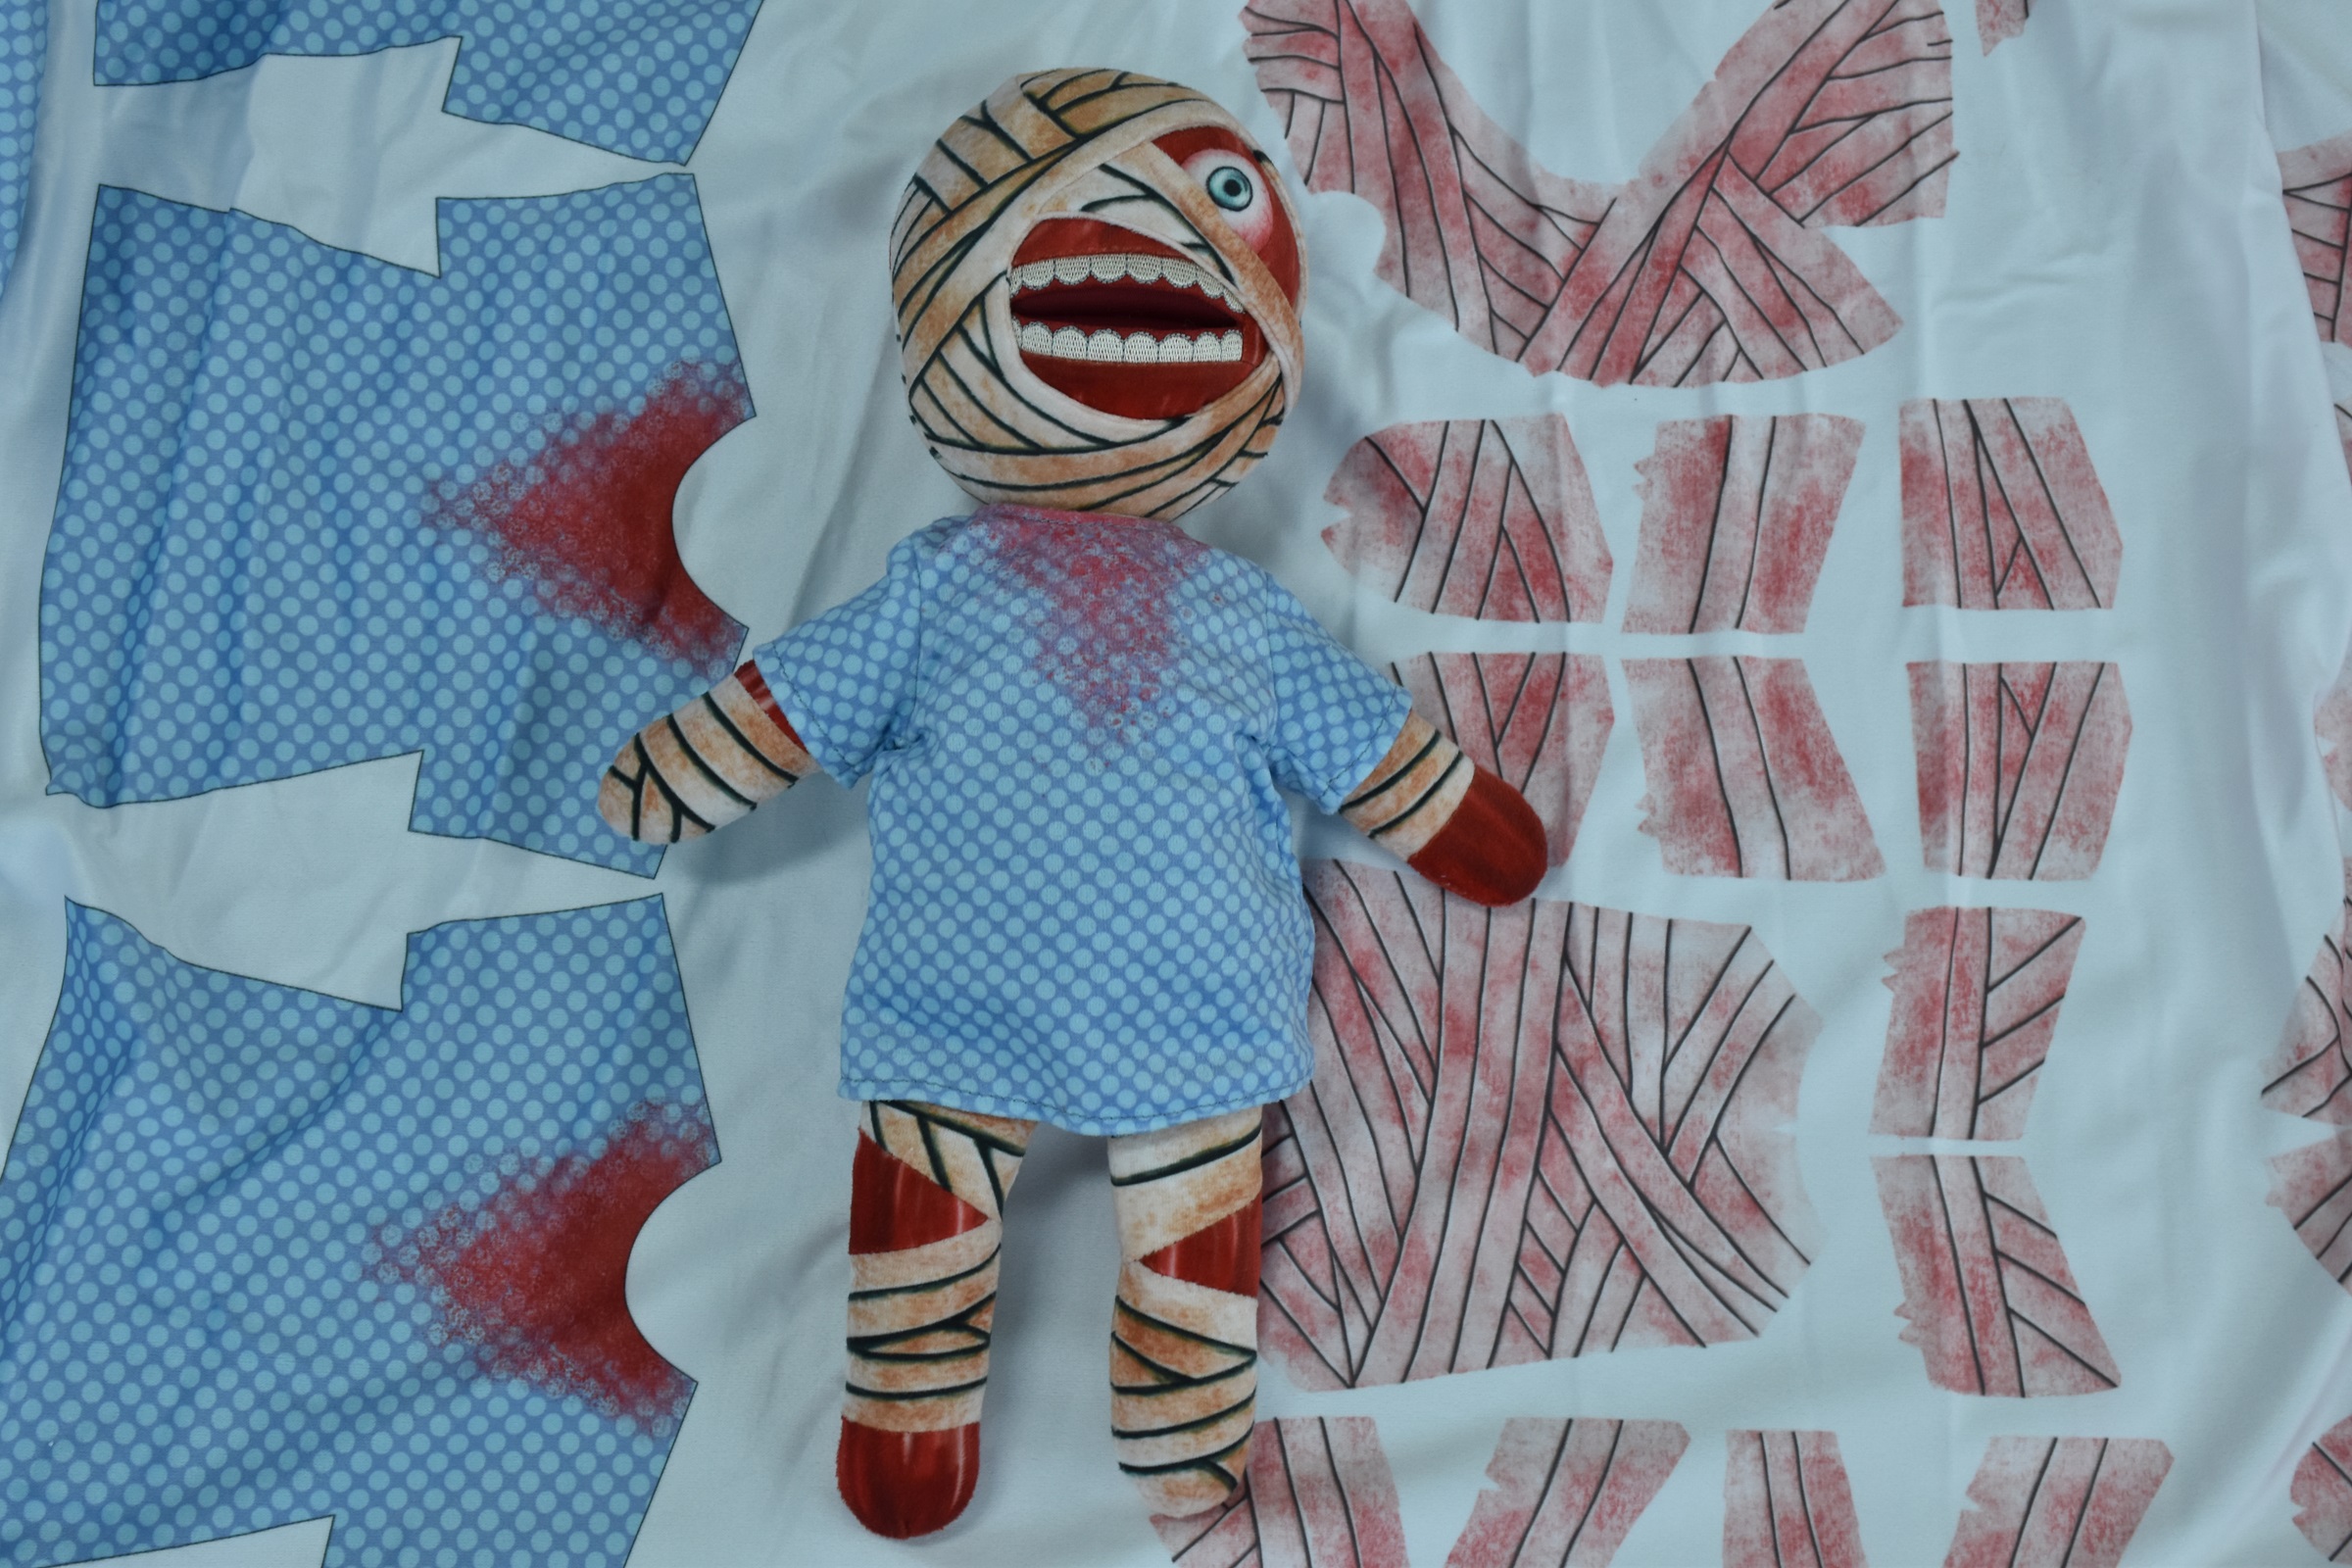
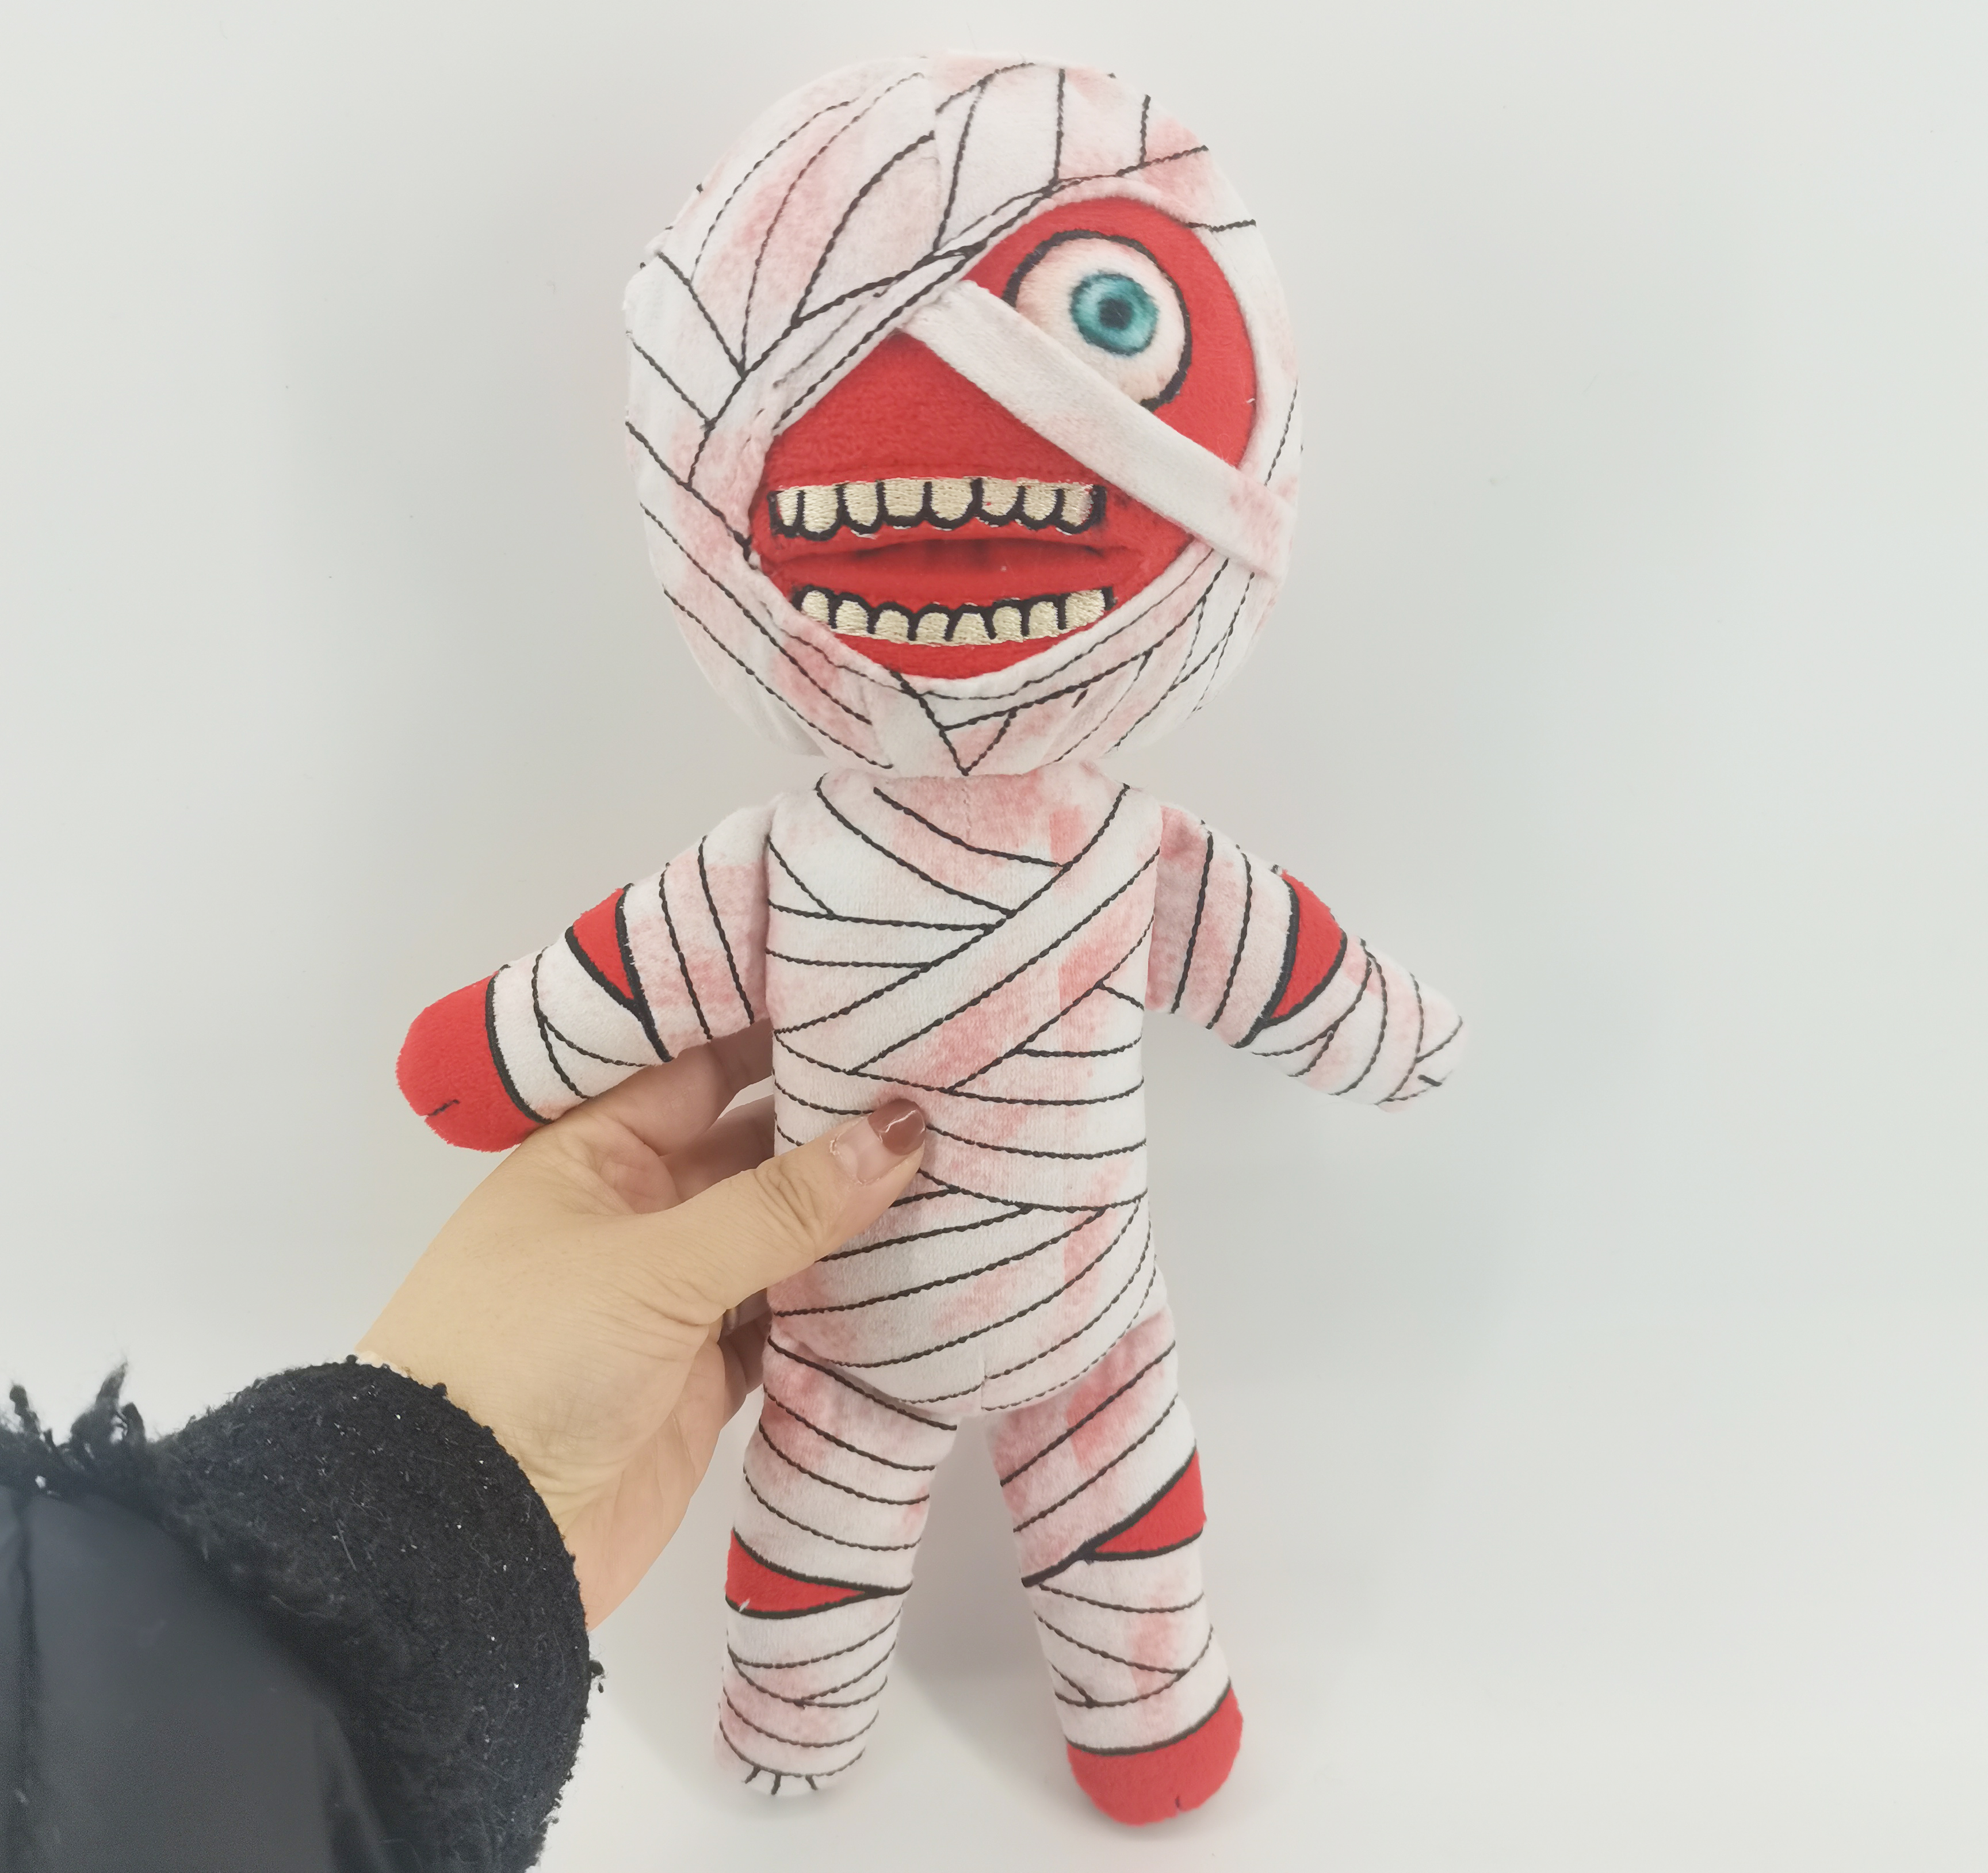
Photo from Gravim
Here's an older prototype photographed with a newer fabric printing sample. The prototype's bandages had black lines that were too thick and there was a weird yellowish tinge that resulted from some sort of transparency issue with my art file. I was able to fix the coloring, although I'm not sure what the problem ended up being. I'm not trained in digital art!
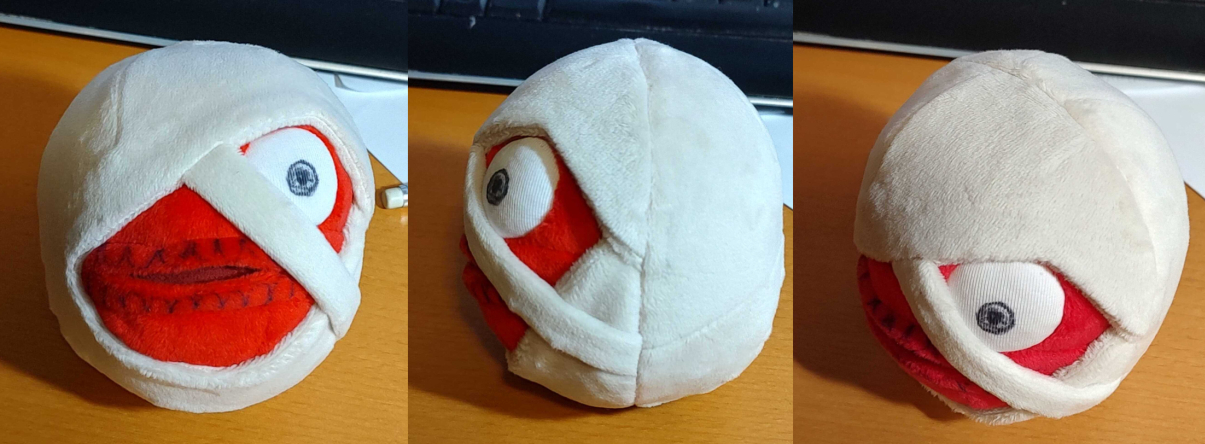
The eye was another area that I put a lot of focus into because it's such an iconic element of the game. I wanted it bulging. This was achieved by using a stretchy fabric for the eye and creating a compartment behind it to hold a densely packed amount of stuffing. Here's a sample head I made for the factory which showed off how the eye, mouth, and bandages were supposed to be constructed.
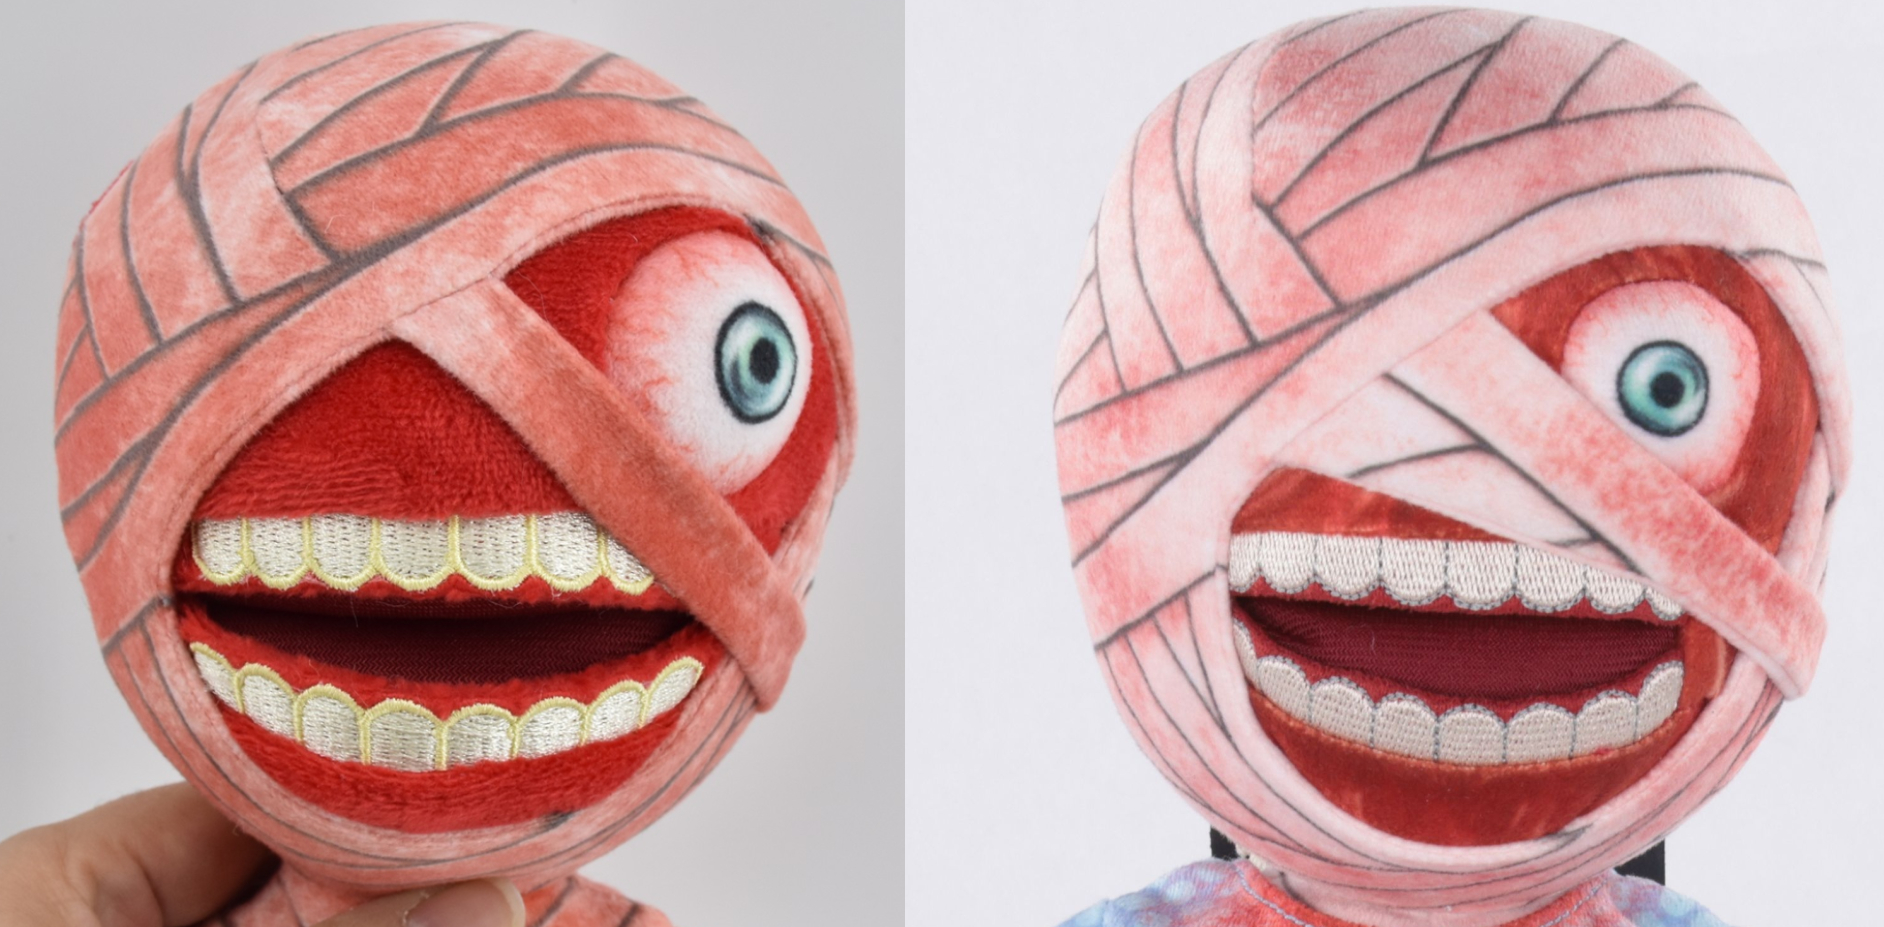
Photo from Gravim
At first, I drew the pupil of the eye dead center on a circle of fabric. But in execution, the pupil points out at an angle due to the bulging of the eye and also because of the curvature of the face. You can see how the earlier prototype has a very unfocused look as a result, compared to the final sample. I compensated by drawing the pupil off-center and then making very sure that the markings on the pattern are clear so the seamsters won't accidentally sew the eye with the pupil pointing in the wrong direction.
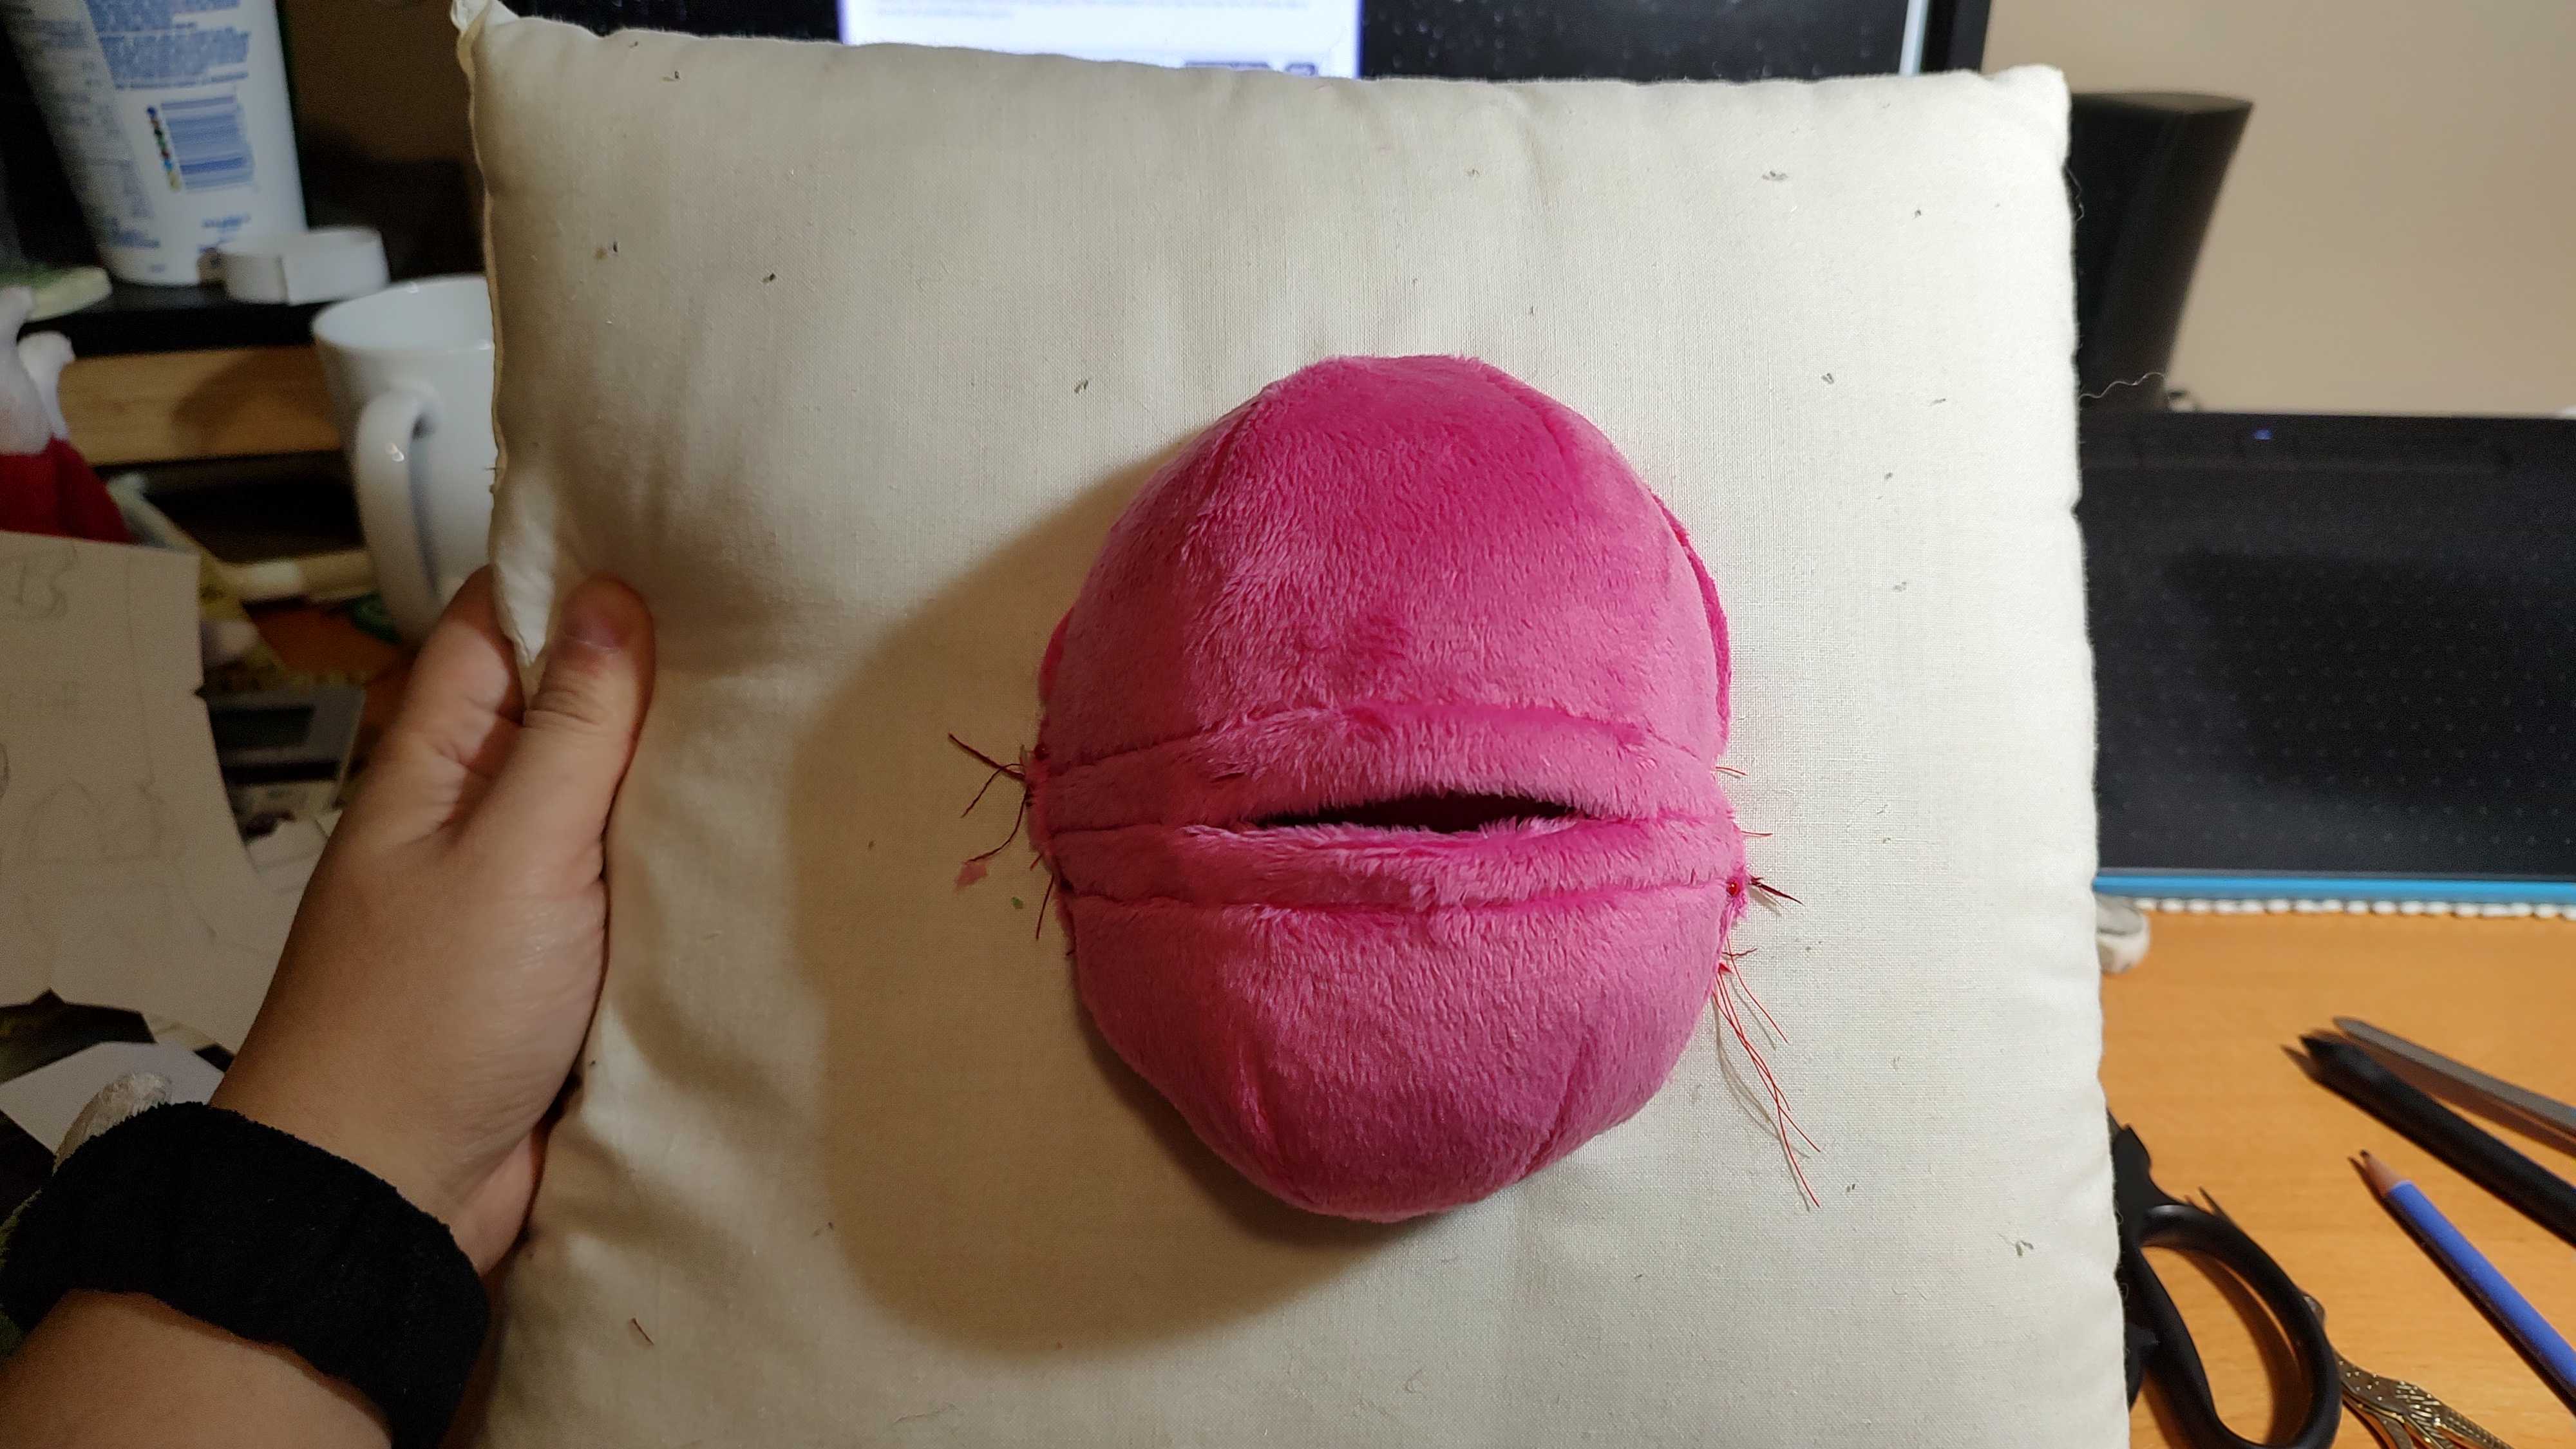
A sample head to test the mouth structure. Give those luscious lips a smooch
Curly's exposed mandibles appealed to me; it's one of the reasons I wanted to tackle this project myself. If you are a plushie artist, you have probably experienced the nightmare of making open jaws. The insides tend to bulge outwards if the mouth is too wide and shallow, and the jaws tend to turn round and gape open uncontrollably if they're too long. I wanted to test a theory on how to make mouths in plushies. I figured that I could construct a mouth with bulgey insides, but contain it with an additional layer of fabric that is narrow and had a small opening that won't misbehave due to its smallness.
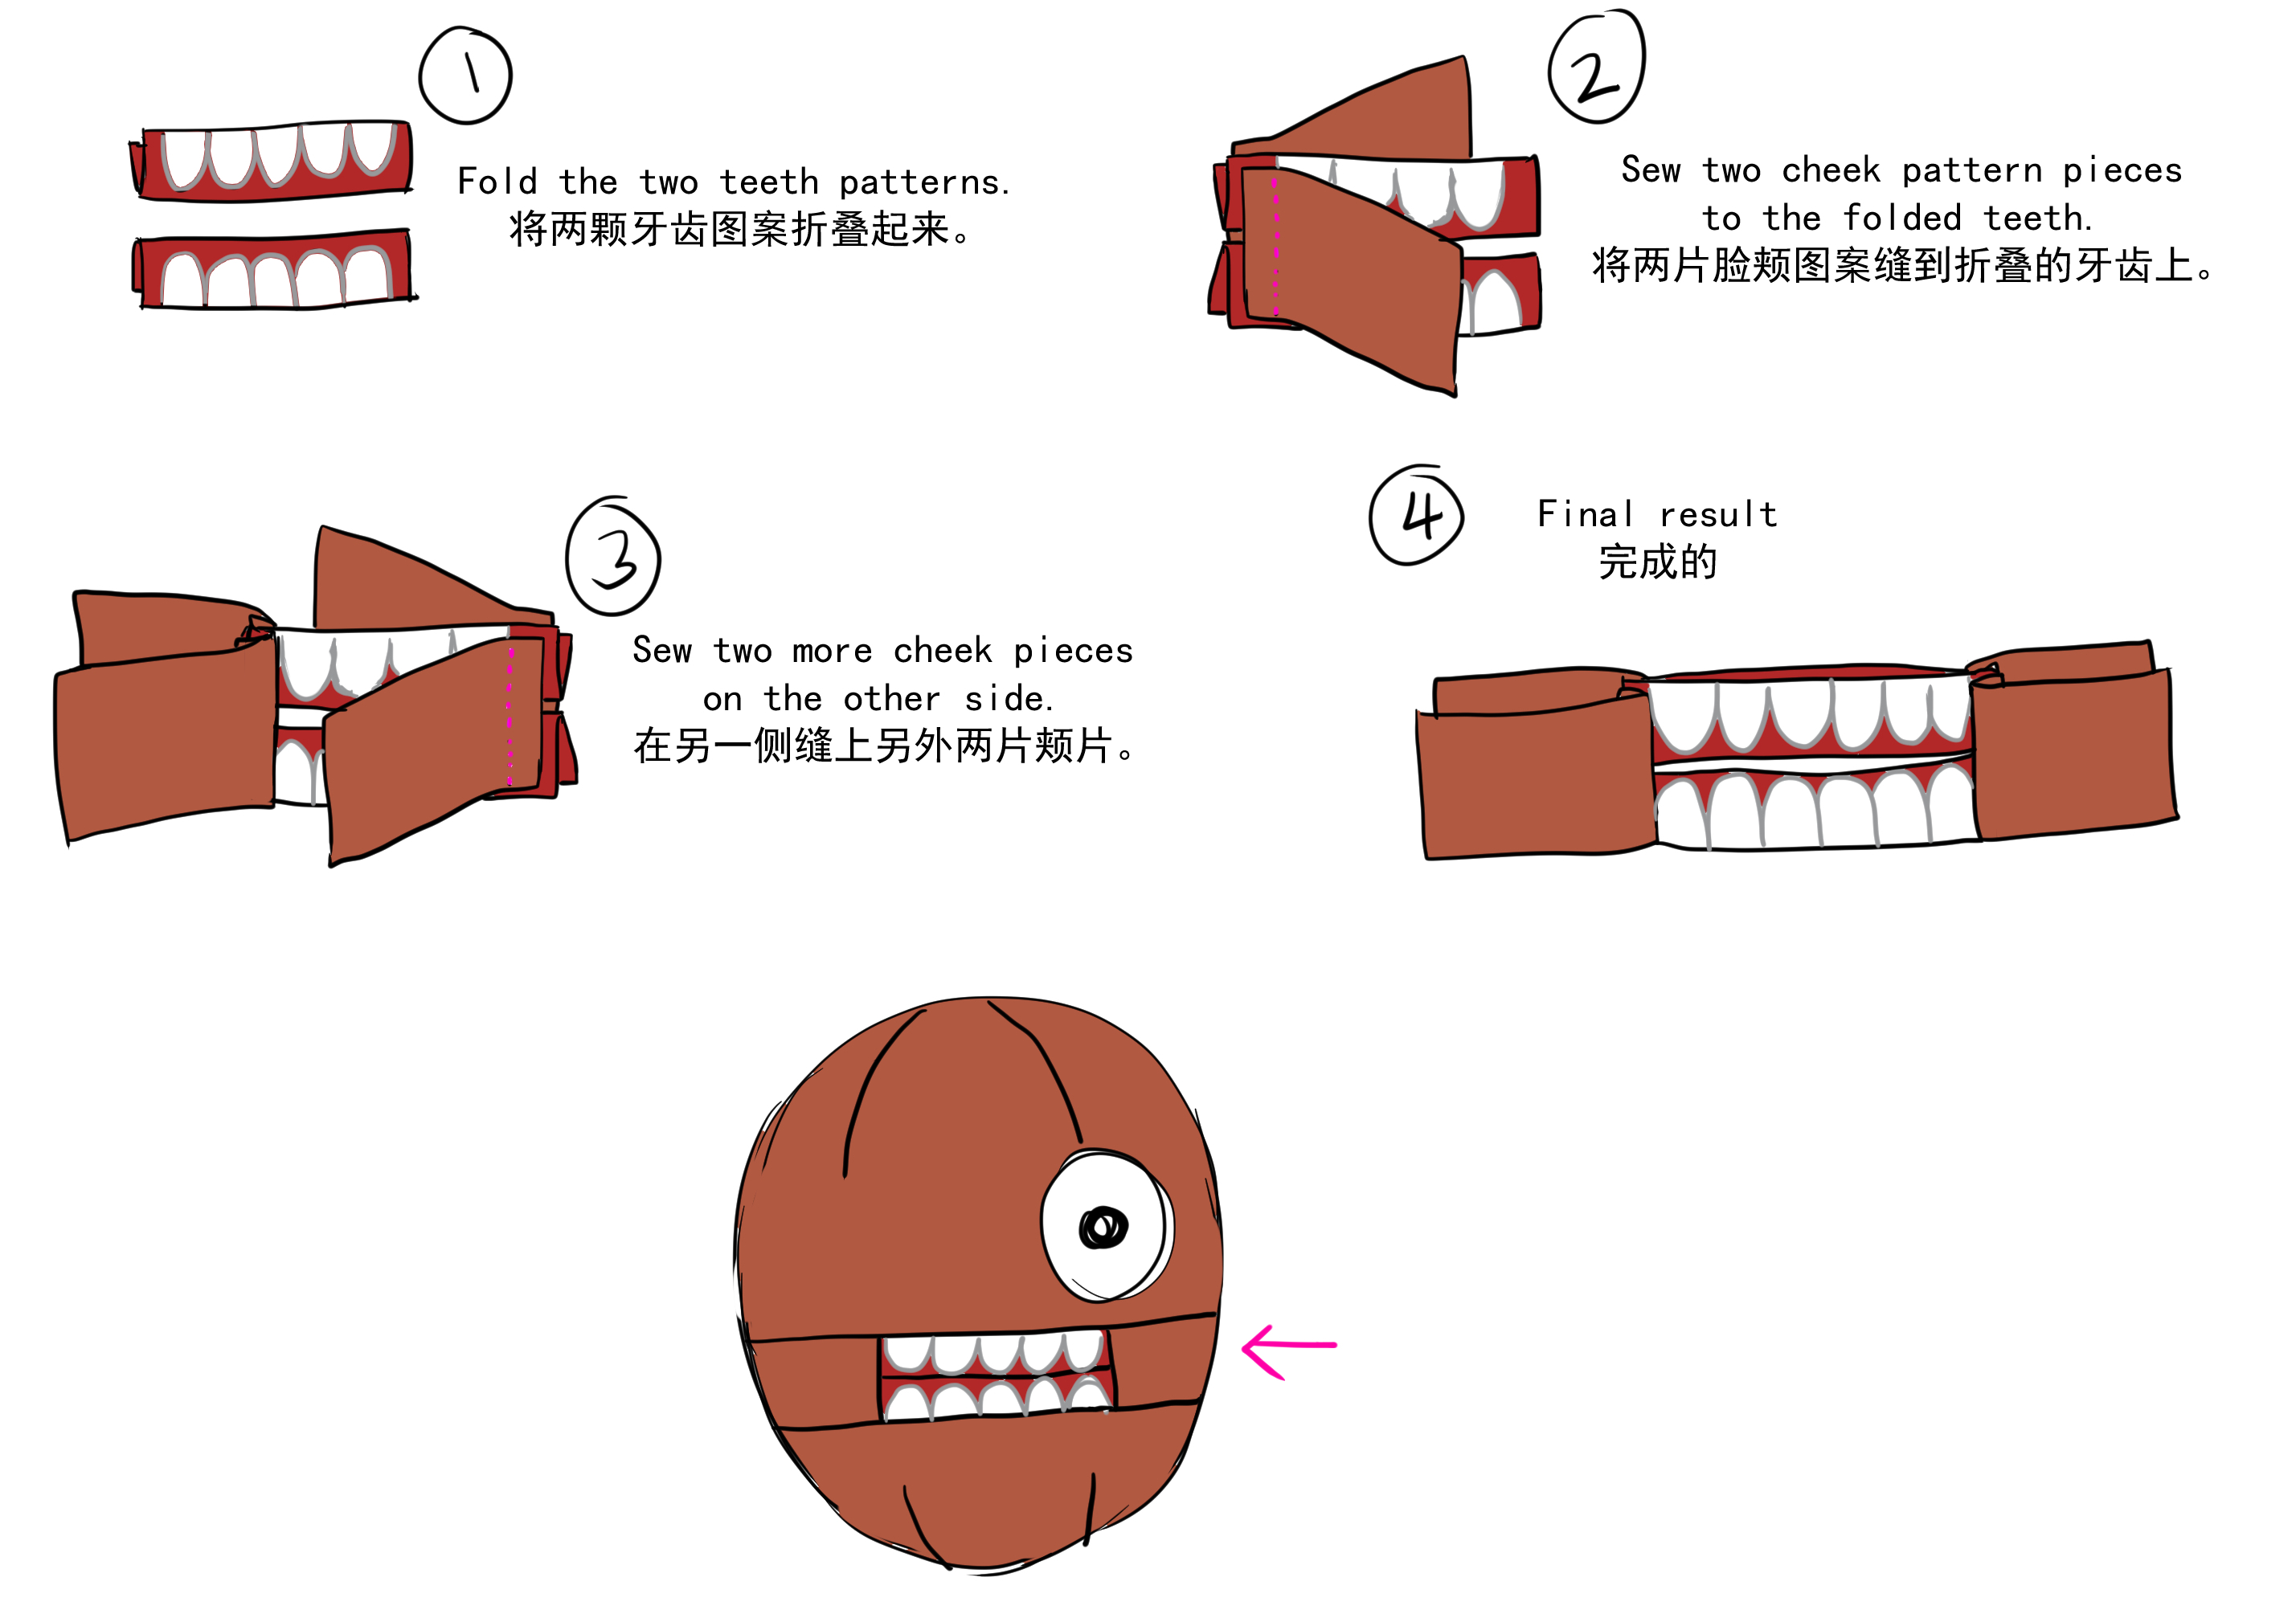
Here's a guide I made for the factory to show how the teeth and cheek are constructed. The actual opening for the mouth is small compared to the inner cavity, which extends behind the cheek area. The result is a controlled jaw that has a deep mouth for sticking stuff into-
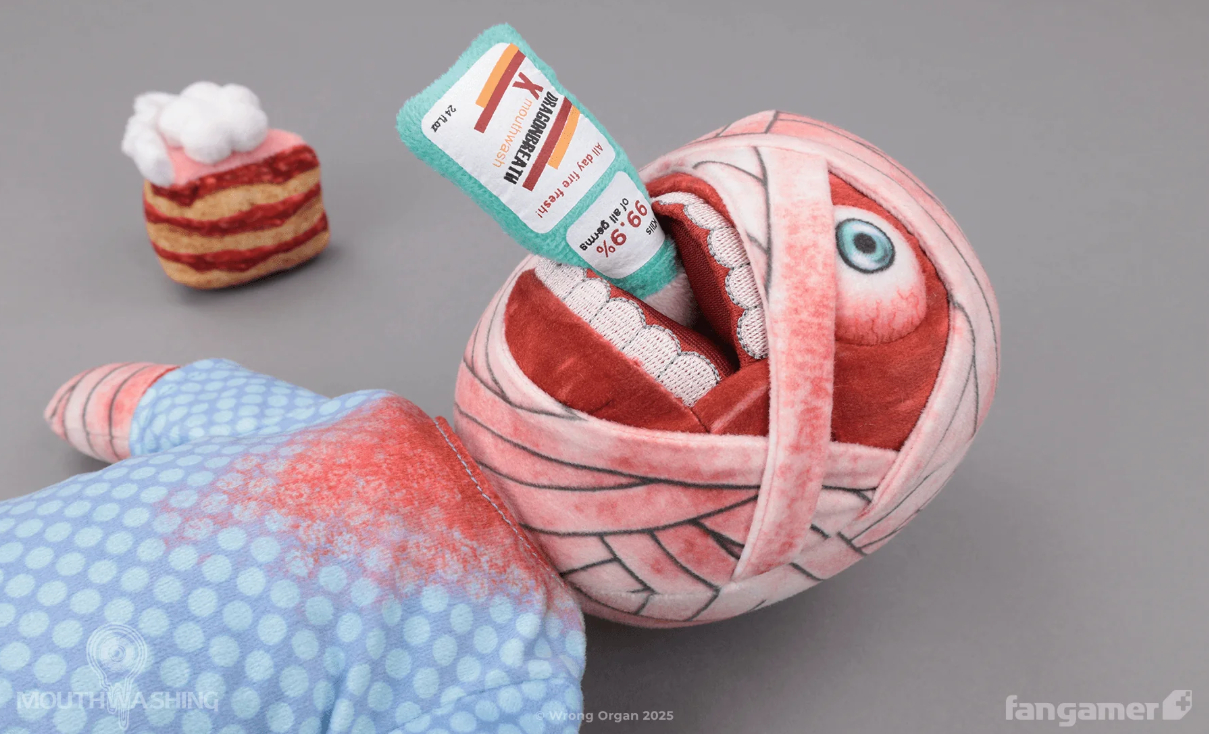
Photo by Fangamer
-like these cake and mouthwash bottle accessories! The printed texture of the cake is a frankenstein of strawberry layered cake images that I edited together. We also considered a pill bottle and a chunk of meat as accessories, but those would be harder to translate into tiny plushies.
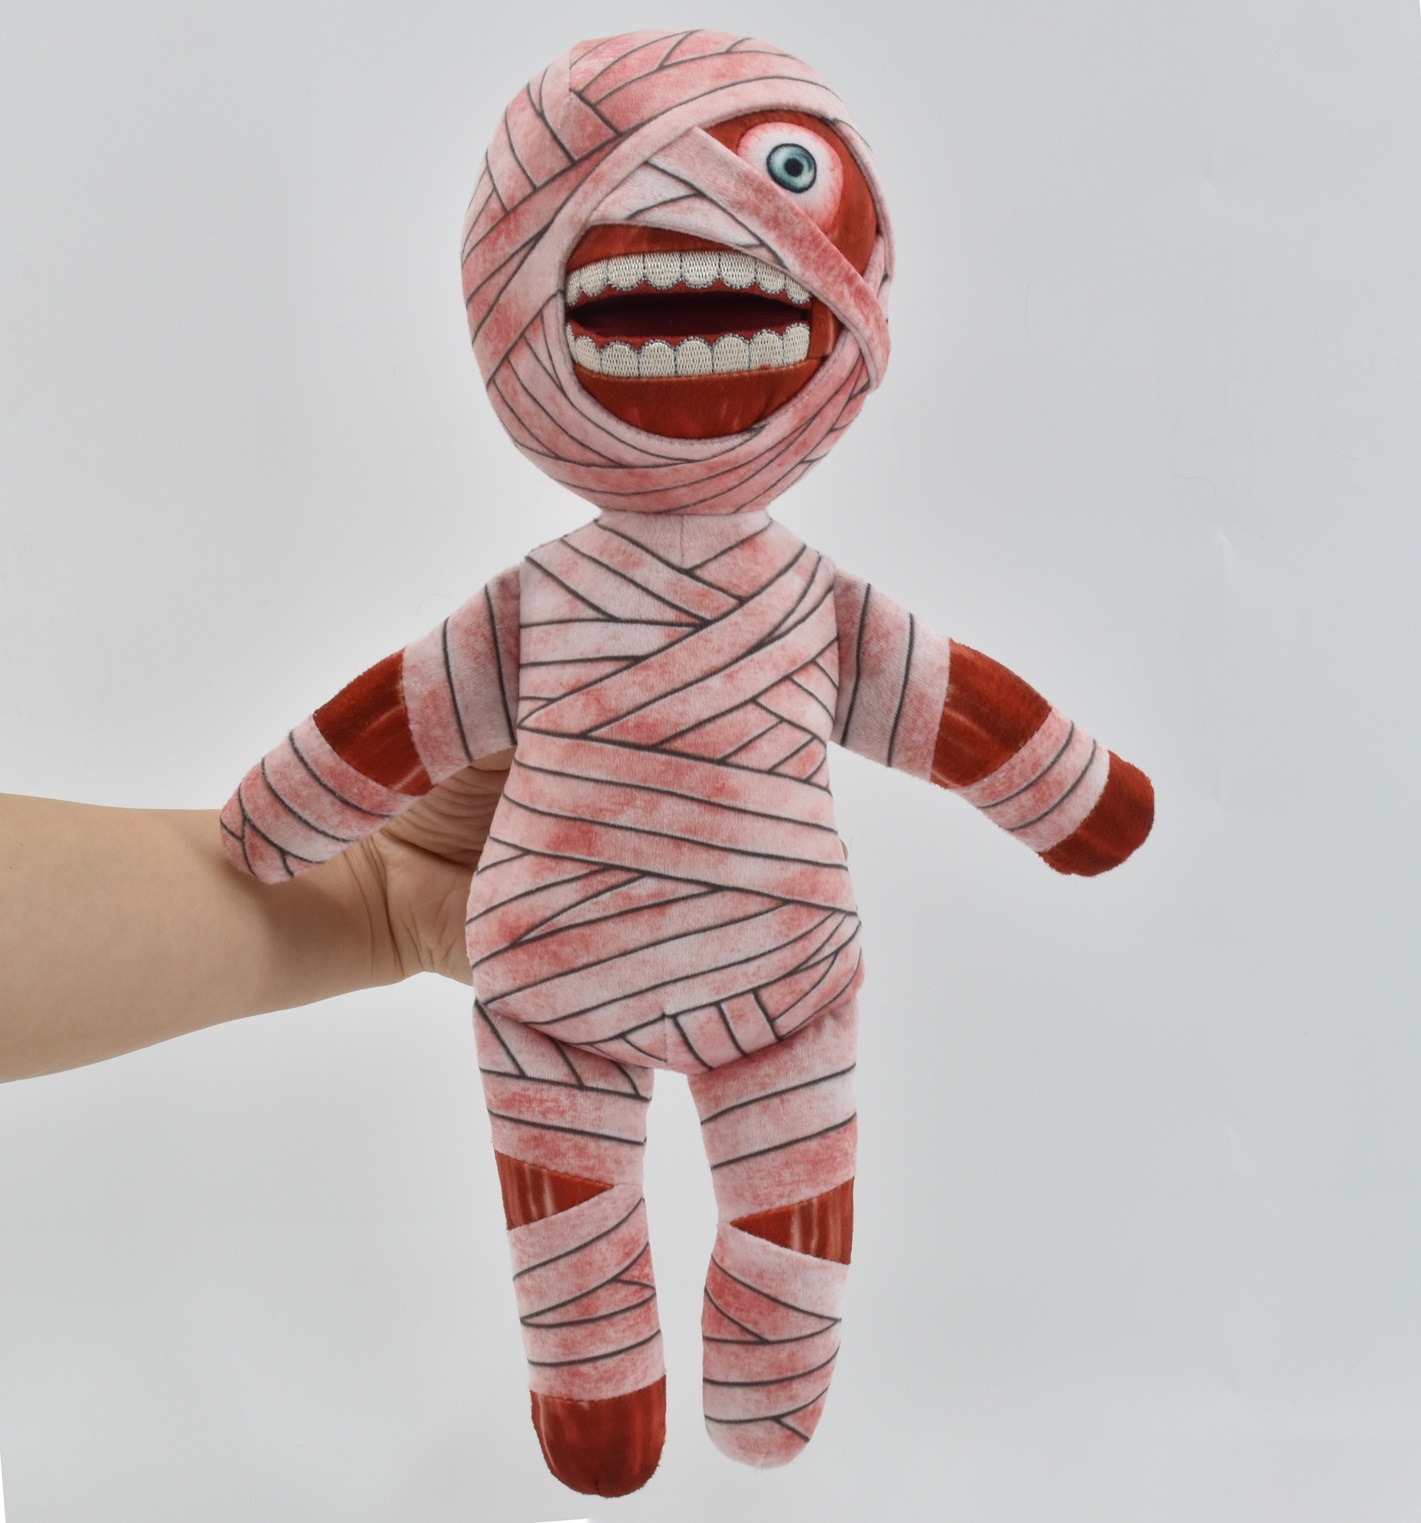
Photo from Gravim
The rest of Curly's body is a fairly standard ragdoll design, with the limbs sewn into the seams. I usually stay away from such simple construction styles, but in this case, it is perfect for the character. The limbs are floppy and do nothing to help Curly sit up, which conveys his helplessness and lack of agency. All he can do is lie there as you carry him around and force things into his mouth. So please, if you buy a Curly plushie, take care of him and treat him well.
Back to Blogs
