Nall Plushie Tutorial

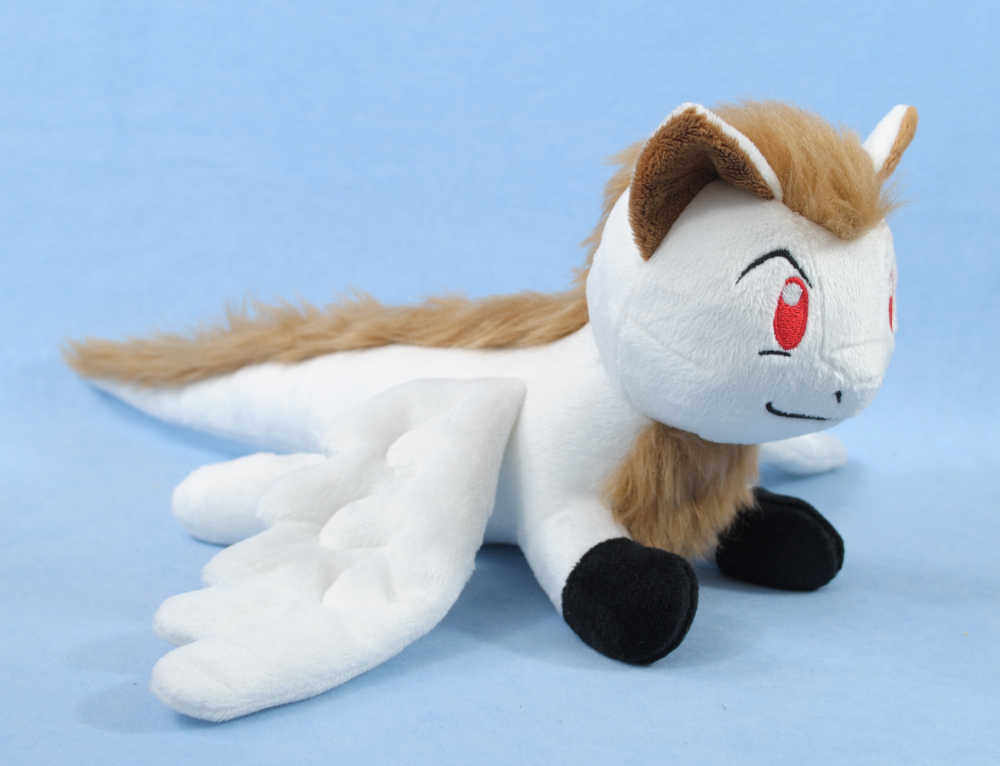
Any fans of Lunar in the house? Here is a free plushie tutorial for Nall, the talking cat-dragon, so you can make your own soft friend! It is a nice, straightforward design that is suitable for the ambitious beginner. But if you consider yourself a total newbie to plushie making, or if you need a sewing refresher, it's a good idea to check out my Sewing Materials and Techniques page for a review on the basics of sewing.
Pattern
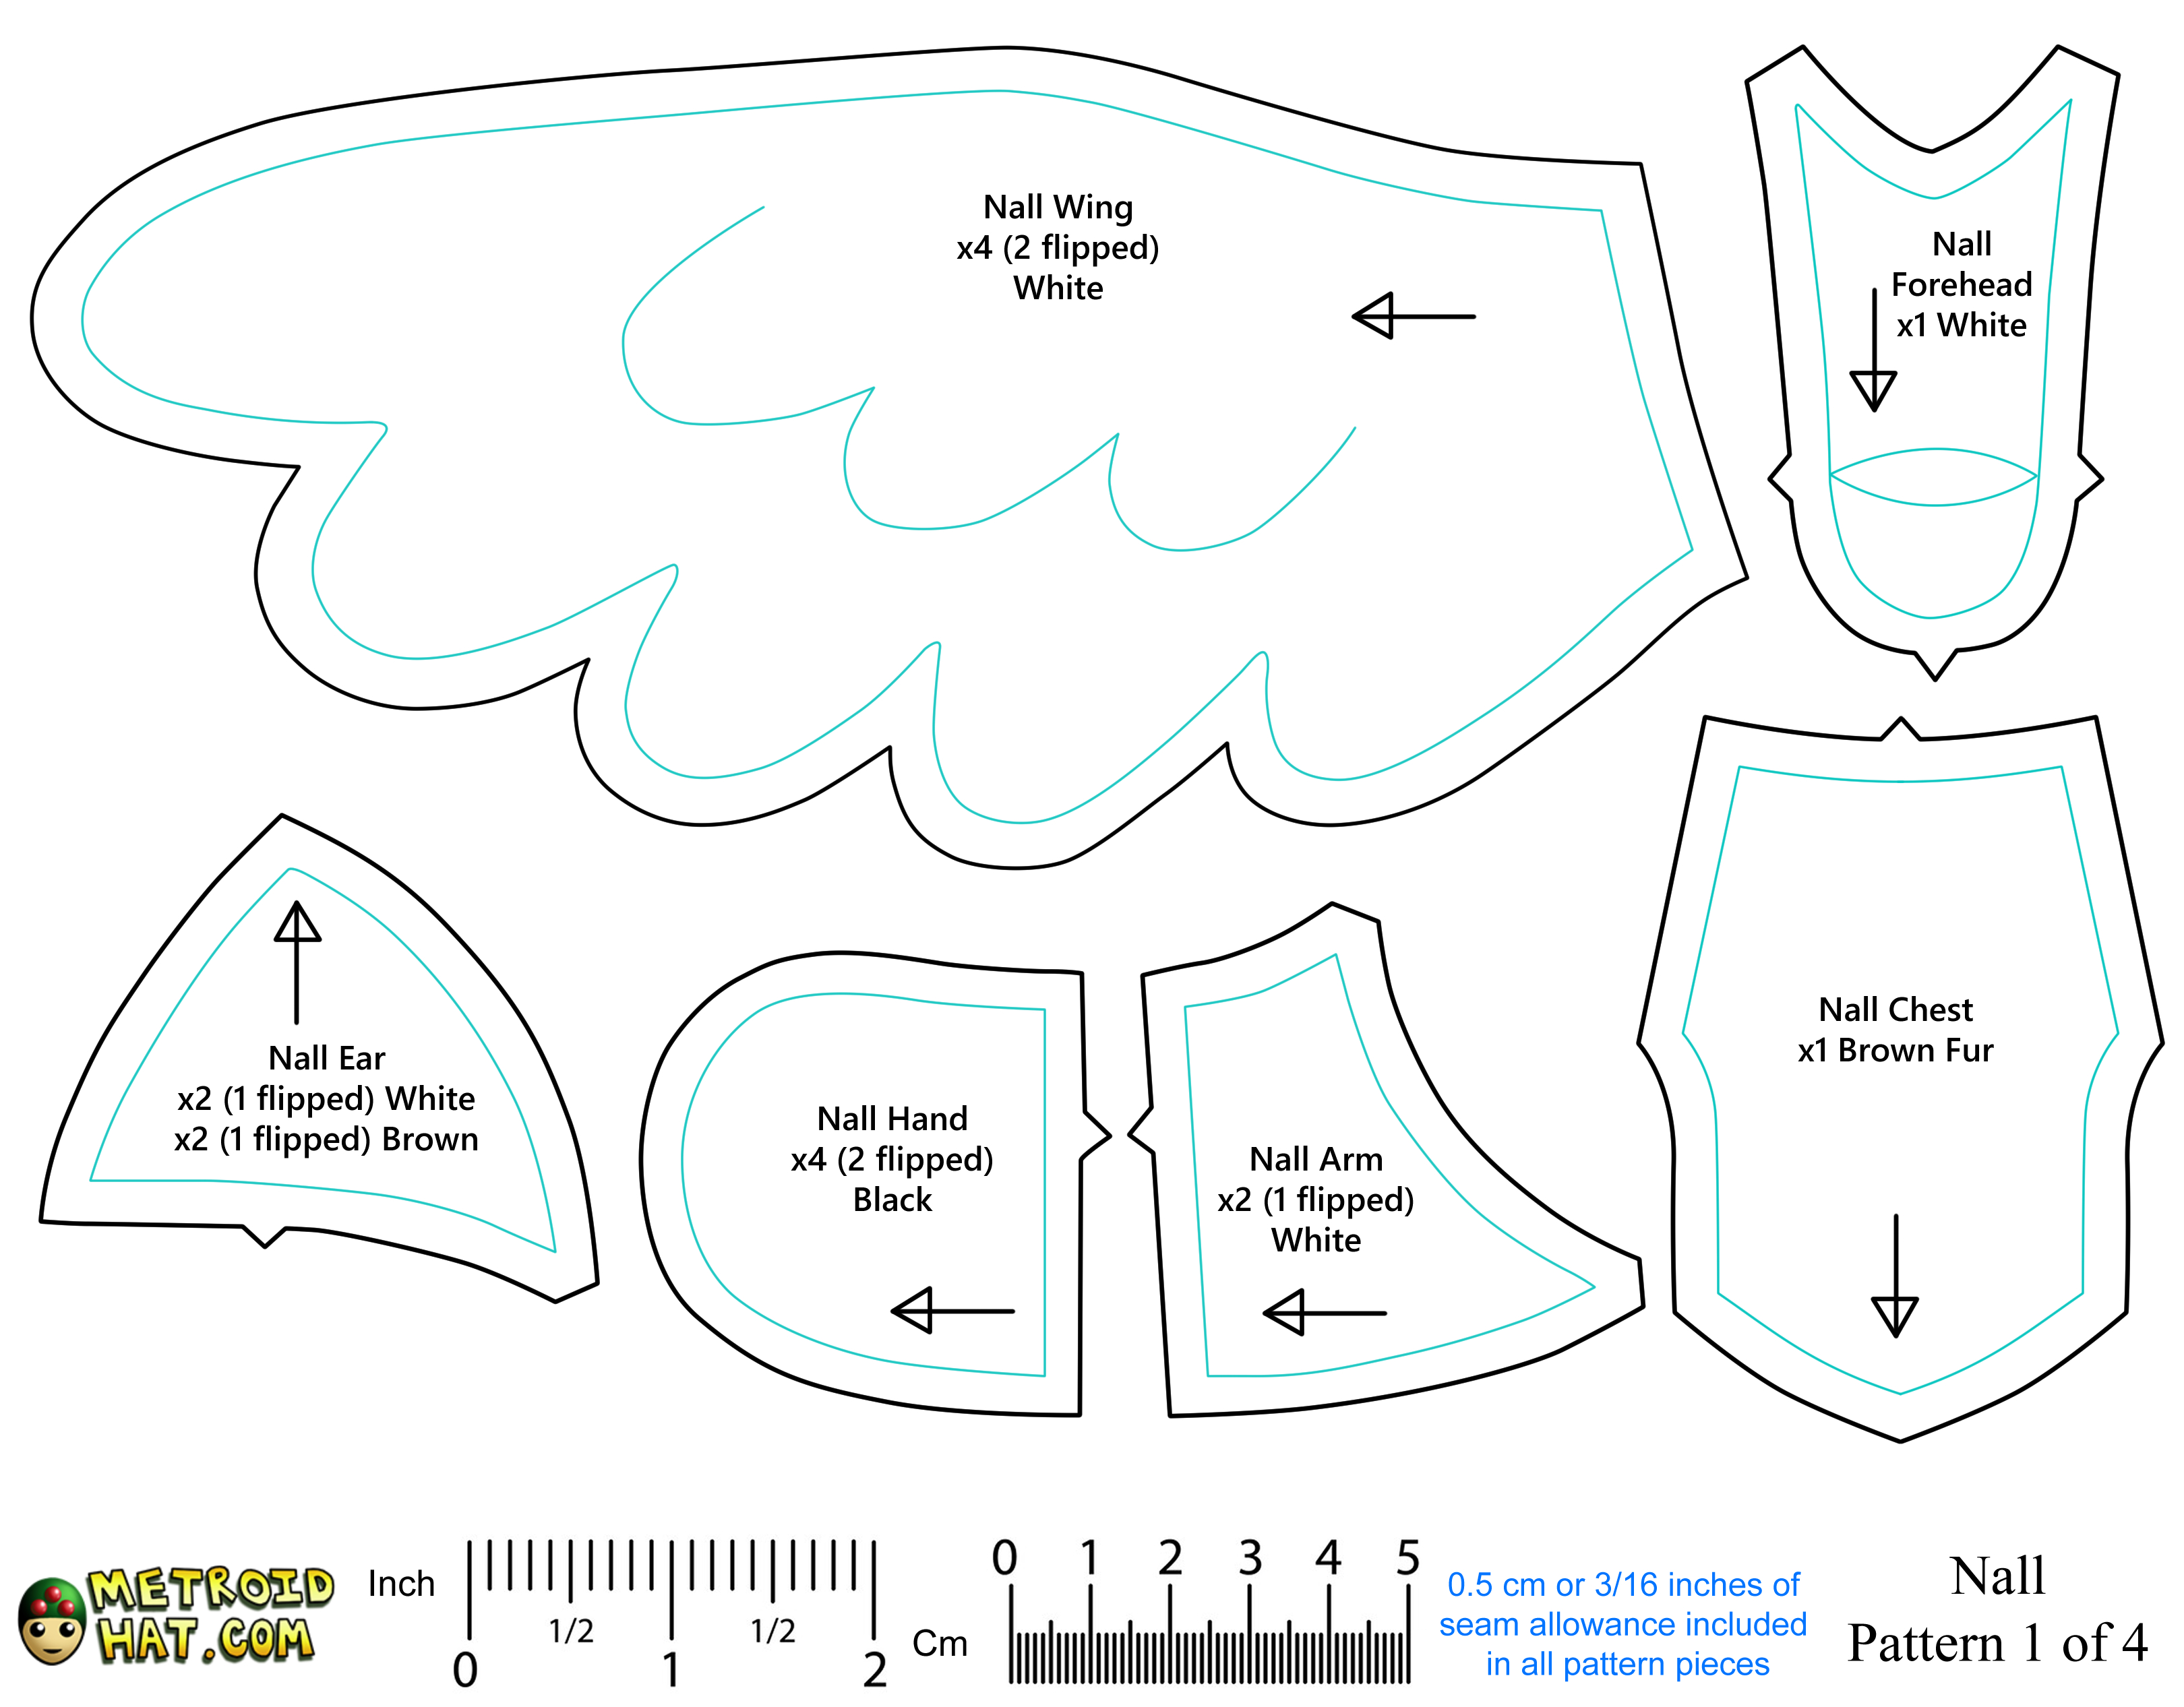
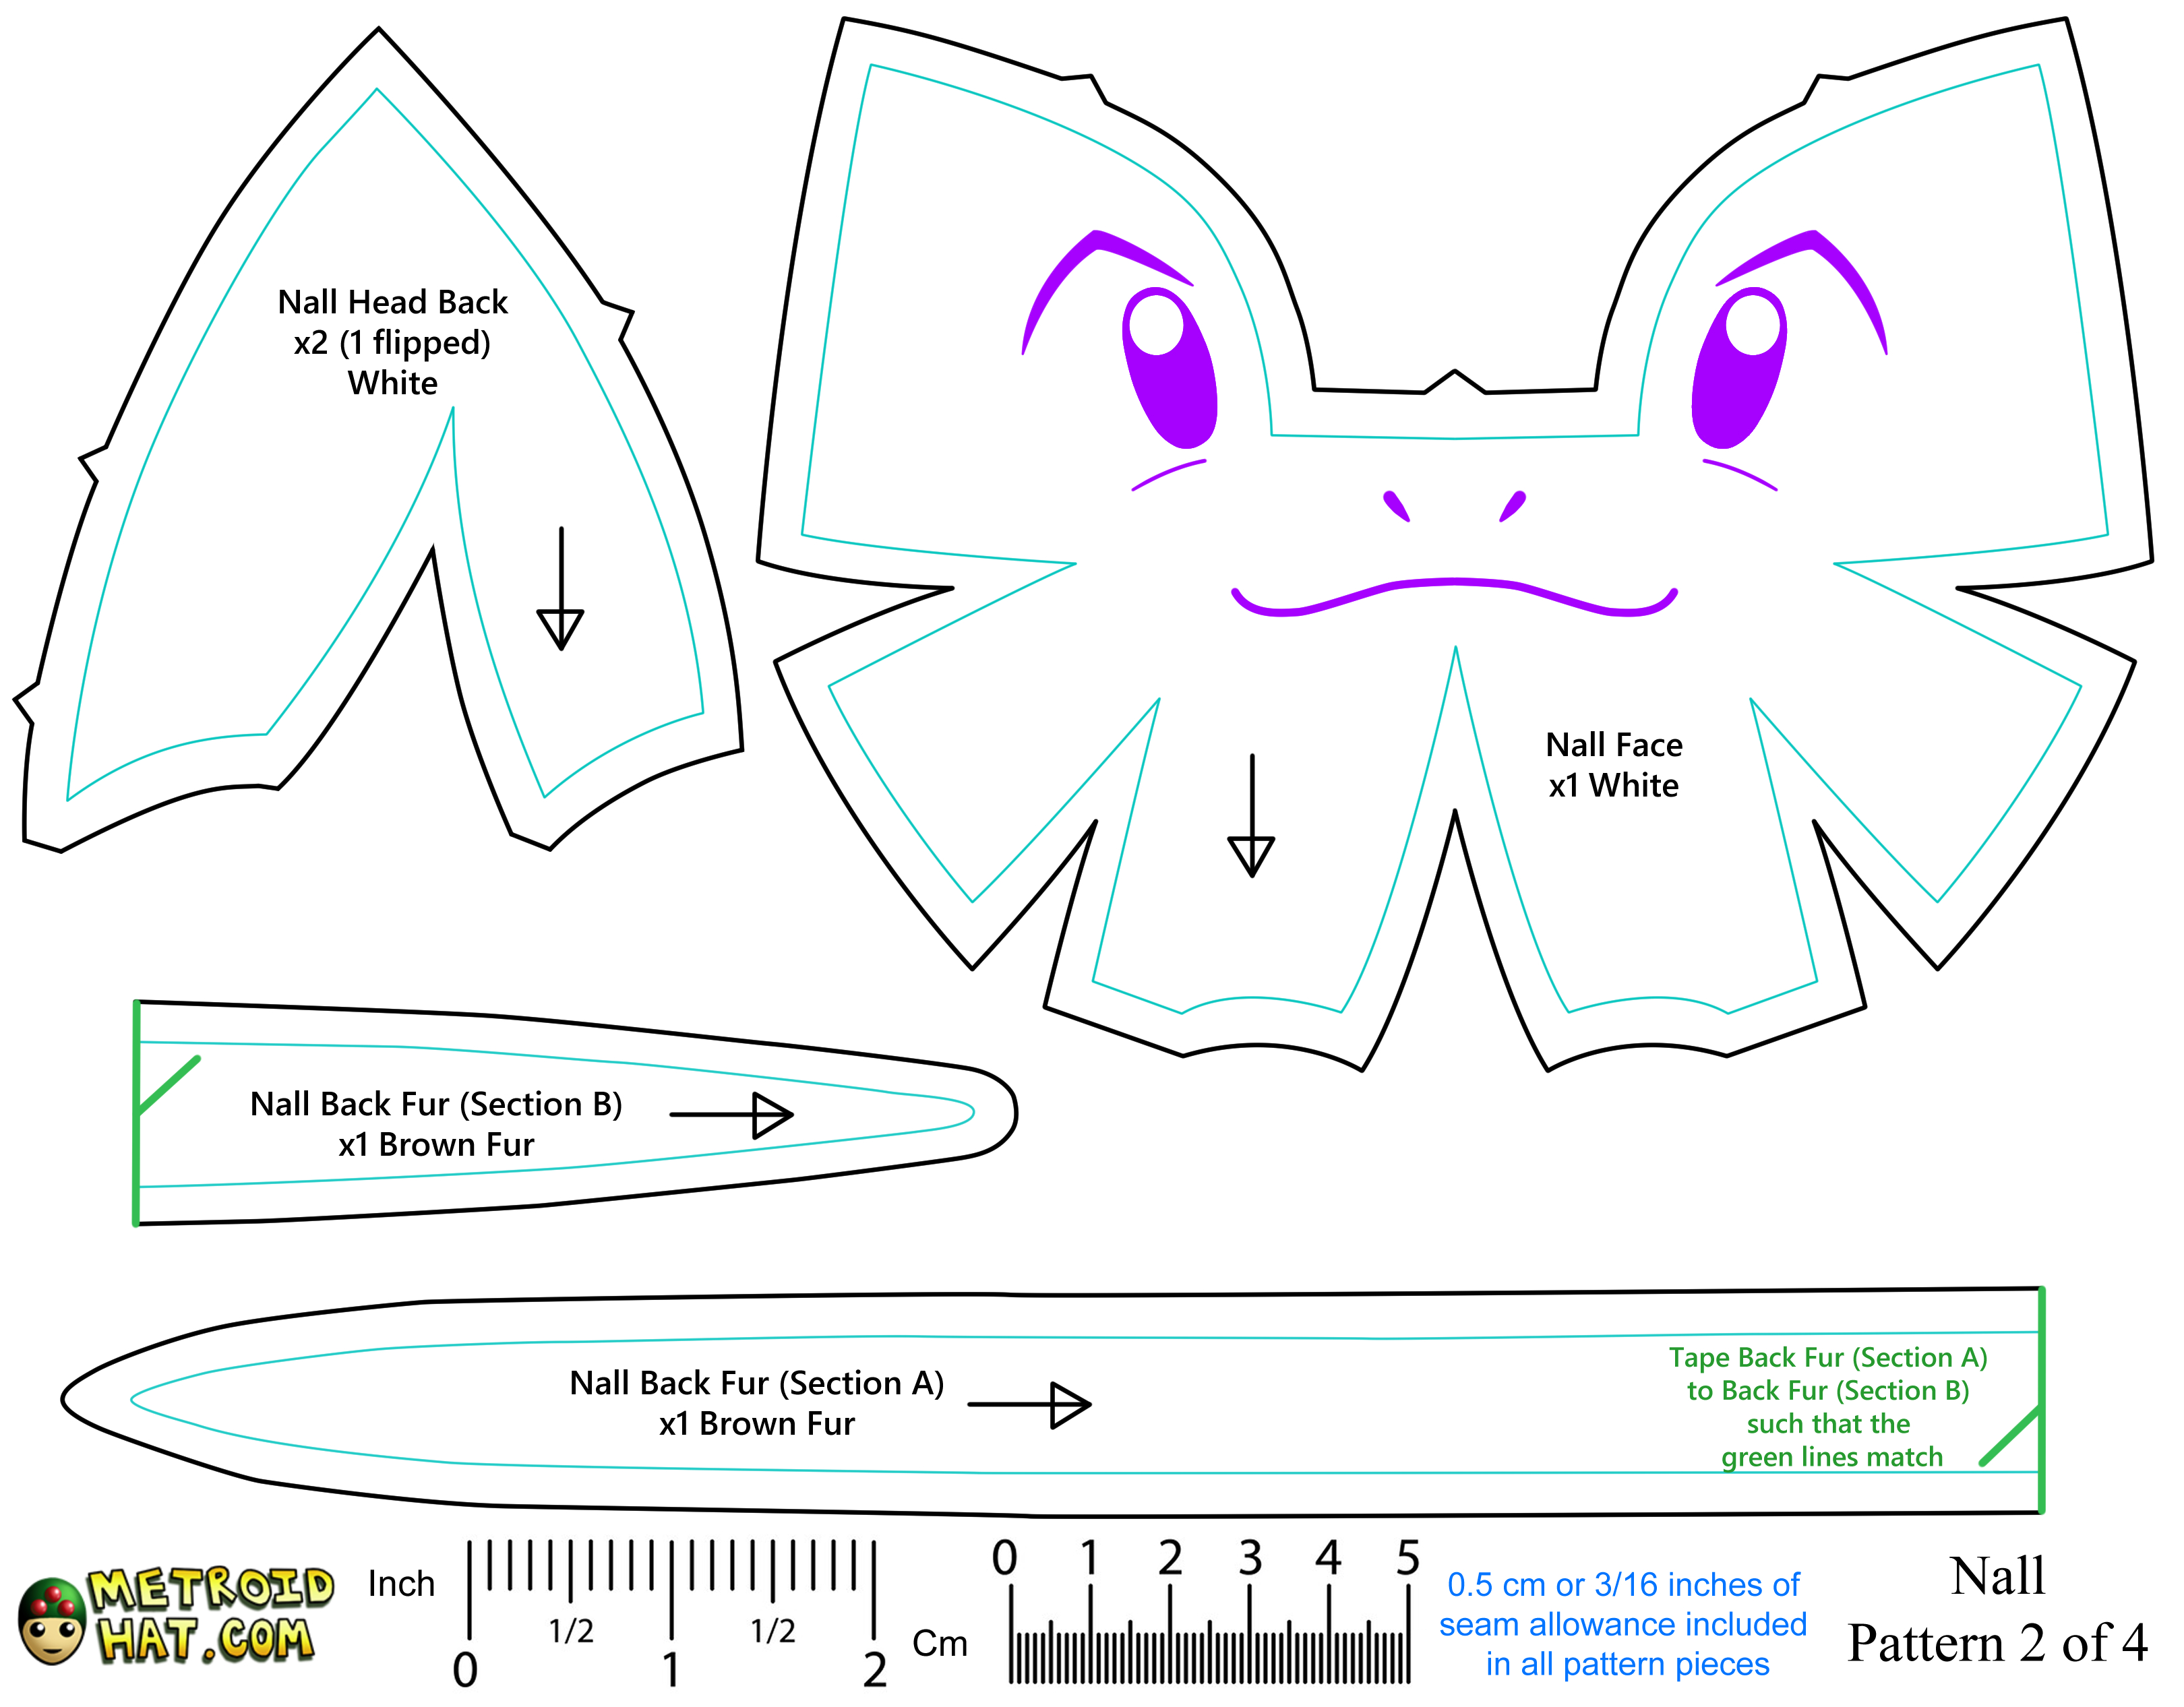
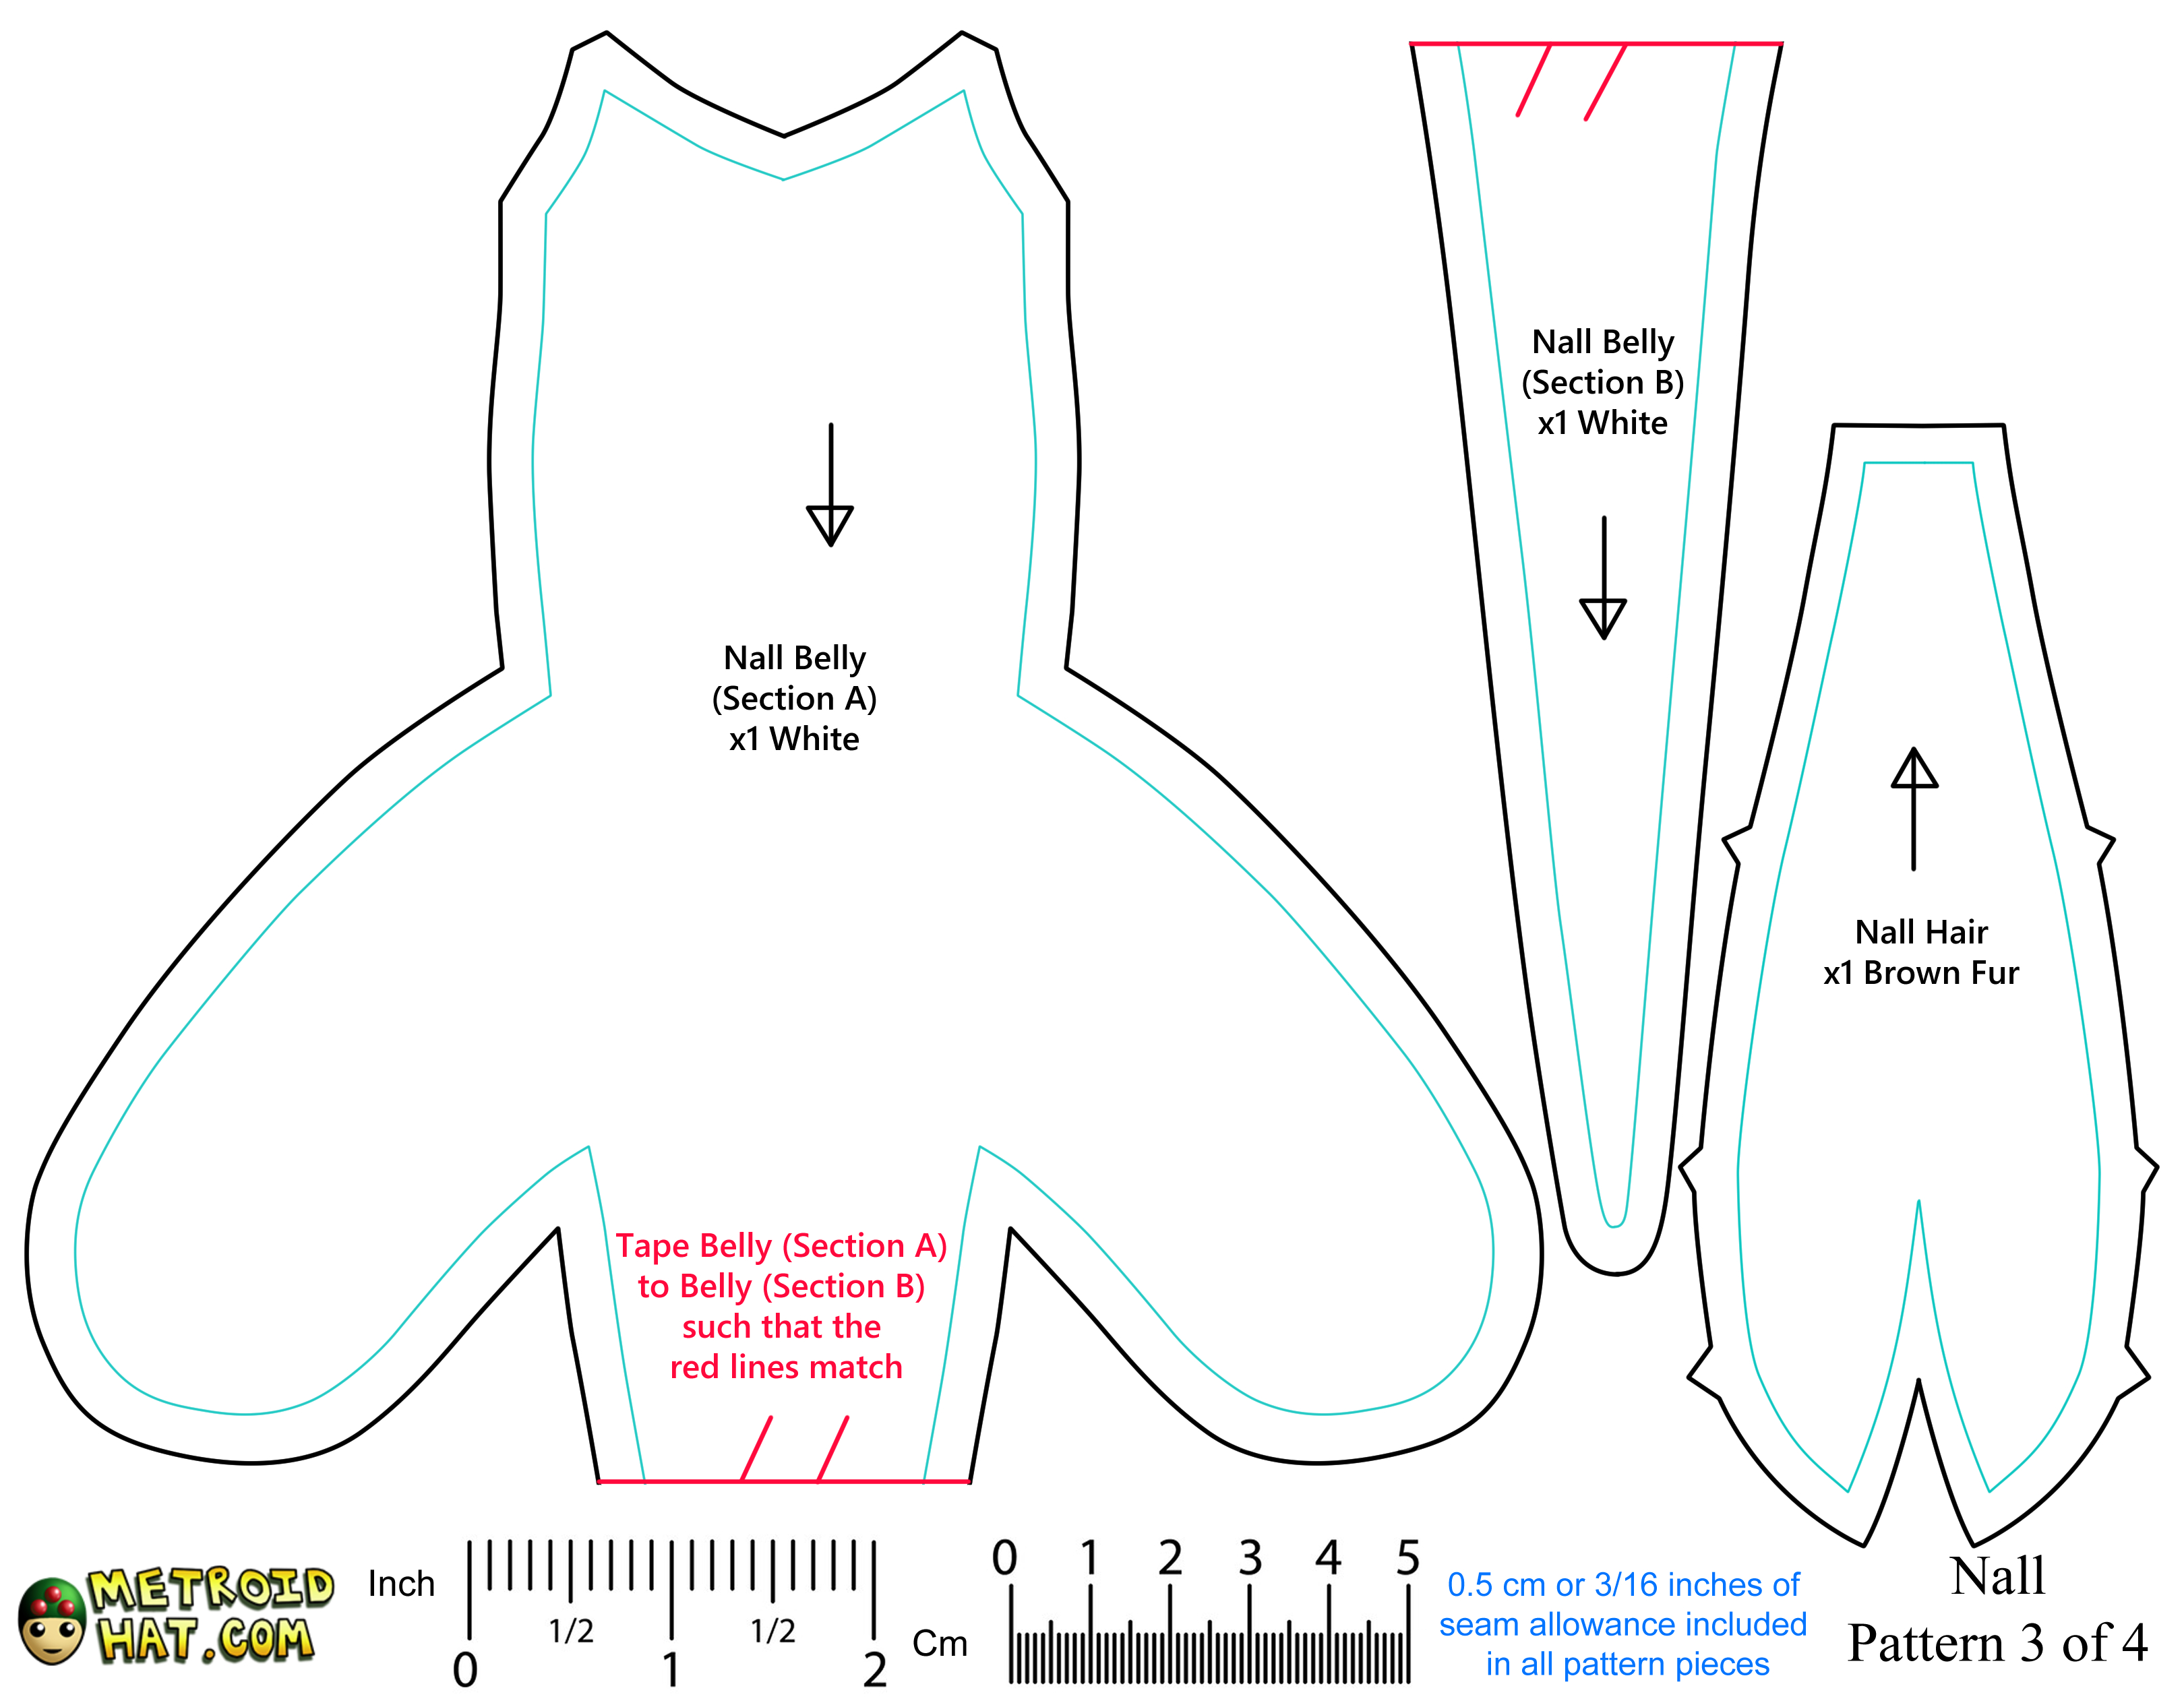
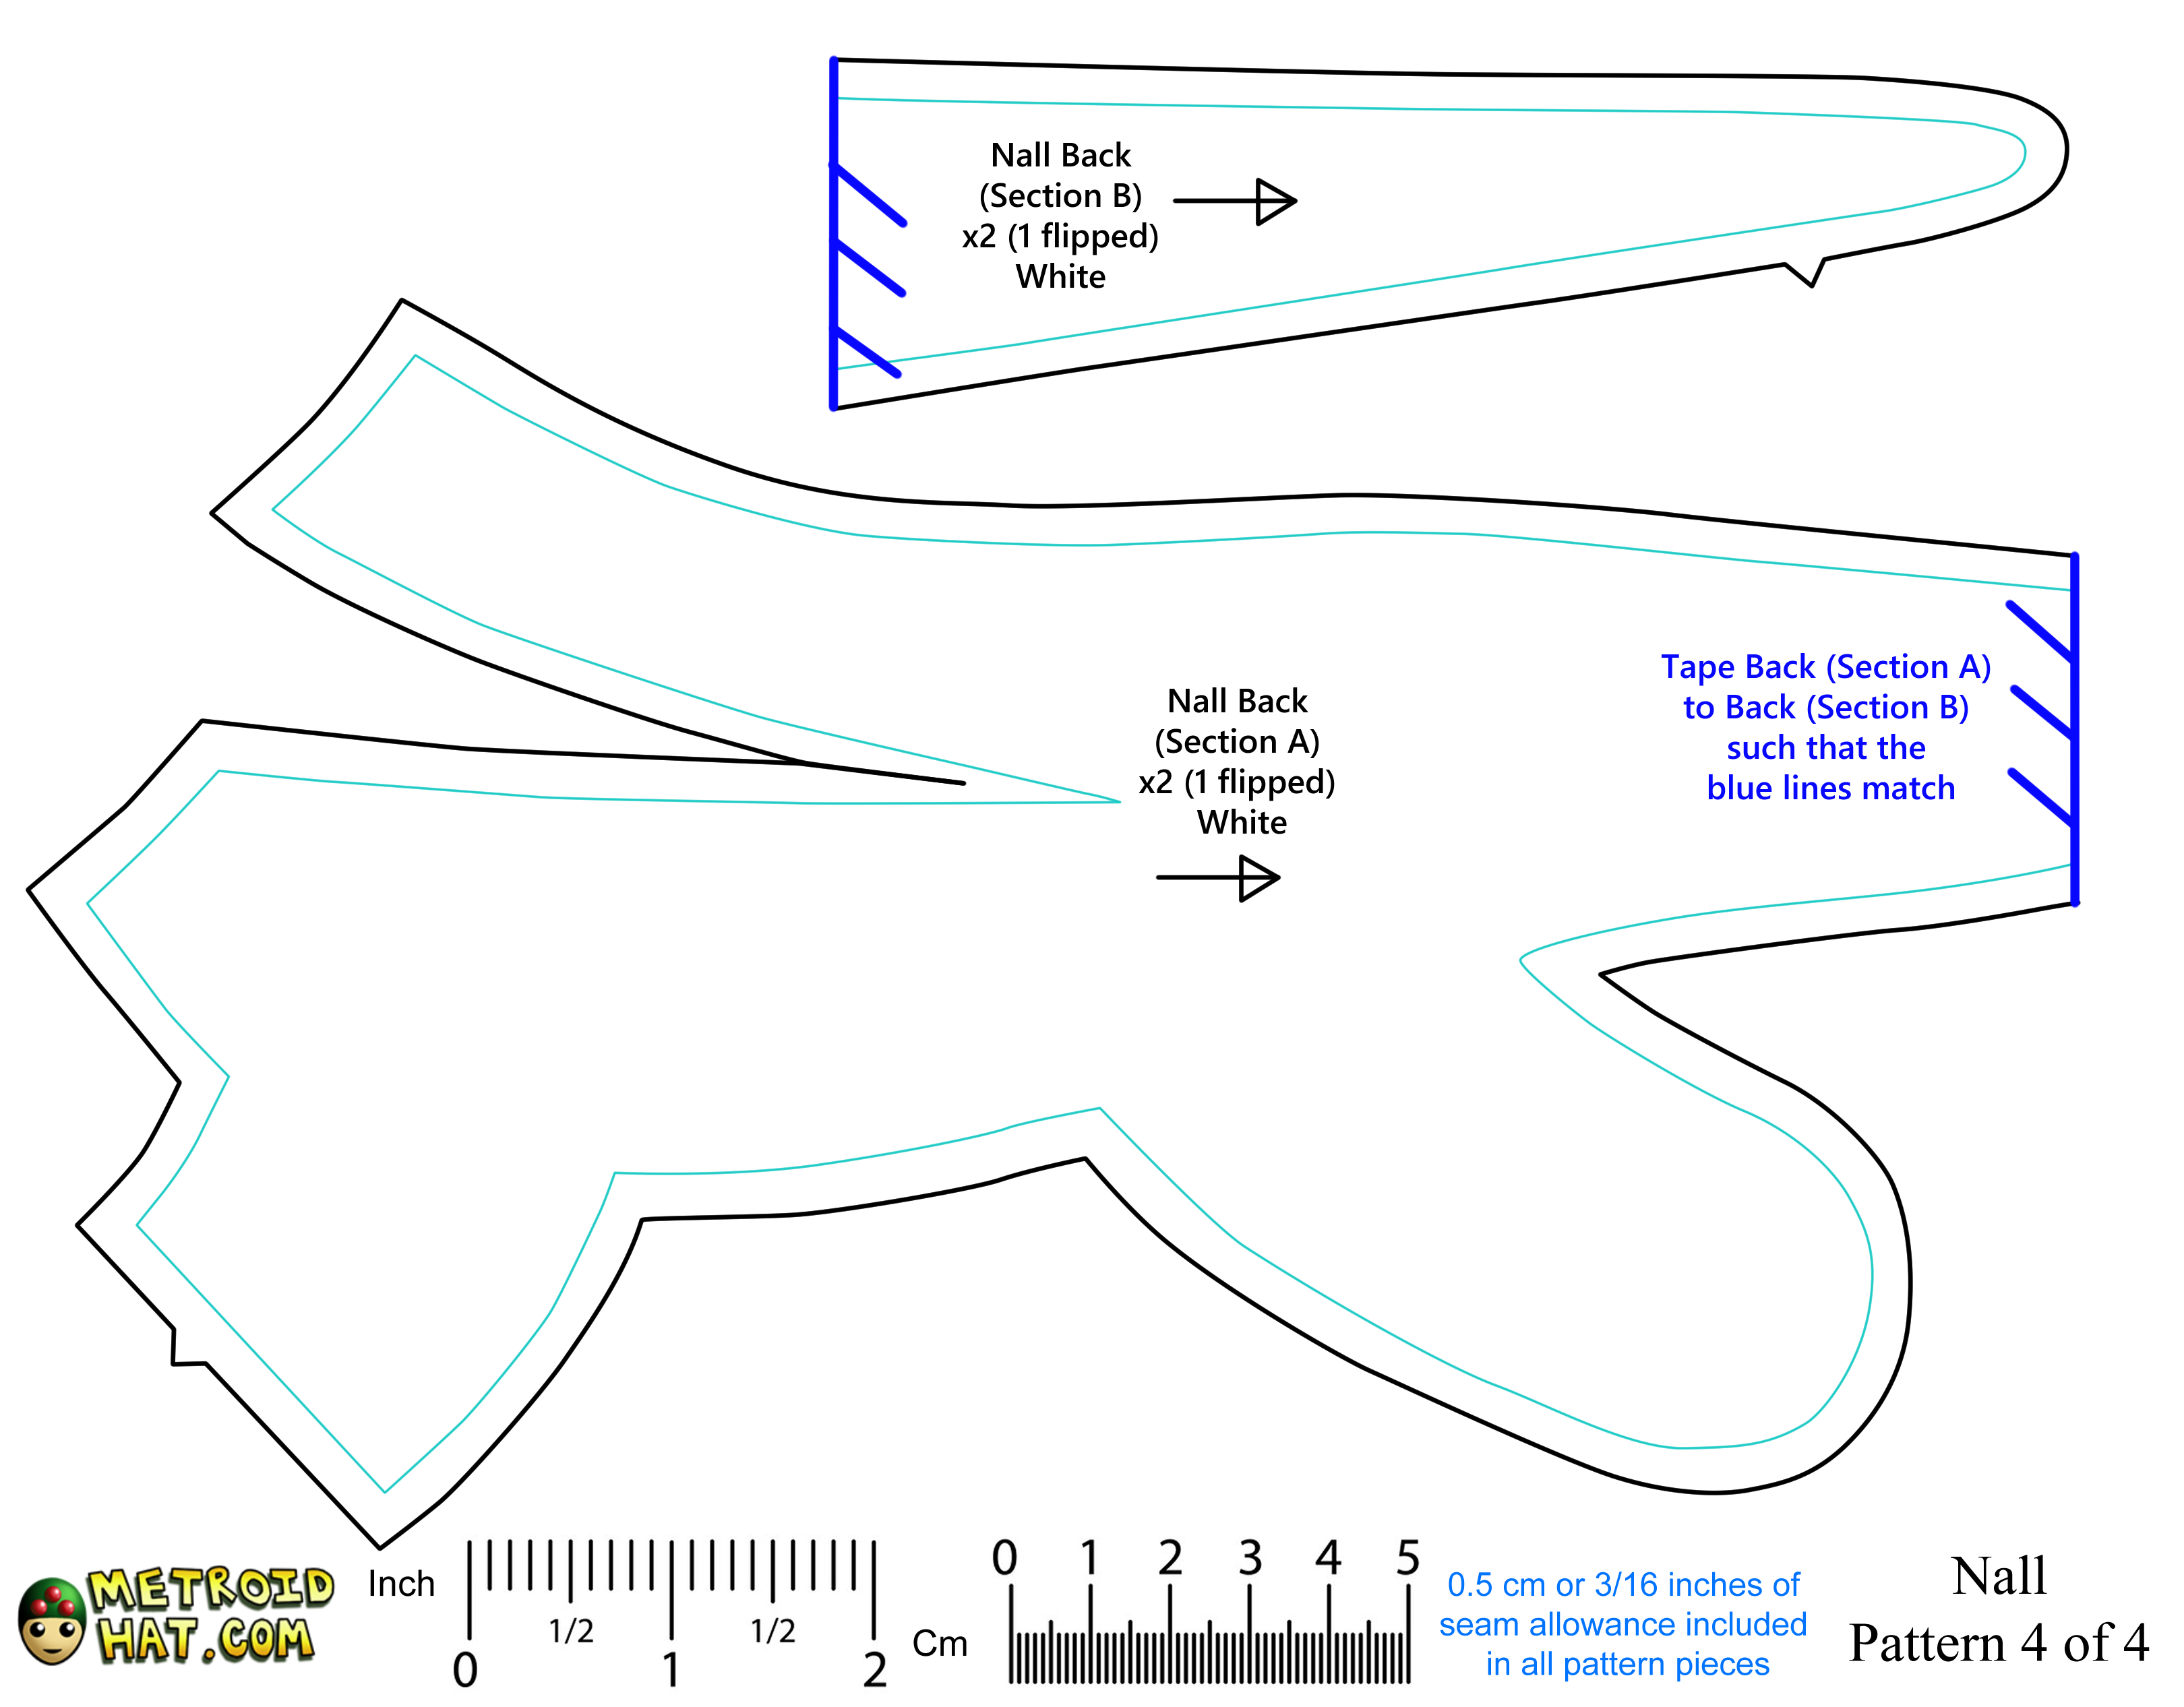
Here's the pattern. These pages can be printed out on normal 8.5x11 paper in landscape mode. A few of the pattern pieces are too big to fit on the paper, so you'll have to match corresponding colored lines and tape the pieces together.
And here's the embroidery file. Don't have an embroidery machine? Well I'm not gonna come and put you in Plushie Jail if you don't embroider the face; you can use whatever method of marking fabric that you're familiar with. Try hand embroidery, hand applique, or fabric paints.
Nall Embroidery File
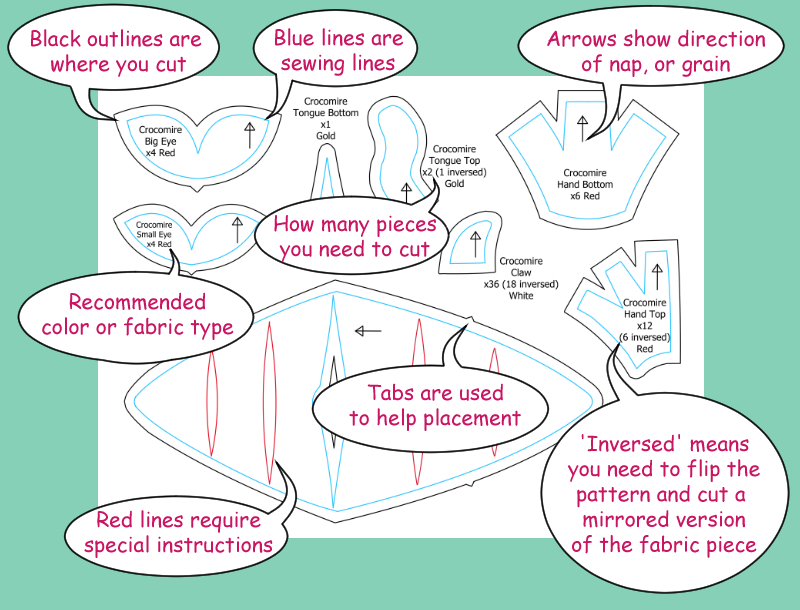
Here's a handy guide on how to read my patterns:
Materials List
Once you've gathered your materials, you can cut out the paper patterns and cut the fabric pieces.
Time to Sew!
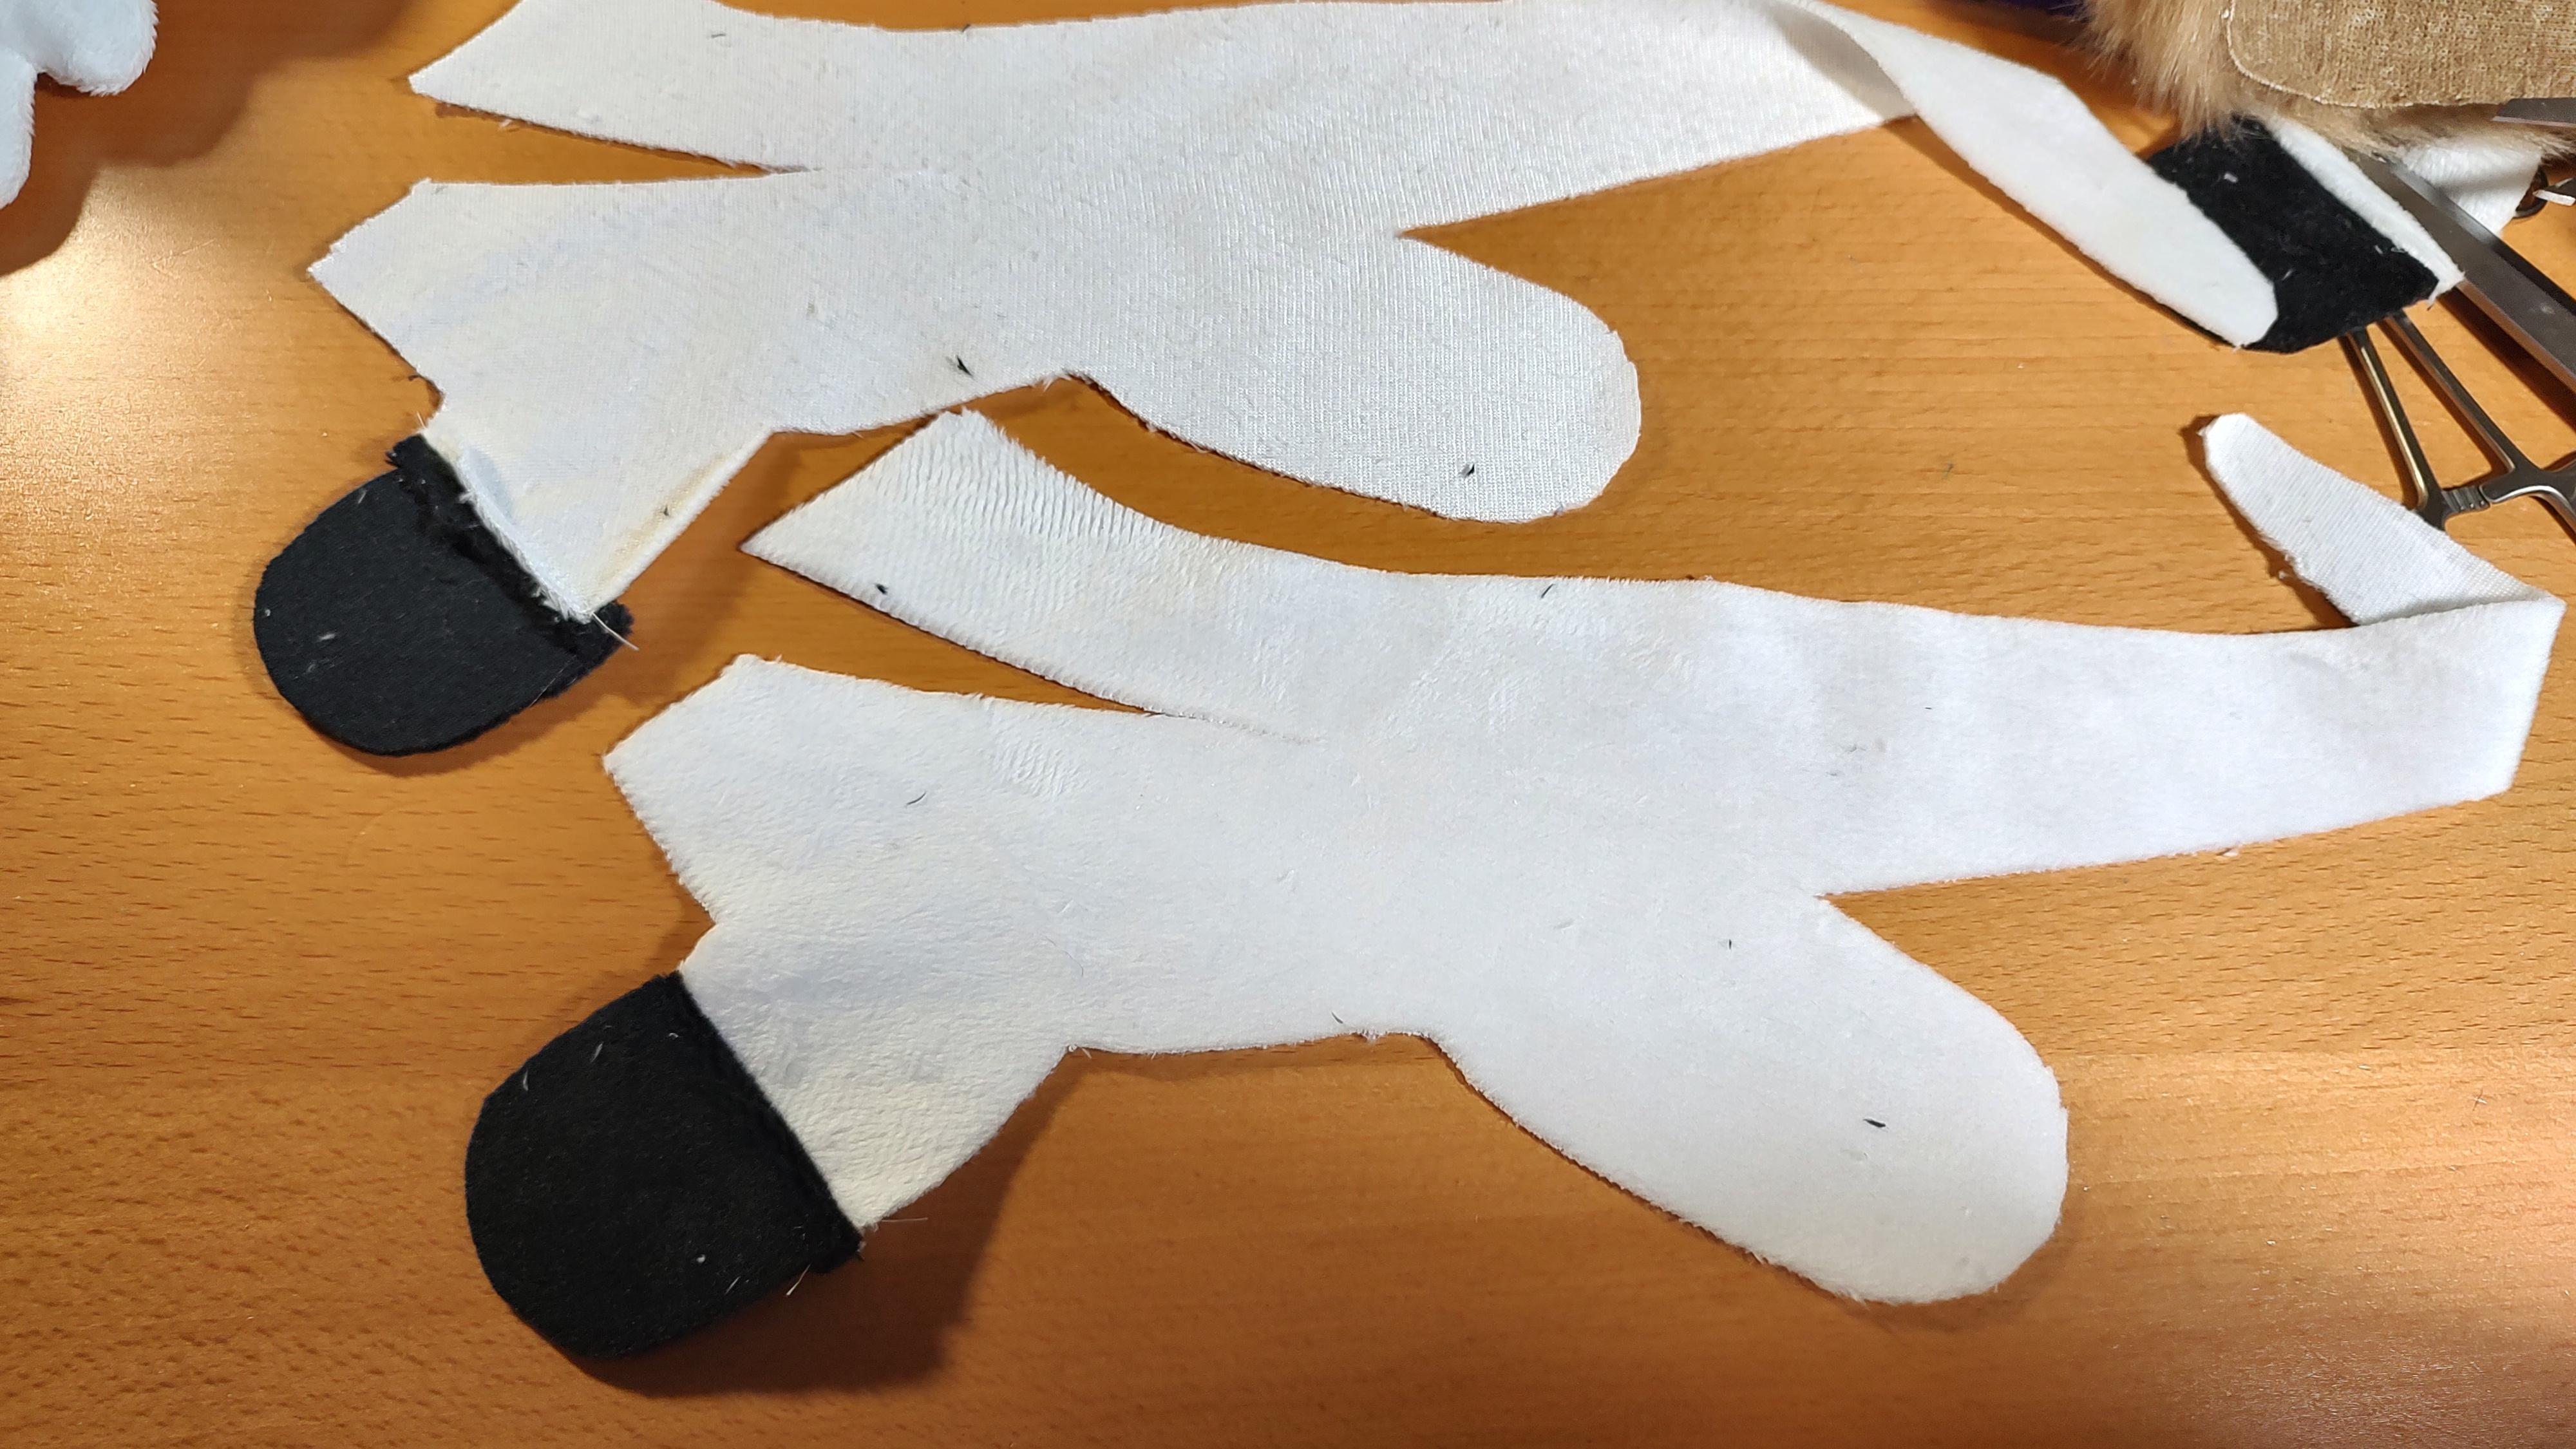
Sew the Chest to the Belly.
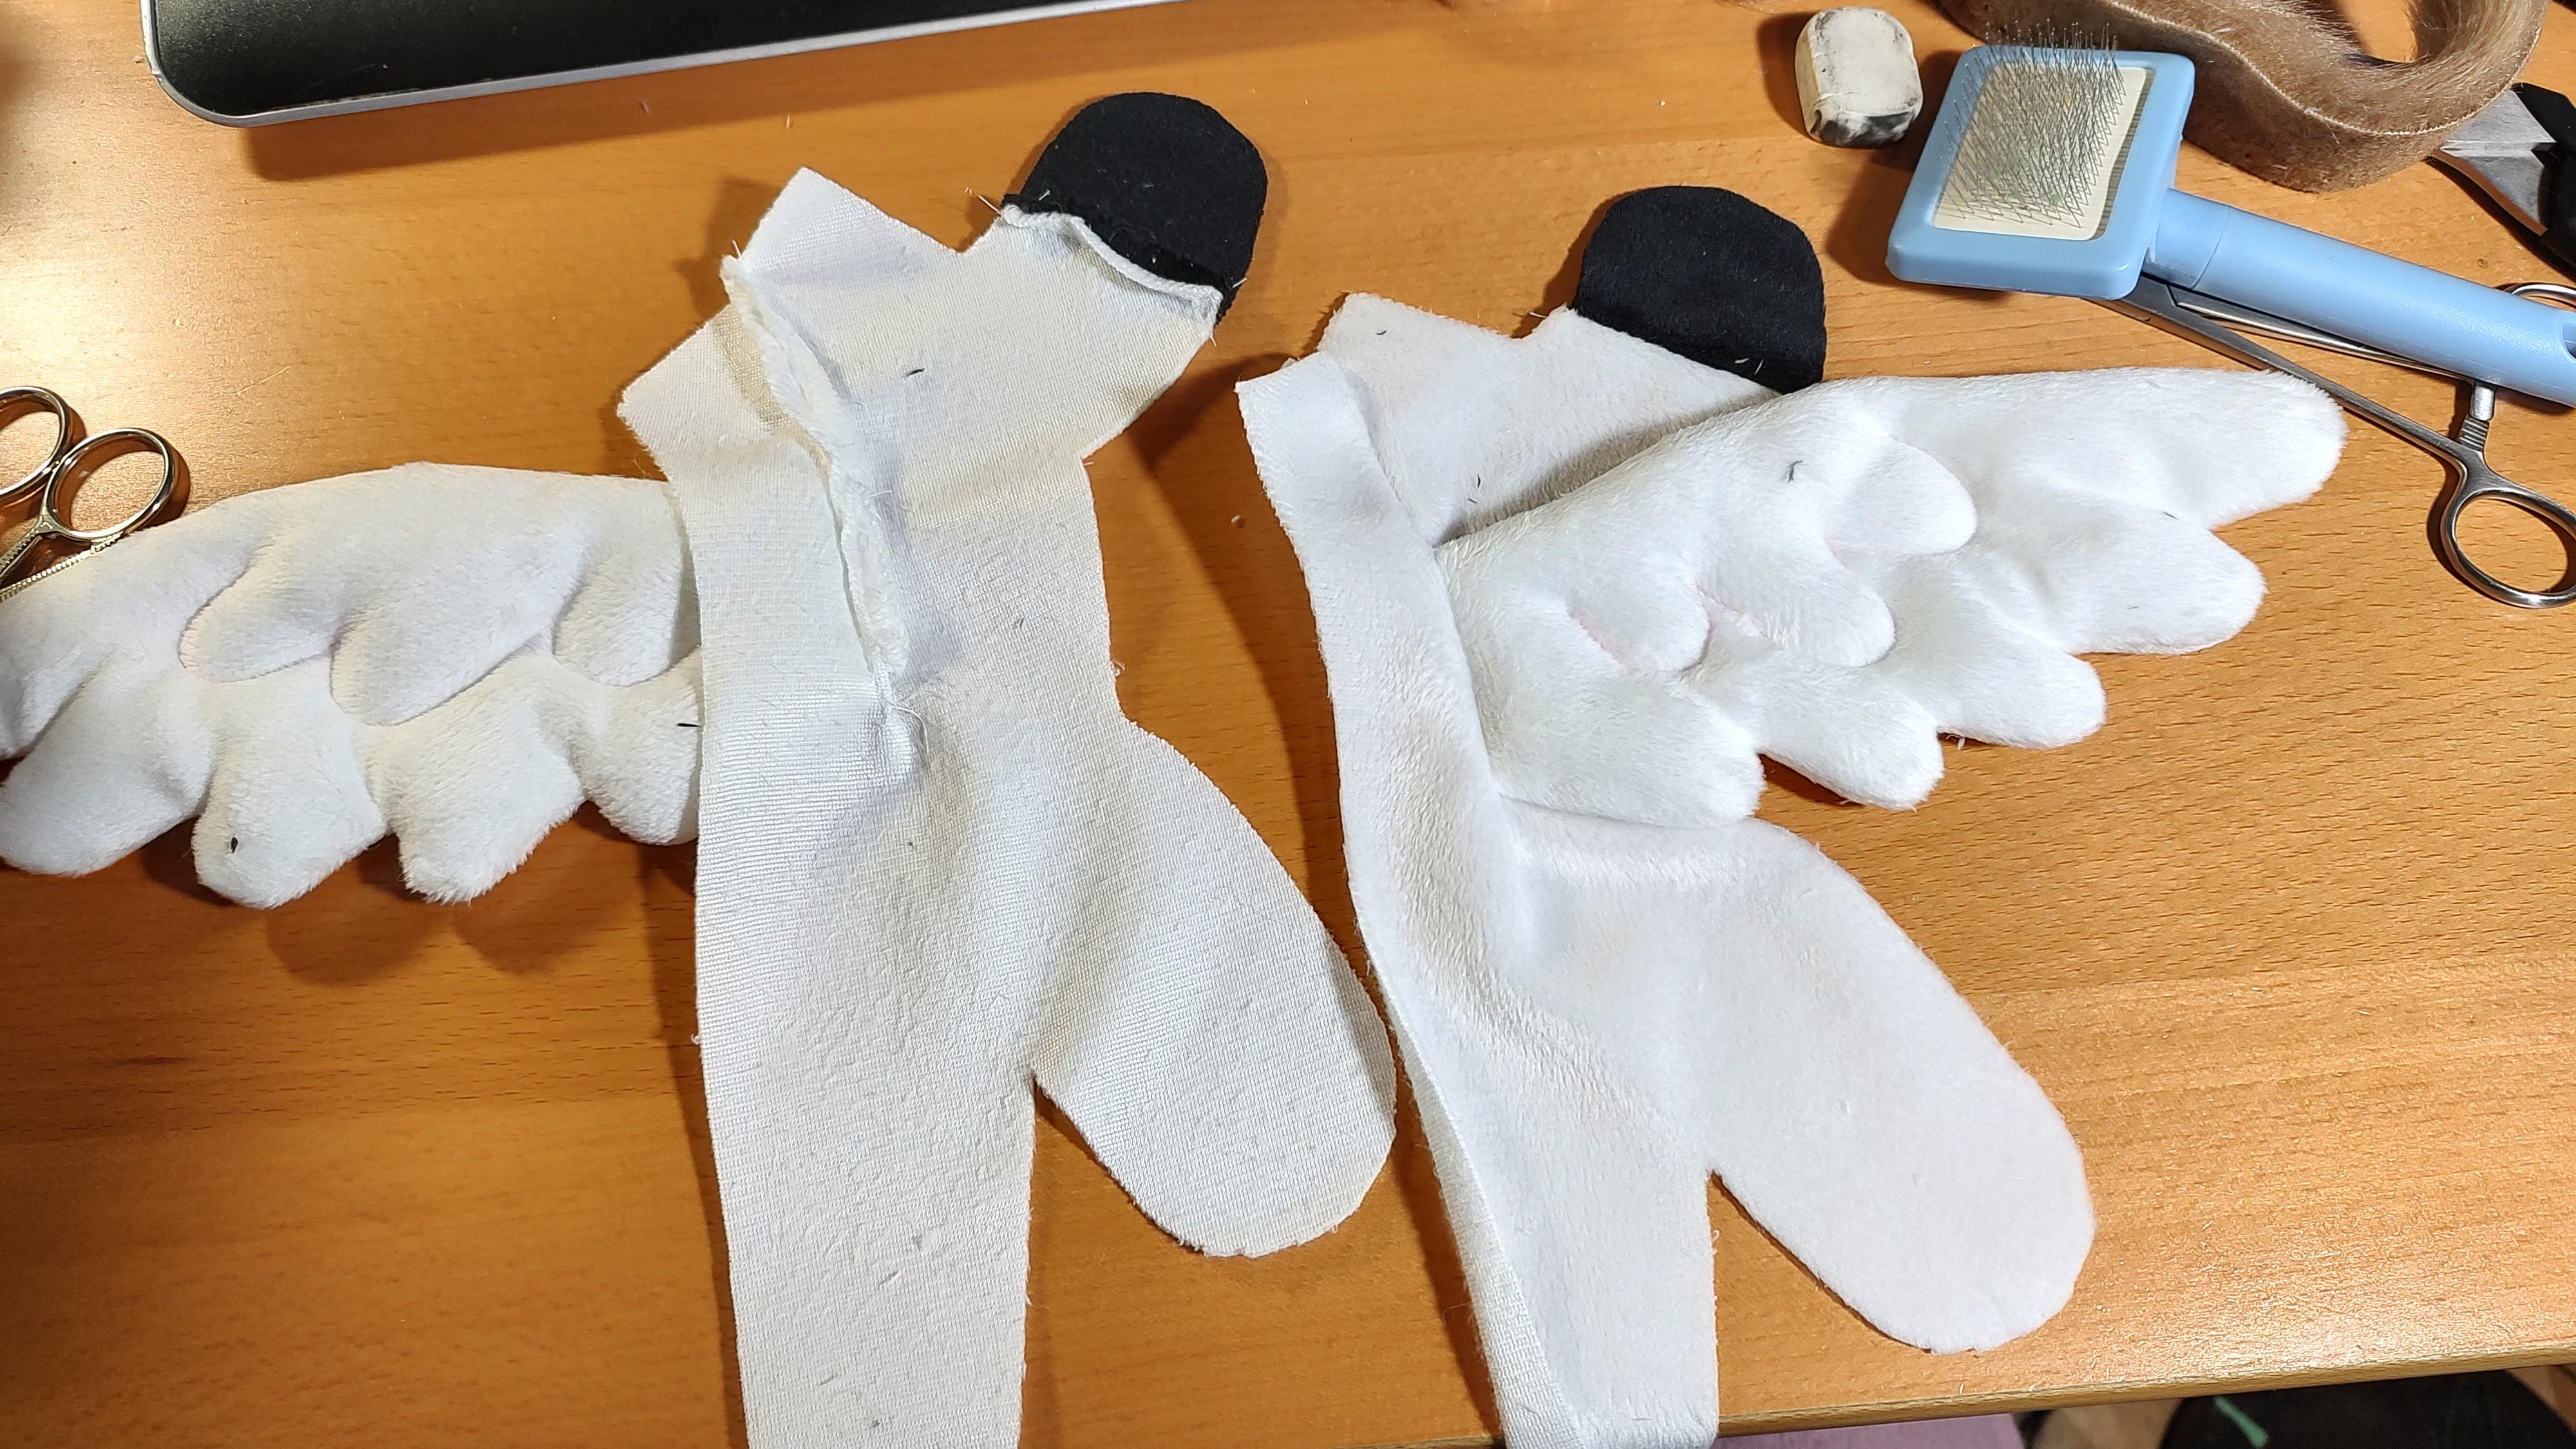
Sew two of the Hands to the Arms. Make sure the two Hands are inverse versions of each other; the tabs at the 'wrists' of the Hands and Arms should match up.
Sew the Arms to the concave area where the Chest and Belly meet up.
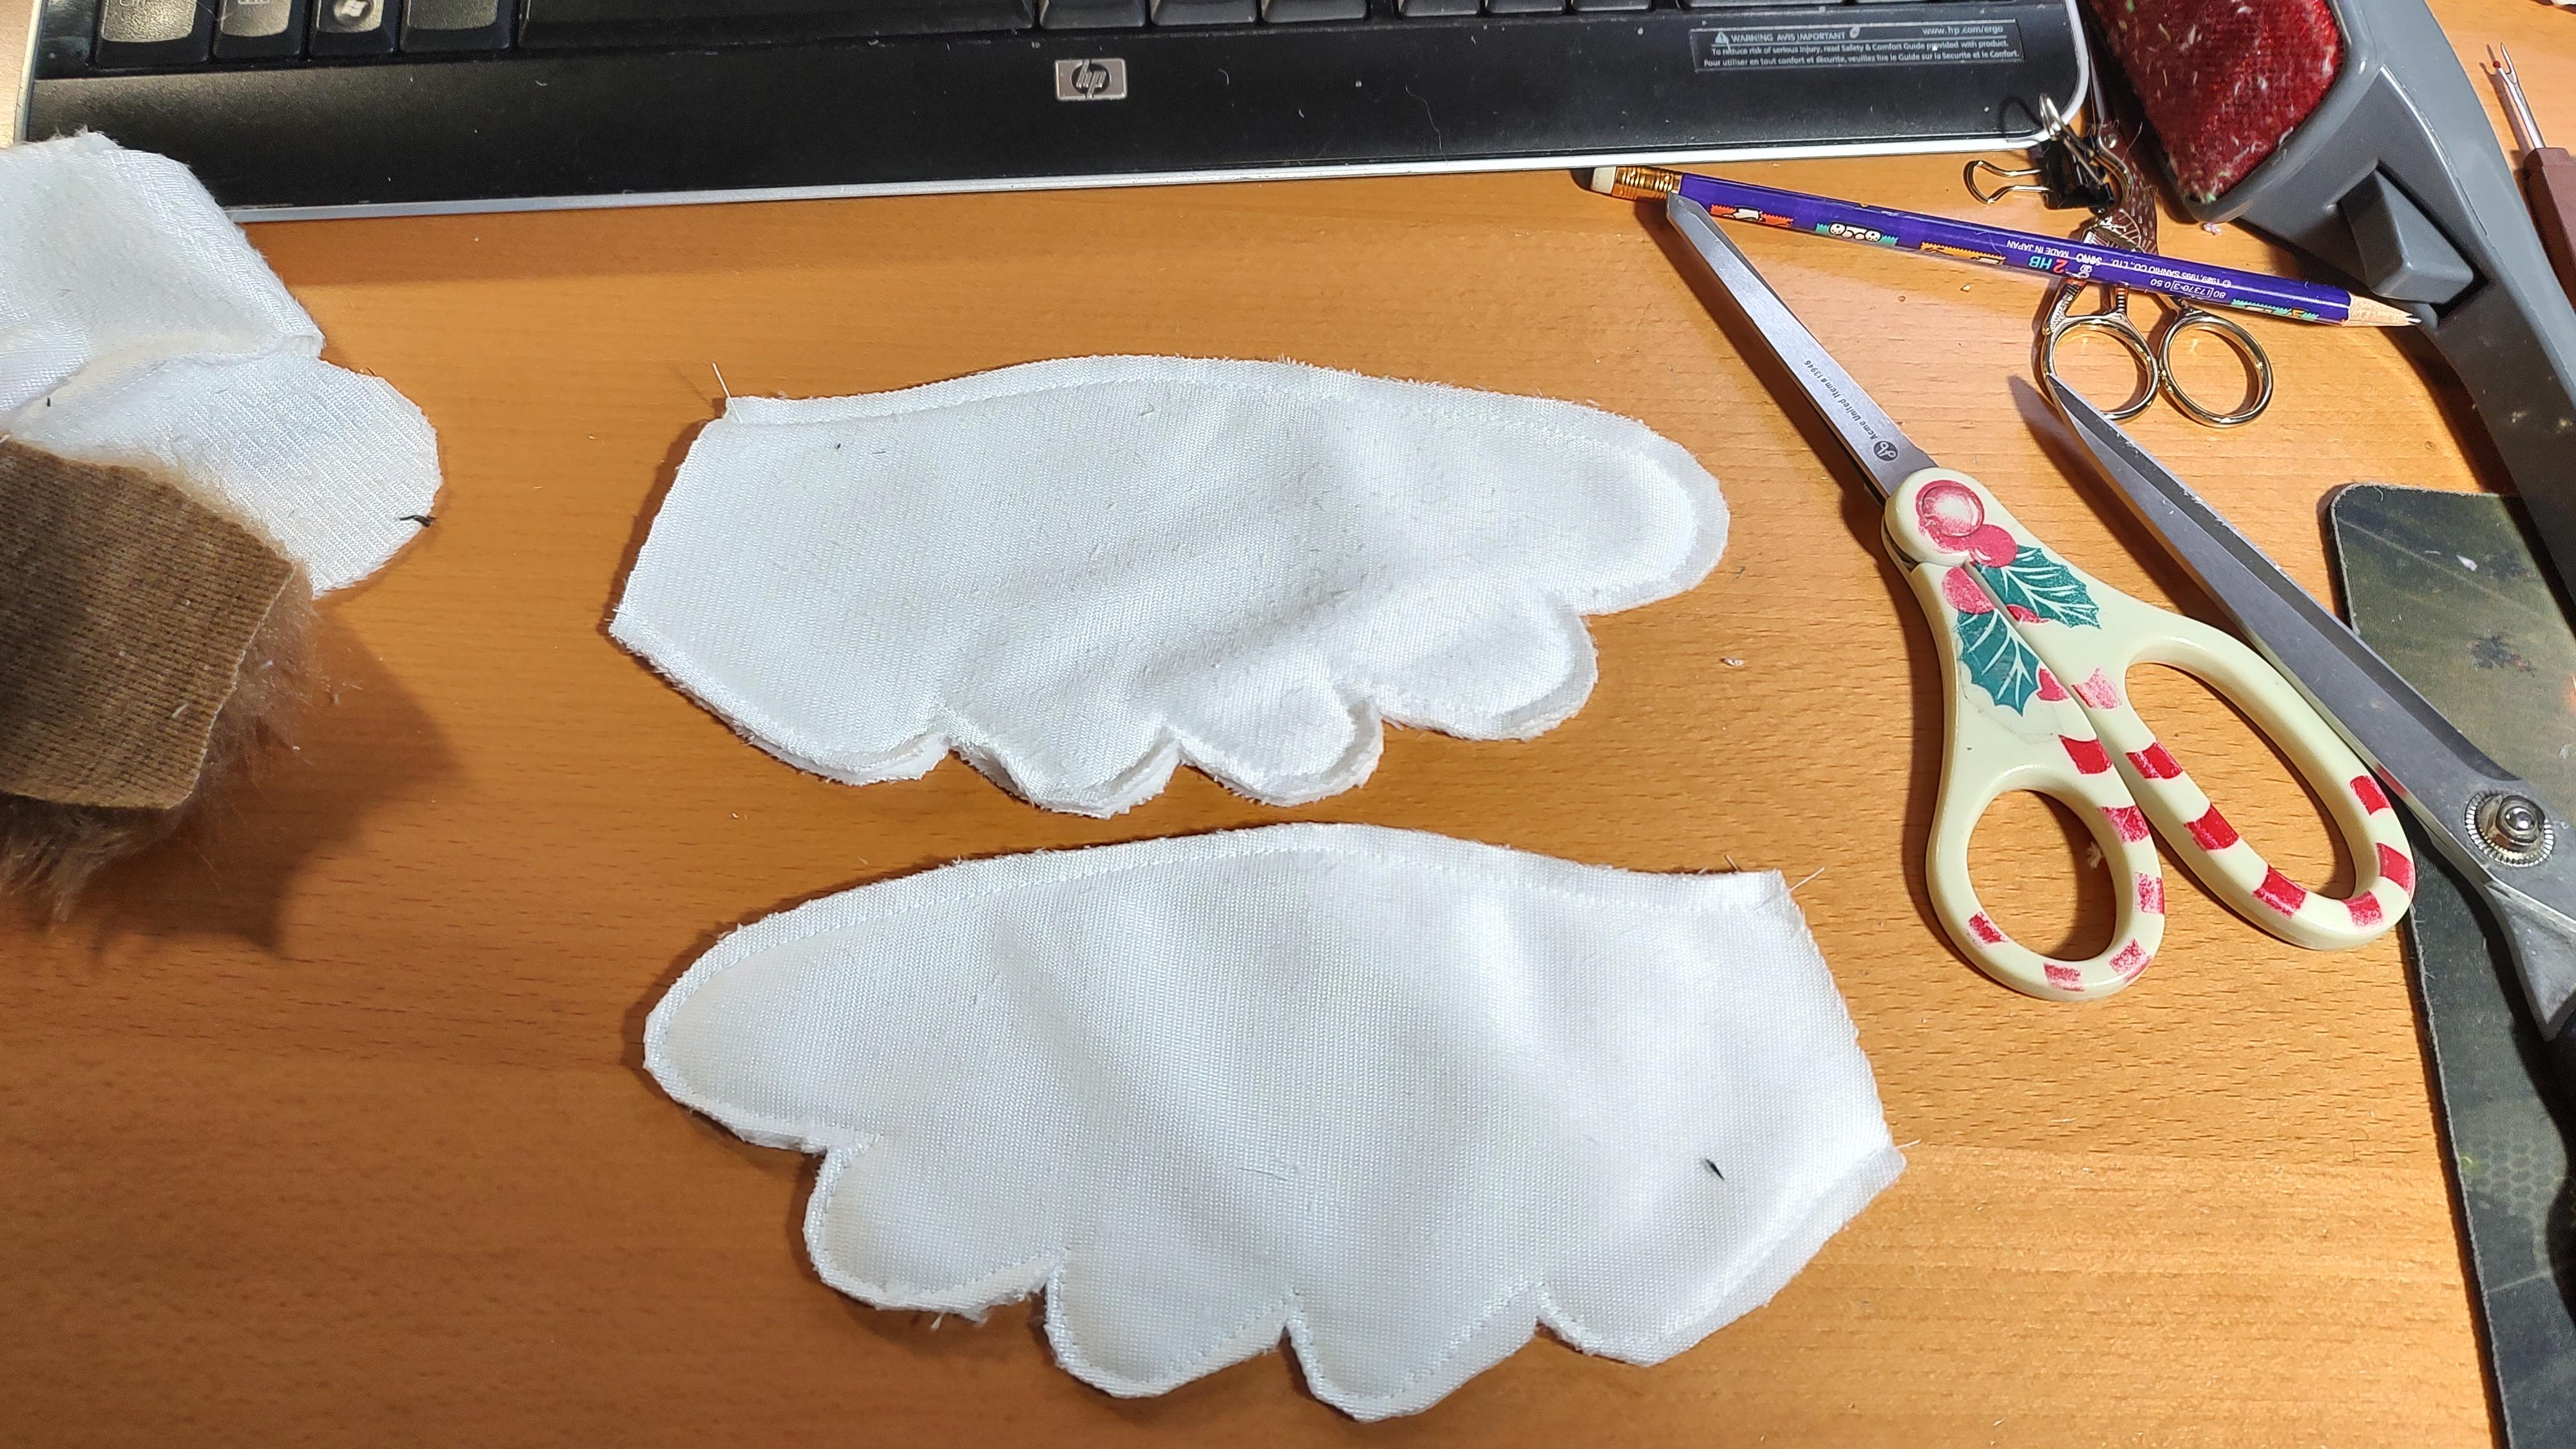
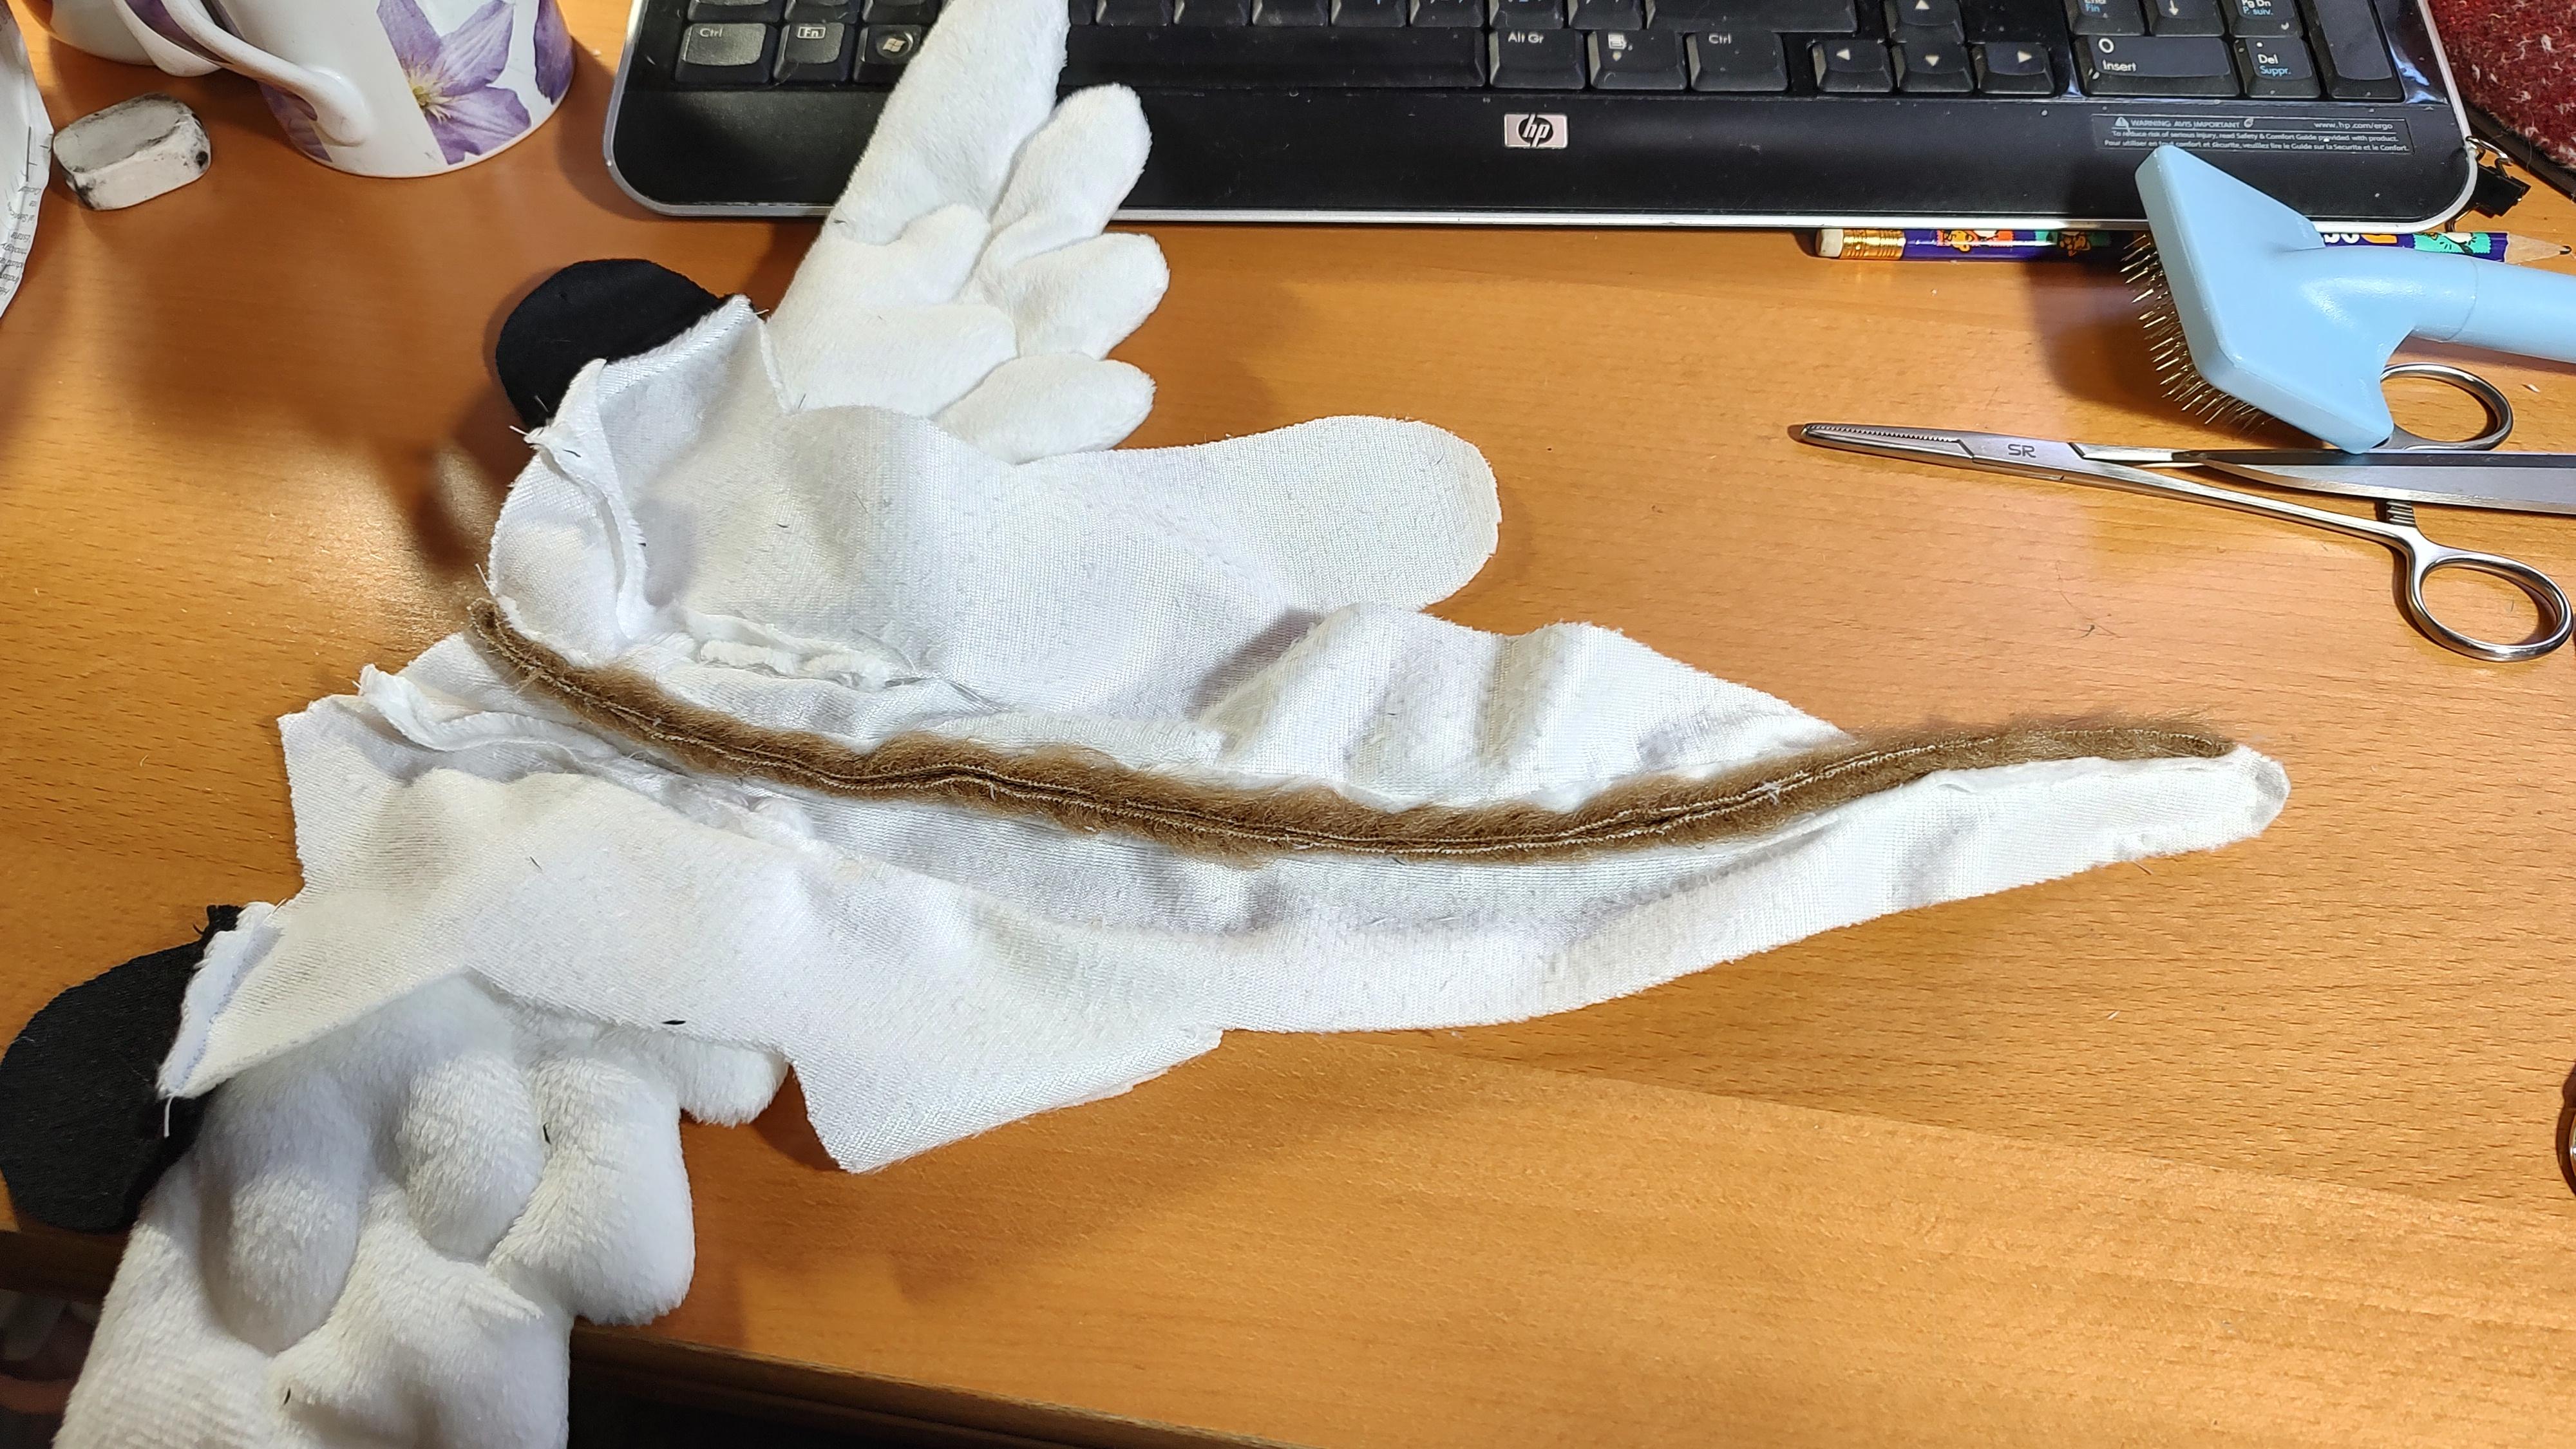
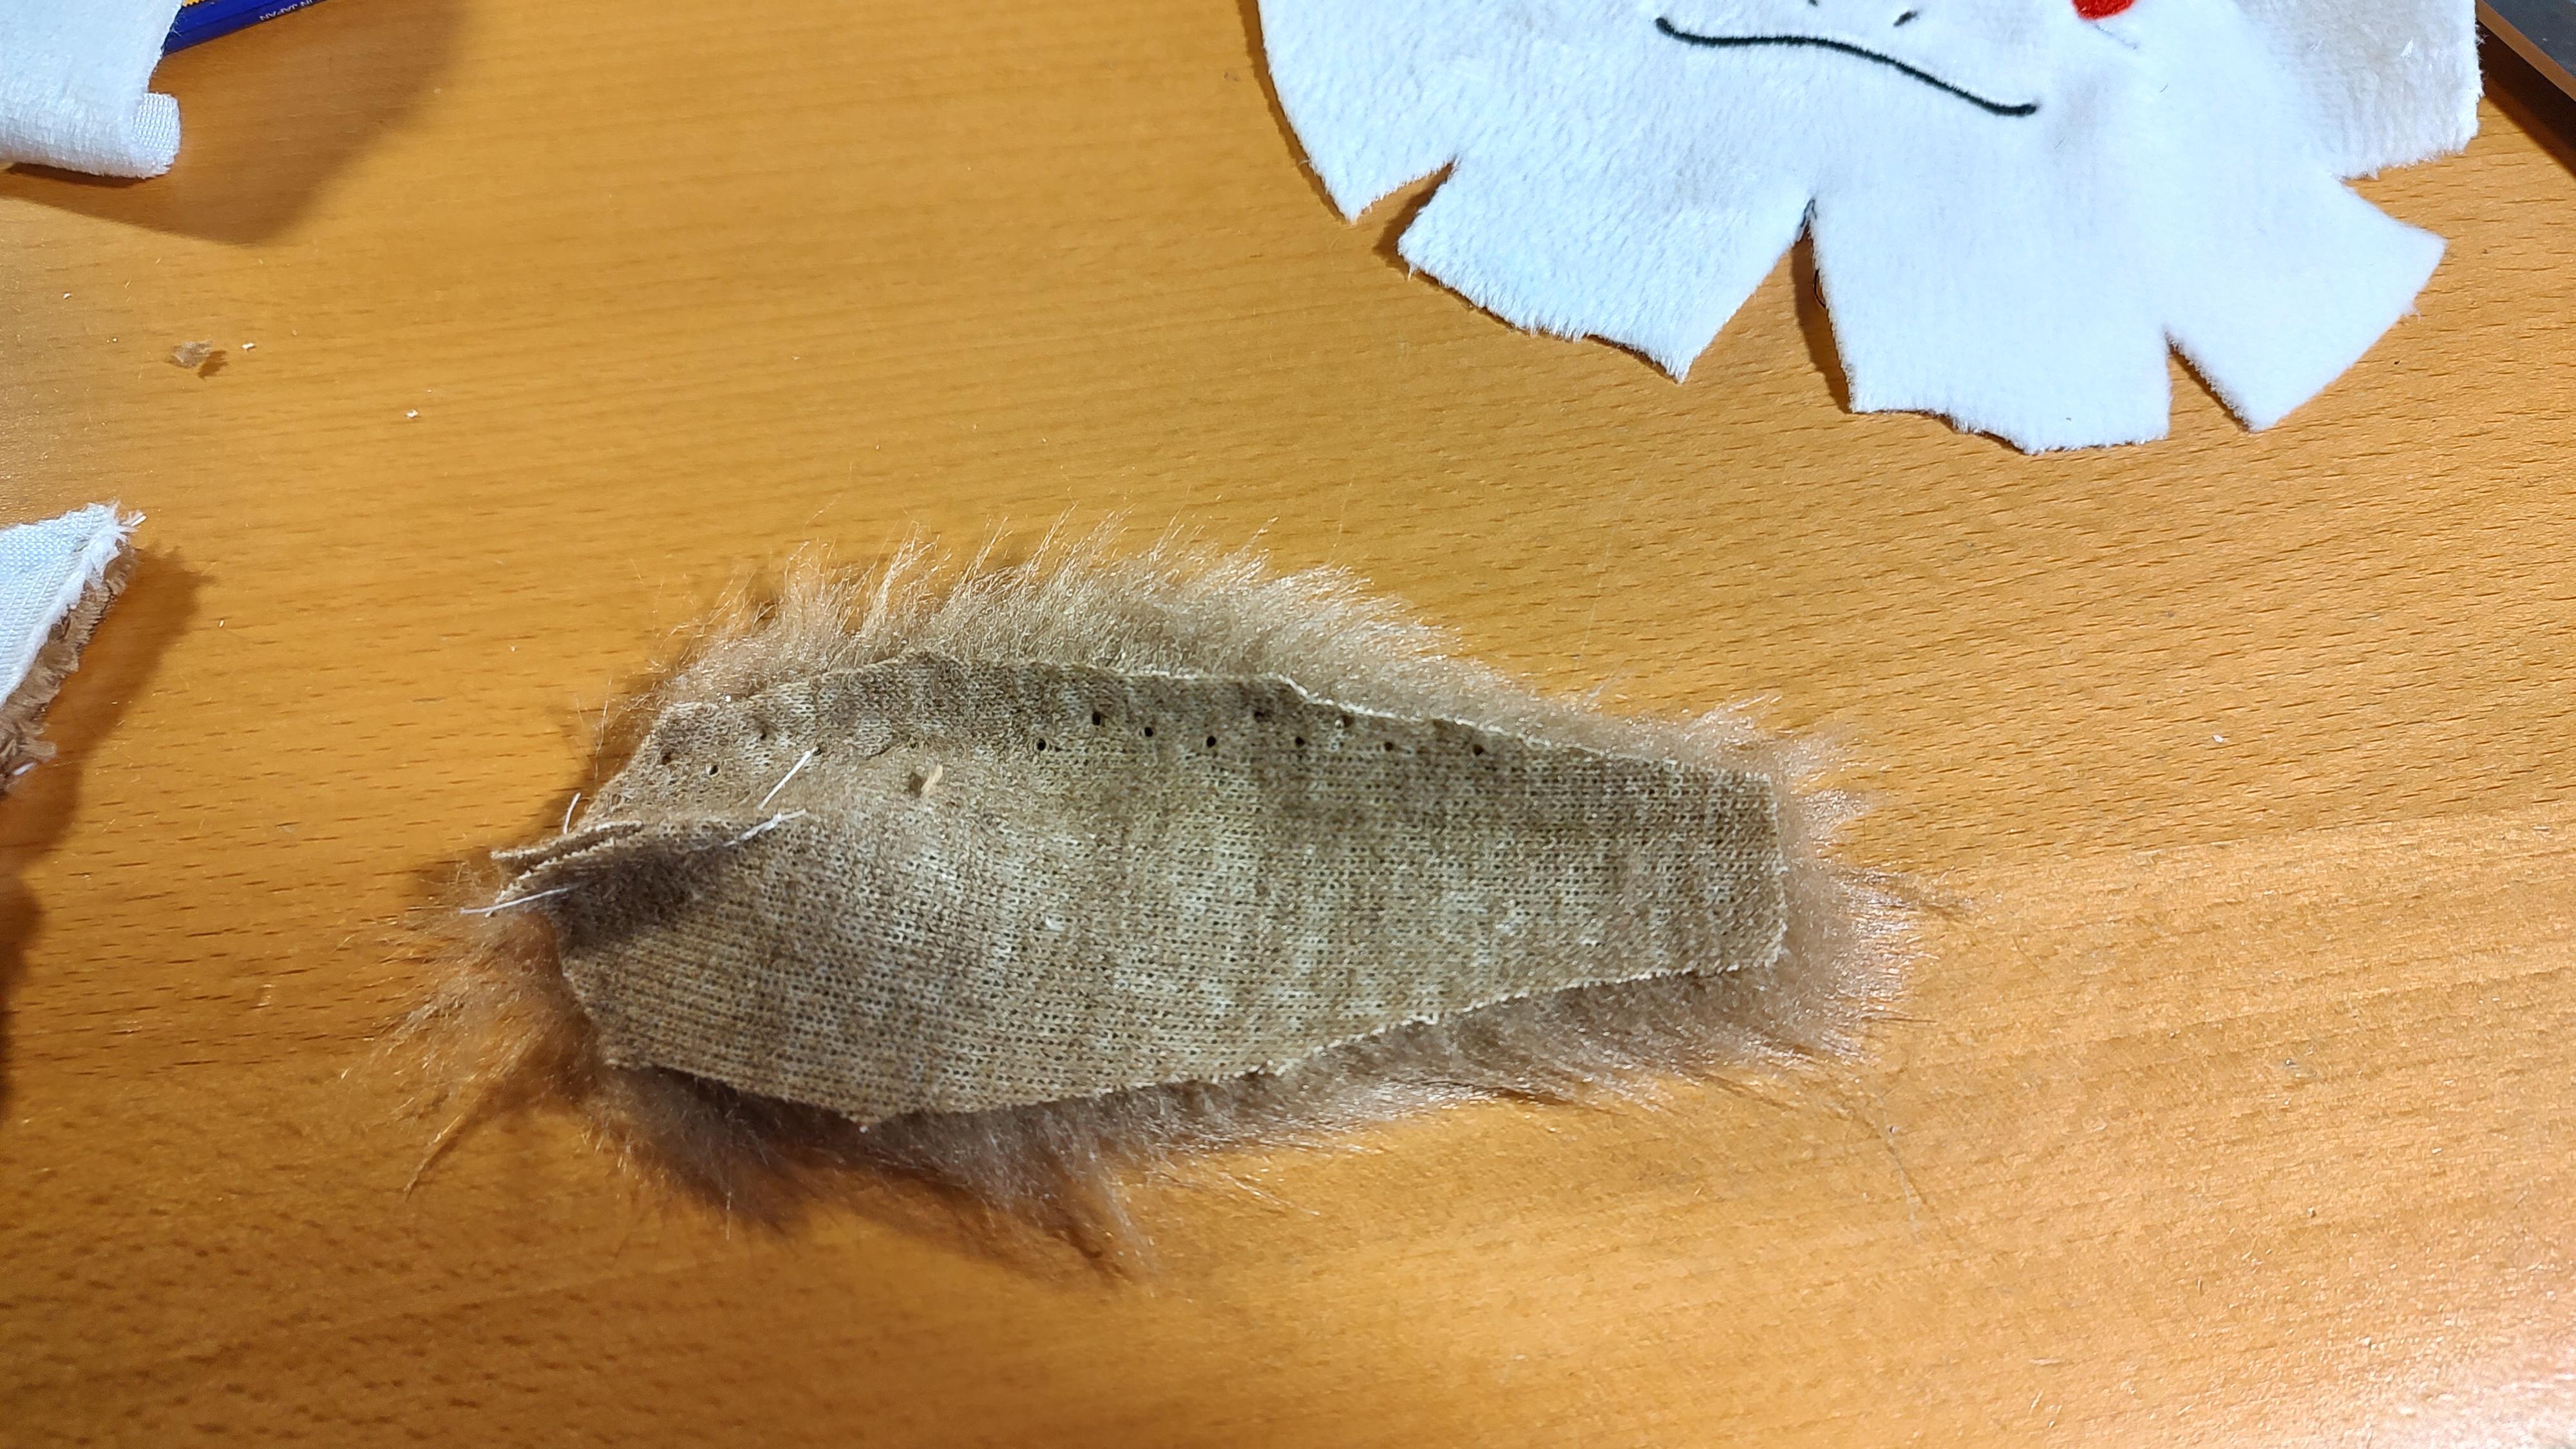
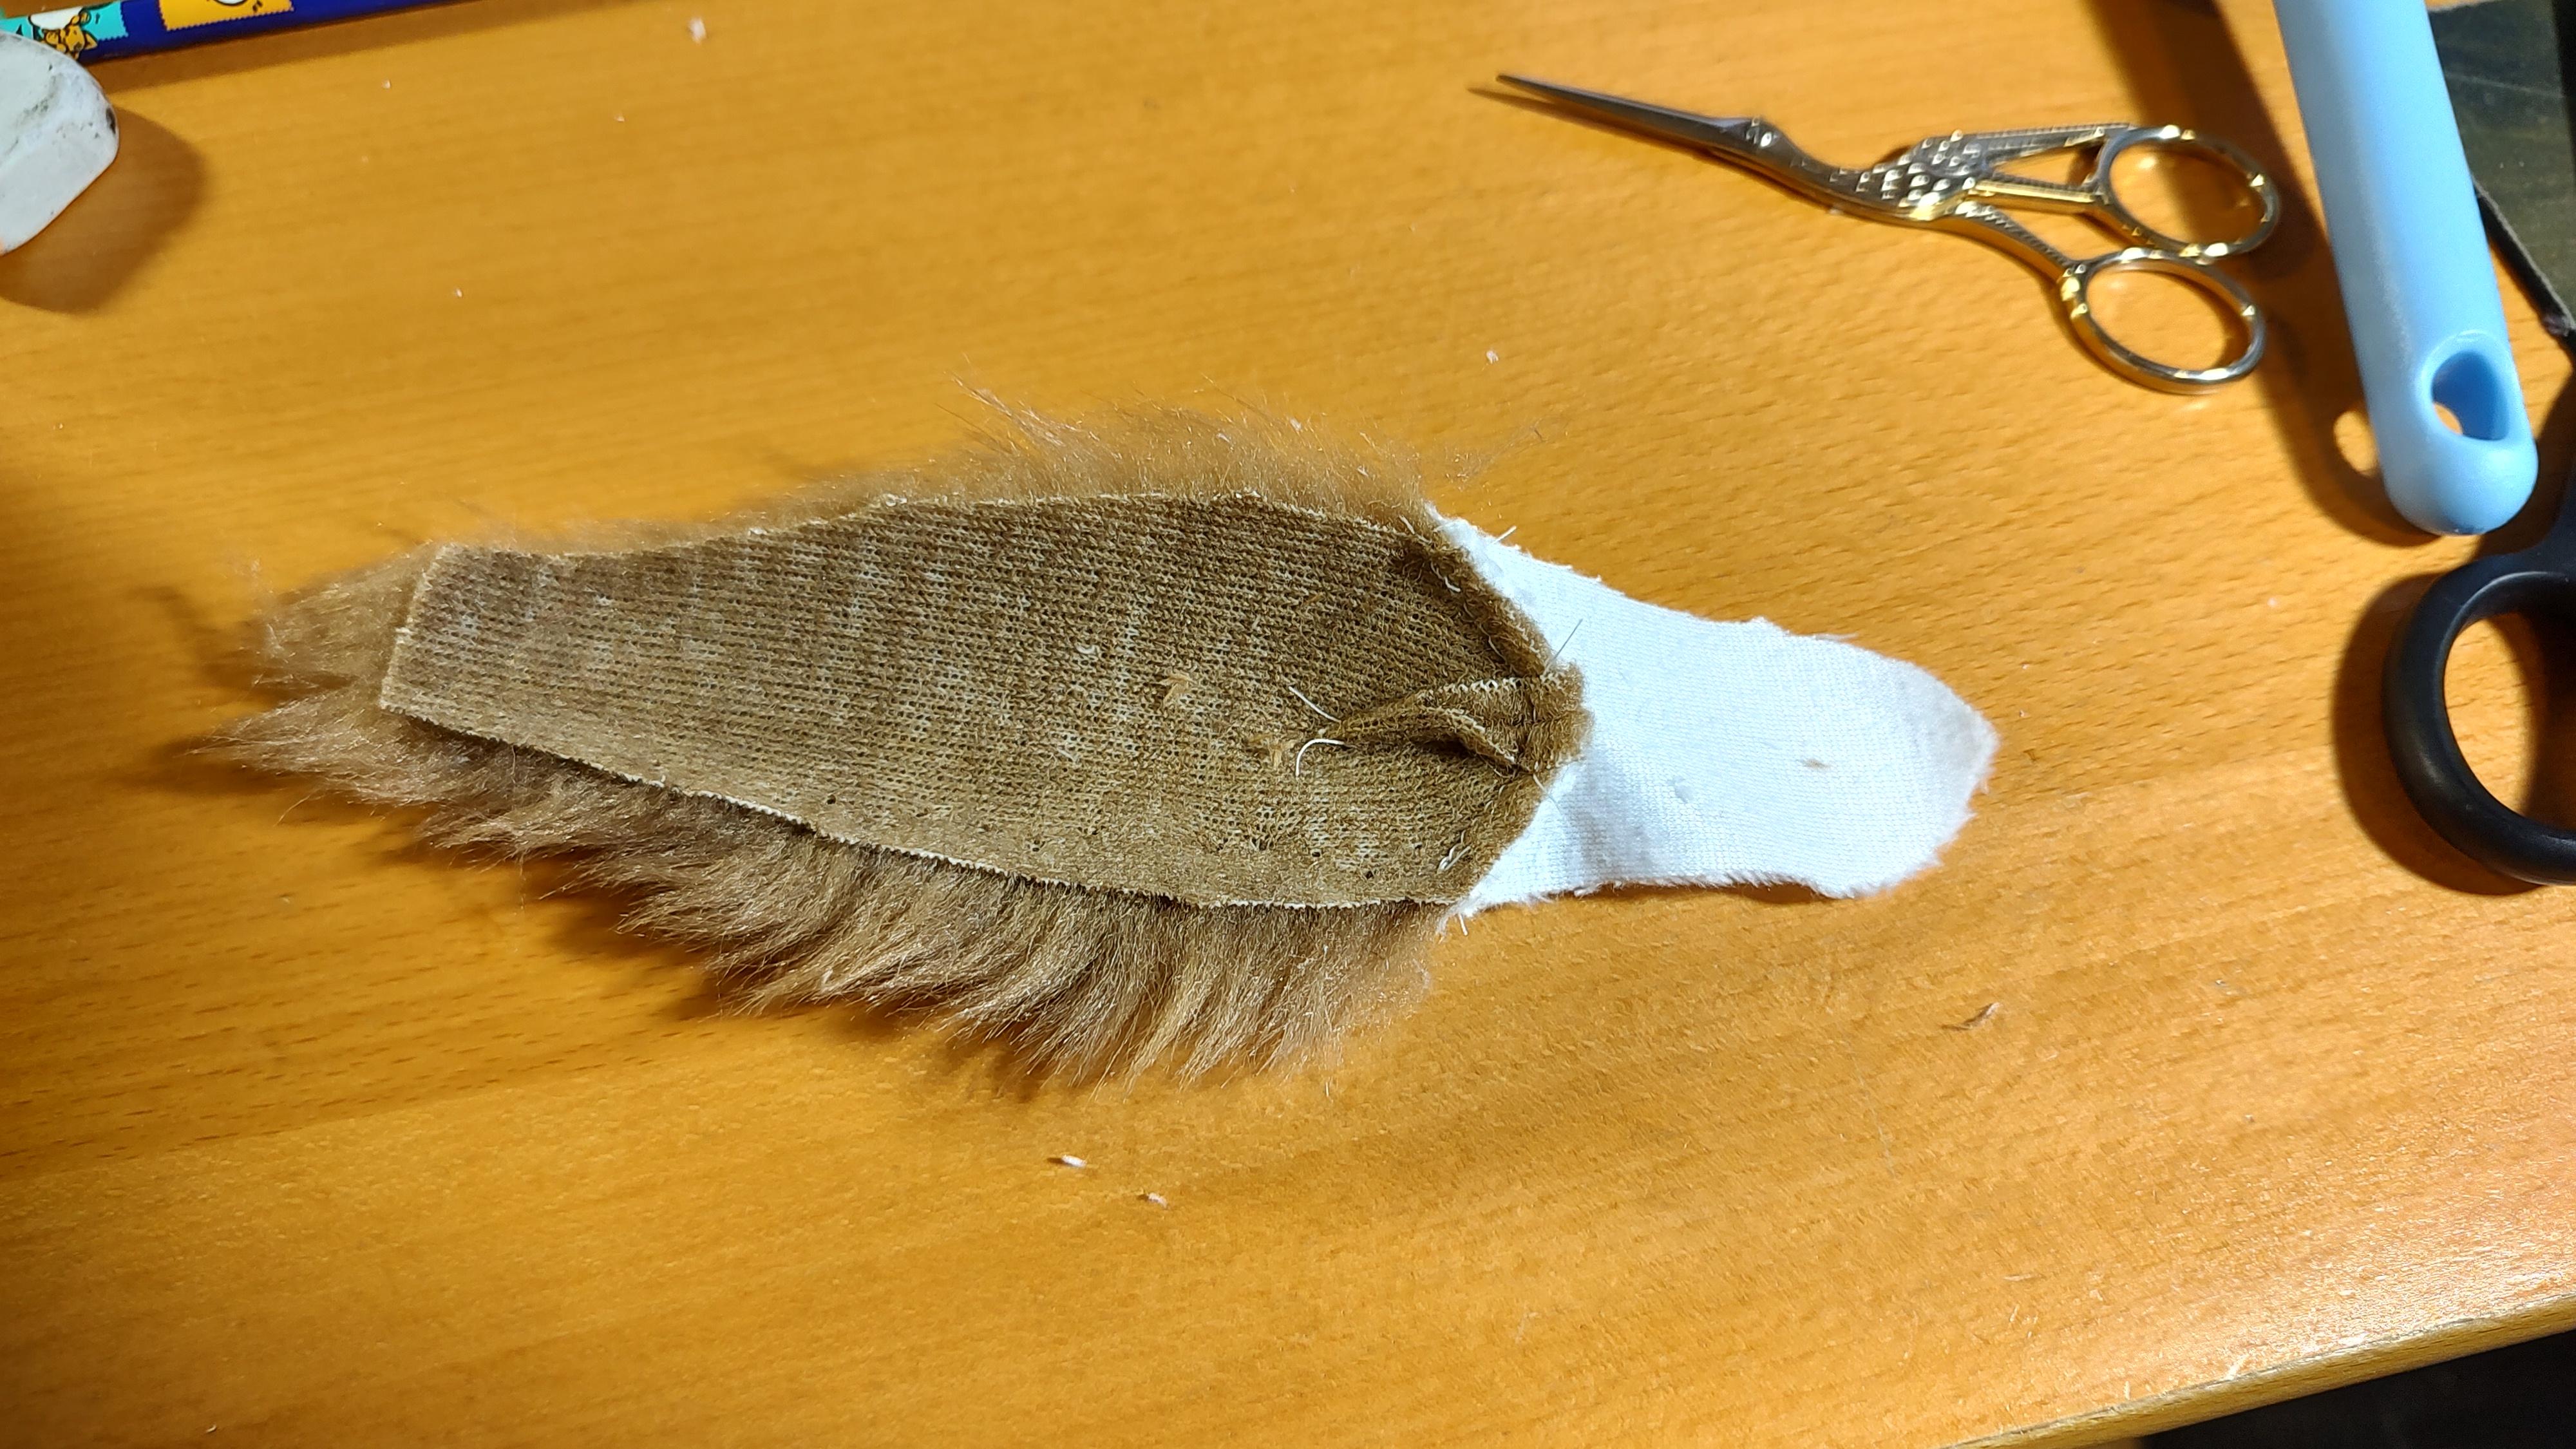
Match up two sets of wings and sew around the perimeter, leaving the base of each wing unsewn. Trim into the seam allowance between each feather and around the tips of the feathers to make it easy to turn rightside-out.
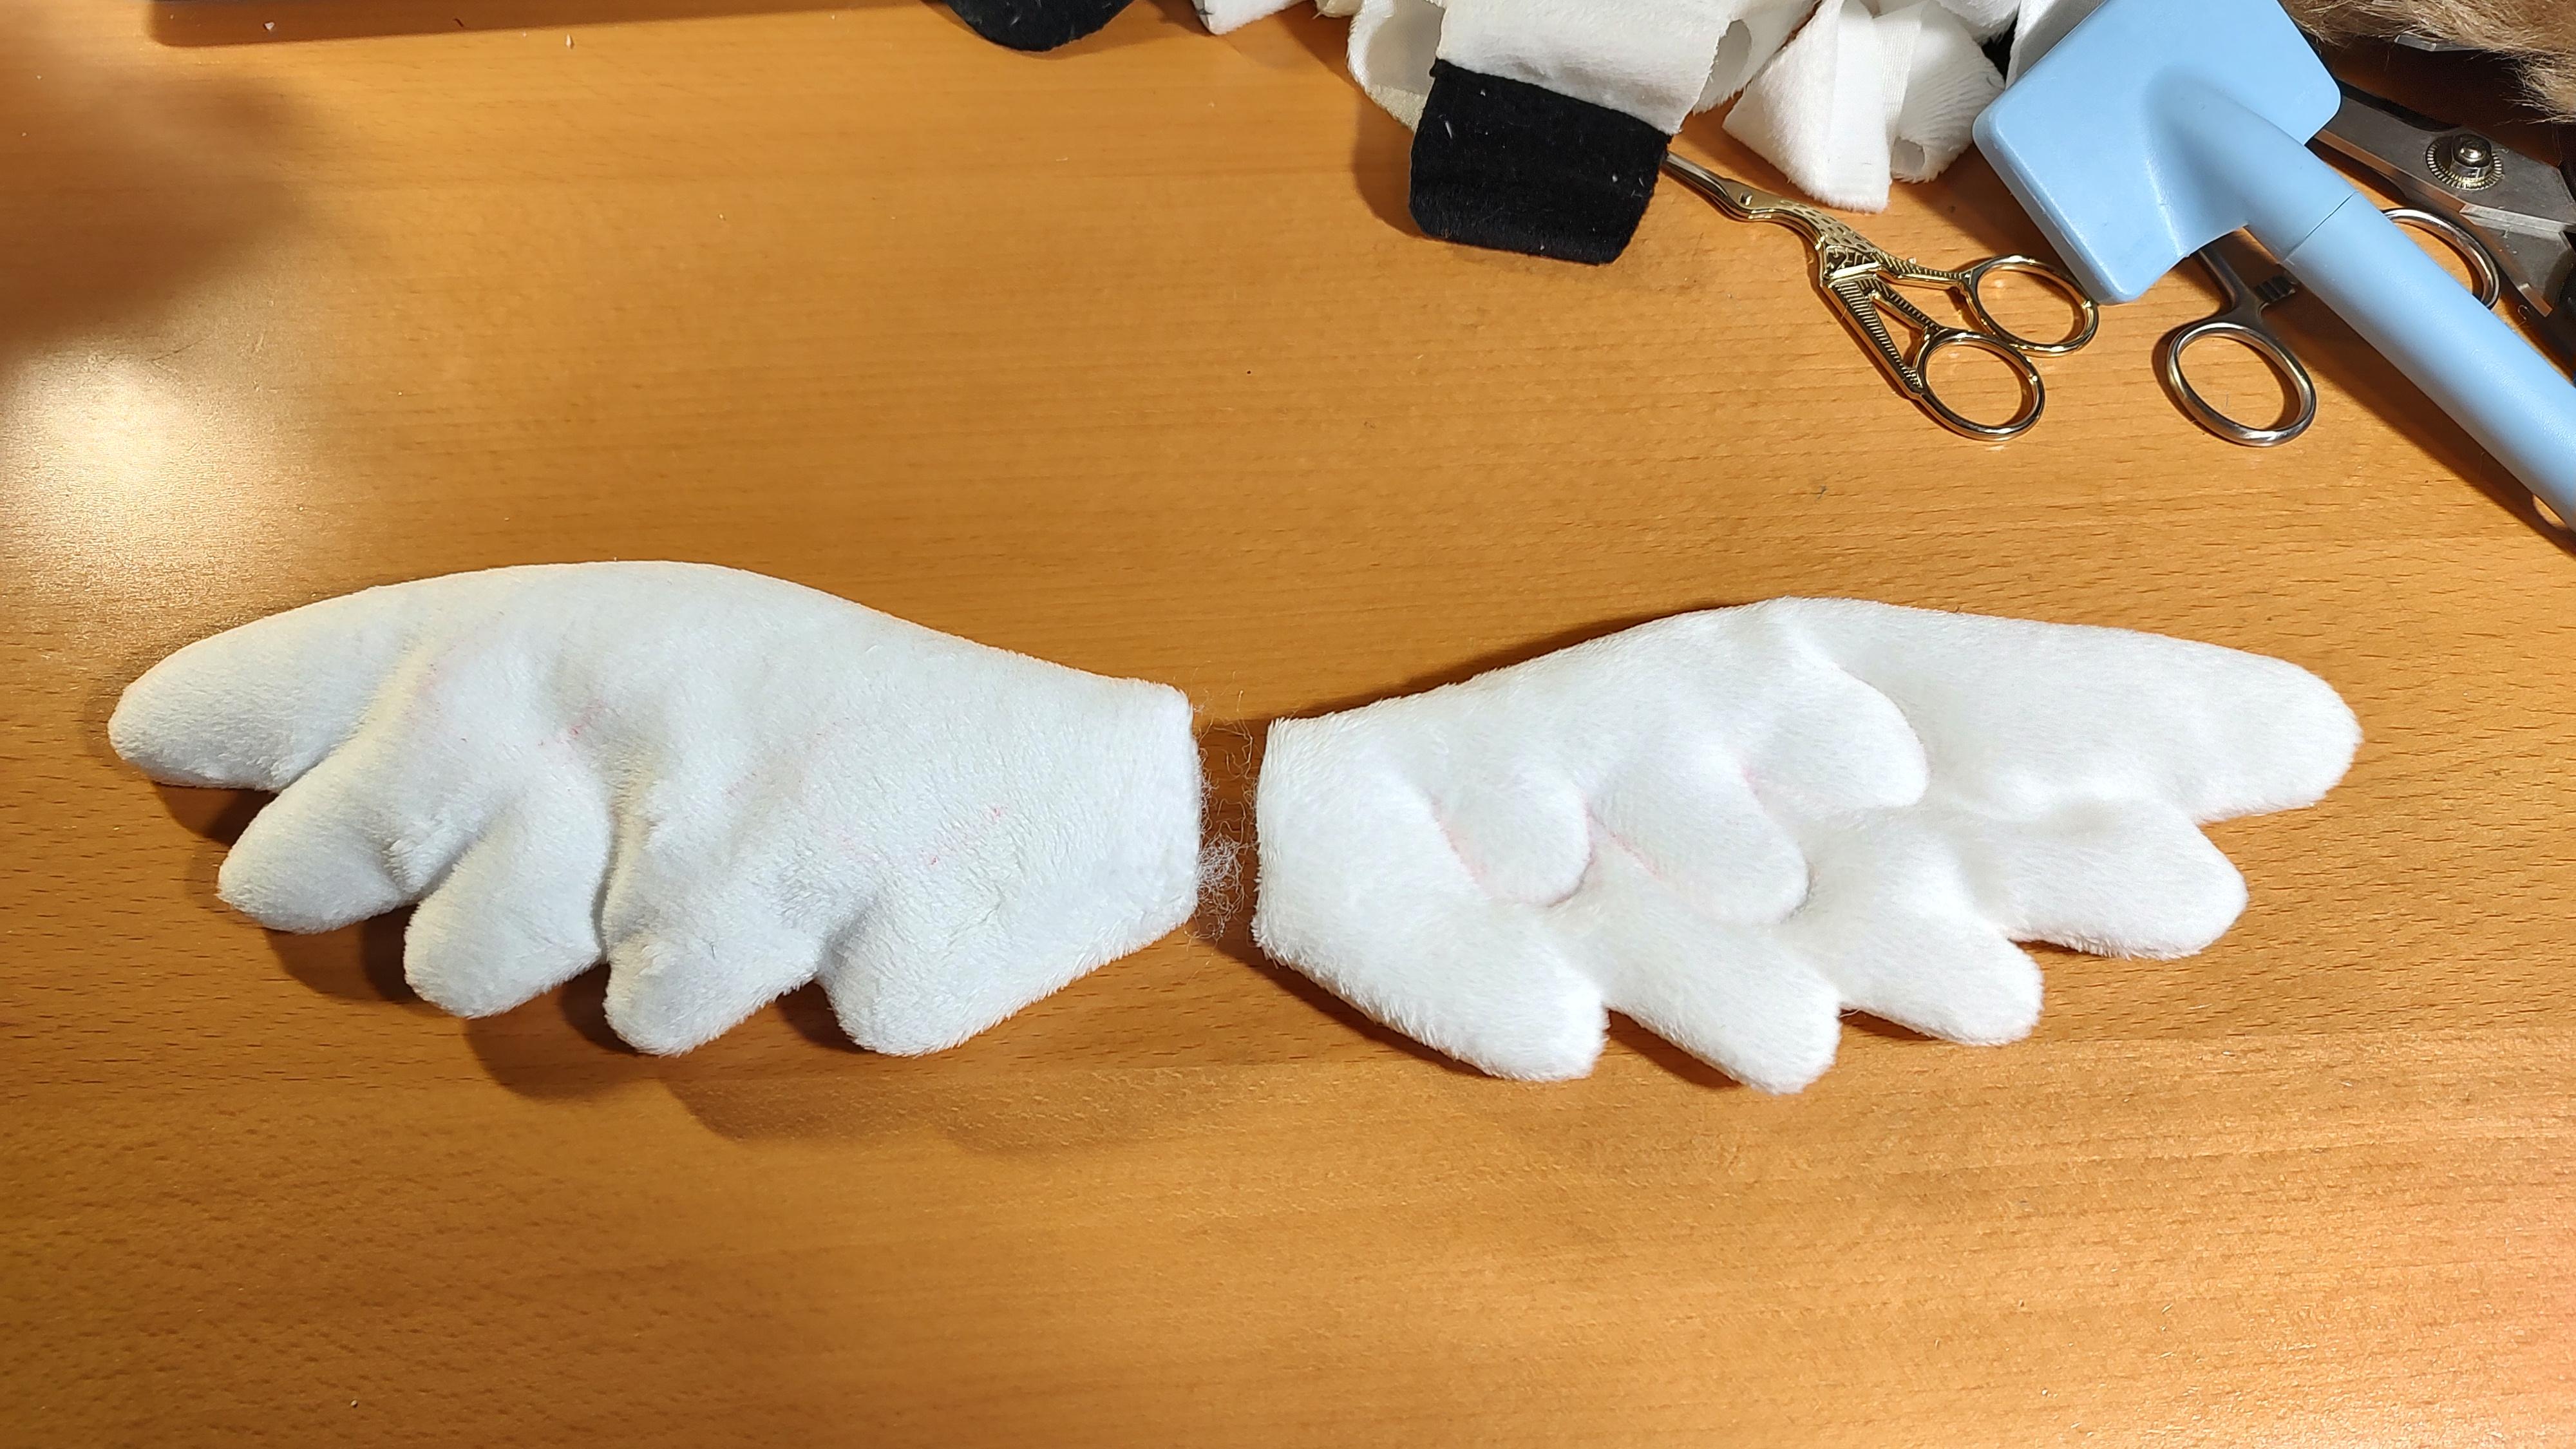
With the wings rightside-out, stuff it lightly. Then sew the feathers in the middle of the wing. That helps keep the wing flat and holds the stuffing in place.
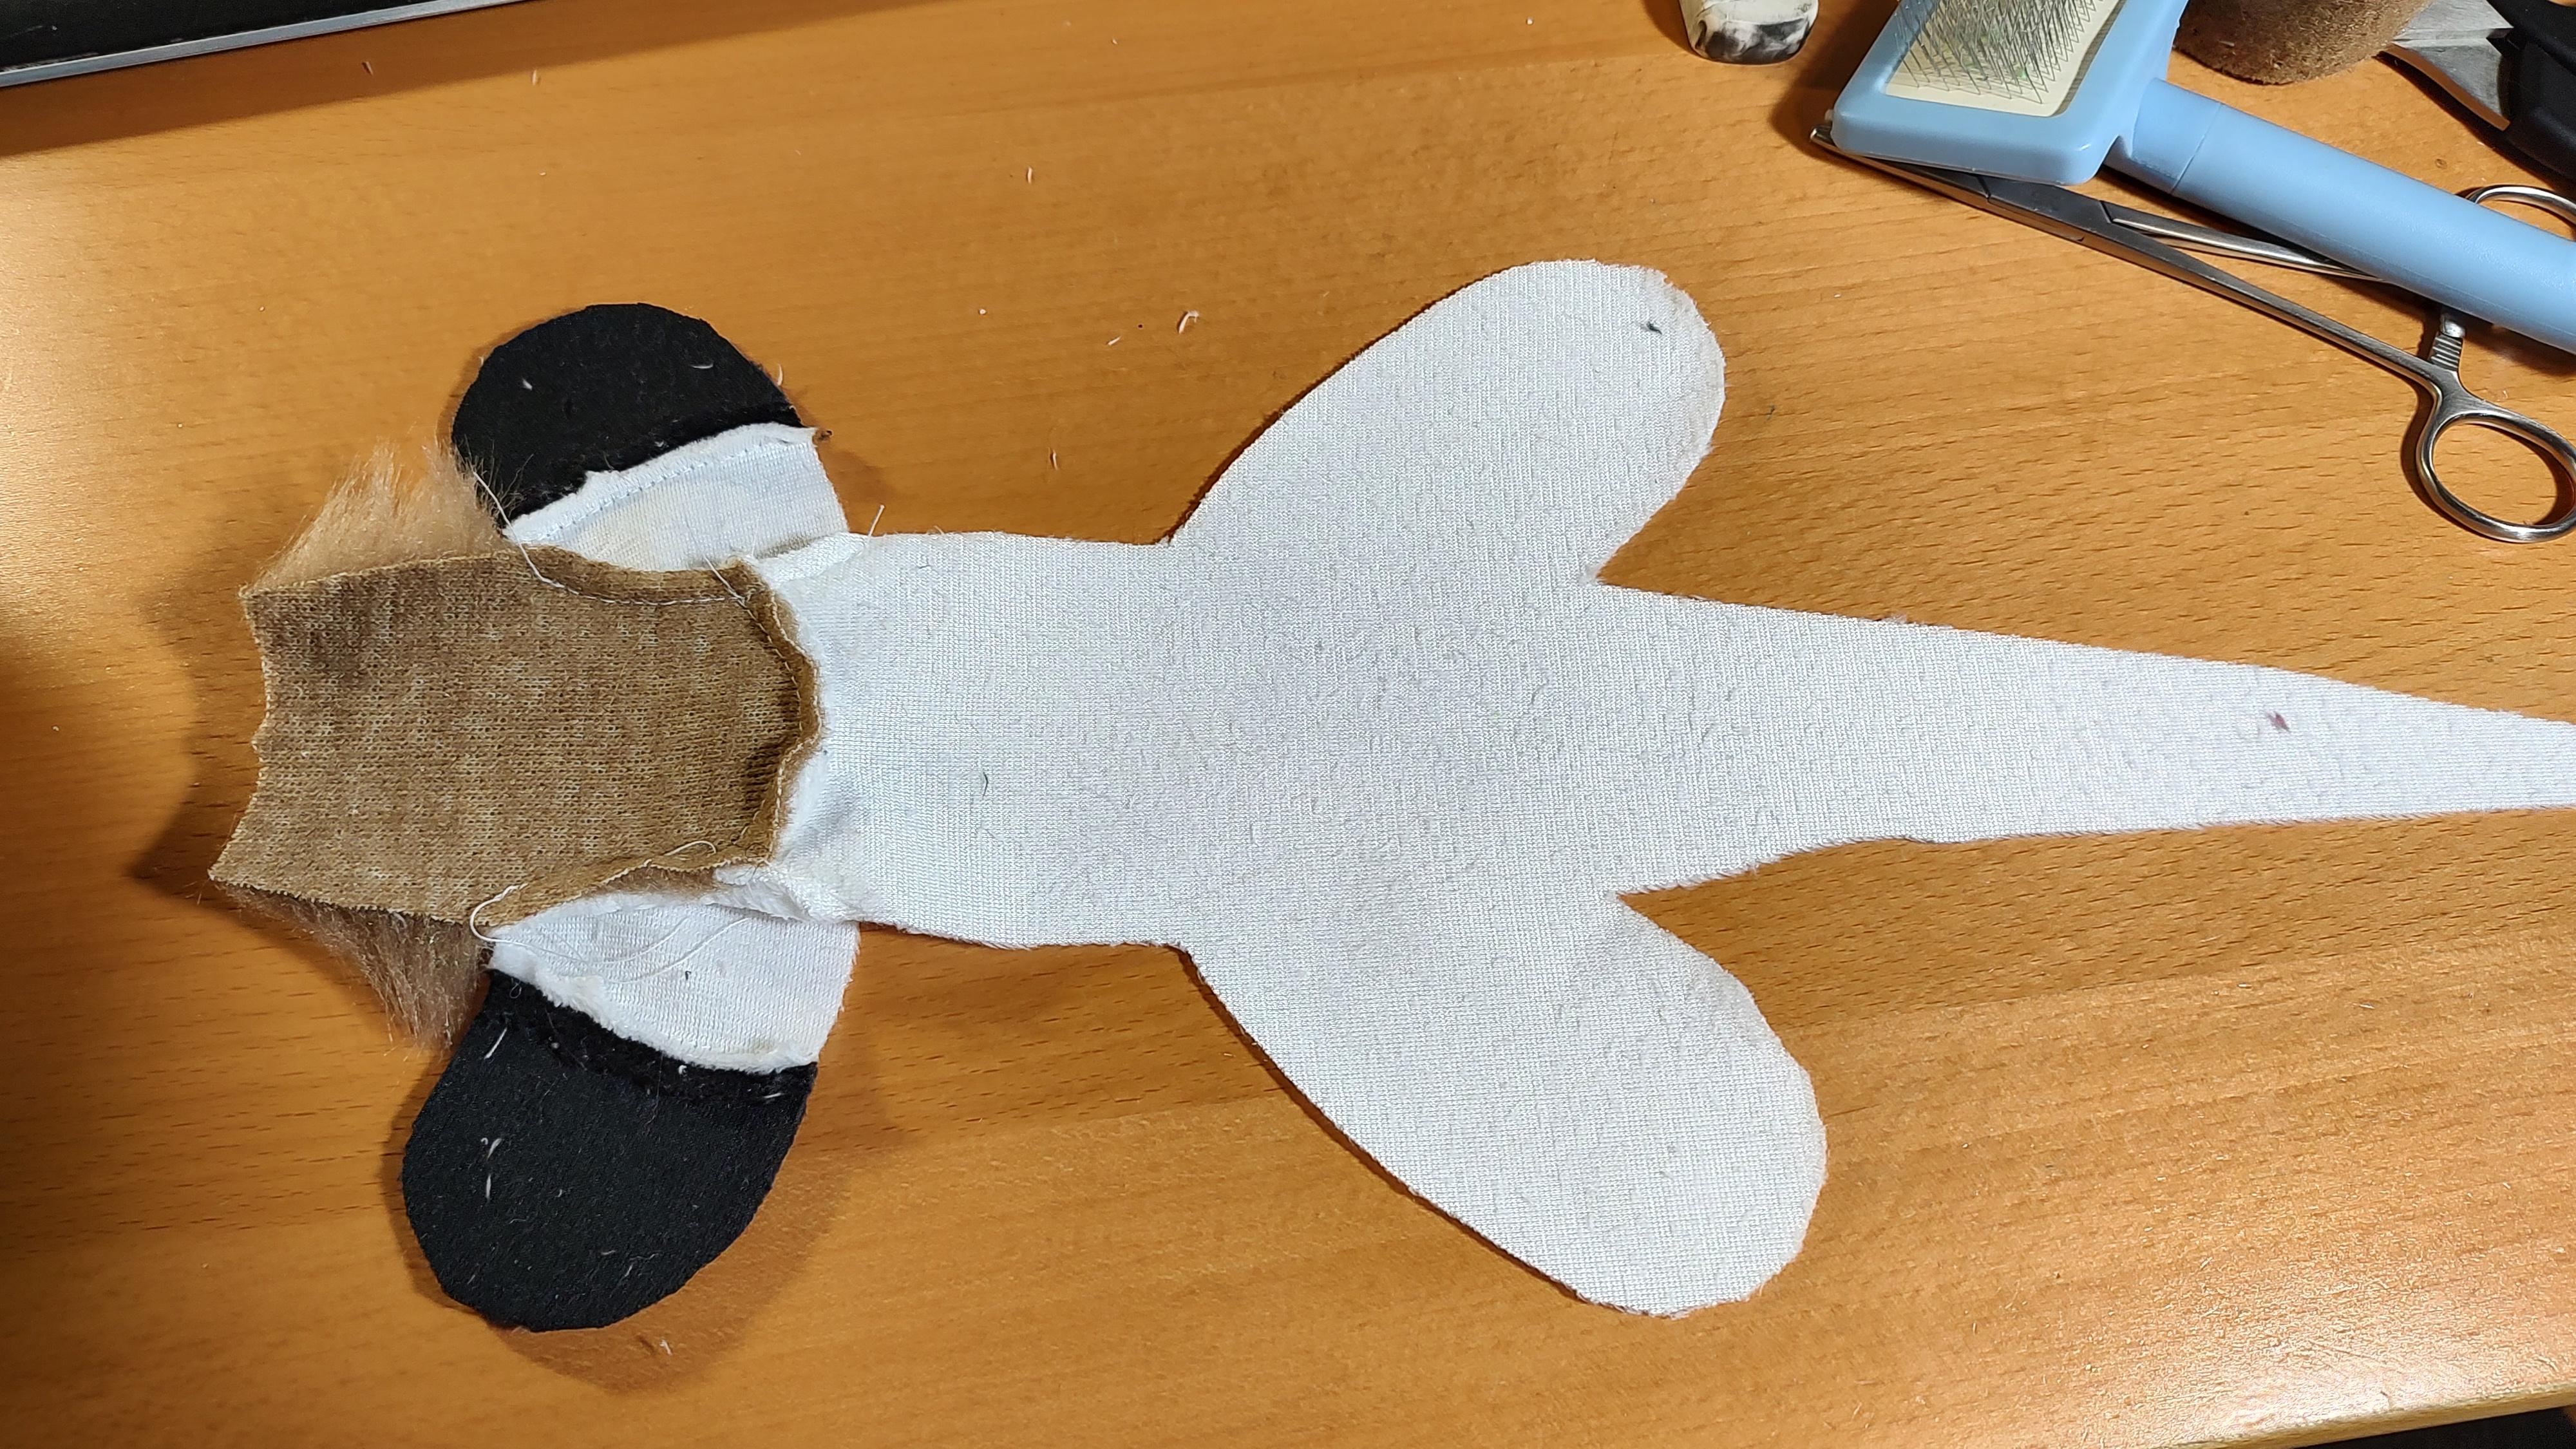
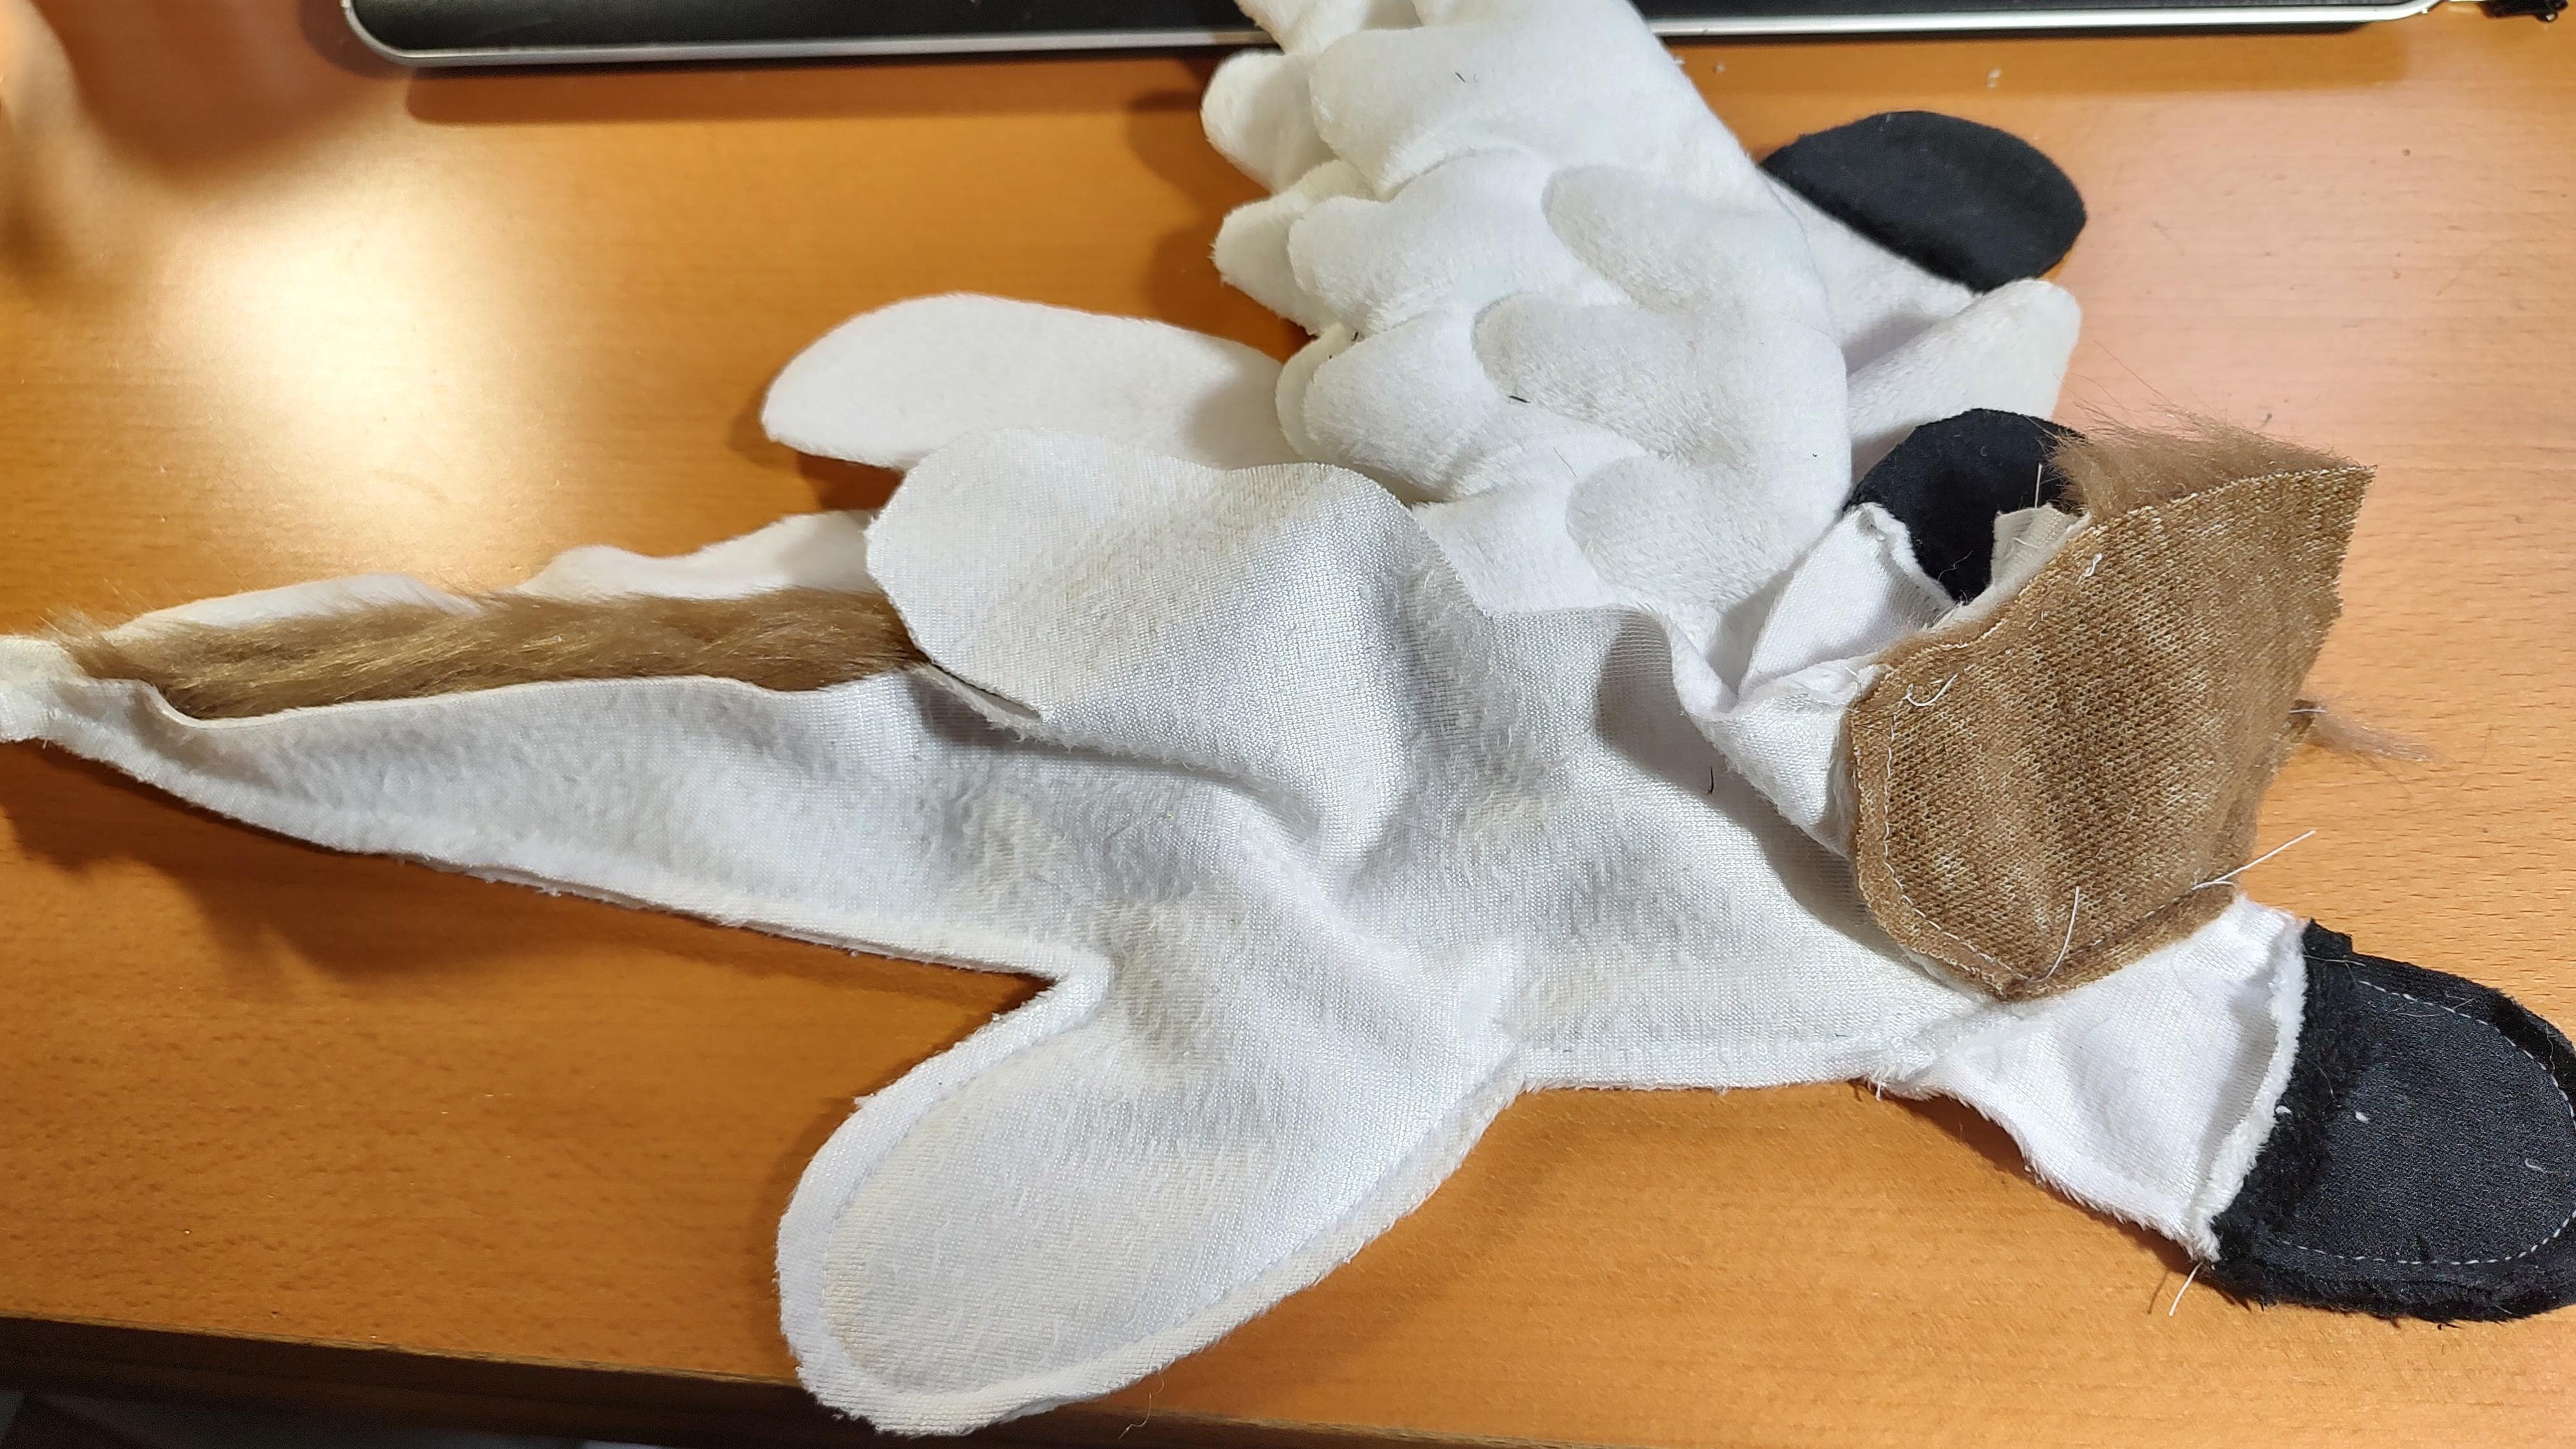
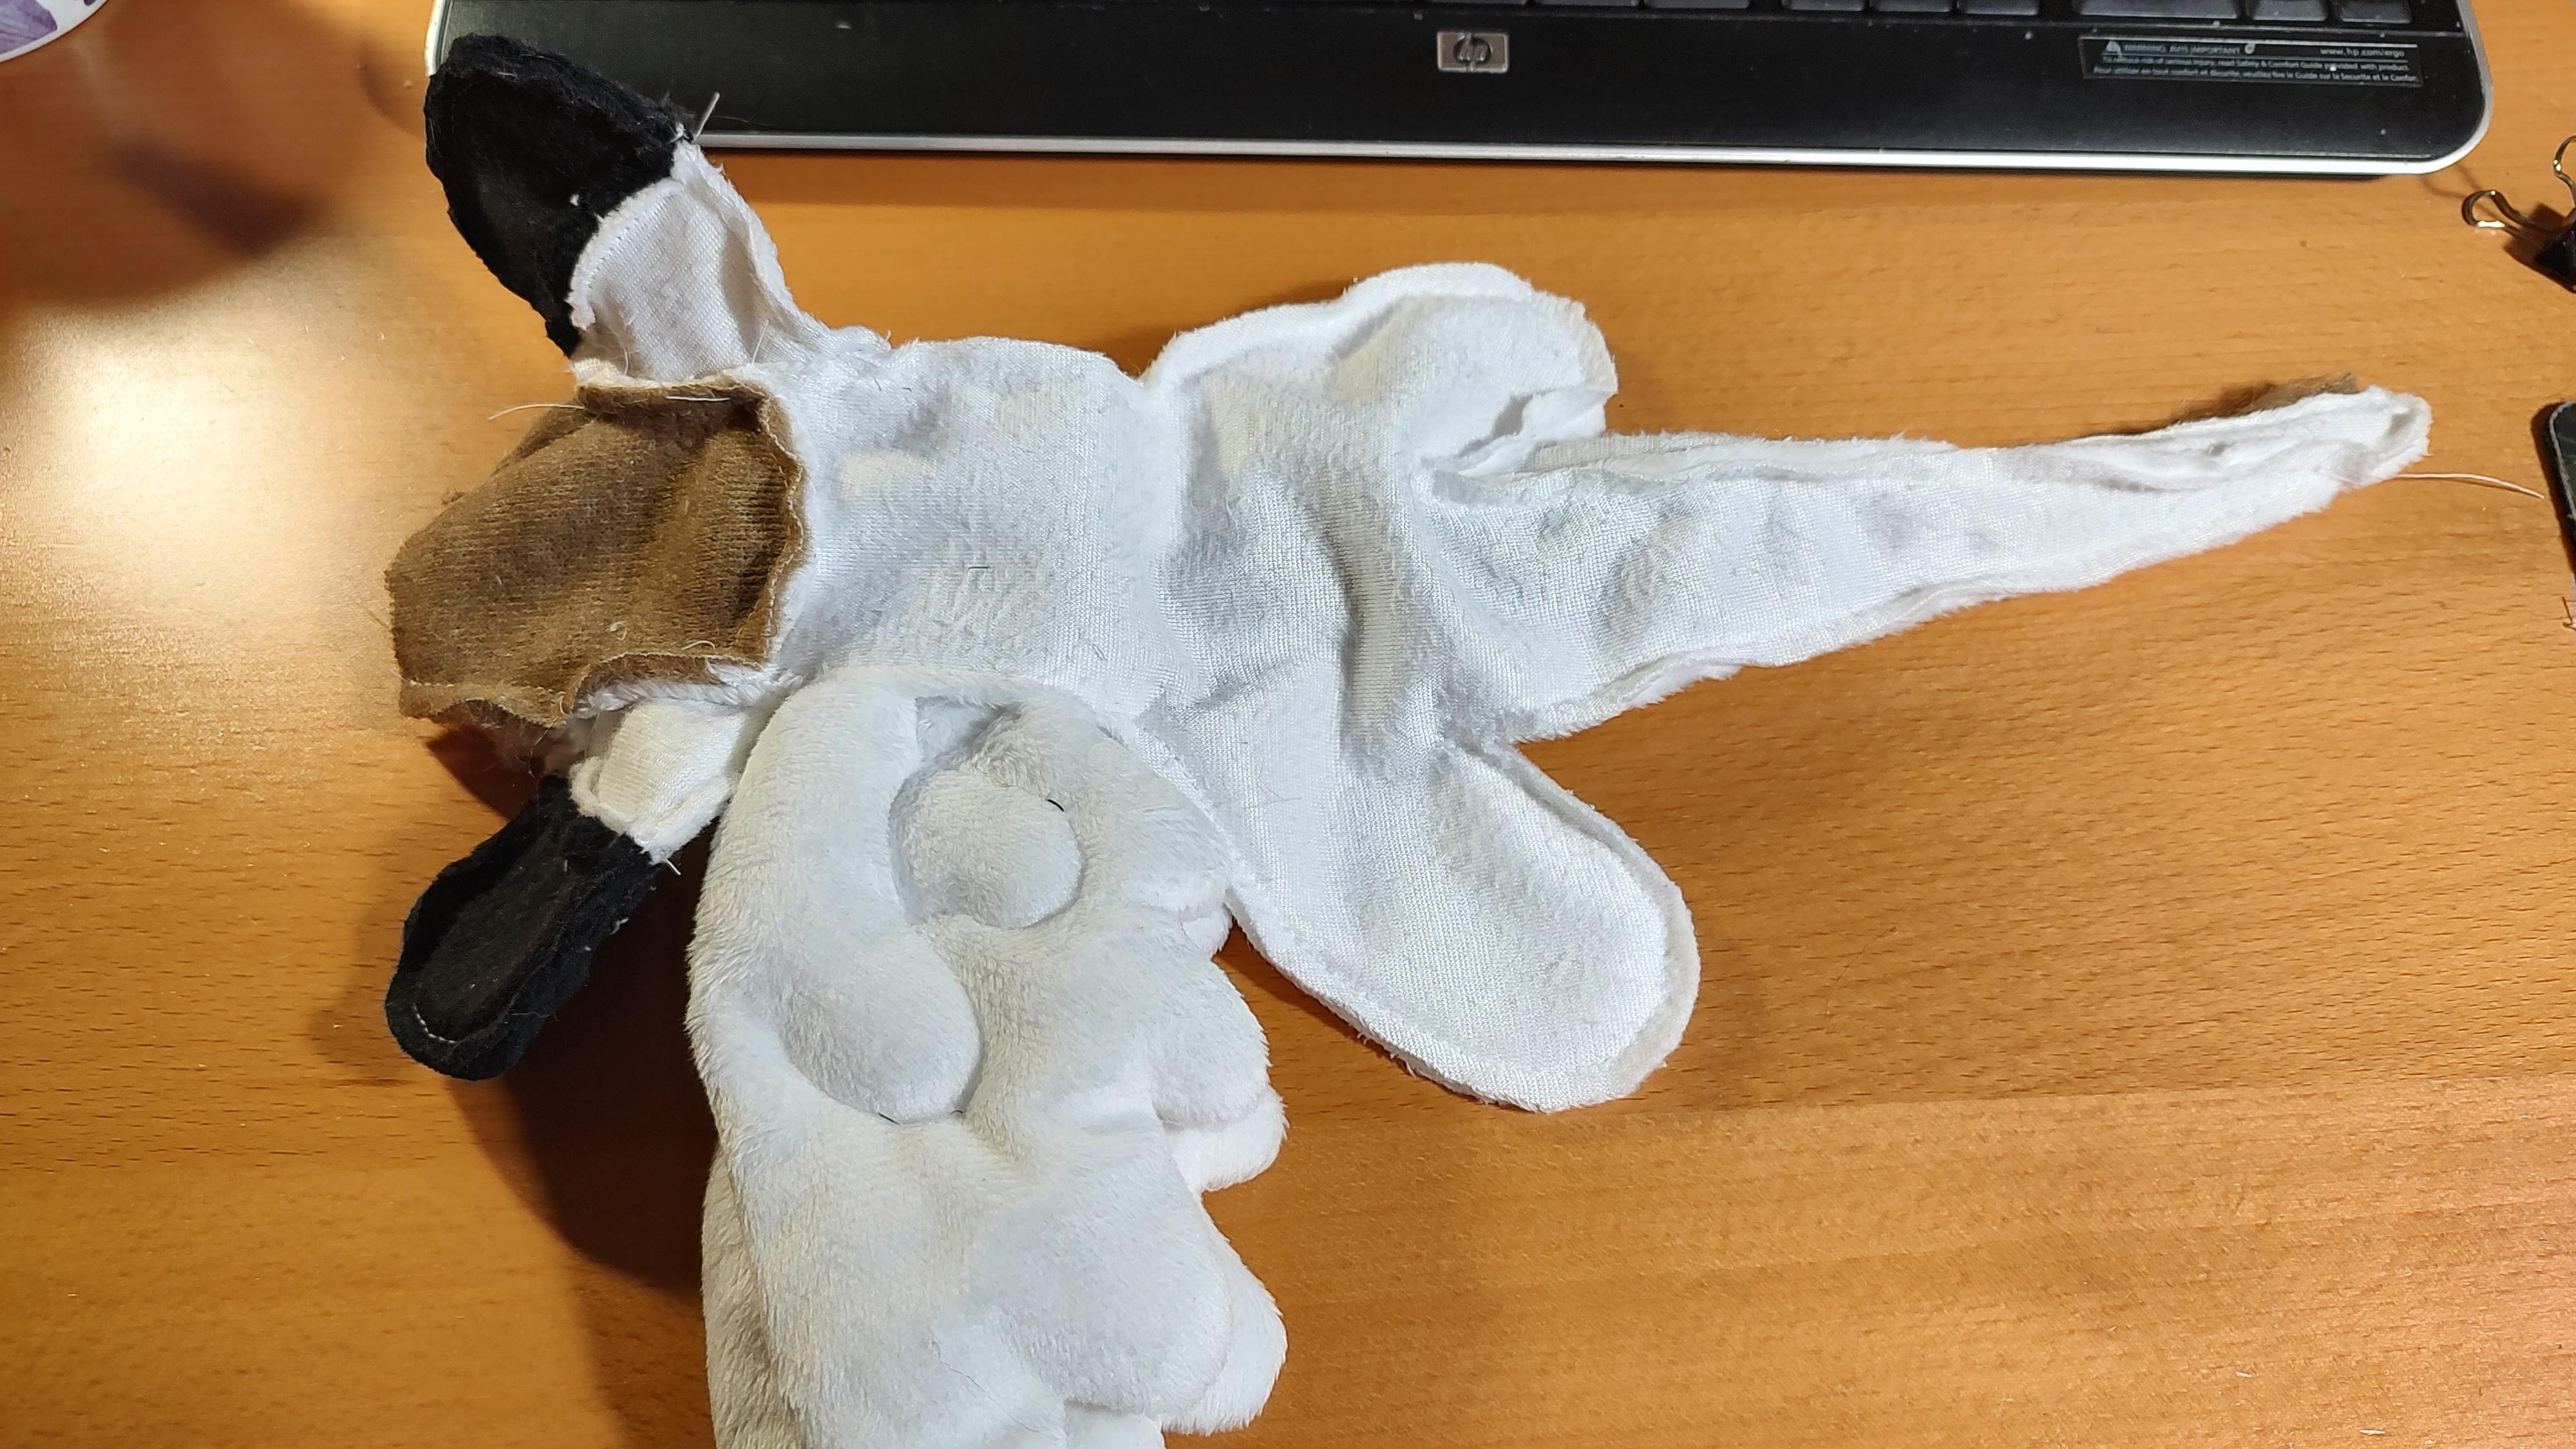
Take the two remaining Hand pieces and sew them to the Back pieces.
Now you can insert the two finished Wings into the dart running through the Back pieces. Sew down the dart.
Fold the Back Fur piece in half width-wise and pin it between the two Back pieces. Sew the two Back pieces together with the Back Fur sandwiched between them. Keep sewing past the end of the tail, going around the tip, and ending at the tab below the tip of the tail.
Sew the Belly-Chest combination to the bottom of one of the Back pieces. Take care to match the seams where the Hands meet, and also note that the tip of the Belly's tail is only going to reach the tab below the tail on the Back piece. That is, the Belly's tail and Back's tail are not going to touch tip to tip.
Now sew the other side of the Belly-Chest to the other Back piece. But! Leave the area between the front and back leg unsewn. That is where the plushie will be turned inside-out later. It is also a good place to stick the wings for now, keeping them out of the way.
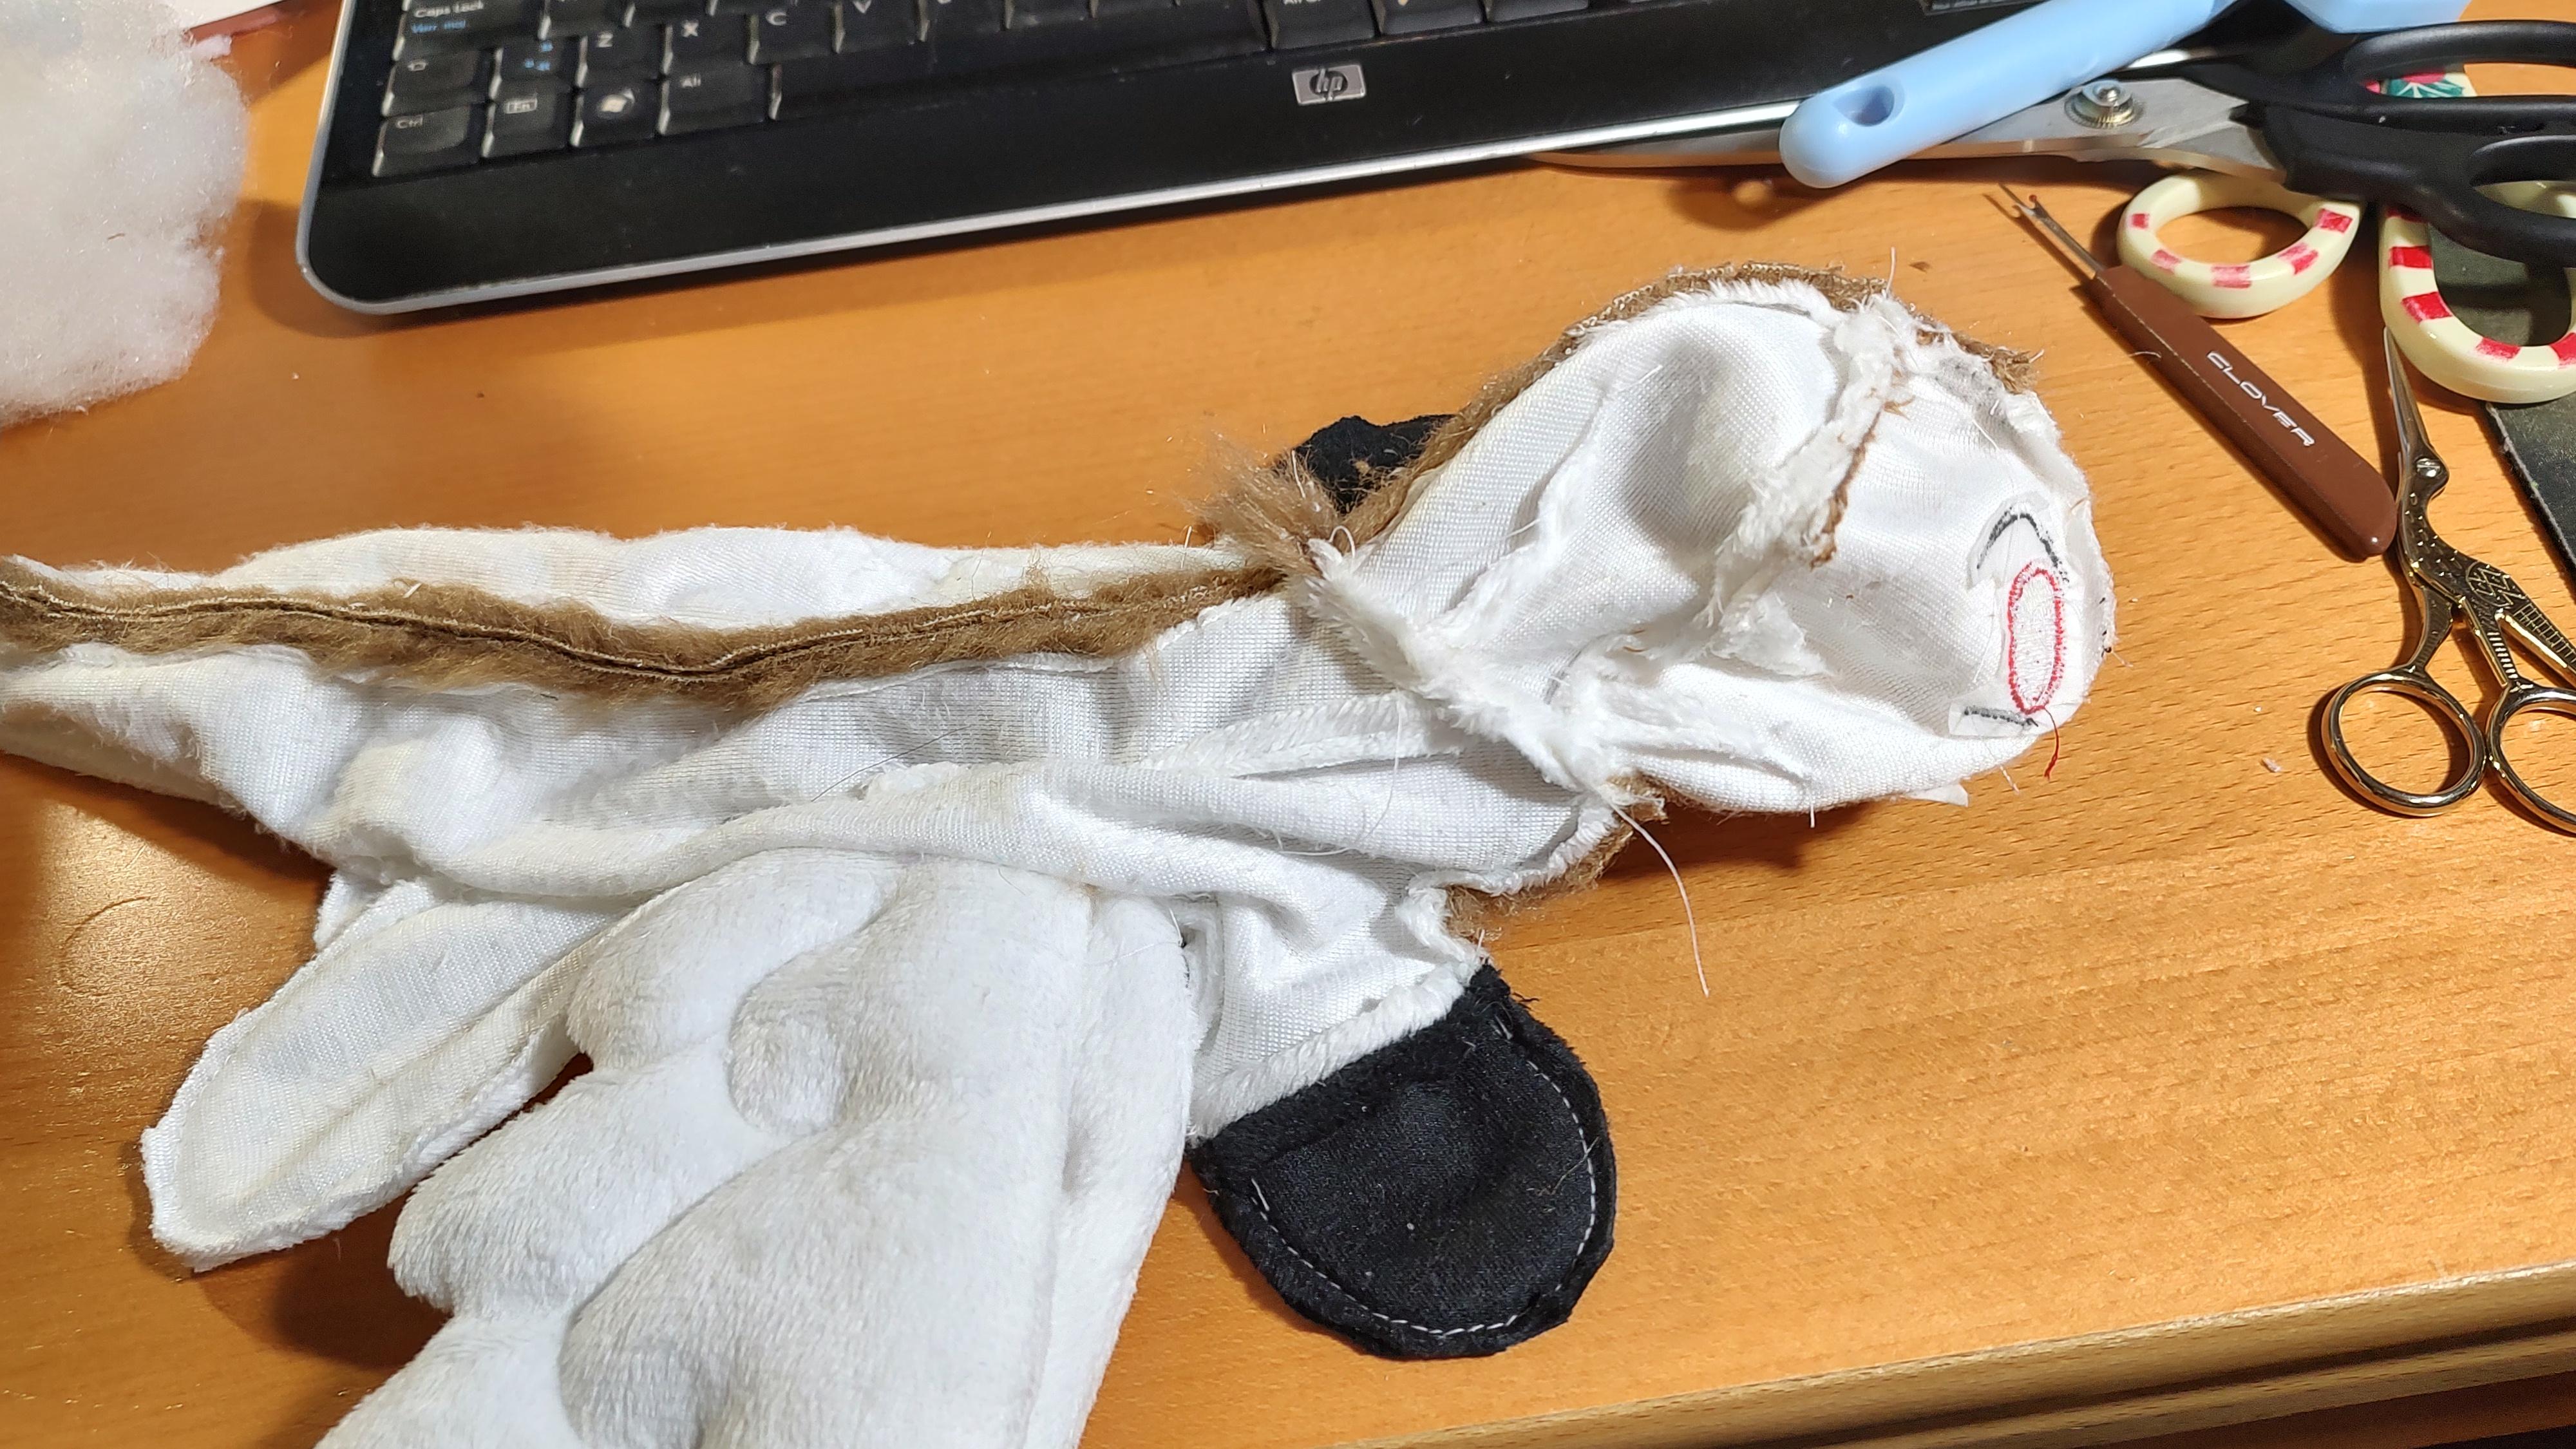
Horray, the body's done! Now to work on the head.
Sew the dart along the Hair piece.
Sew the Hair to the Forehead as shown. You might want to clip into the seam allowance at the pointy part of the Forehead to make it easier to line up with the sharp angle of the Hair. The Forehead should just touch the first series of tabs on the Hair.
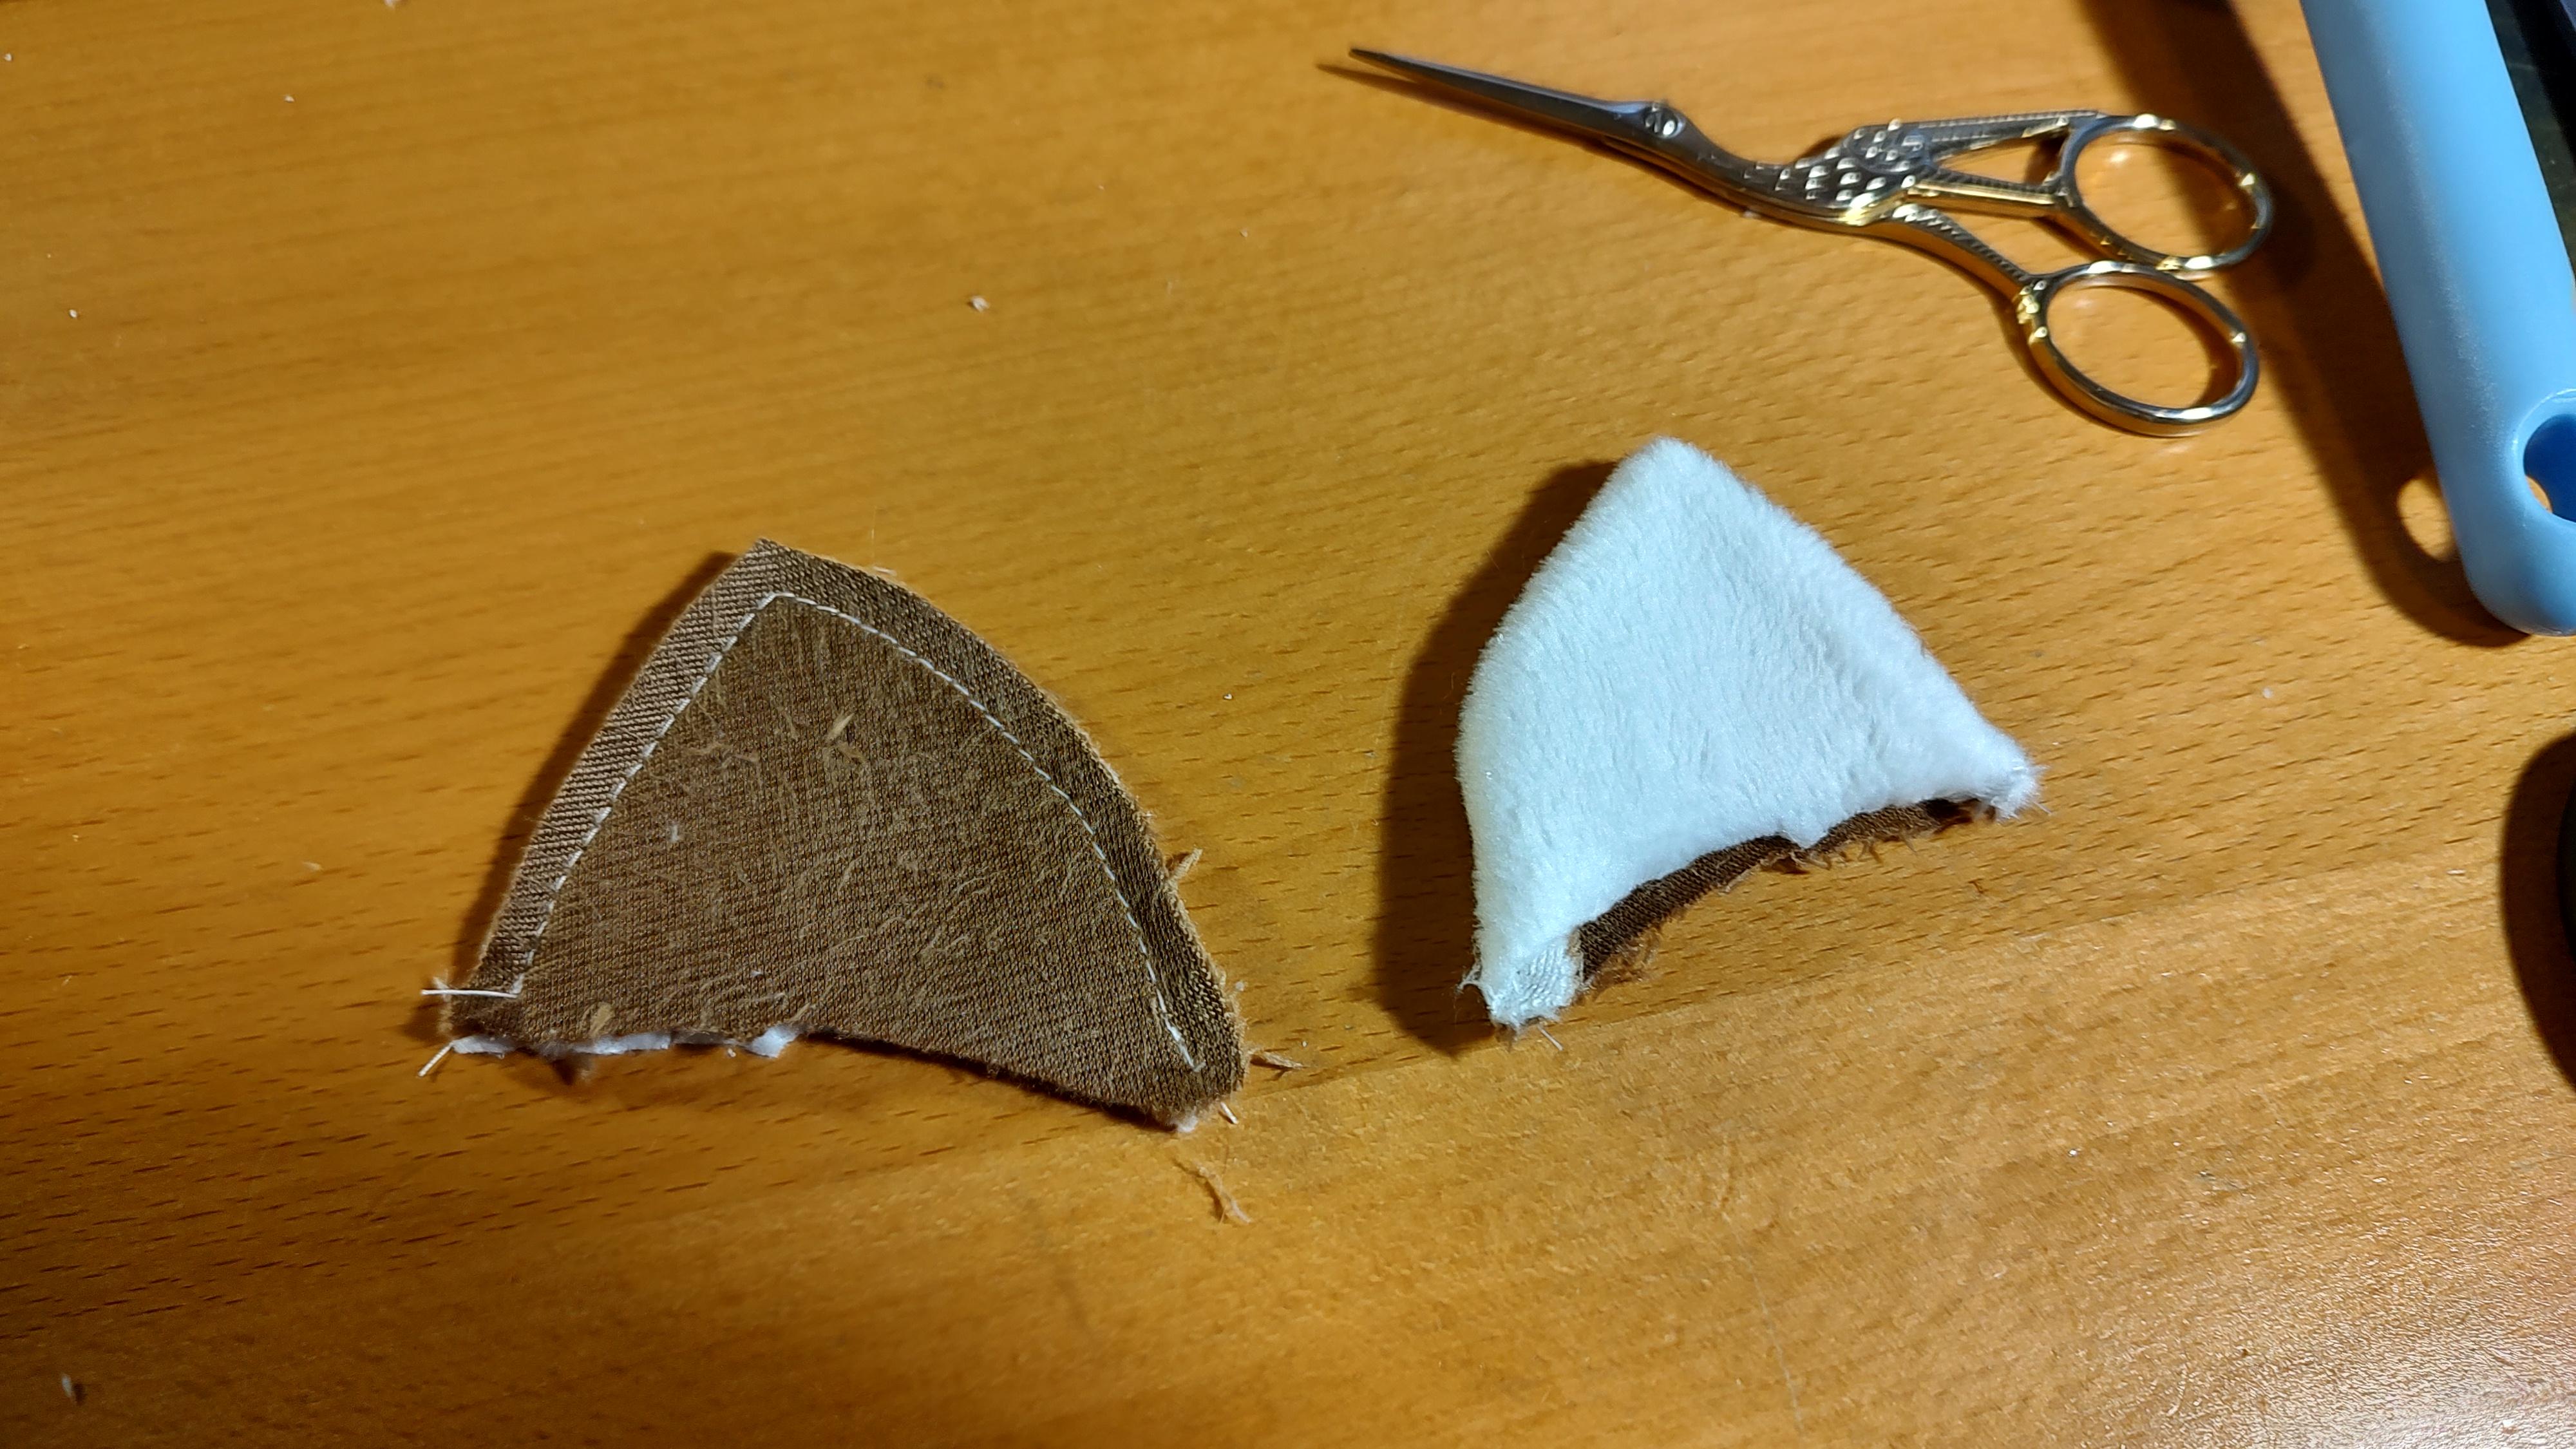
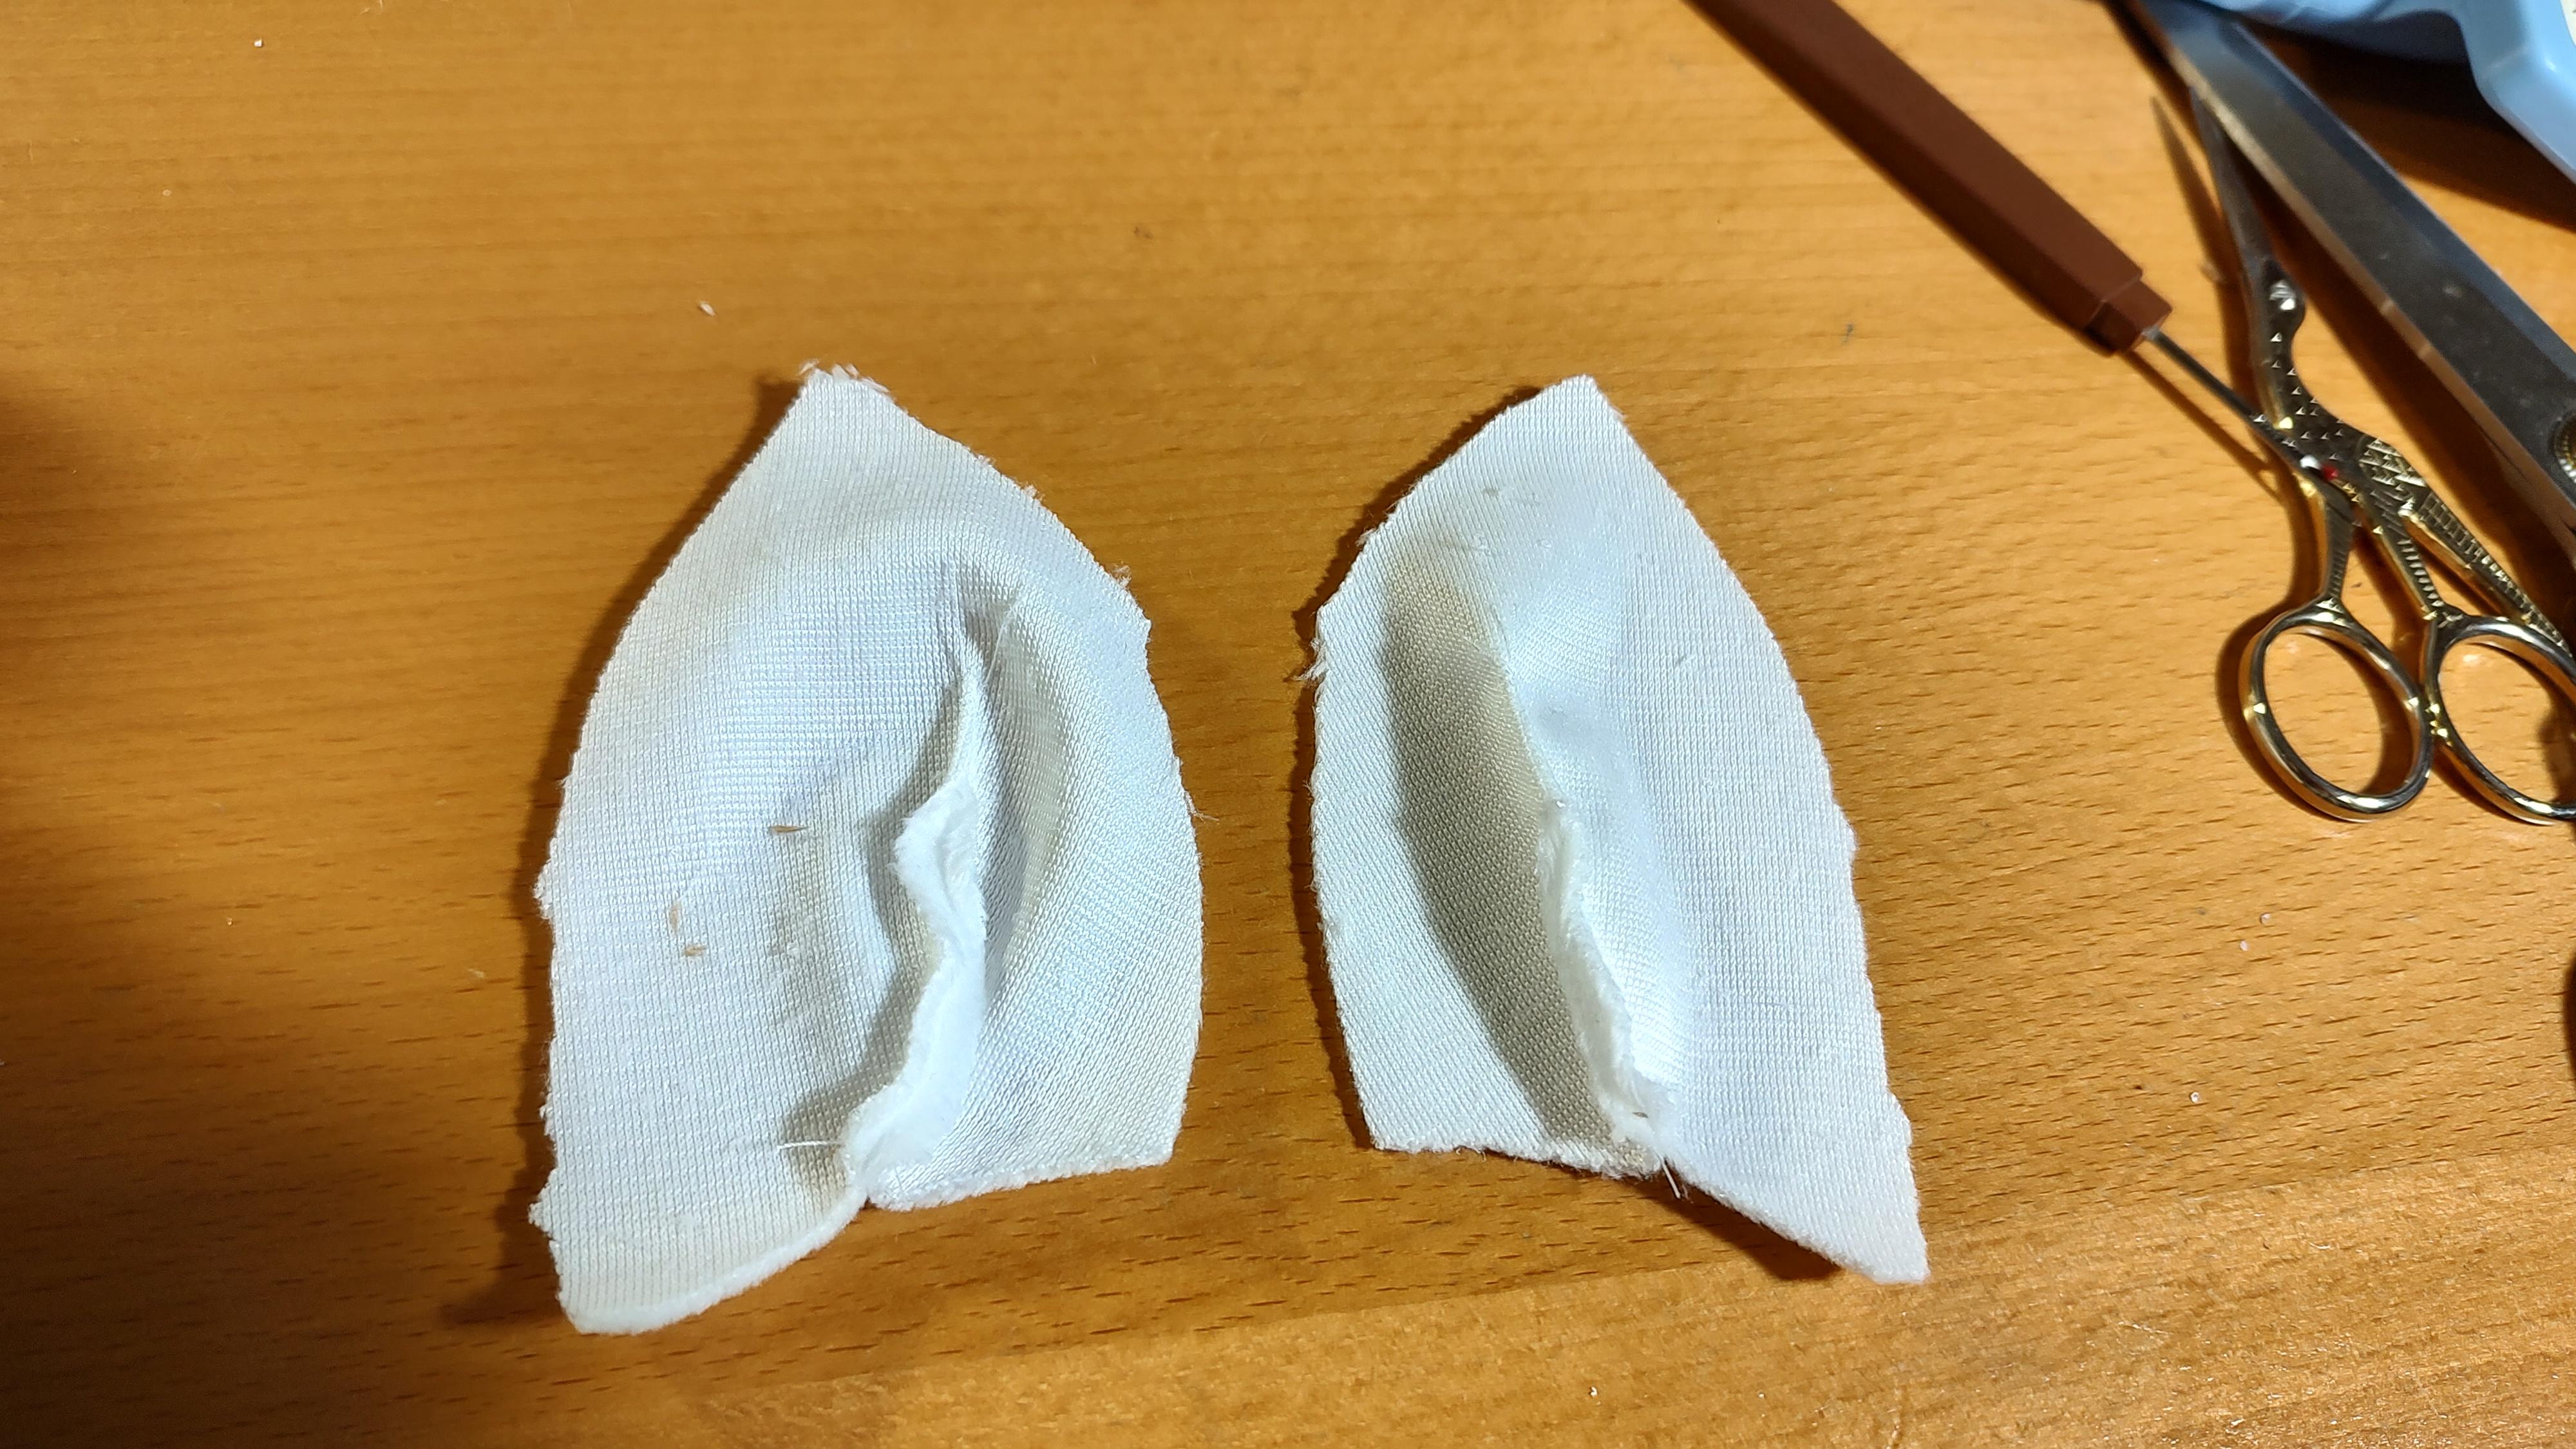
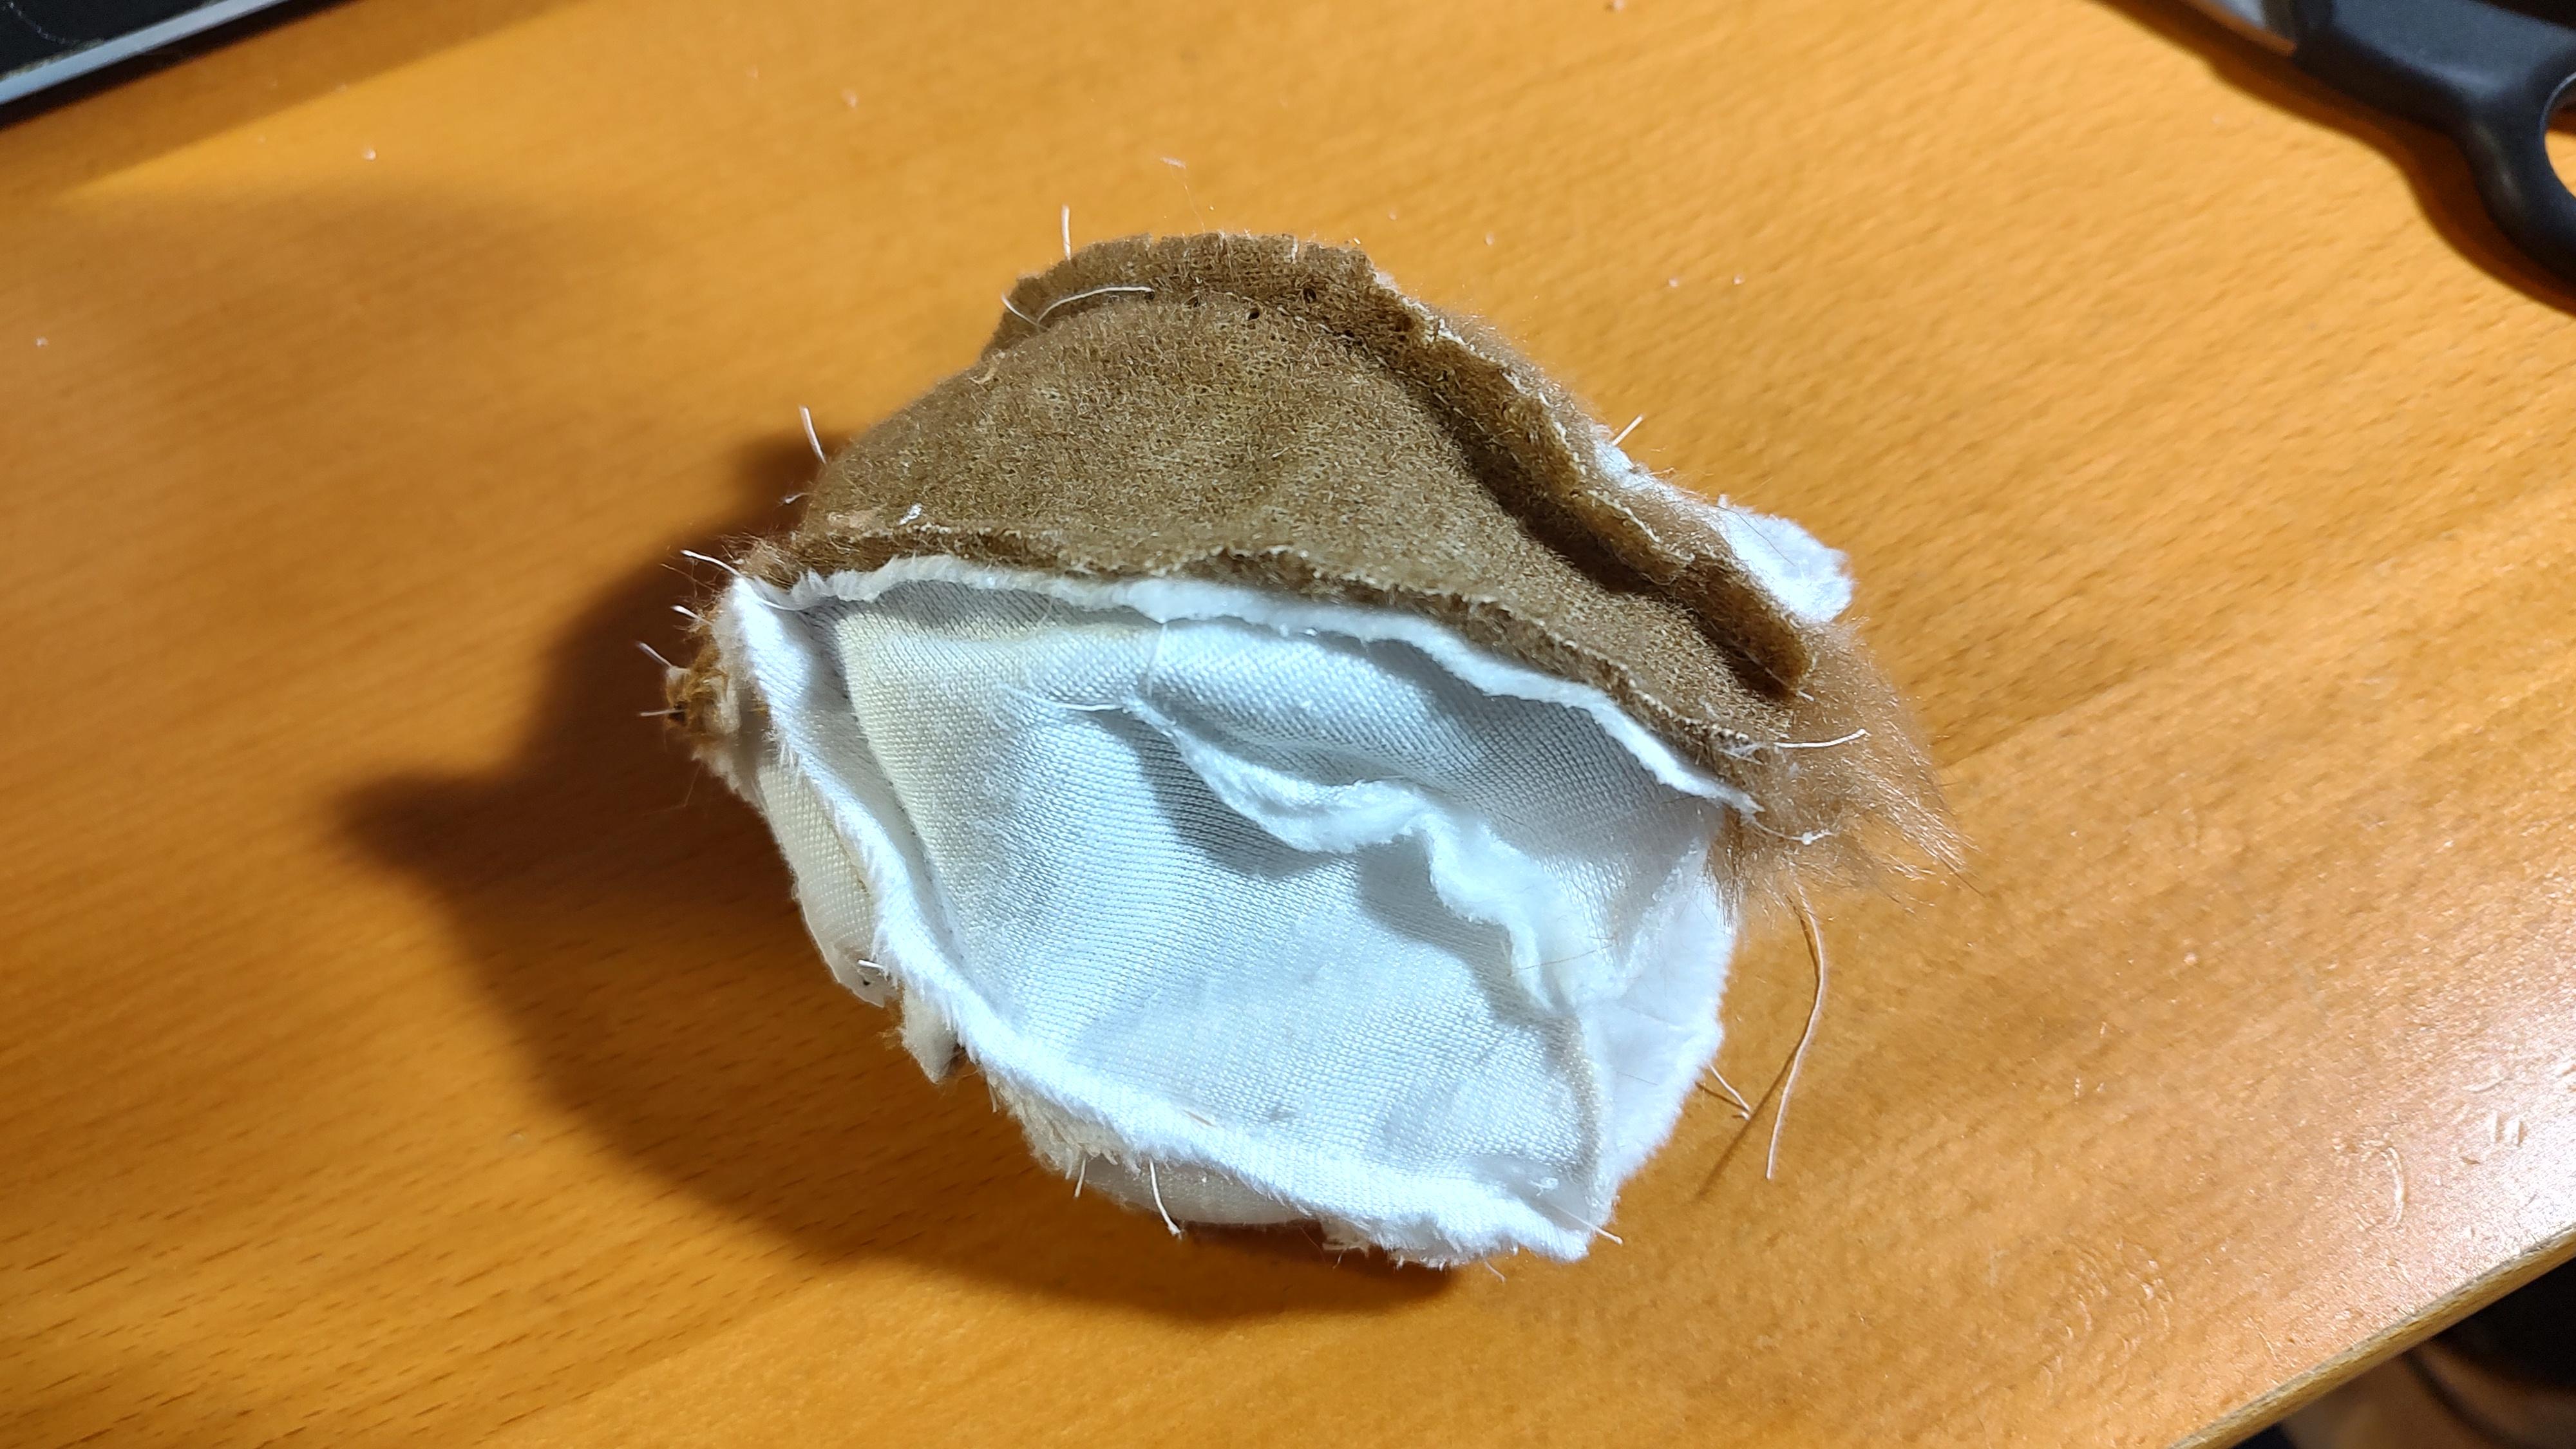
Sew a brown Ear to a white Ear piece, leaving the bottom open. Trim the seam allowance at the point and turn inside-out.
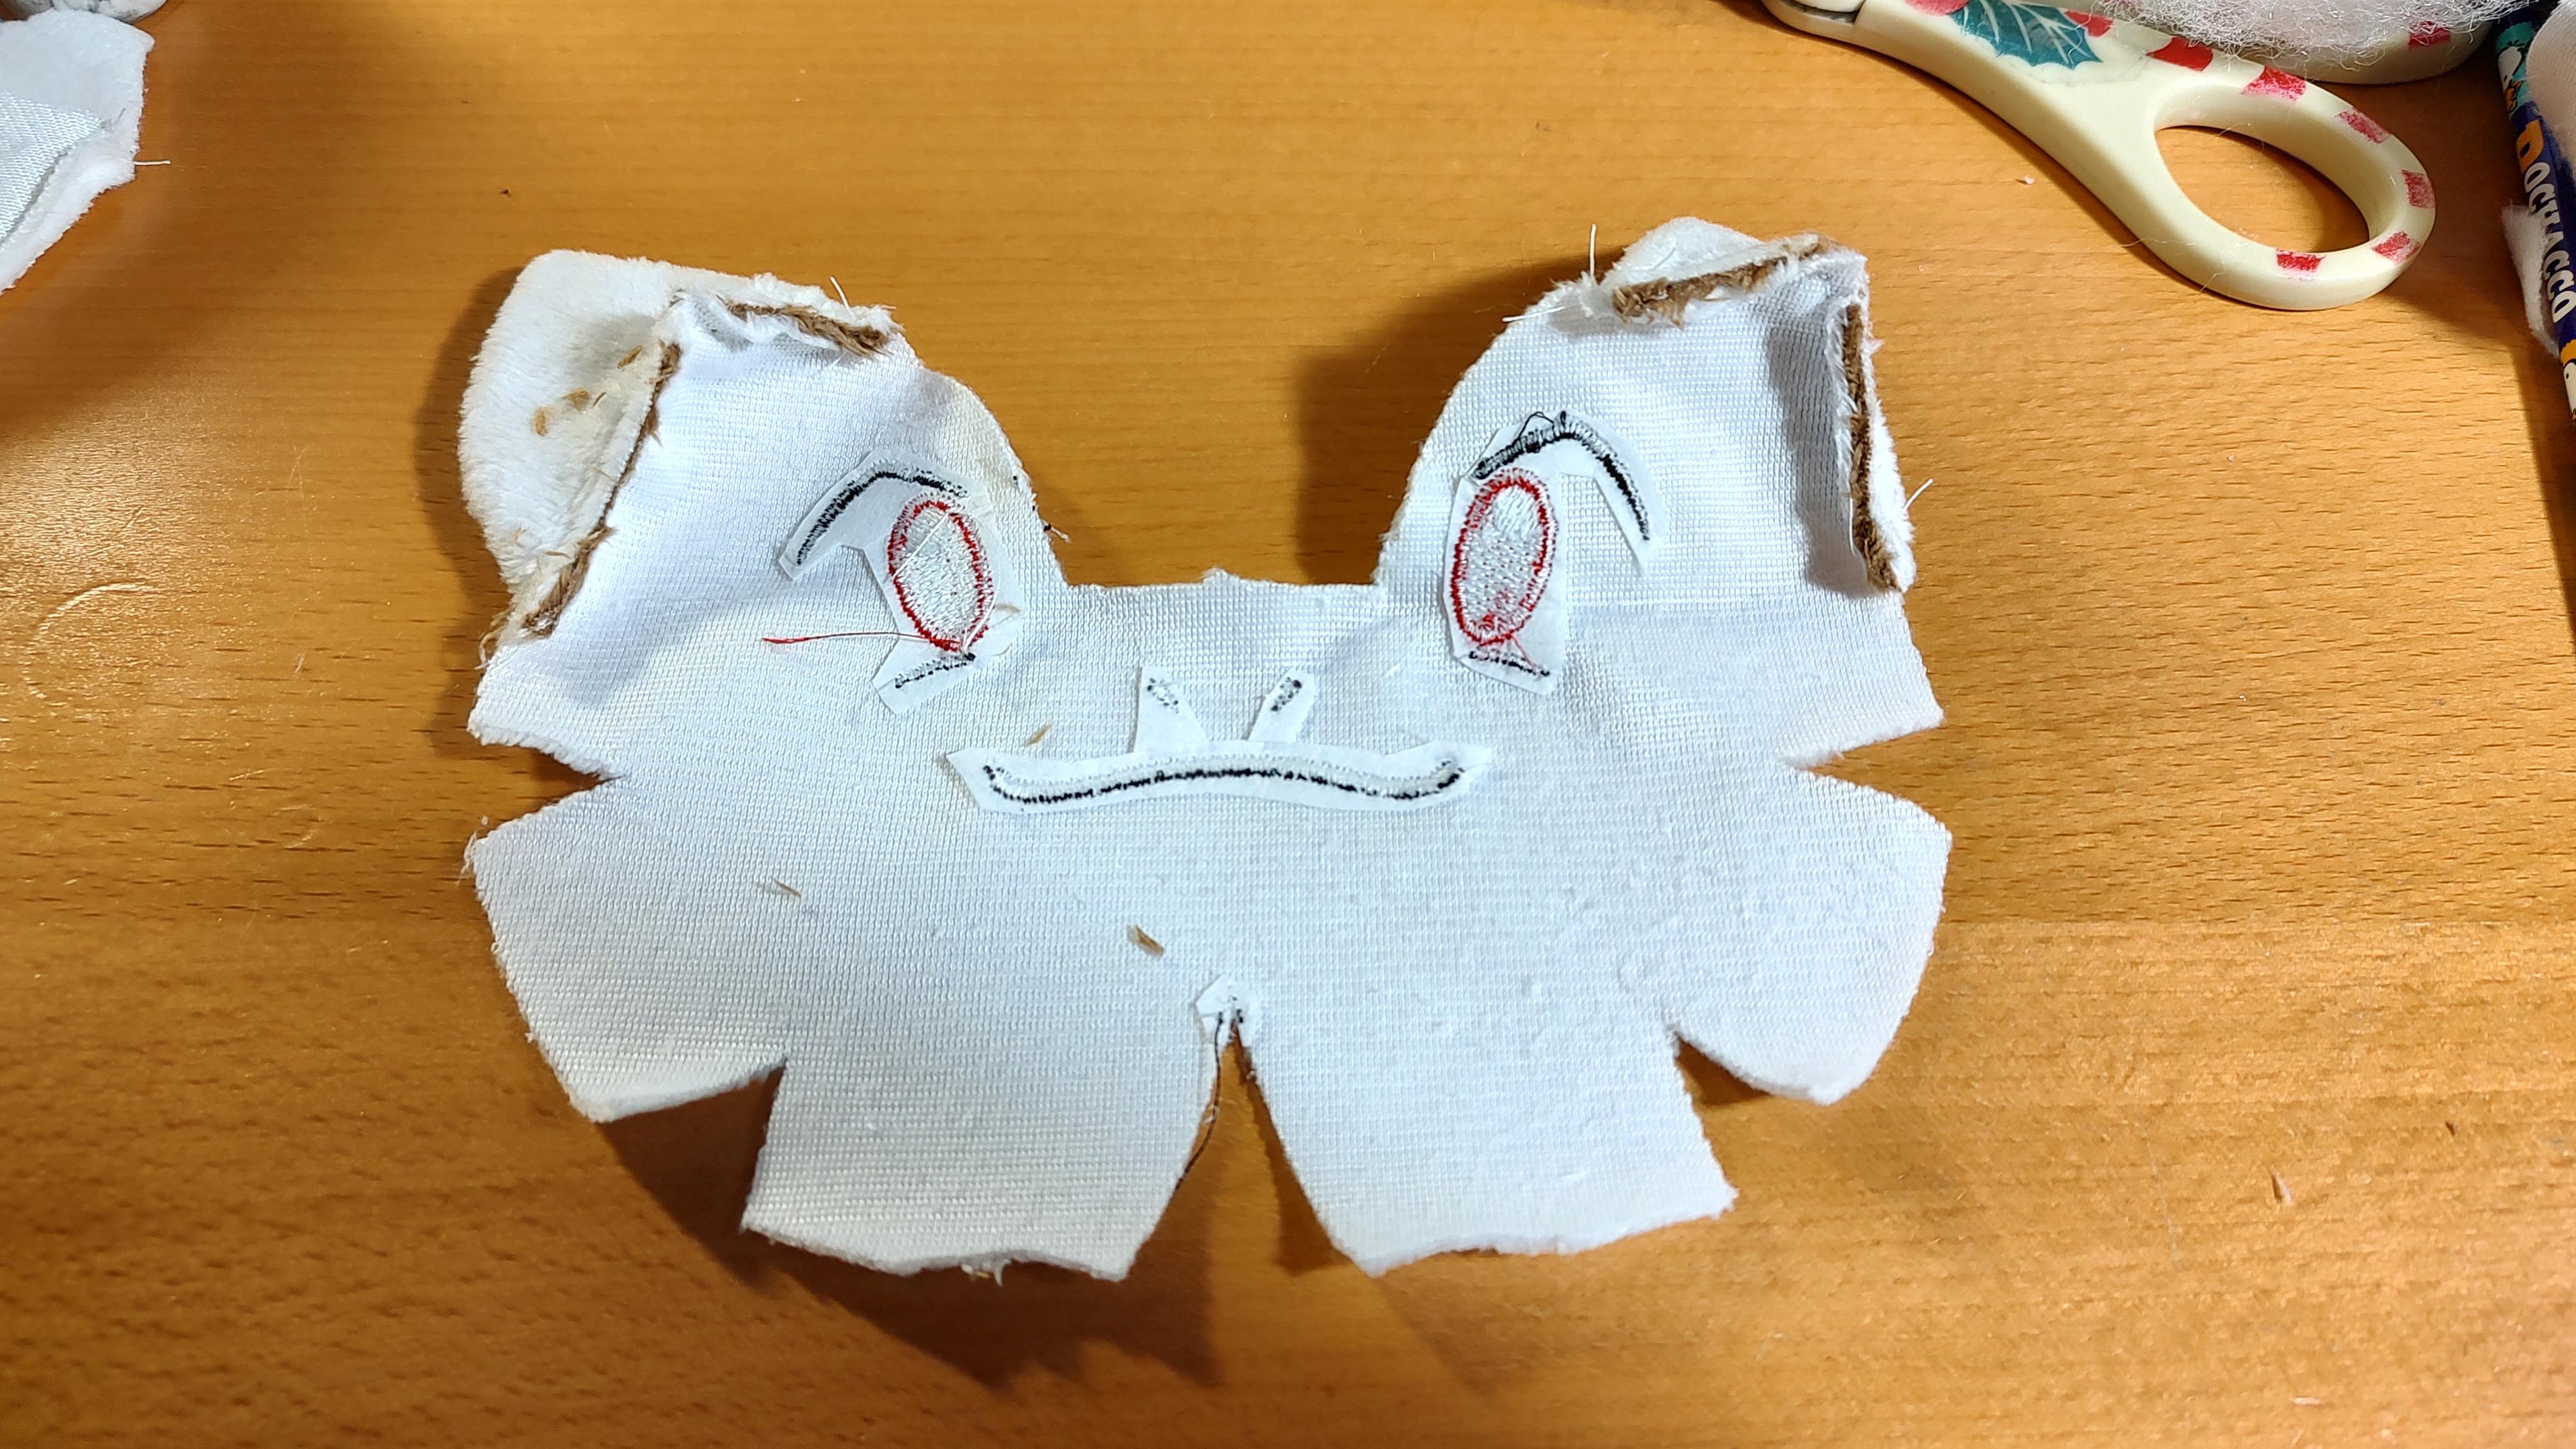
Now's a good time to apply features to the Face using whatever method you like, if you haven't done so already. Some methods can be applied after the whole head is finished and stuffed, such as painting, but if you're using machine embroidery, it needs to be done before the Face is sewn.
Sew the Ear to the Face as shown. This can be a bit tricky because the Ear needs to turn a sharp corner. If you clip into the seam allowance of the Ear at the tab, you will find it easier to make that sharp turn. If you have a sewing machine and you're having a bit of trouble, you can sew this part by hand to help with accuracy.
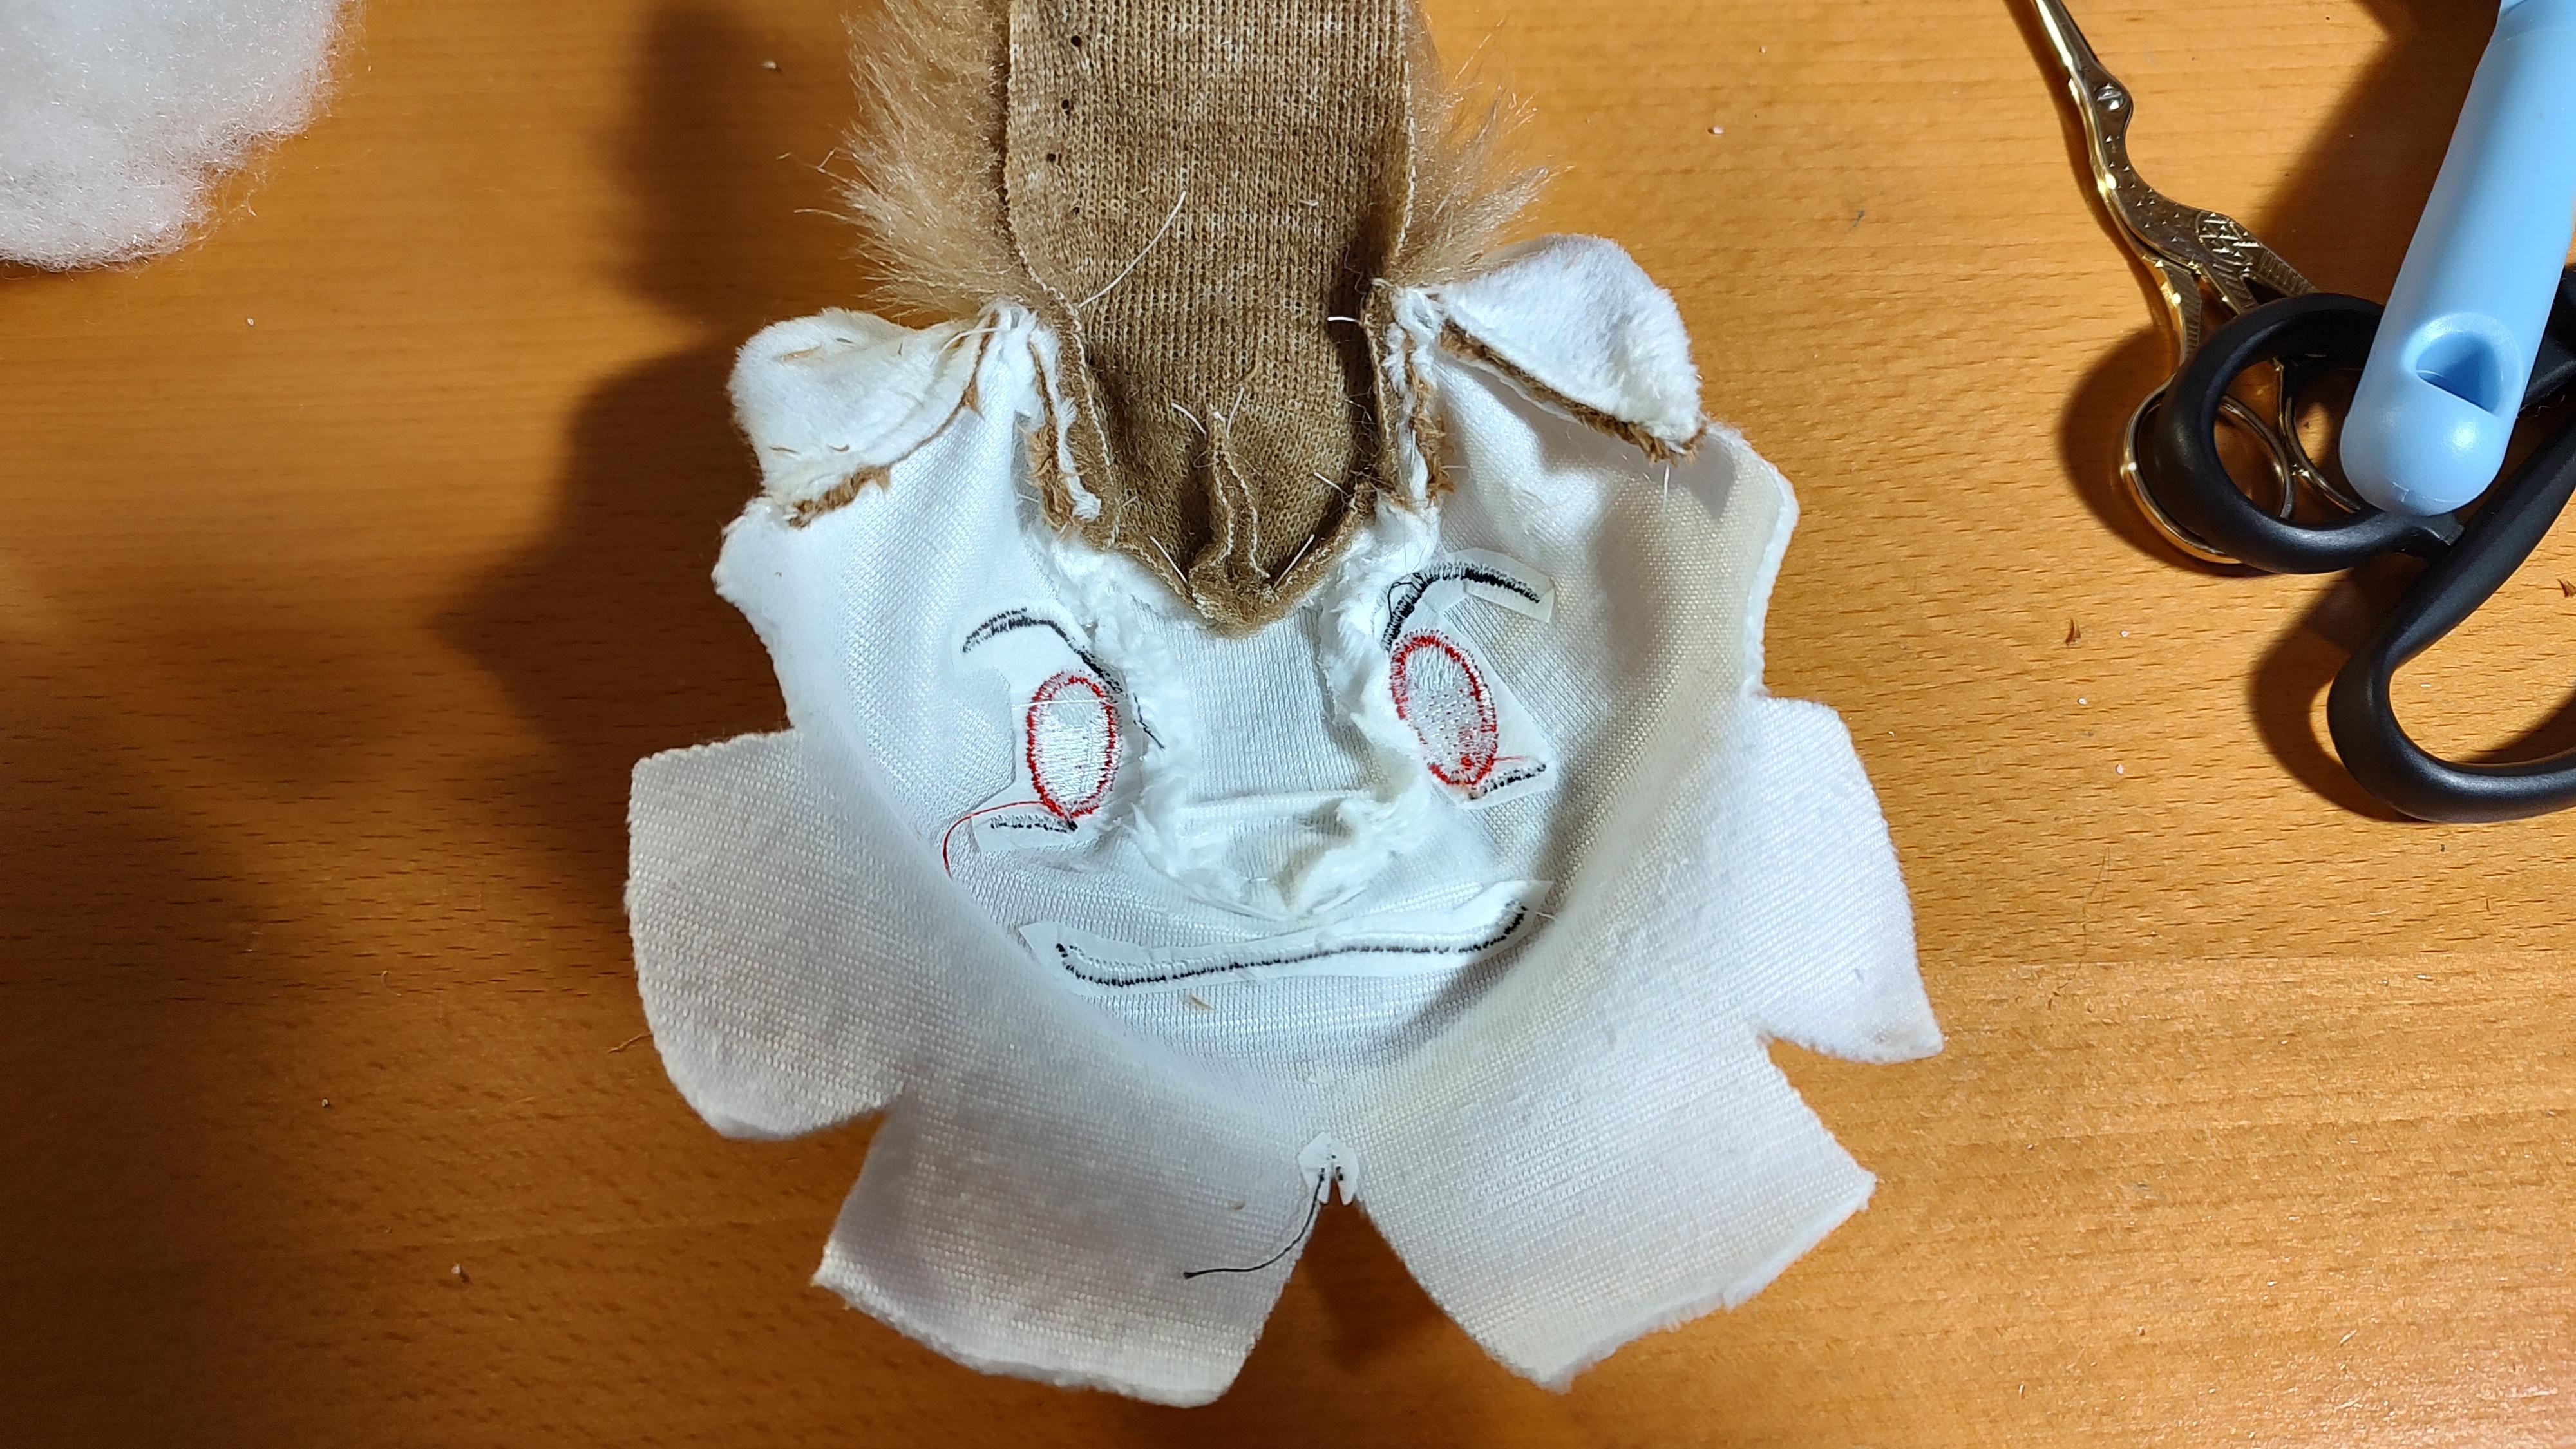
Sew the Forehead-Hair combo to the middle of the Face. The middle tabs on the Hair area should meet up with where the Ears take a sharp turn along the Face piece. To make sewing around the nose area easier, clip into the seam allowance of the Face along the nose.
Do you see that sewing line between the eyes on the Forehead? I didn't take a good photo of this, but once the Forehead is sewn onto the face, fold the tip of the nose down where it begins to change angles and sew a small curved line on the Forehead piece. Just a little pinch. If you look at the pattern for the Forehead, you can see that blue football-shaped line which is the line on which you sew.
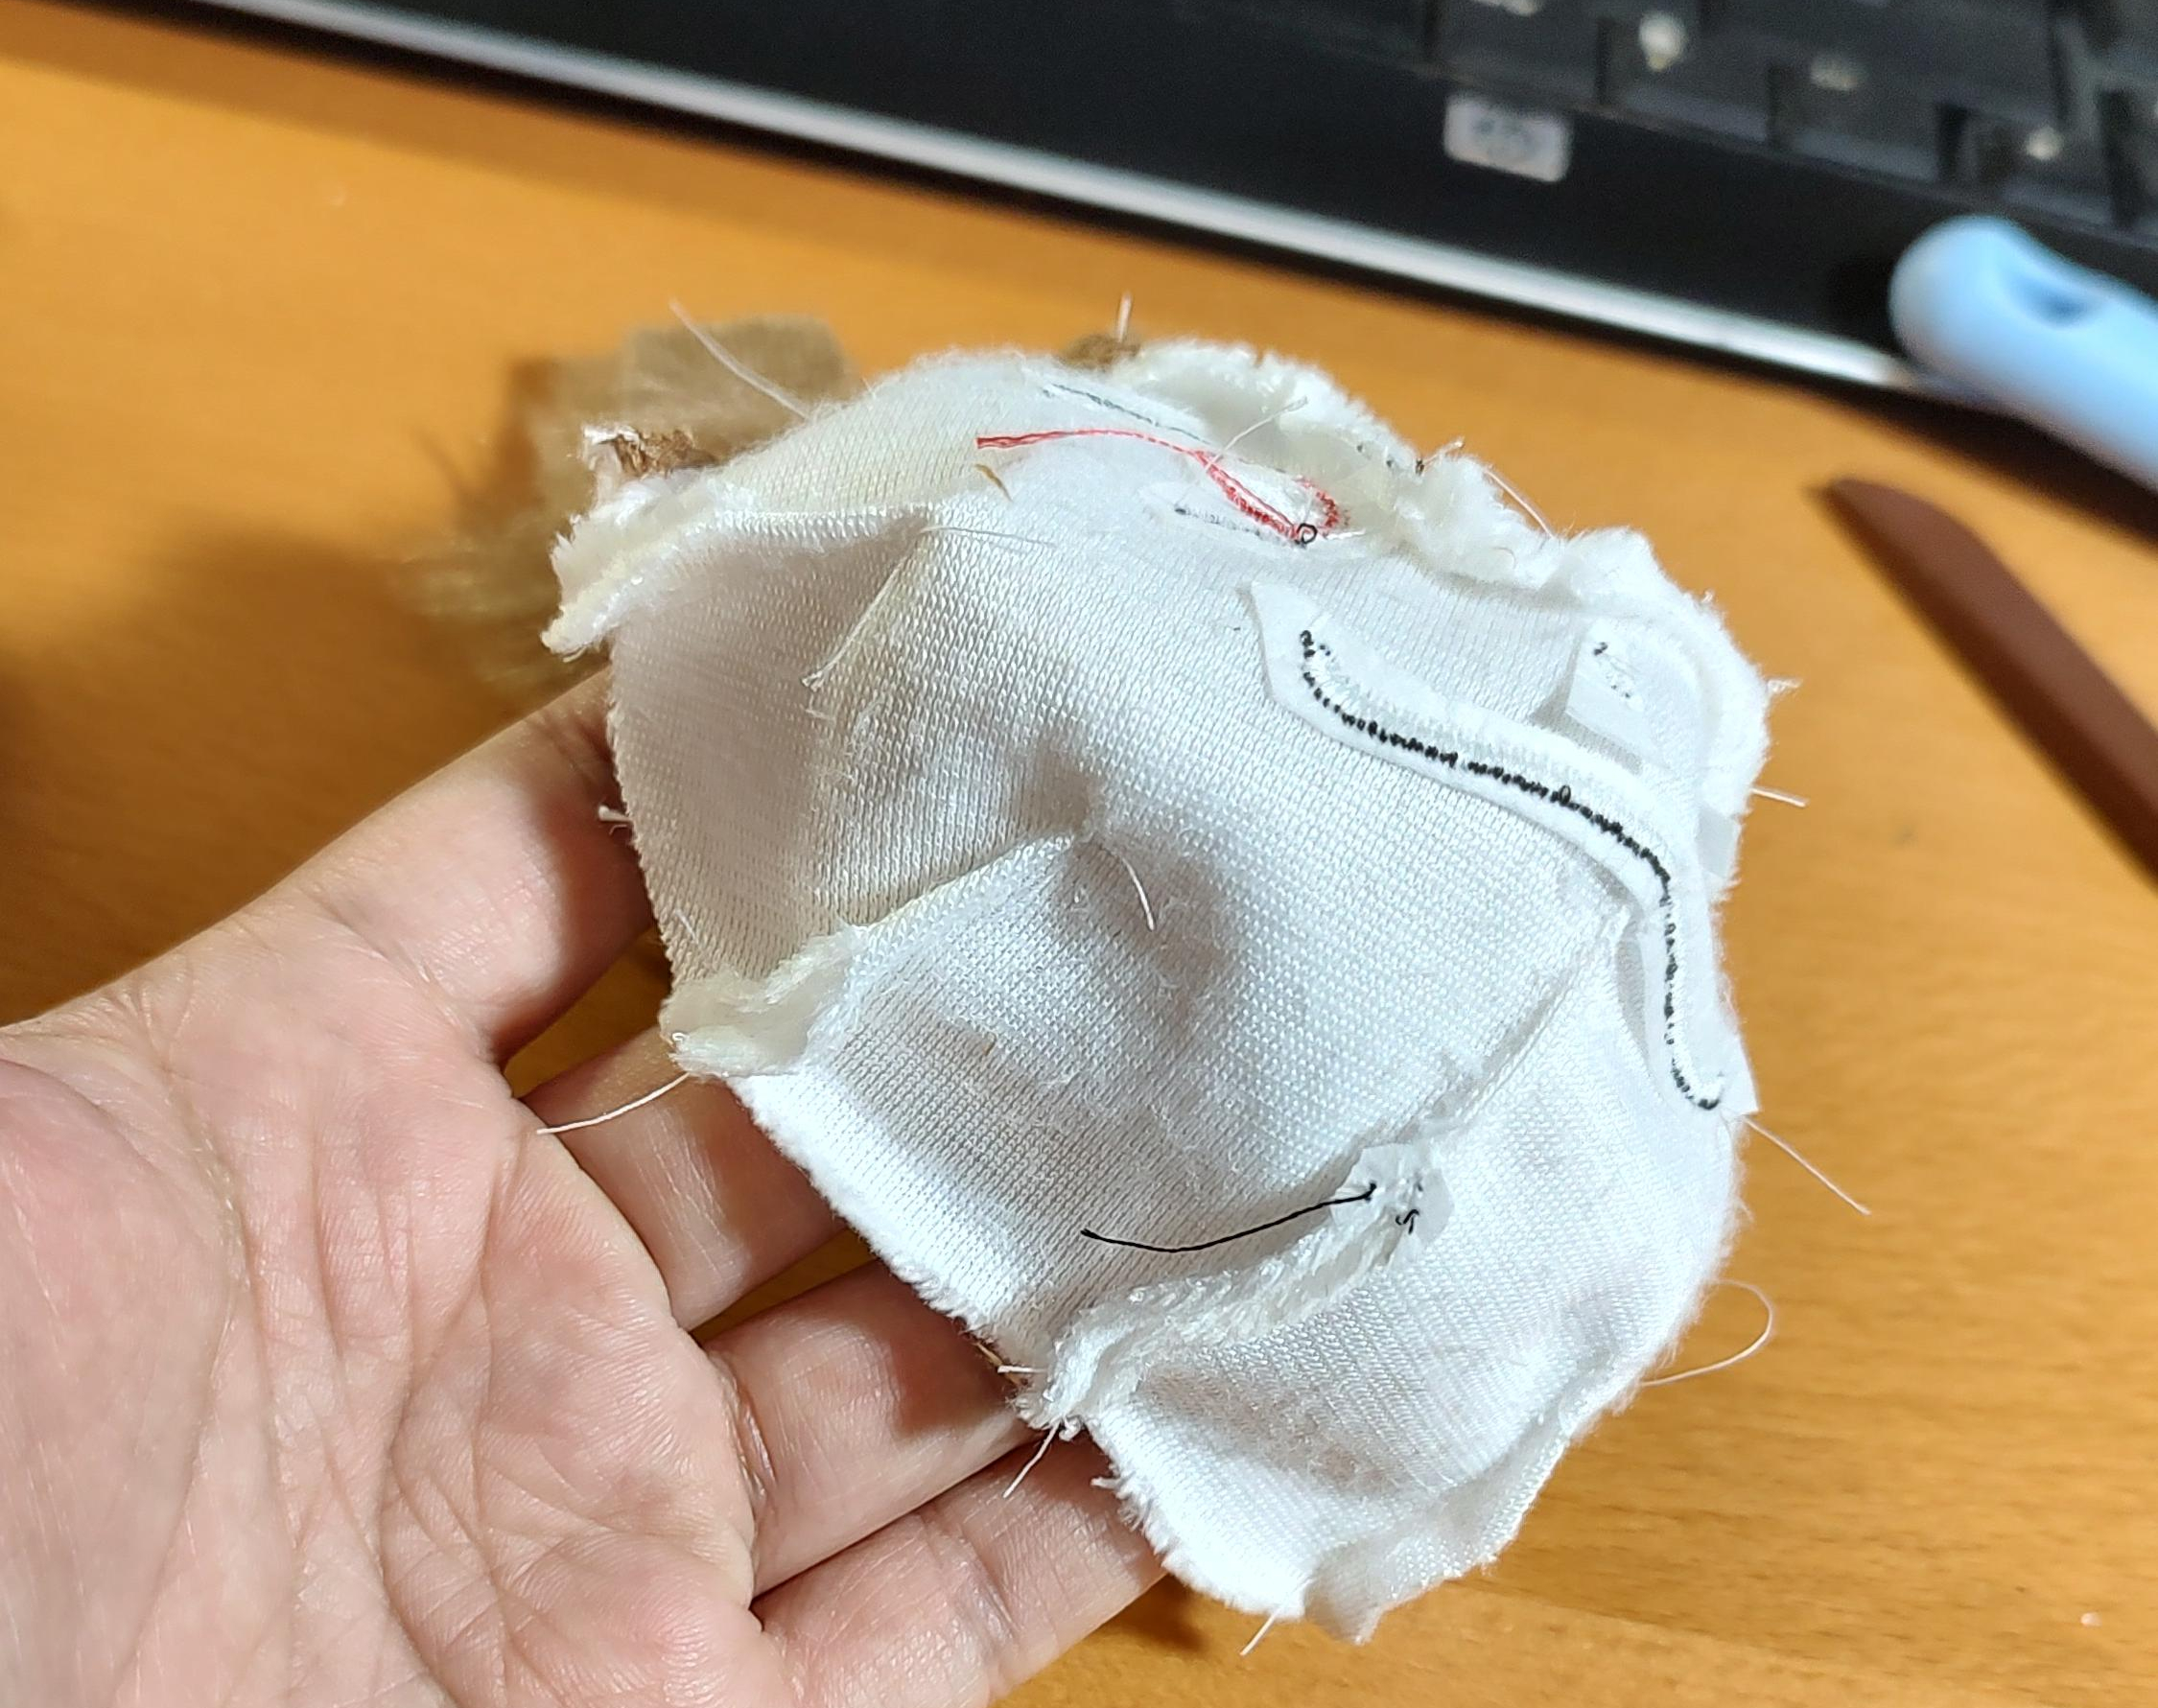
Sew up the rest of the darts on the Face.
Sew the darts on the Head Back pieces.

Sew the Head Back pieces to the Face. Take care that the side with two tabs is the side you want to sew, as those tabs correspond to the dart seams on the Face.
You'll want to make a full stop at the upper tip of the Head Back where the Ears begin to turn. Then reposition the fabric under your sewing machine feet and start sewing down the other side of the Head Back, joining it with the Hair.
Sew the head to the rest of the body. When it comes alignment, try to make sure that the center of the Chest piece matches with the center dart on the Face, under the chin.
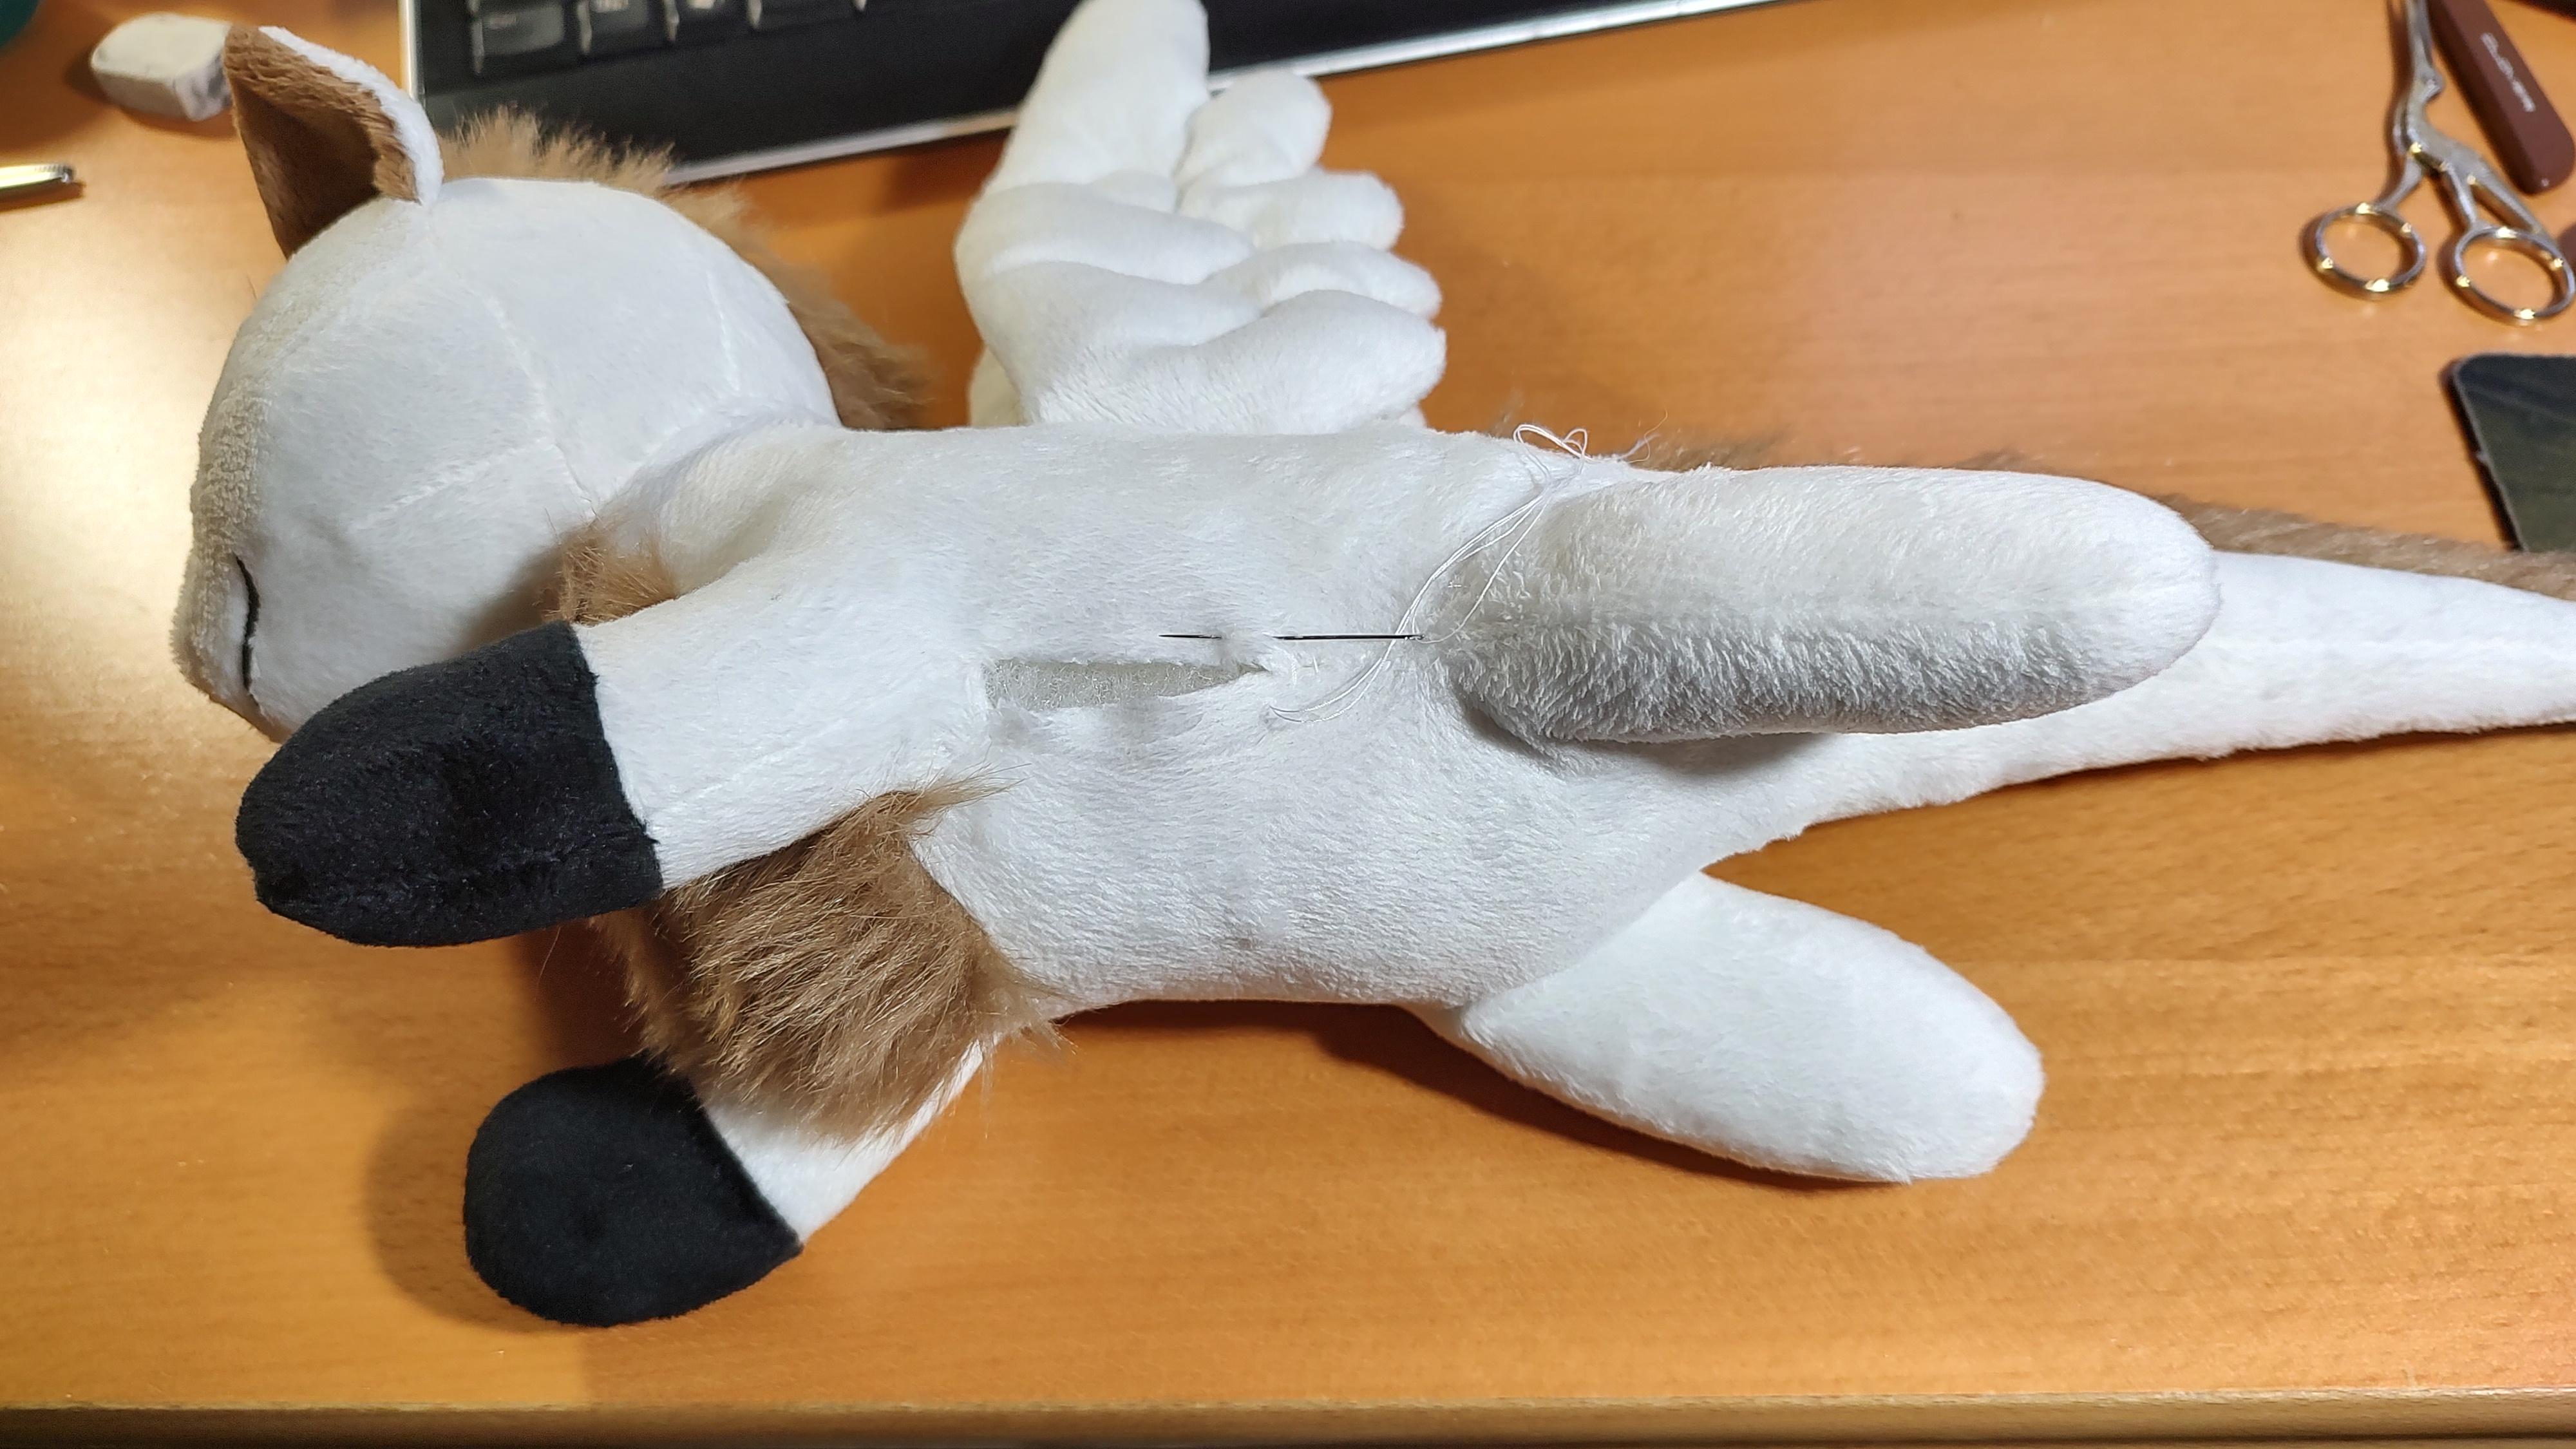
Wow, all the sewing stuff is done! Anywhere there is a sharp bend, snip into the seam allowances (ie. under armpits, leg...pits) and trim the seam allowance anywhere there is a substantial curve (ie. tail tip, tips of the limbs, the tip of the nose). This will make it easier to turn Nall right-side out. Then you can stuff him. To close the stuffing hole, use the Ladder stitch.
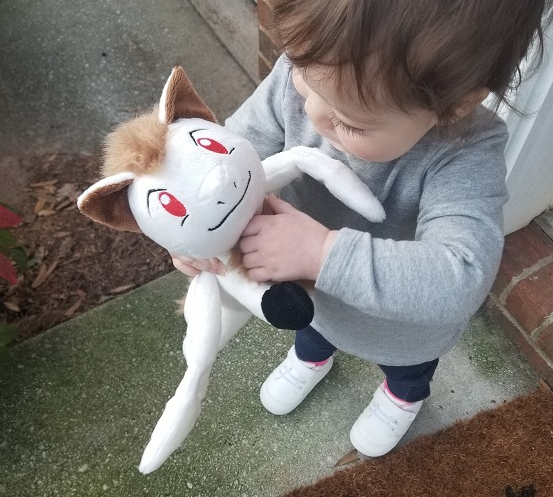
Congratulations, you made Nall! Fun fact: I made him originally as a present for a friend's daughter, who is named after the Lunar series! Here she is, enjoying her new friend. And I turned Nall into a free pattern as a reward for reaching my Ko-Fi donation goal. If you enjoyed using this tutorial, maybe drop me a line on Twitter or email (eyes5_5eyes(AT)hotmail(DOT)com) and tell me what you think! Or if you want to incentivize me into making future free tutorials, a donation would be nice!
