Geno Plushie Blog Part 3: 2023 Version
There's been some aspects of the first Geno plushie that I've stubbornly held onto for a long time. I didn't want to change the body's velour material even though it's so hard to source to the point where I'm sometimes dying my own batches. The same with the cape; I wanted the shininess of taffeta and satin even though they were a pain to iron, frayed easily, and looked very stiff once completed. And while the pattern did undergo some improvements over the years, it never received a big overhaul.
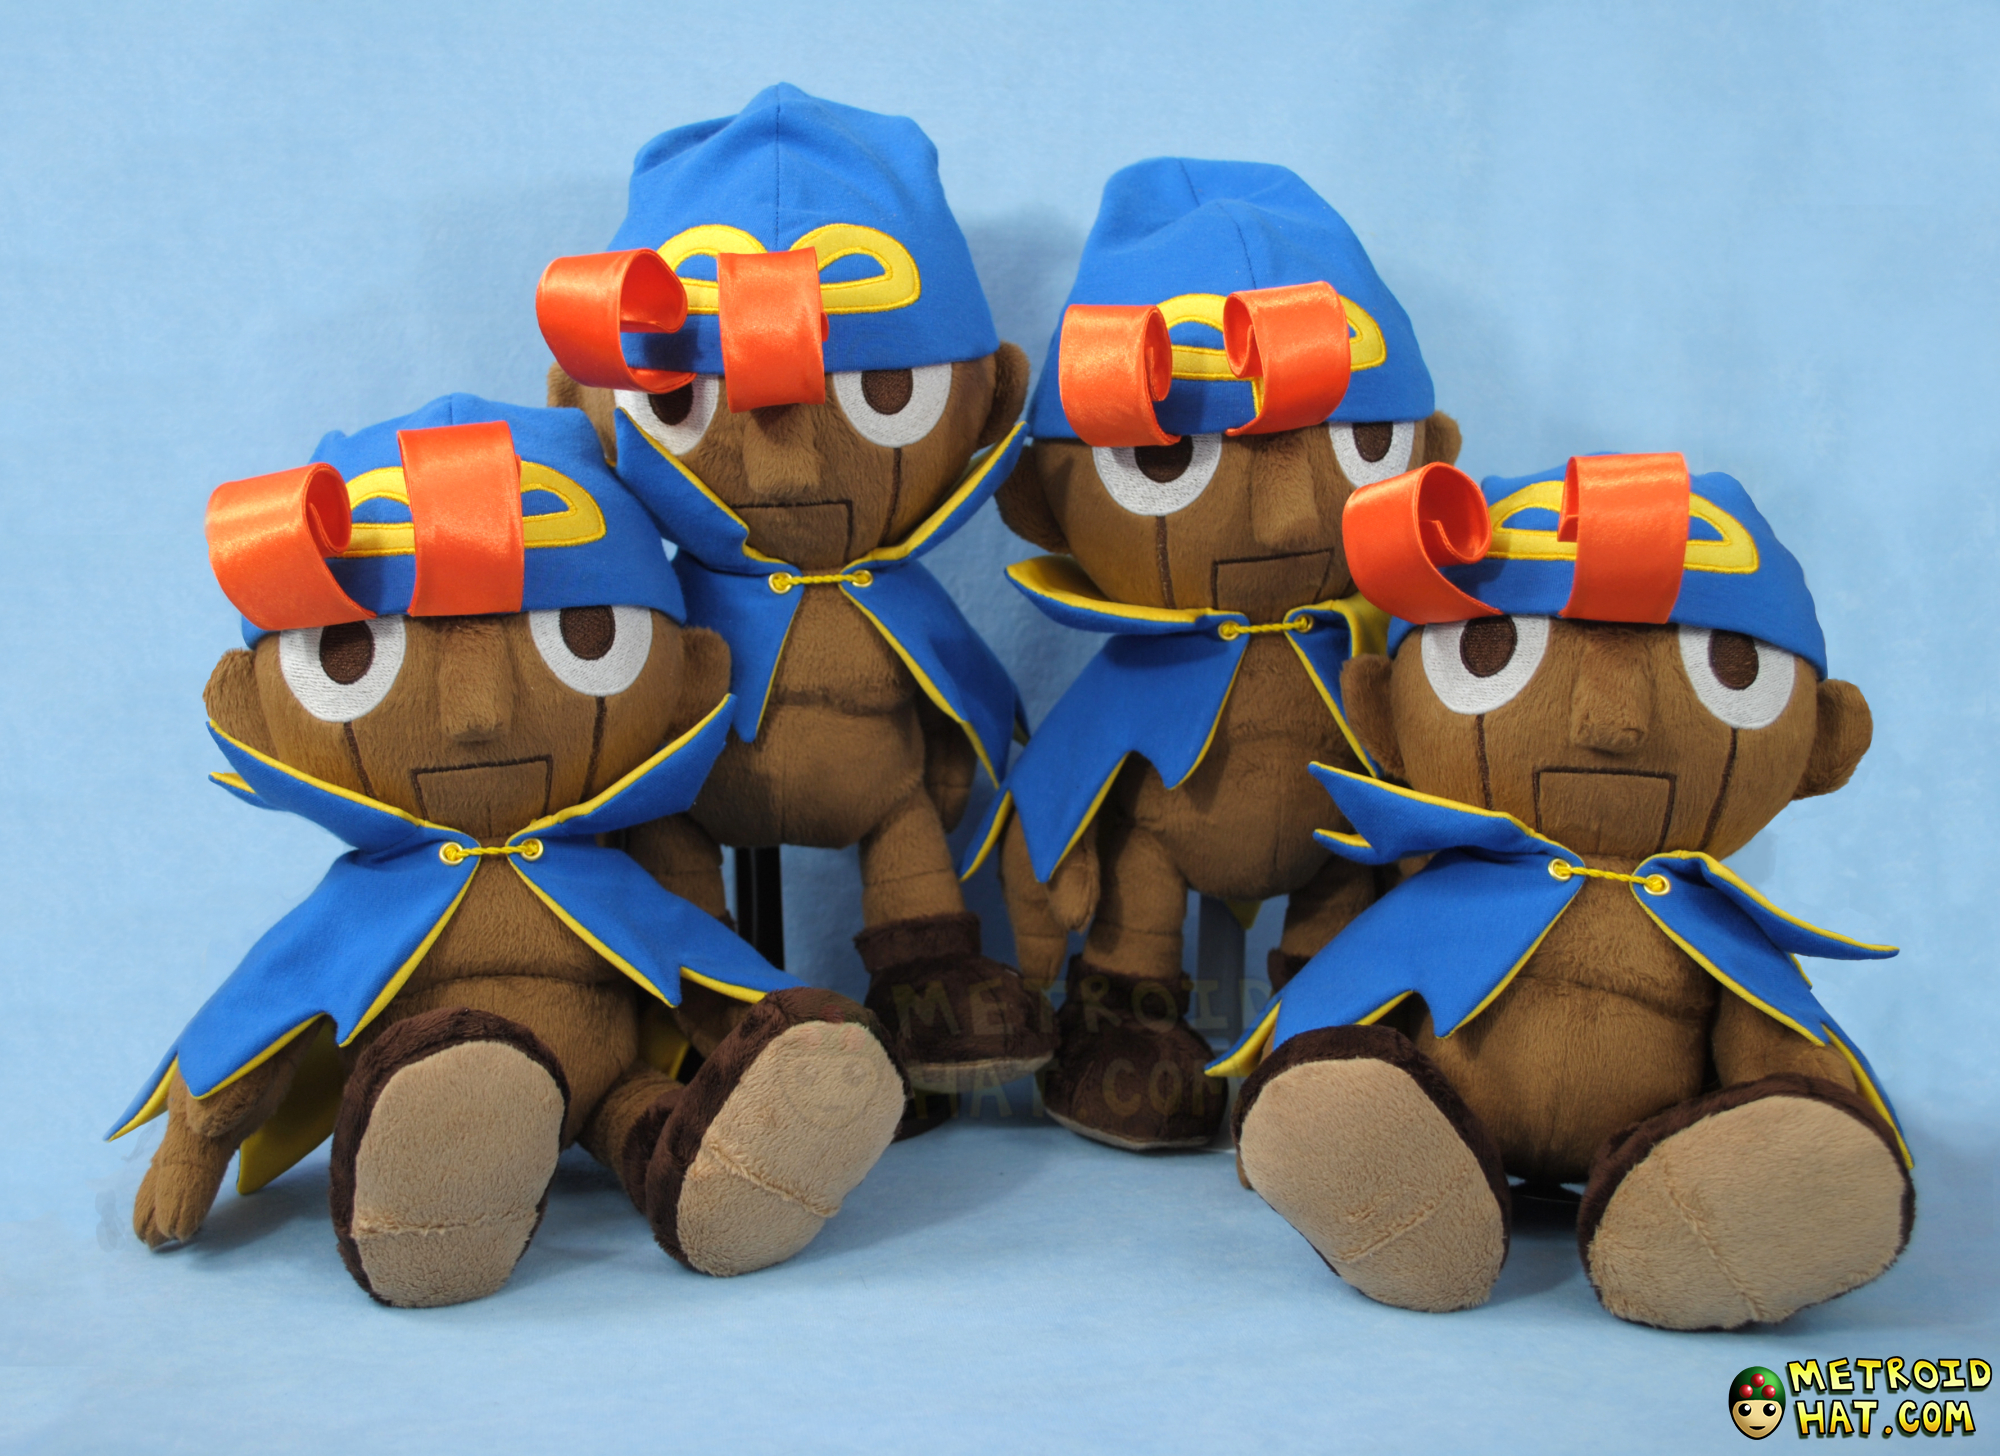
But in 2023, with the Mario RPG Remake coming out, I thought it was nigh time to revisit the Geno plushie with a fresh mentality. The new high-res renders of Geno certainly came in handy as references. And I think, the end result turned out real nice!
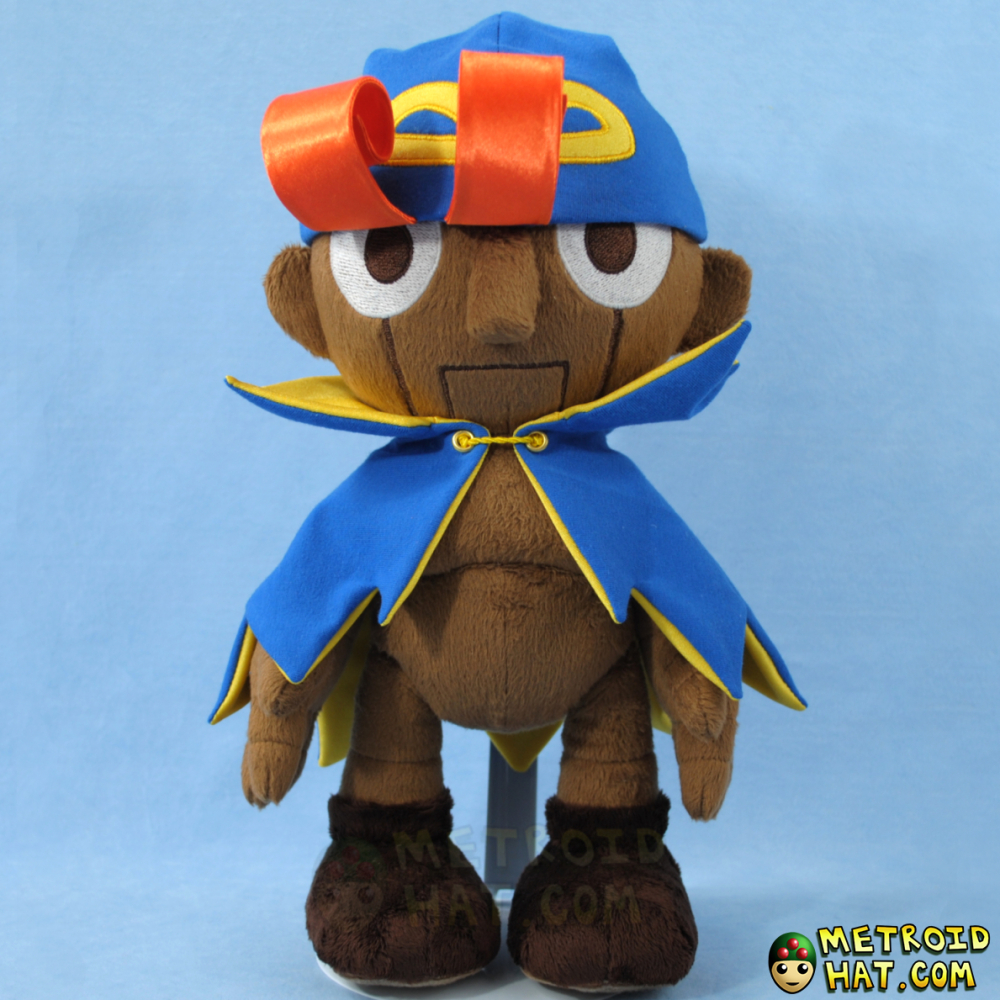
Firstly, I wanted Geno to be bigger, with a better snuggability factor. His proportions became more accurate to the game with a bigger head and smaller body. He was now about 12 inches standing compared to the previous 10.5 inches. The body material switched to minky, which was much easier to source and work with. And the cape and hat became jersey fabric. I had asked myself, 'what material has the best drape?' when I was contemplating my choices. In exchange for the shiny quality of taffeta/satin, jersey was easier to sew, easier to iron, draped better on the shoulders and head, and took to embroidery better. At least the yellow jersey has a bit glimmer to it.
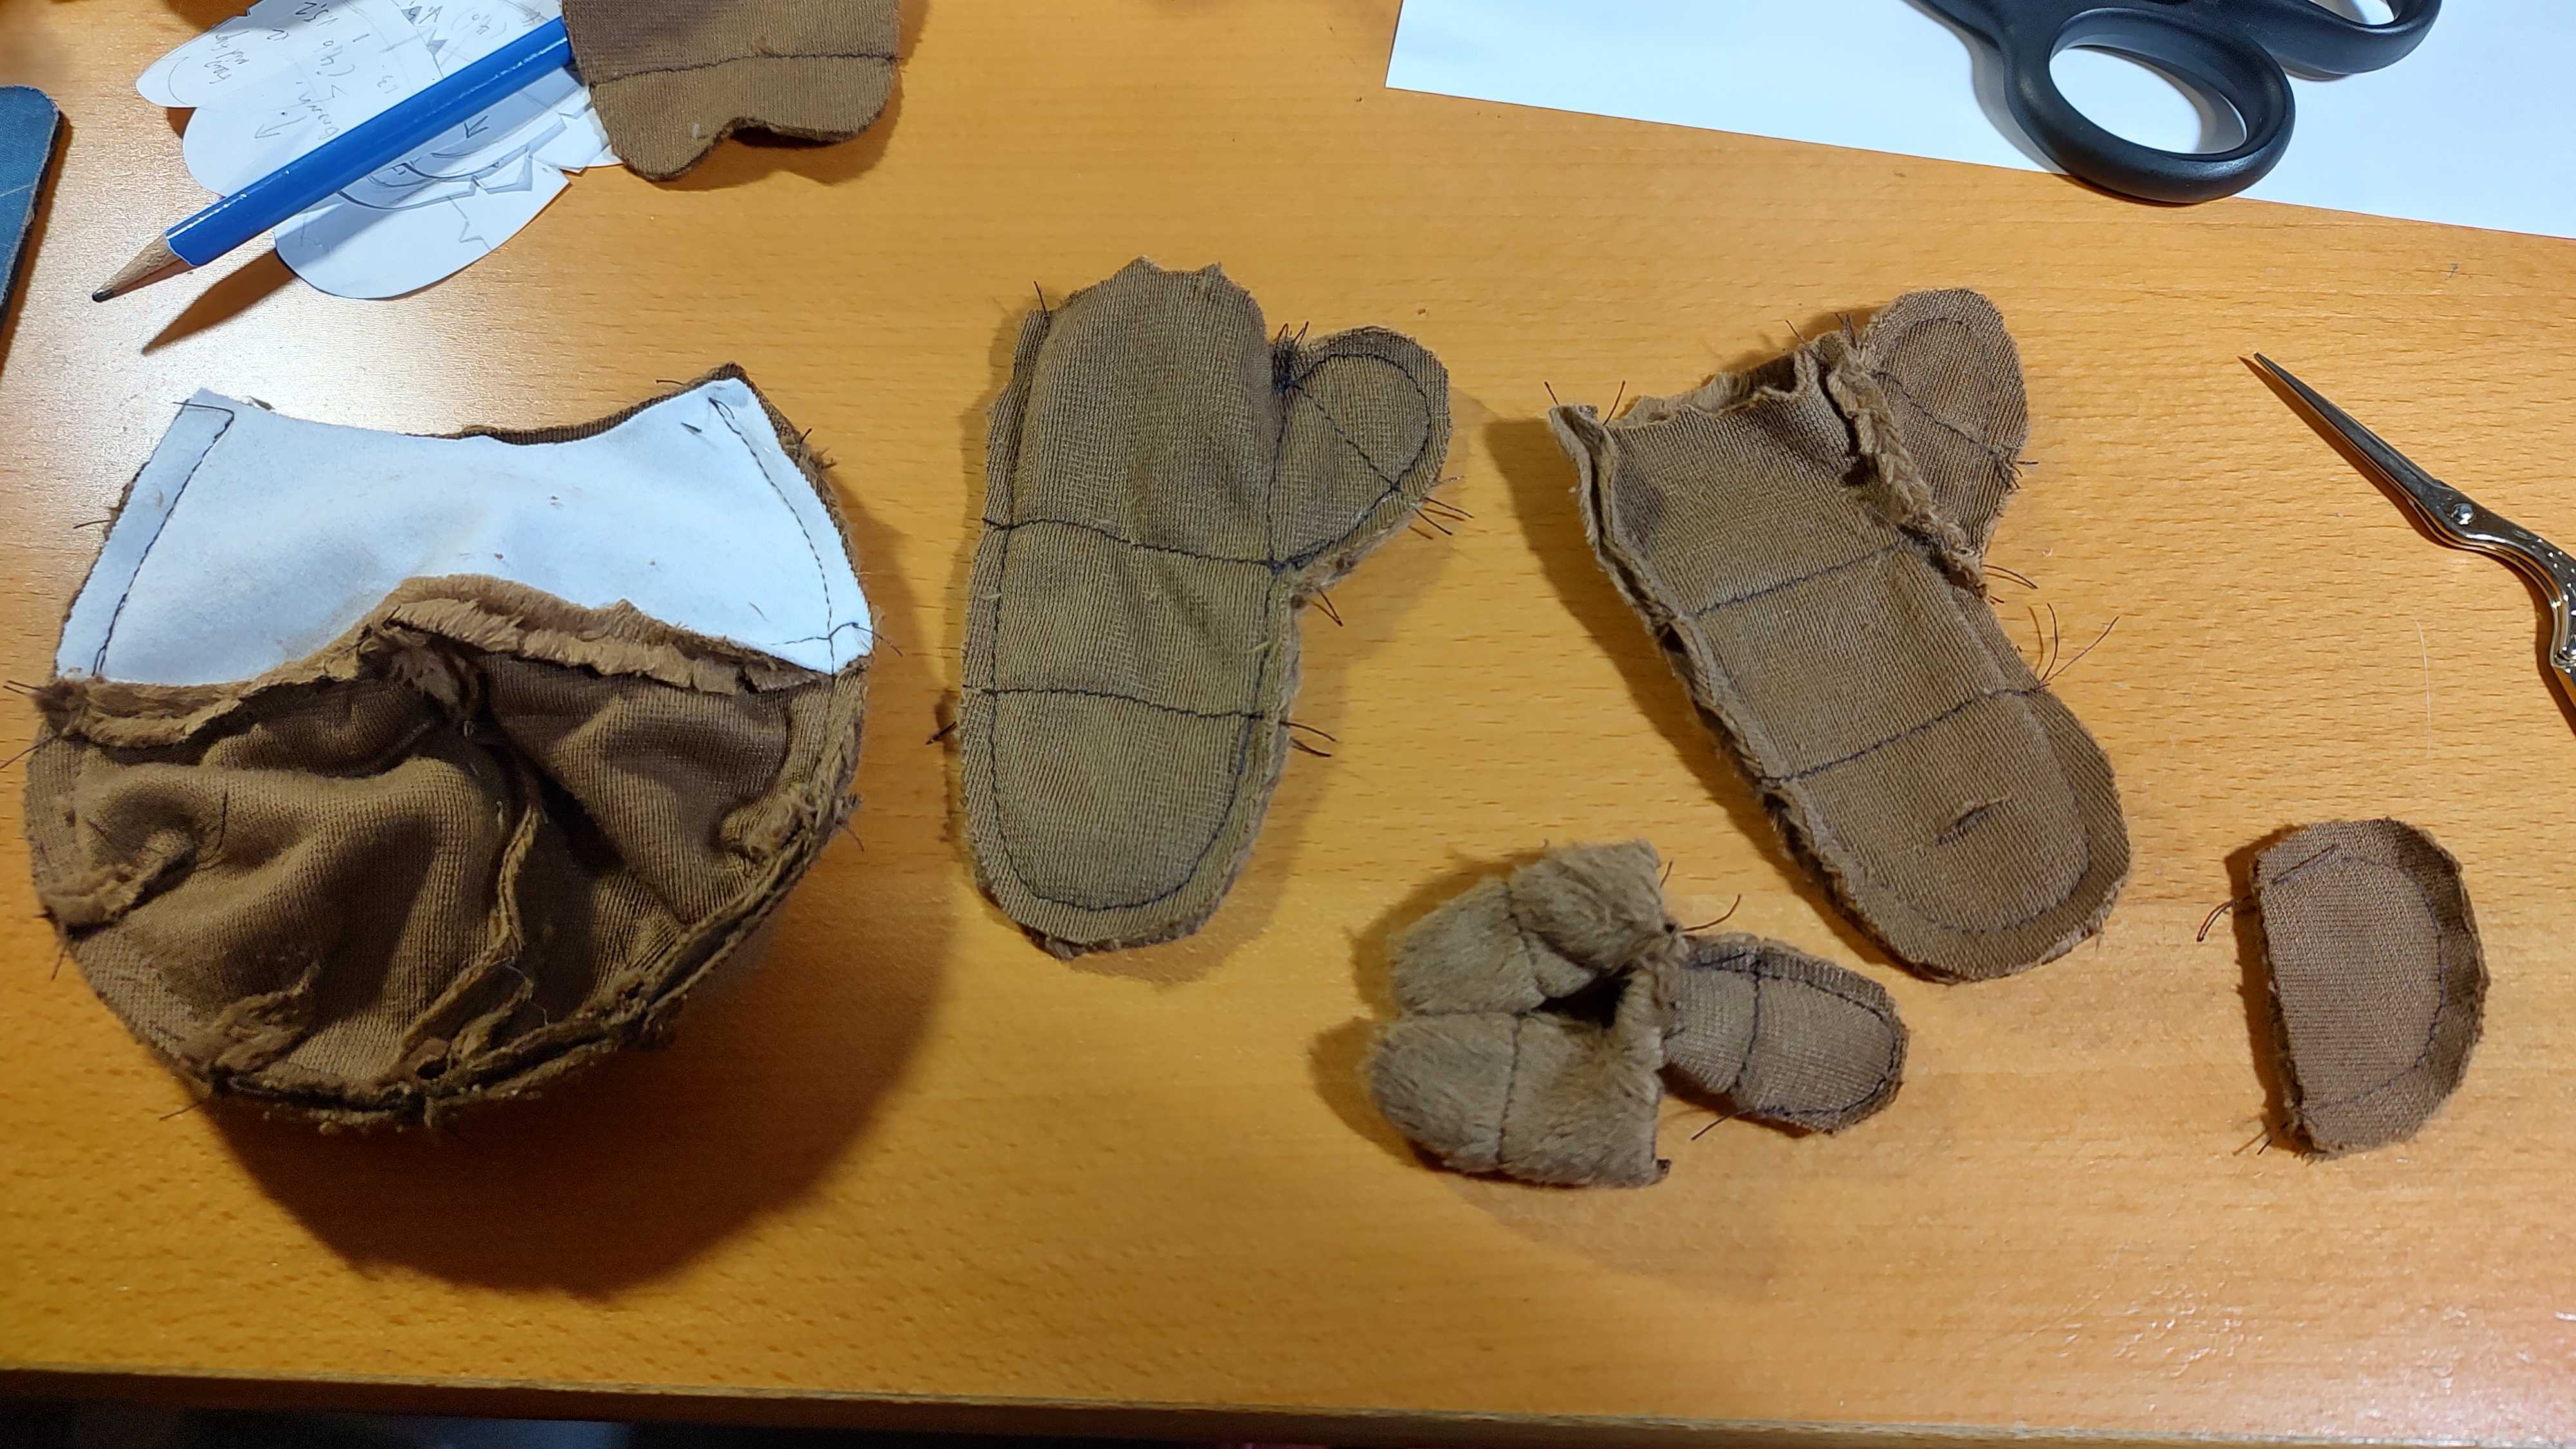
Fingers, especially on small plushies, can be something of a challenge. You can always simply sew what is basically an outline of a hand on 2 pieces of fabric and stuff it, which was what I did on my older Geno plushies. On the more recent hands, I wanted to address the '3D-ness' of the fingers by making them individual tubes which were sewn together before being sewn into the hand itself. And I managed to give each finger a bit of an inward-curving angle to help make them look more natural.
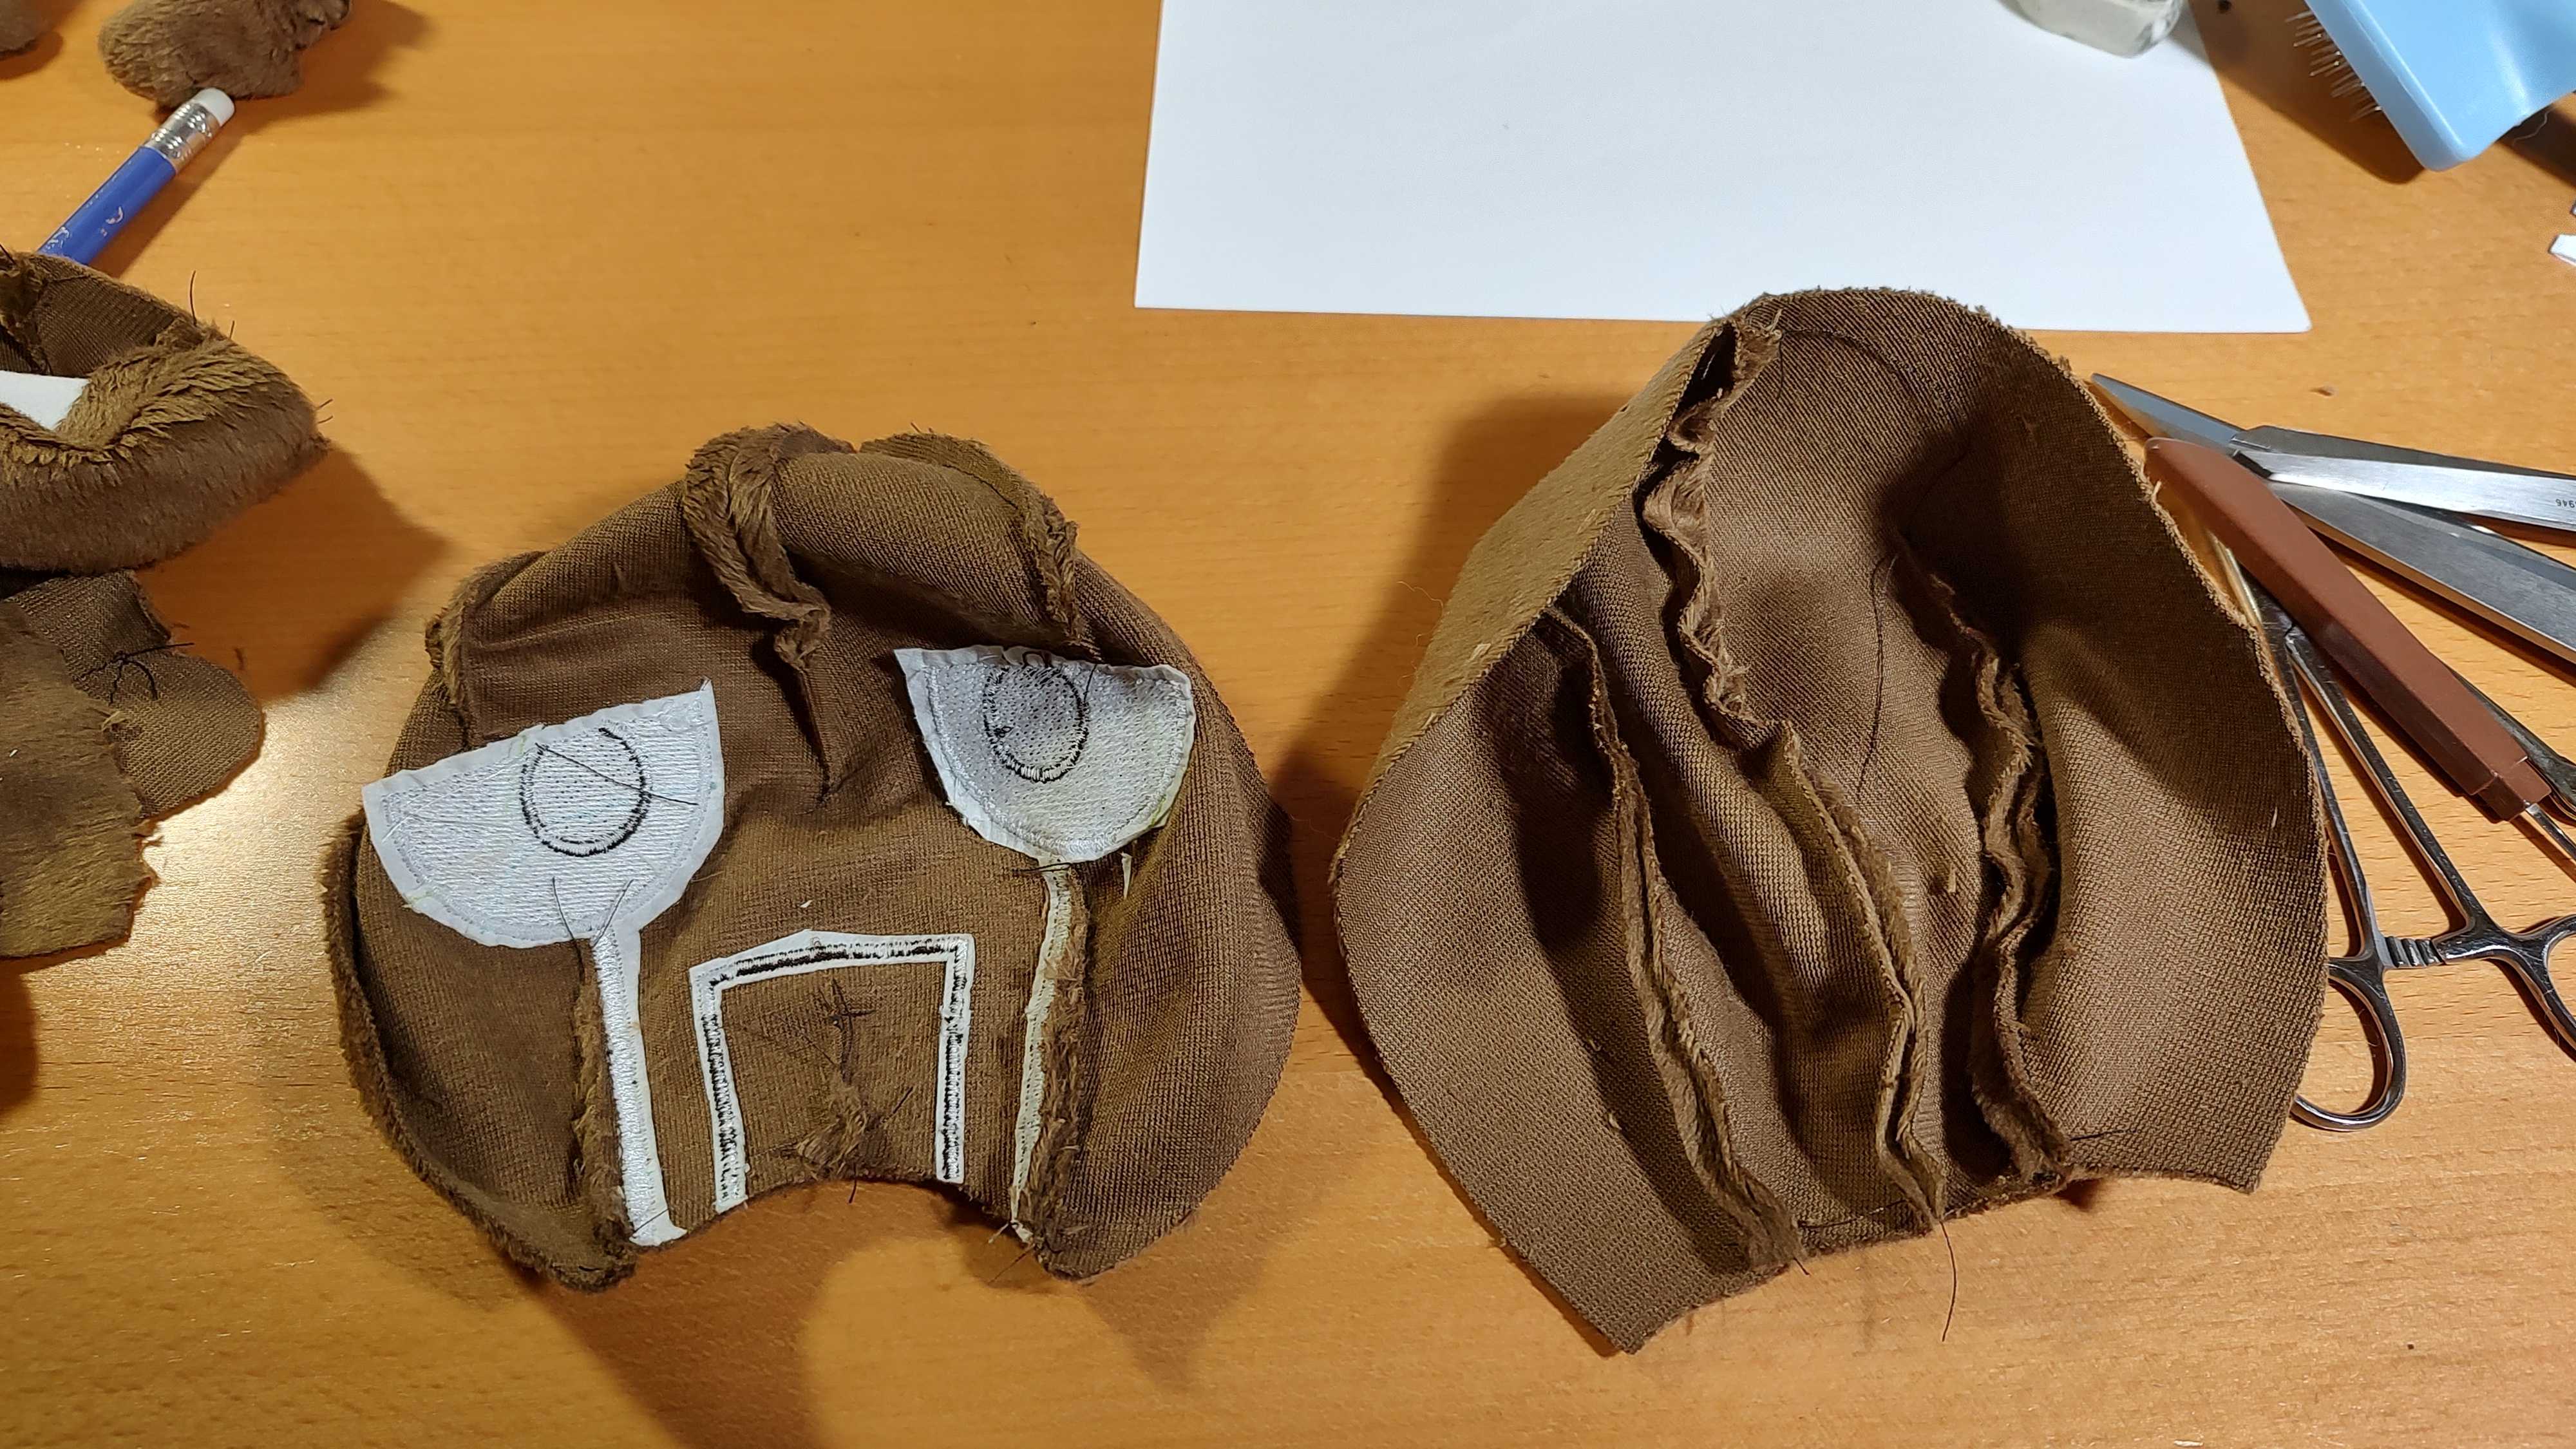
Geno, being a wooden doll, has a lot of joint lines along his limbs and face. I previously ignored those, but this time I took the time to topstitch them, even across every individual finger. But the ones on his face I decided to embroider completely so they stood out more. Previously, those lines were also seams, which allowed me to control the curve of his face around that area. There's still seams under the eyes, but they're sewn so close to the embroidery line that they're not easily visible. In this behind-the-scenes picture, you can see the seam hugging the embroidery line.
So yeah, I switched to jersey fabric for the cape and hat so that they're drapey and behave more like clothes. But the collar needed some interfacing to stiffen it up. The cape also featured eyelets and cord at the front closure instead of a chain. In my defense, the older render of Geno has some sort of indistinct gold rope that I interpreted to be a chain. The new renders cleared show his cape being held together by eyelets and a cord, so I switched to that.
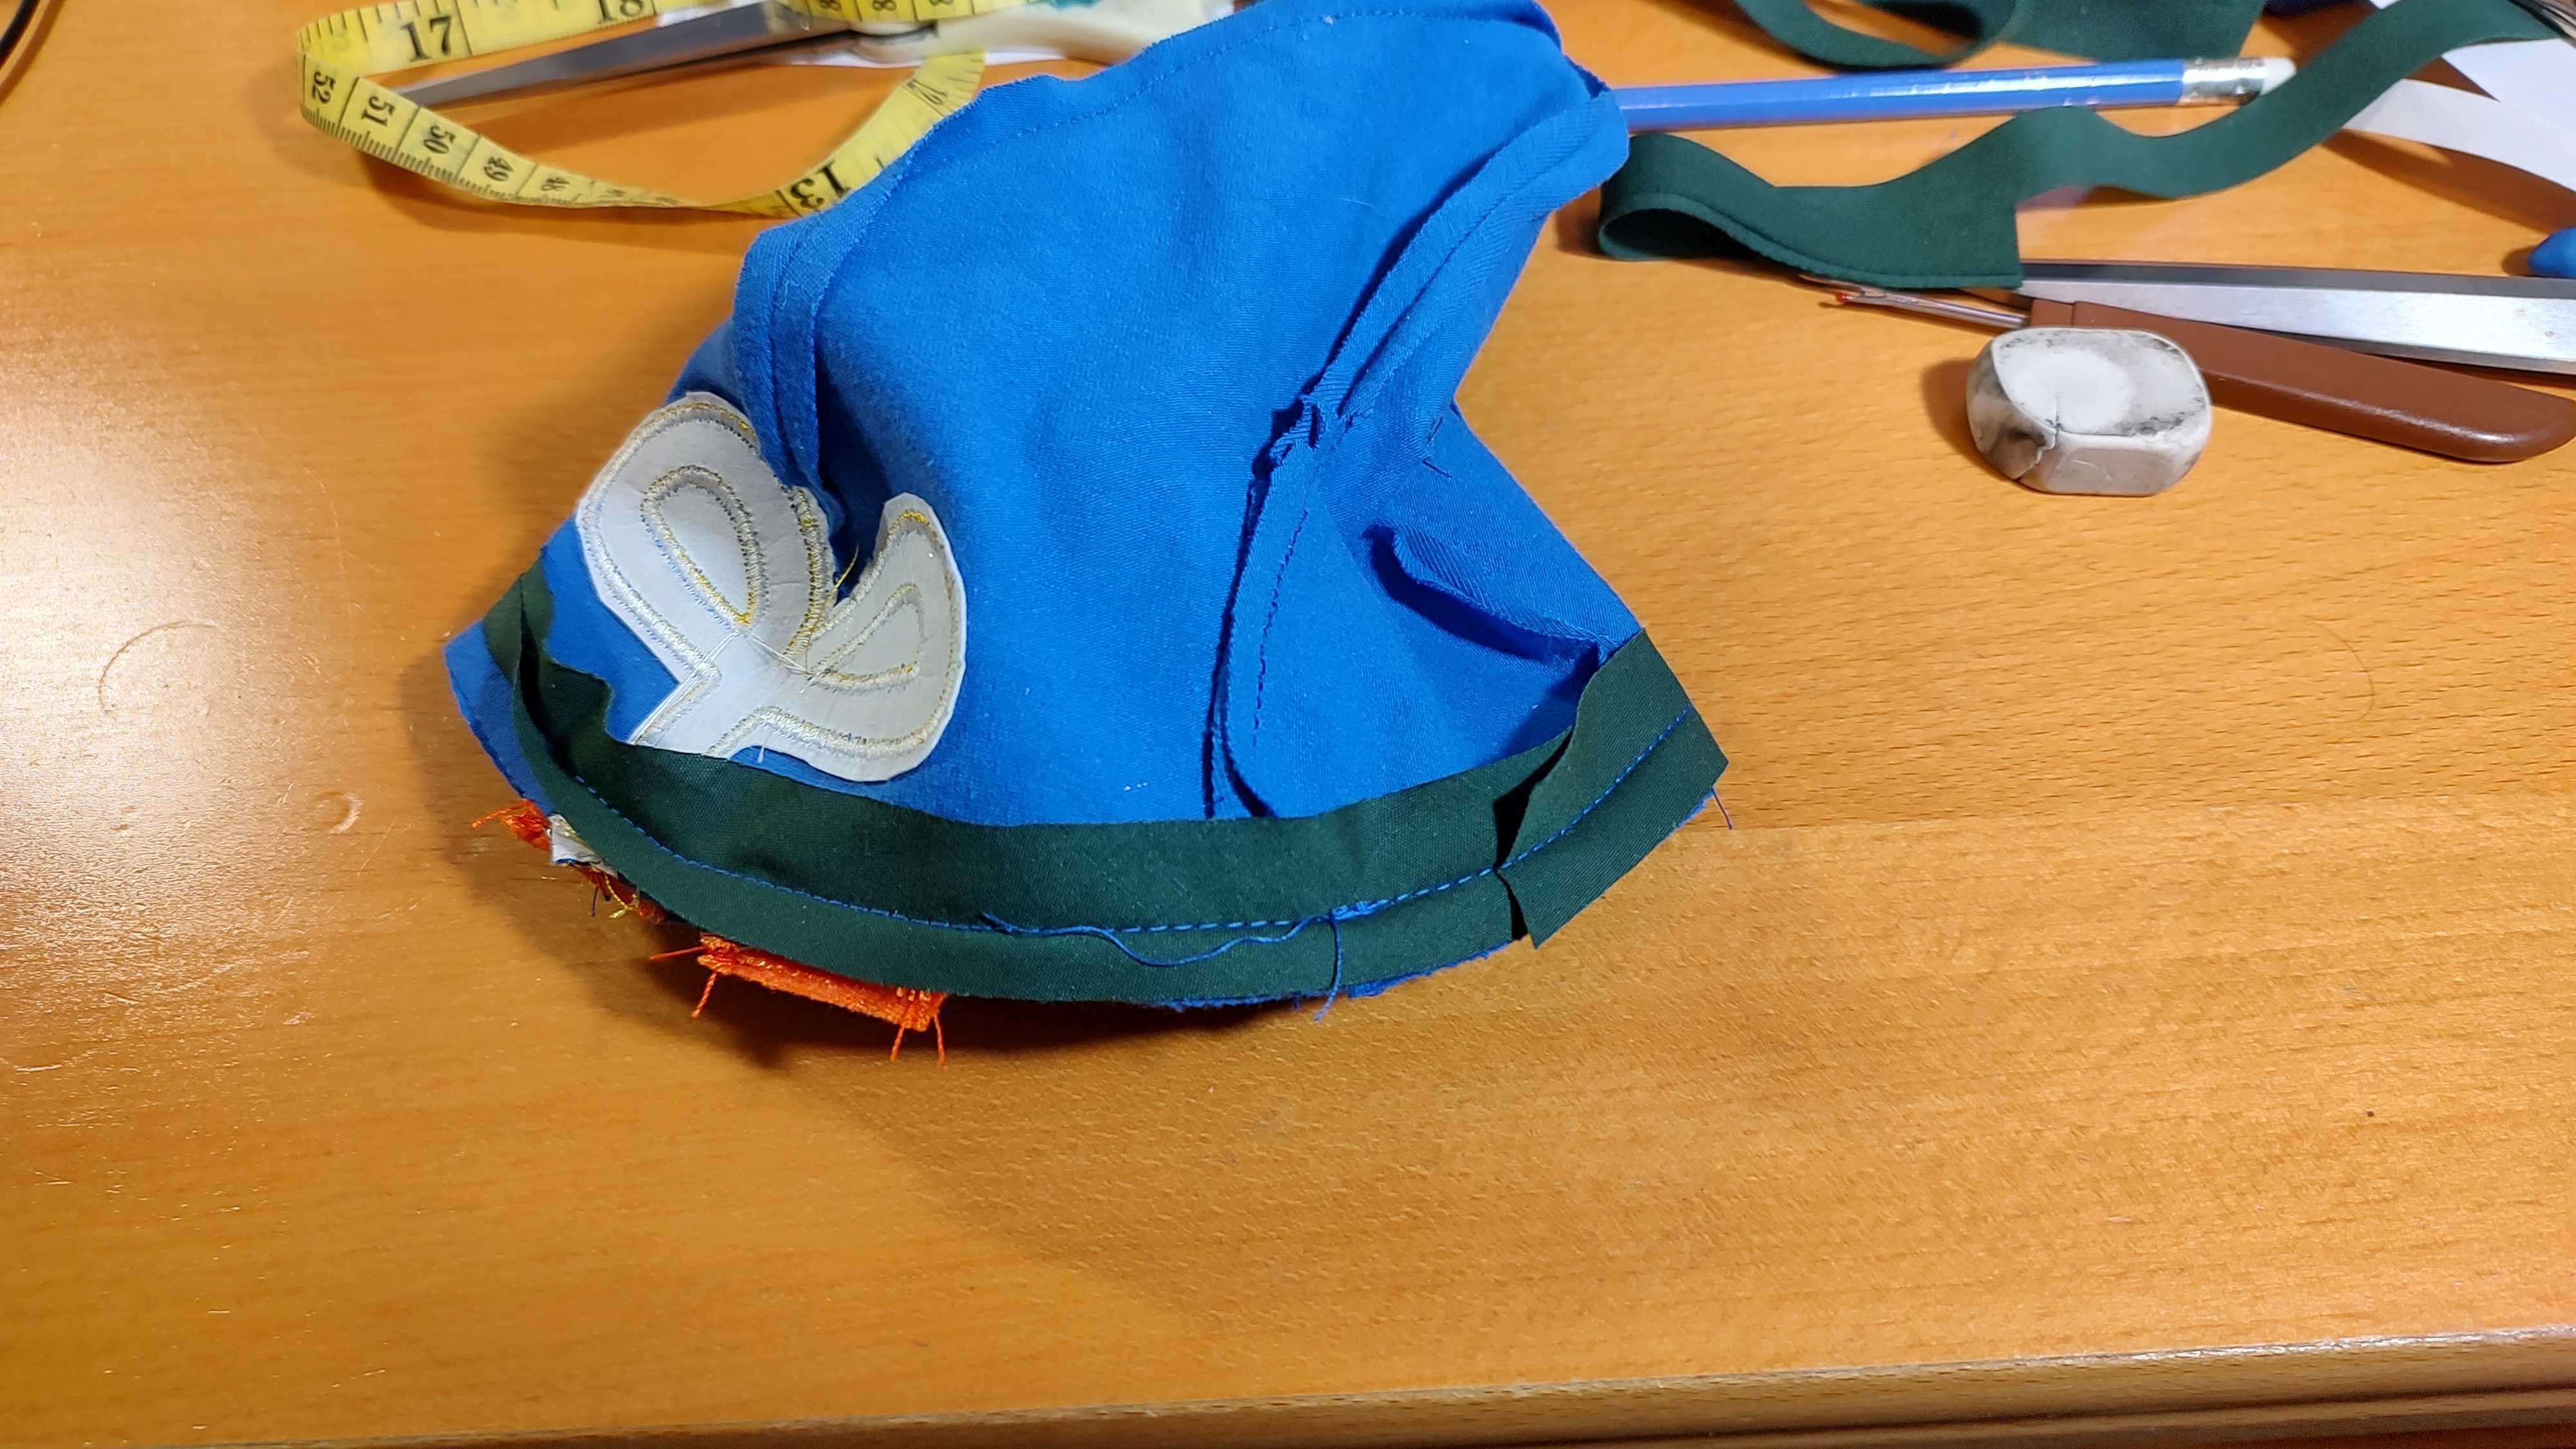
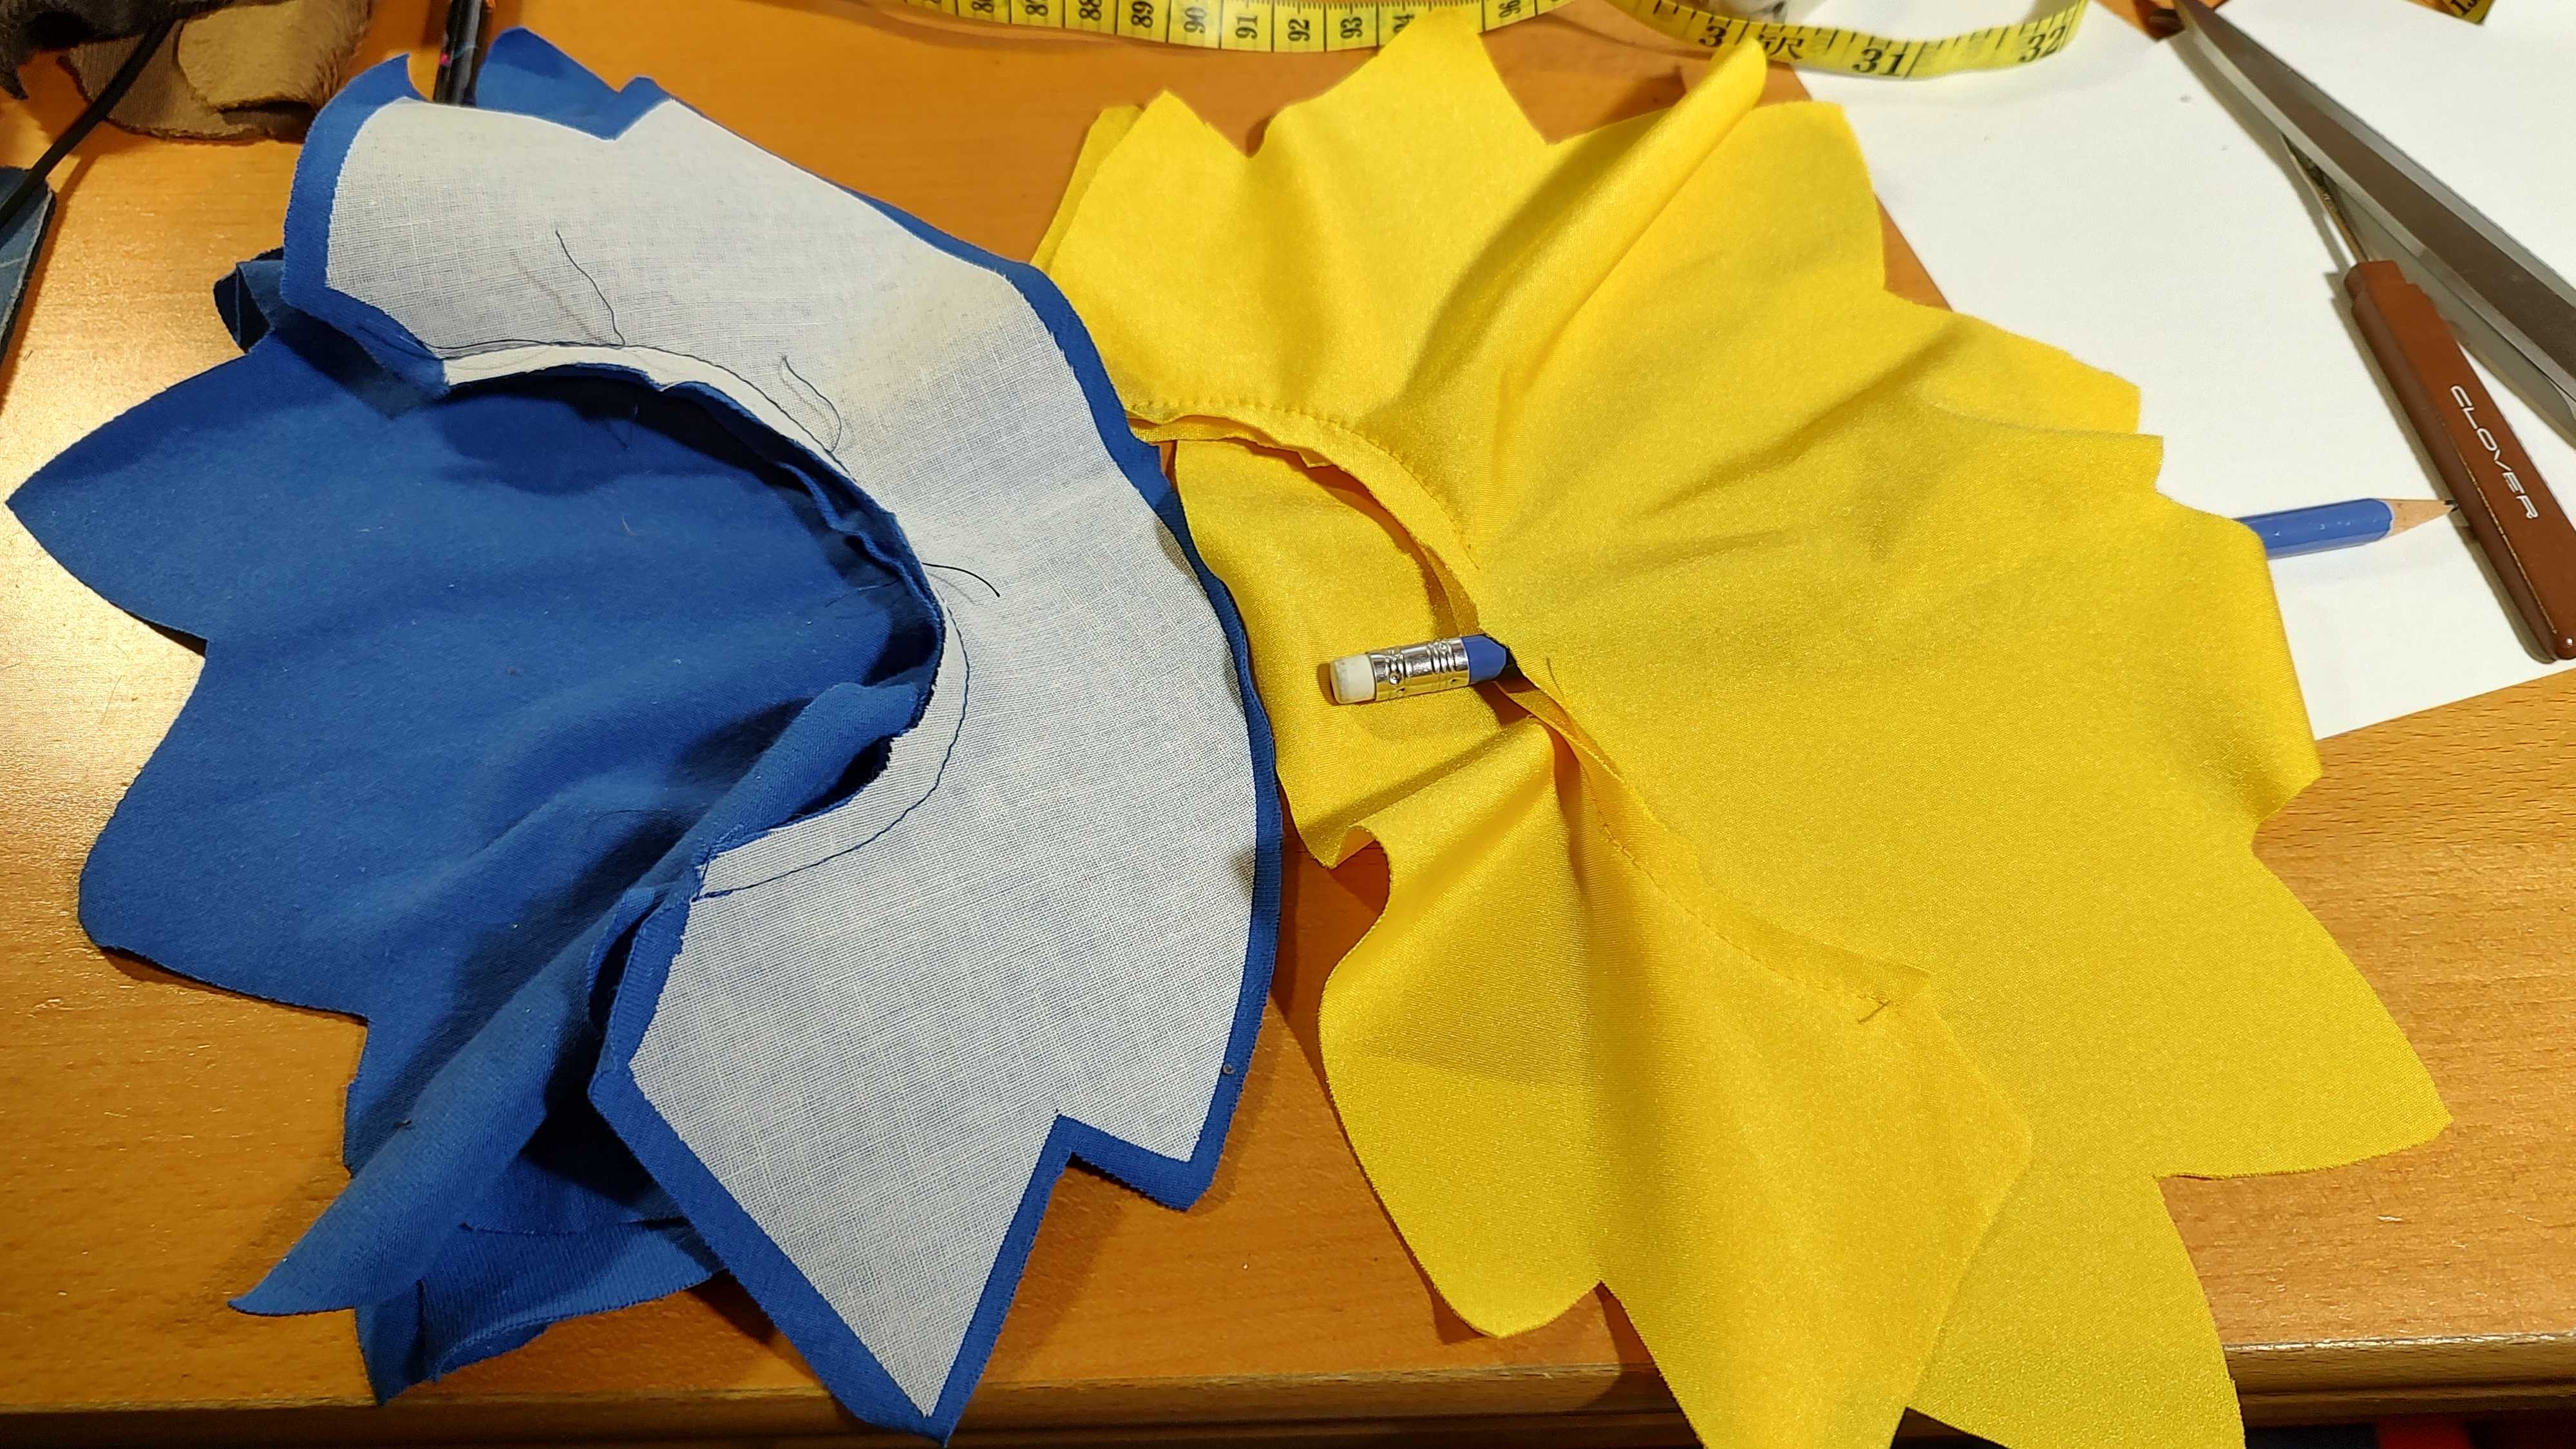
Oh boy, the hat! Truth is, I don't want to give away too many details about it. I mean, I've been pretty forthcoming with my sewing techniques so far, right? I want to keep at least a few secrets close to my chest. :) That custom wired ribbon is something I worked hard to develop. I'll just show off this one picture, which reveals some interesting construction happening around the edge of the hat which is invisible to the outside, but is vital in helping the hat keep its shape.
This new generation of Geno plushies are so satisfying to make and show so much progress over my past efforts. Maybe in a few years, I'll find ways to improve upon it further!
Back to Part 2: 2018 Version
Back to Part 1: 2012 Version
