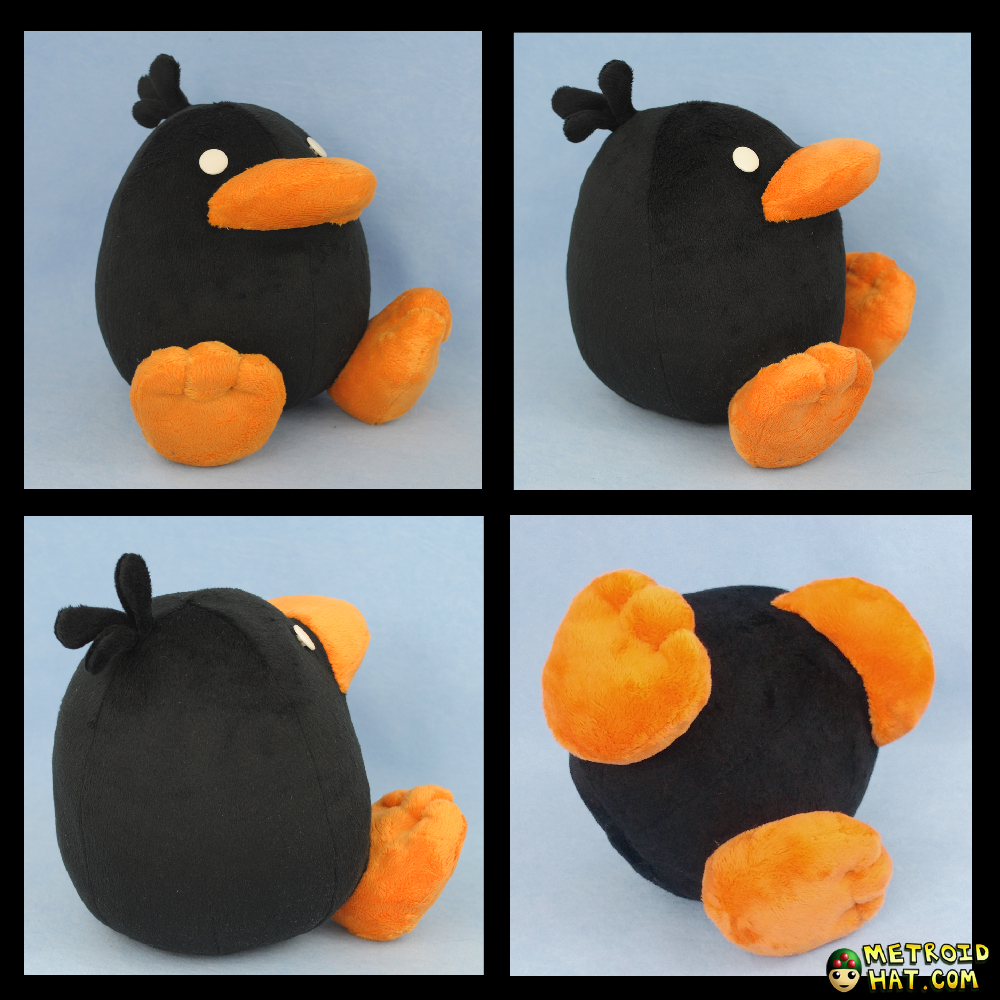
Raphael the Raven Plushie Tutorial
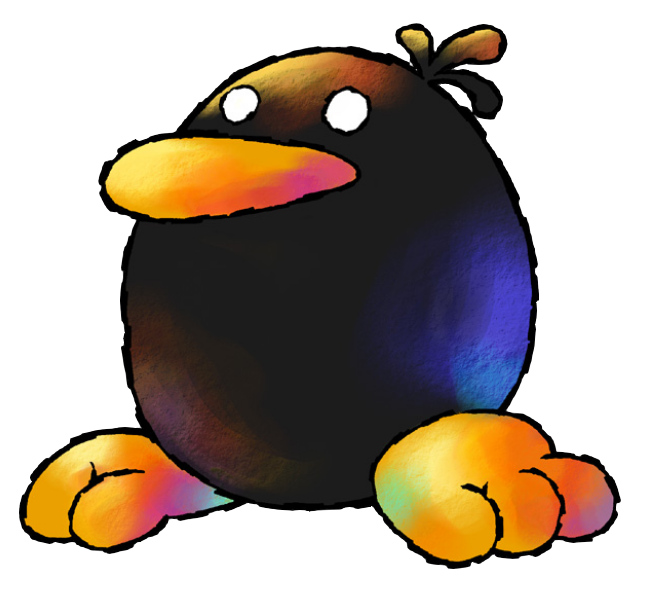
Once in a while, I would give a seminar on Fangamer's Twitch, sharing some of my plushie making processes. For one of them, I designed and sewed a plushie of Raphael the Raven, and I'm sharing the pattern and tutorial here for everyone to use! You remember Raphael, from the game Yoshi's Island? Of course you do!
The entire process in video form is available for you to watch. This will be especially helpful if you need a little extra guidance.
The first part of the stream is here.,
And the second one can be found here.
Sometimes I have Raphael plushies available to buy in my Etsy store. Check it out!
A few things before we get started...
This is a fairly straightforward pattern suitable for beginners, and you don't even need to use a sewing machine if you don't want to! Though if you're a total newbie to plushie making, or if you need a sewing refresher, it's a good idea to check out my Sewing Materials and Techniques page for a review on the basics of sewing.
Pattern
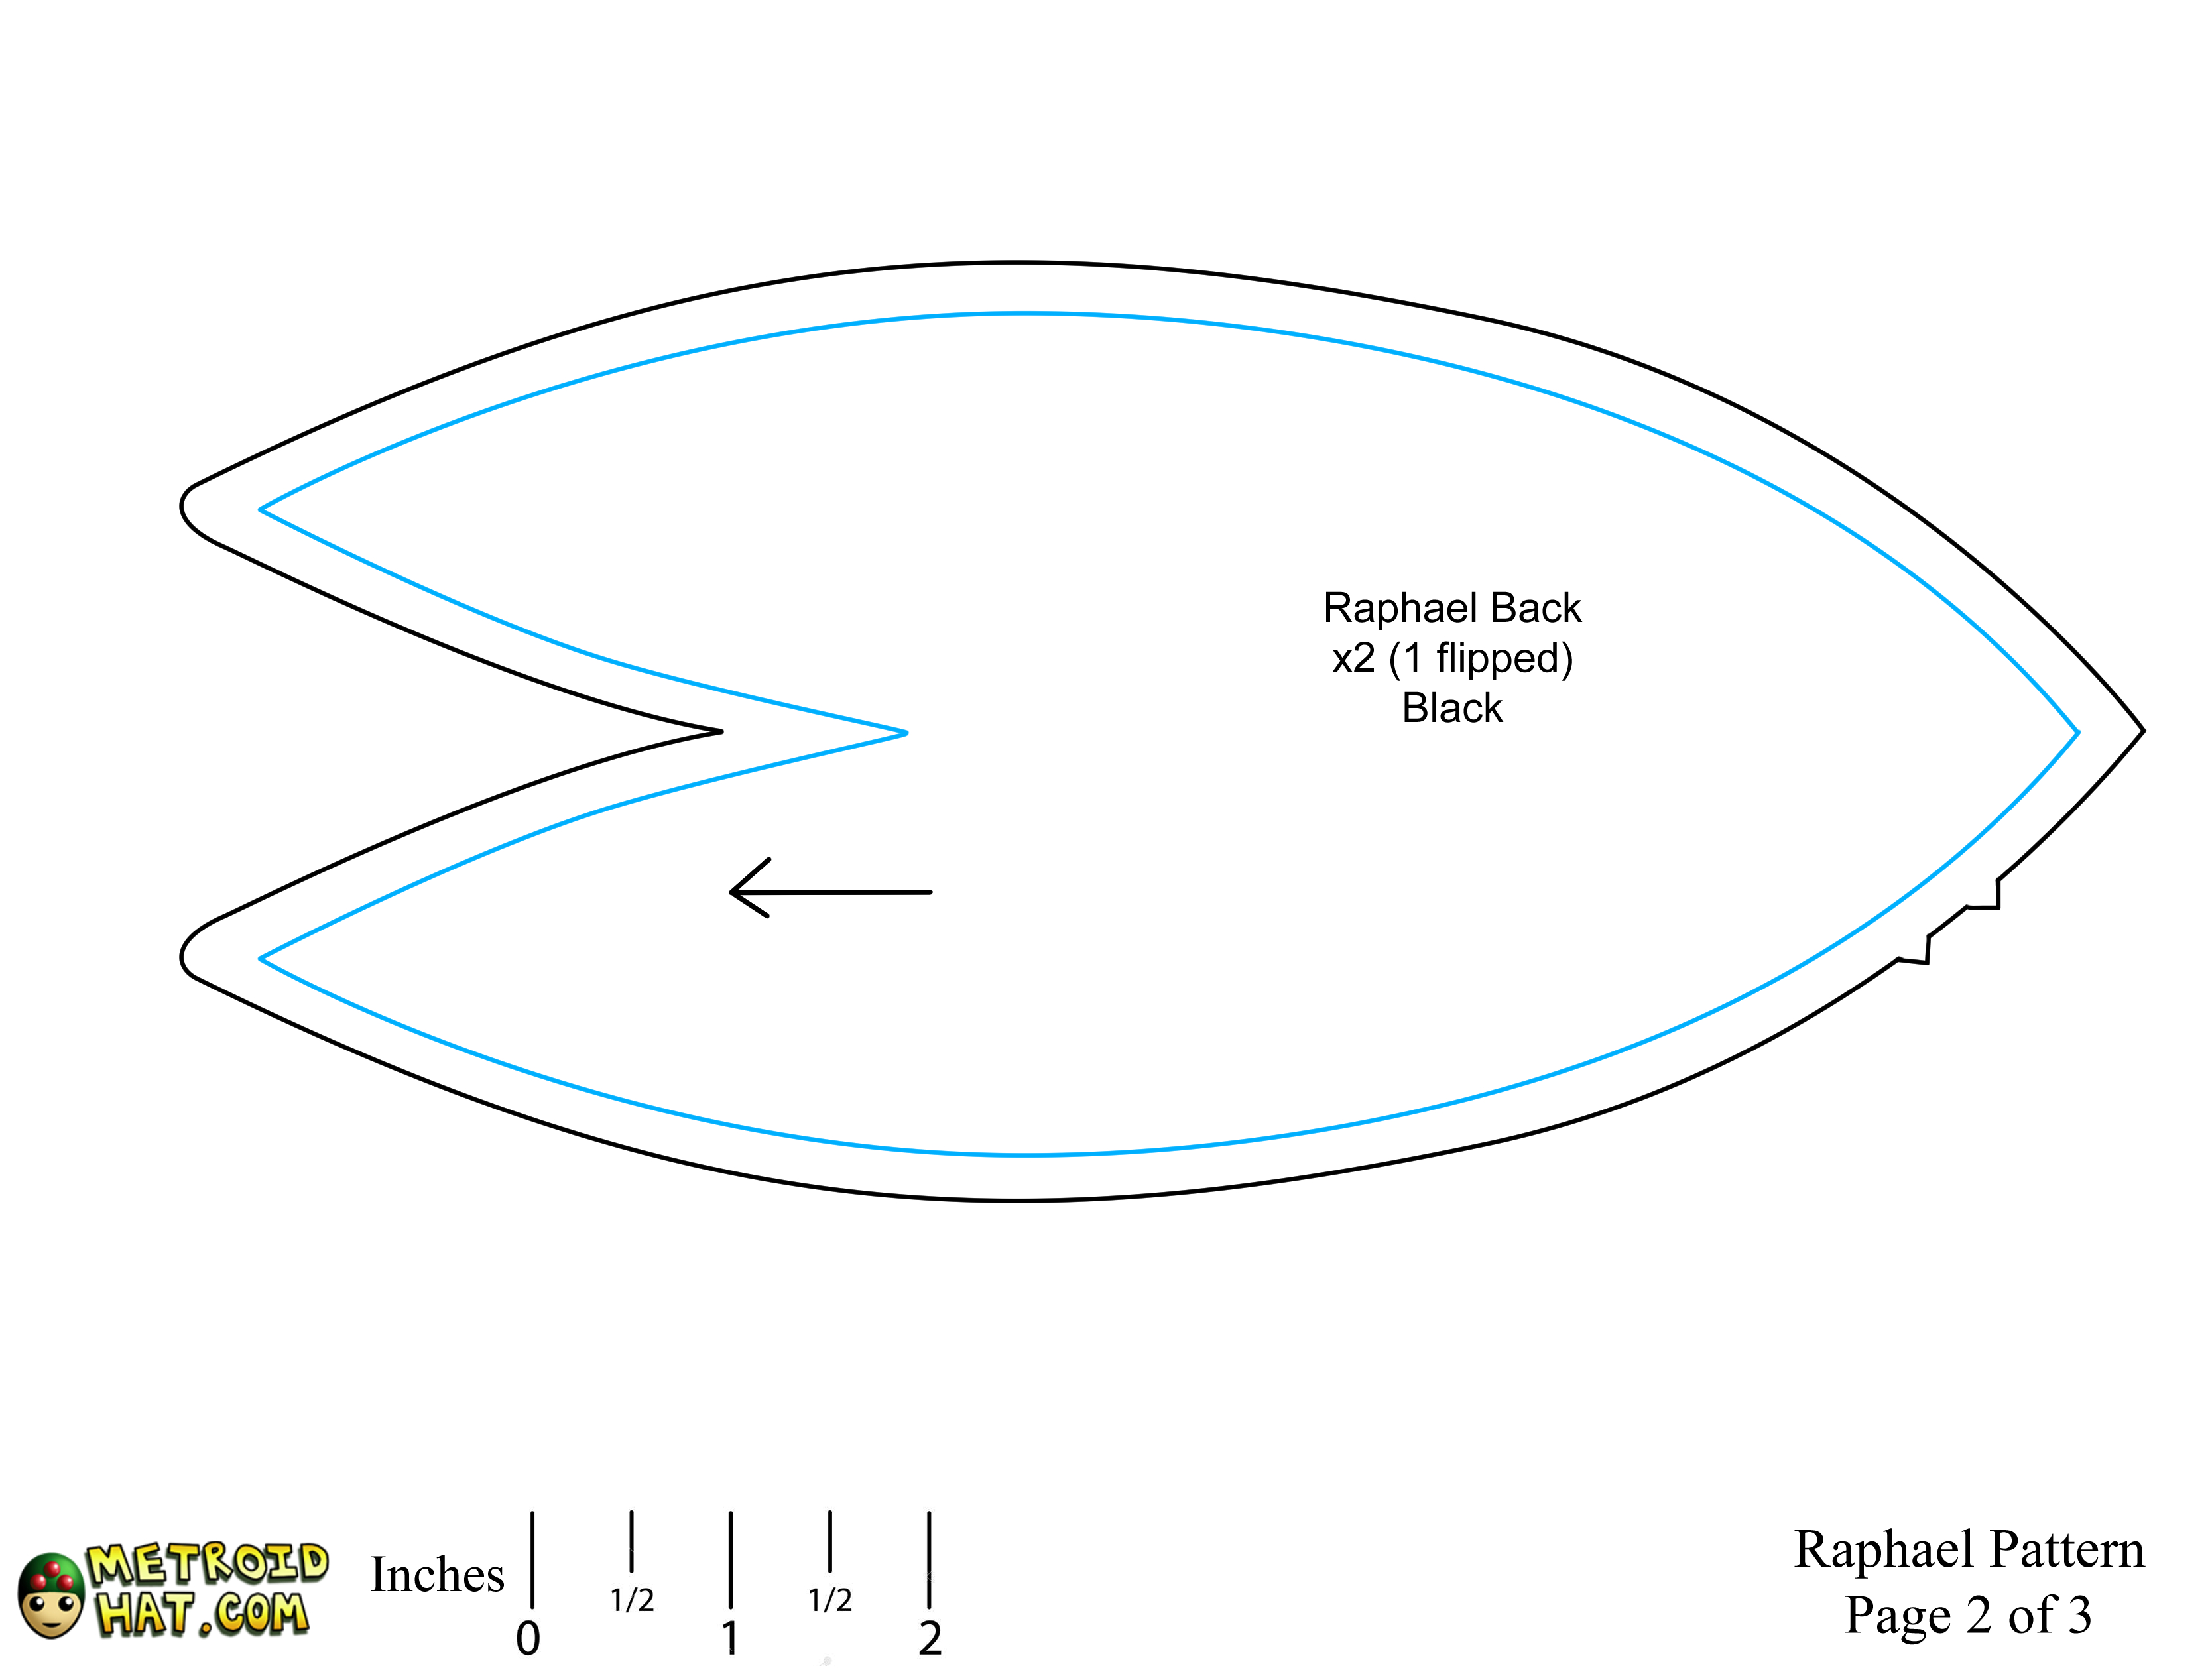
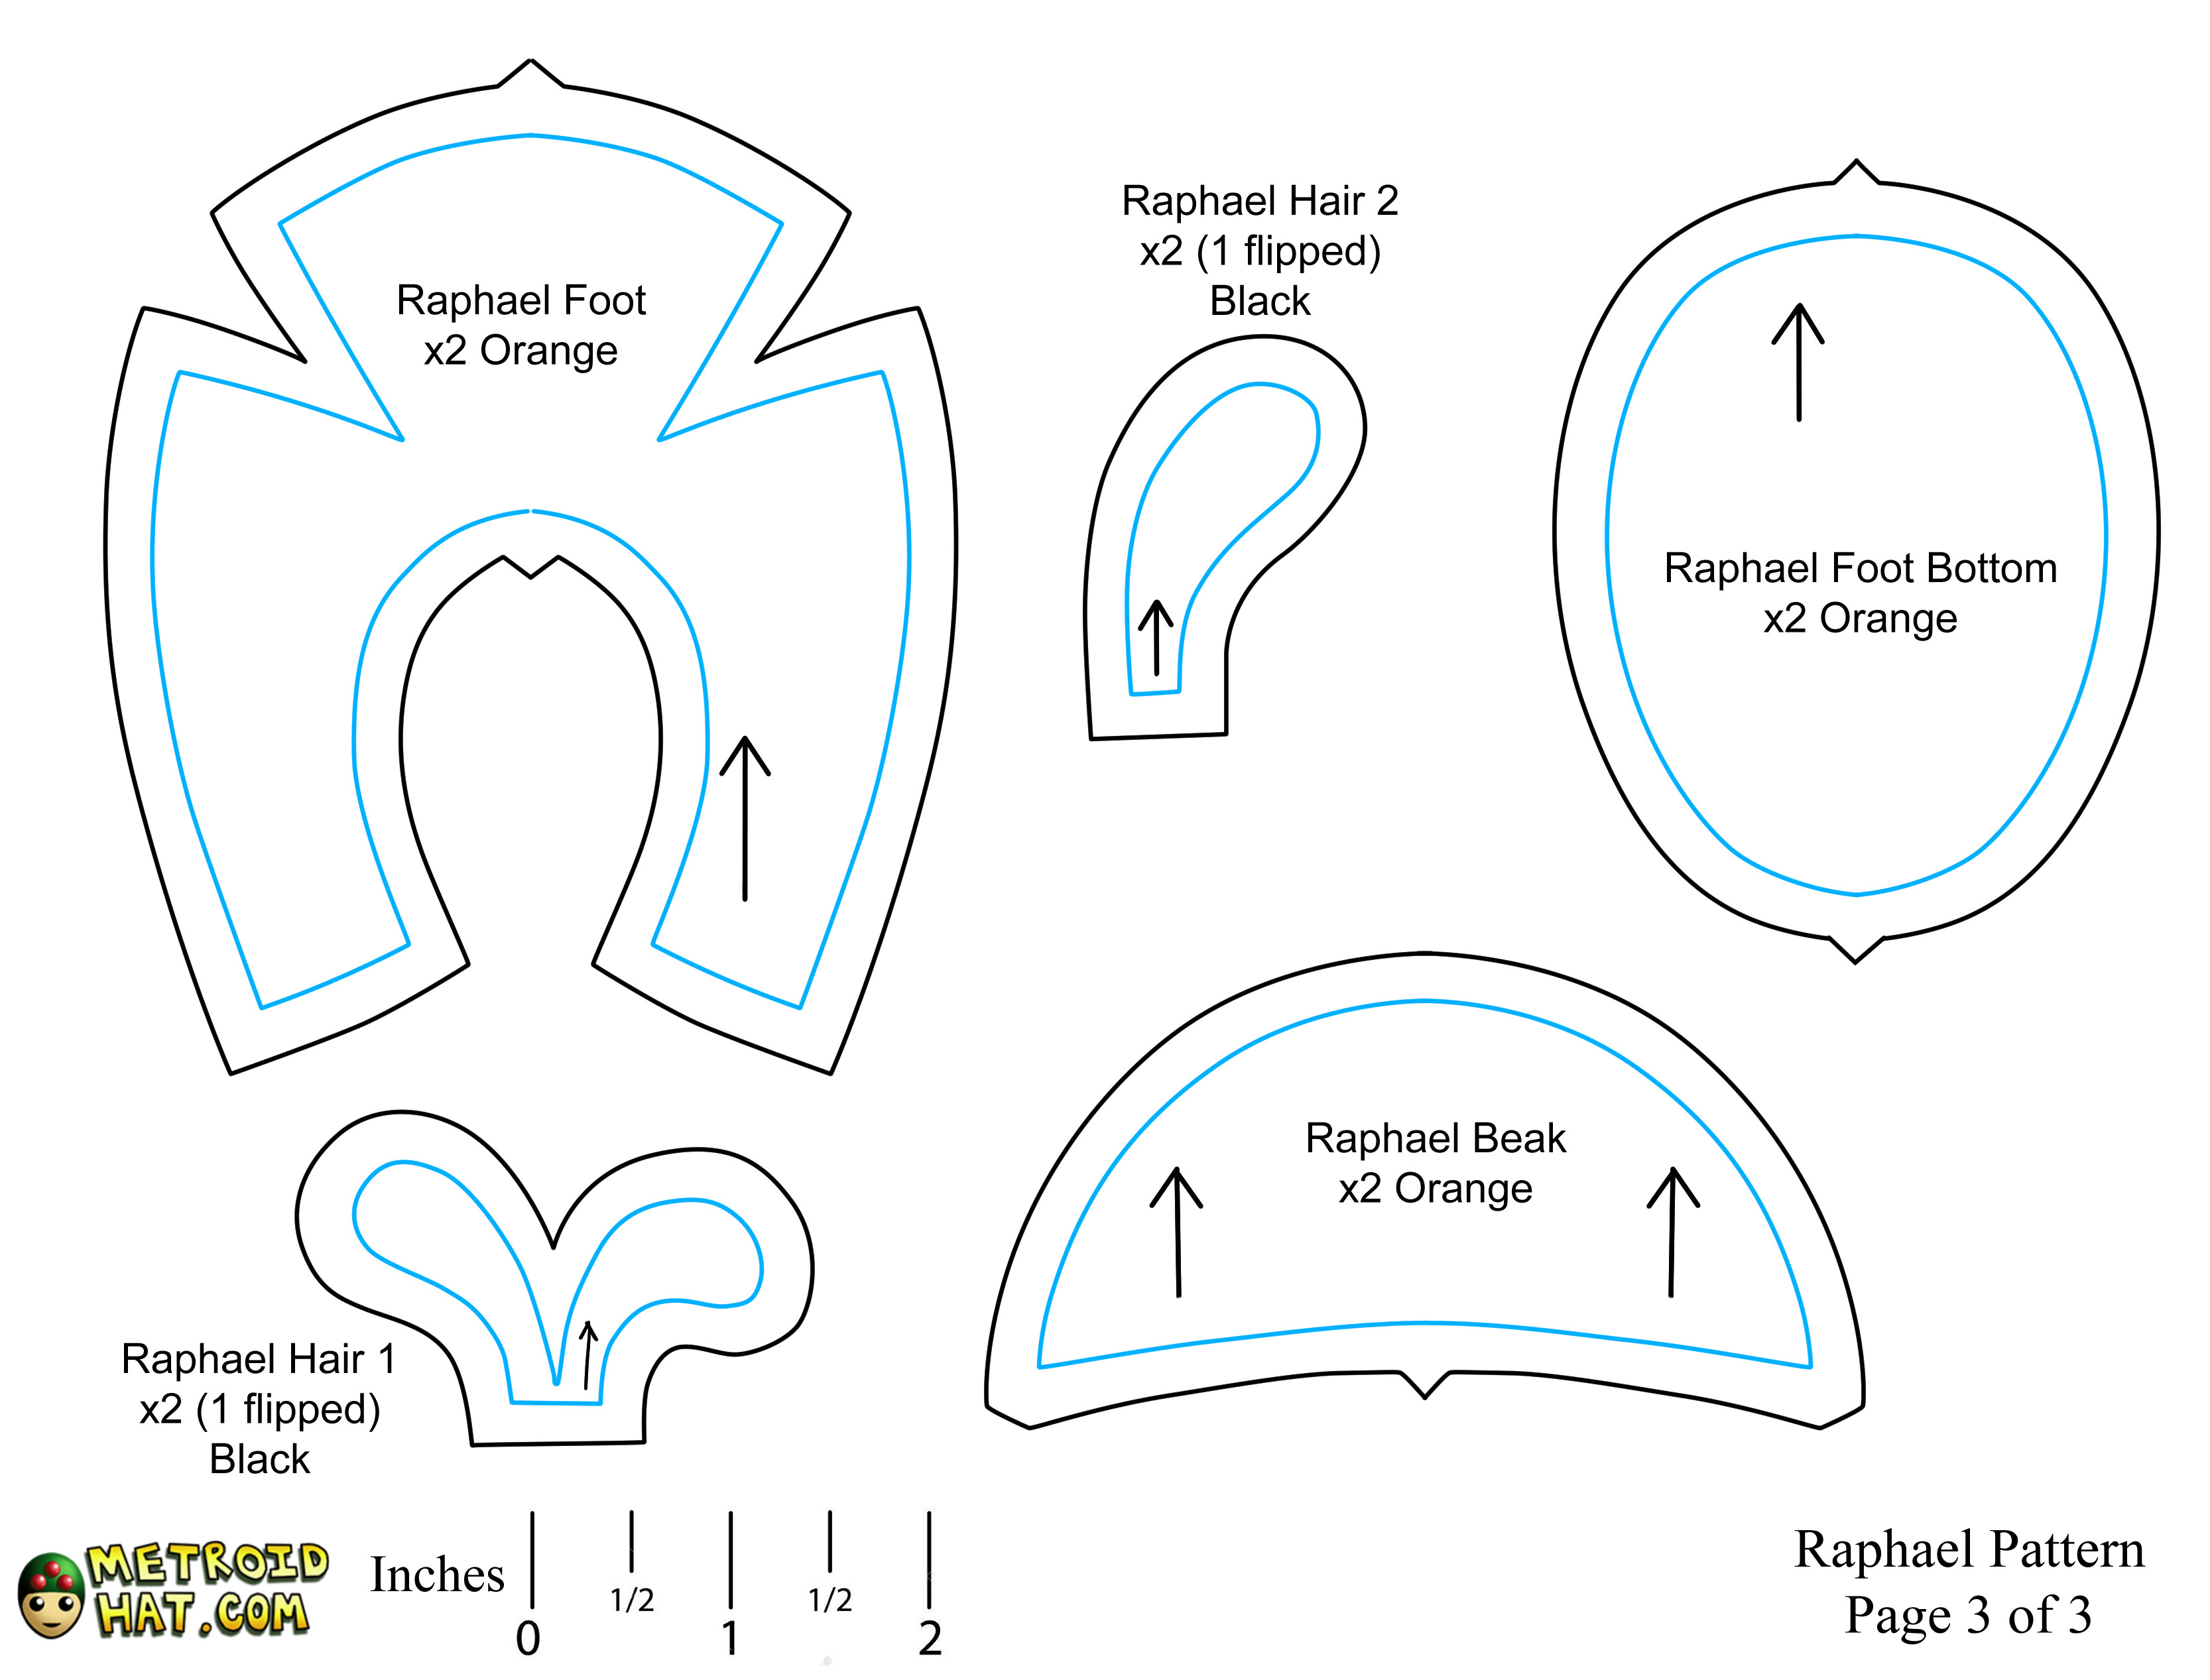
The three pattern pages can be printed out on normal 8.5x11 paper in landscape mode.
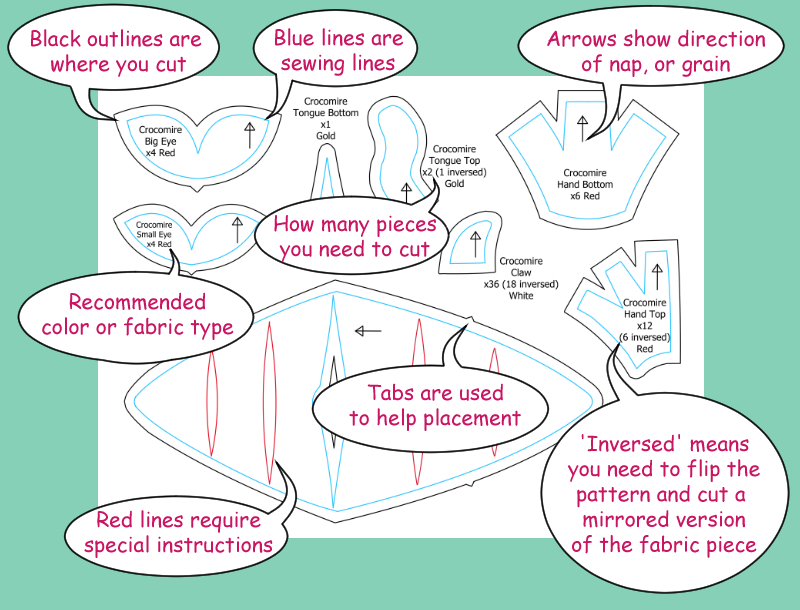
Here's a handy guide on how to read my patterns:
Materials List
-Black Minky (or fleece or whatever)
-Orange Minky (or fleece or whatever)
-Black thread
-Orange thread
-2 white shank buttons about 1/4 inches in diameter
-Stuffing
-(Optional)Weighted pellets (or beans or rice or whatever)
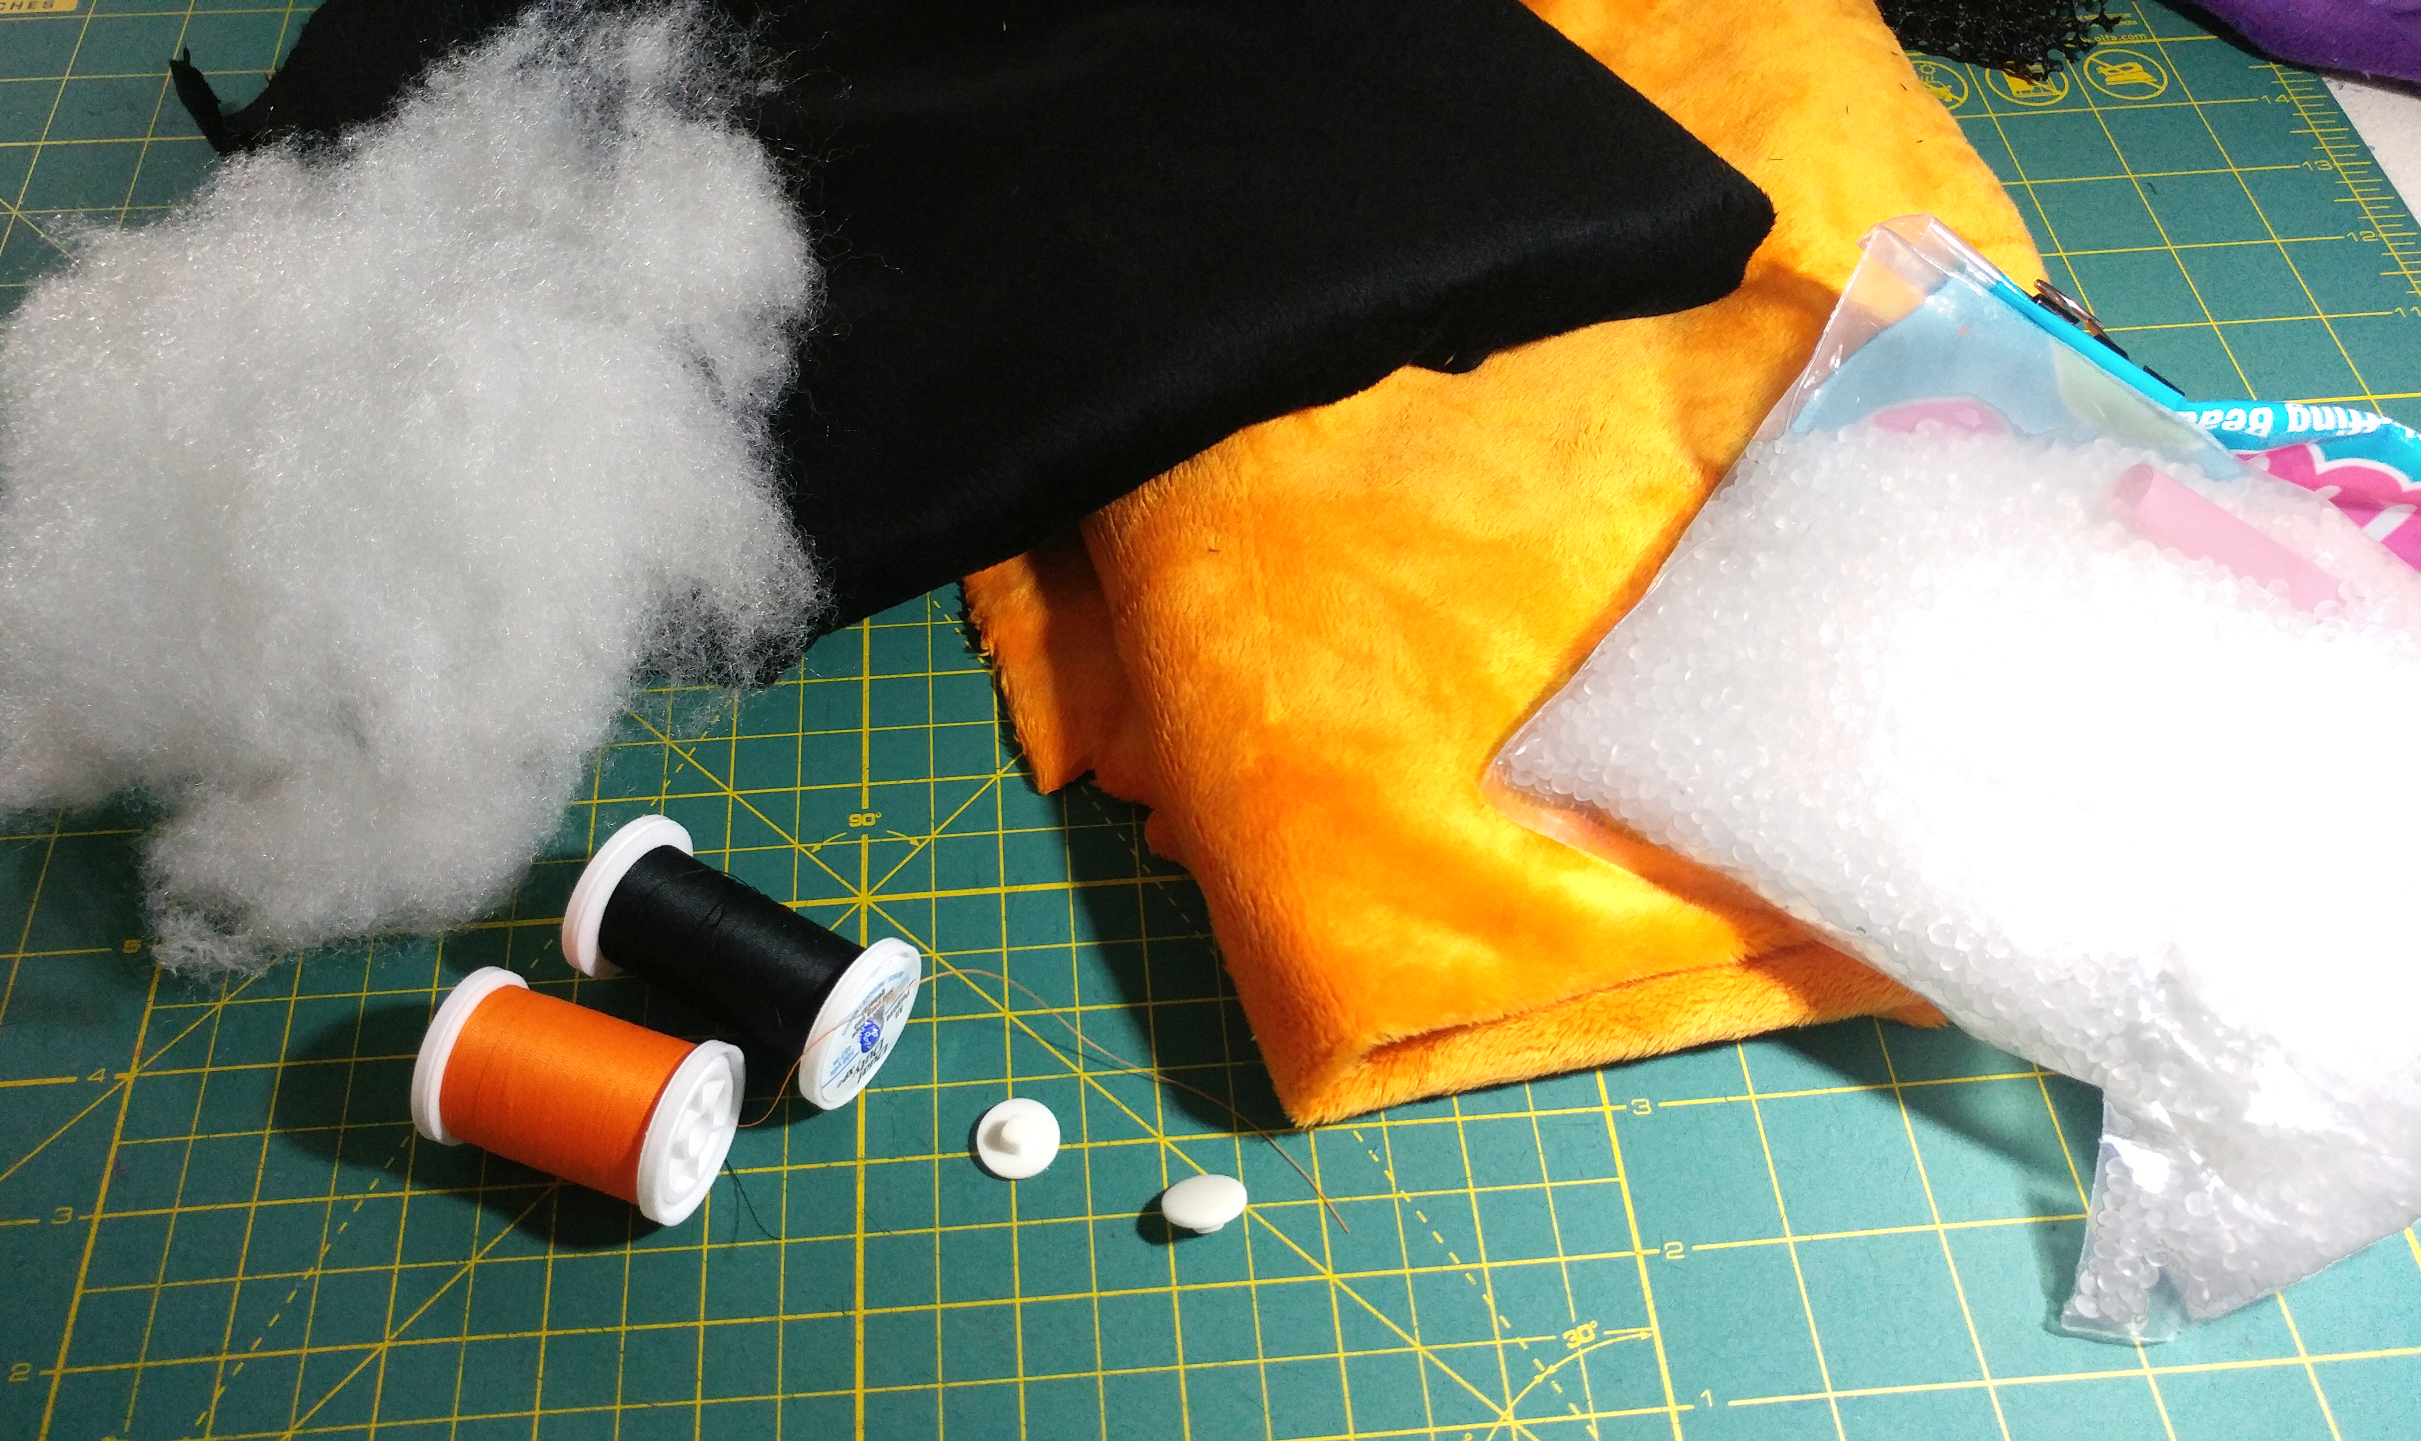
For Raphael's eyes, you will need two white round shank buttons that are around 1/4 inches in diameter. Shank buttons are the kind with a hollow protrusion in the back for thread to pass through. The weighted pellets help give Raphael a bit of bulk in his bottom, but you can use only stuffing if you want.
Here's a list of some suggested tools. Not all of them are necessary, so just go with what you're comfortable with.
-Scissors
-Pins
-Sewing machine
-Hand sewing needles (Including one as long as you can find)
-Seam ripper
Time to Sew!
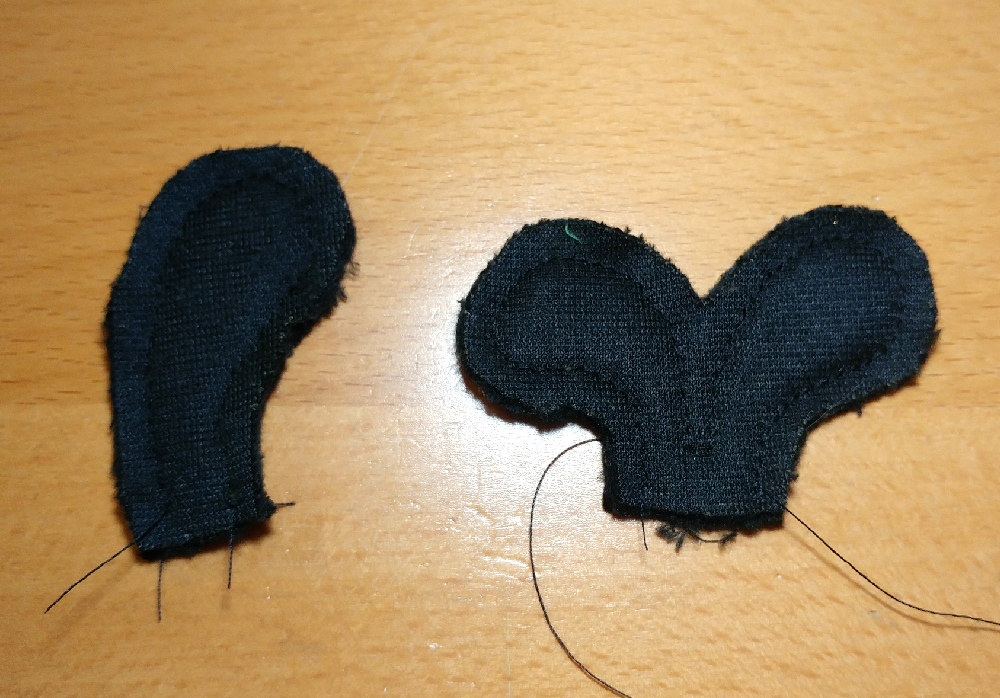
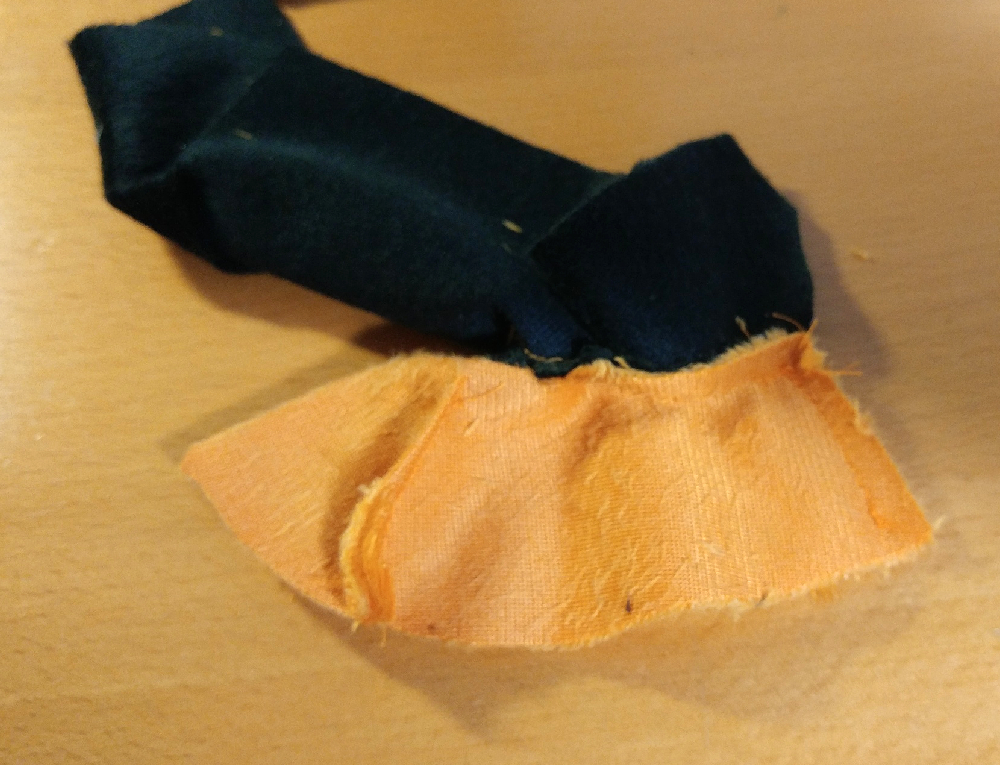
Match the two Hair 1 pieces together, right sides facing. Then sew around the Hair, leaving the bottom unsewn. Do the same for the Hair 2 pieces.
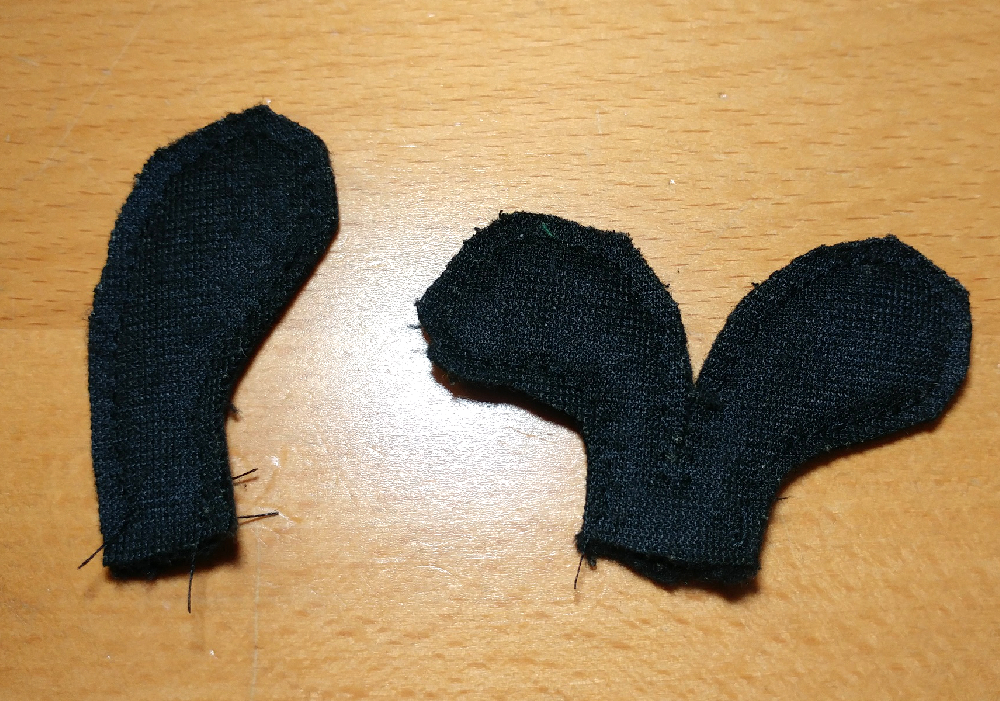
Trim the seam allowances around the area you just sewed, making especially sure to snip right down into the the crevice in the middle of Hair 1.
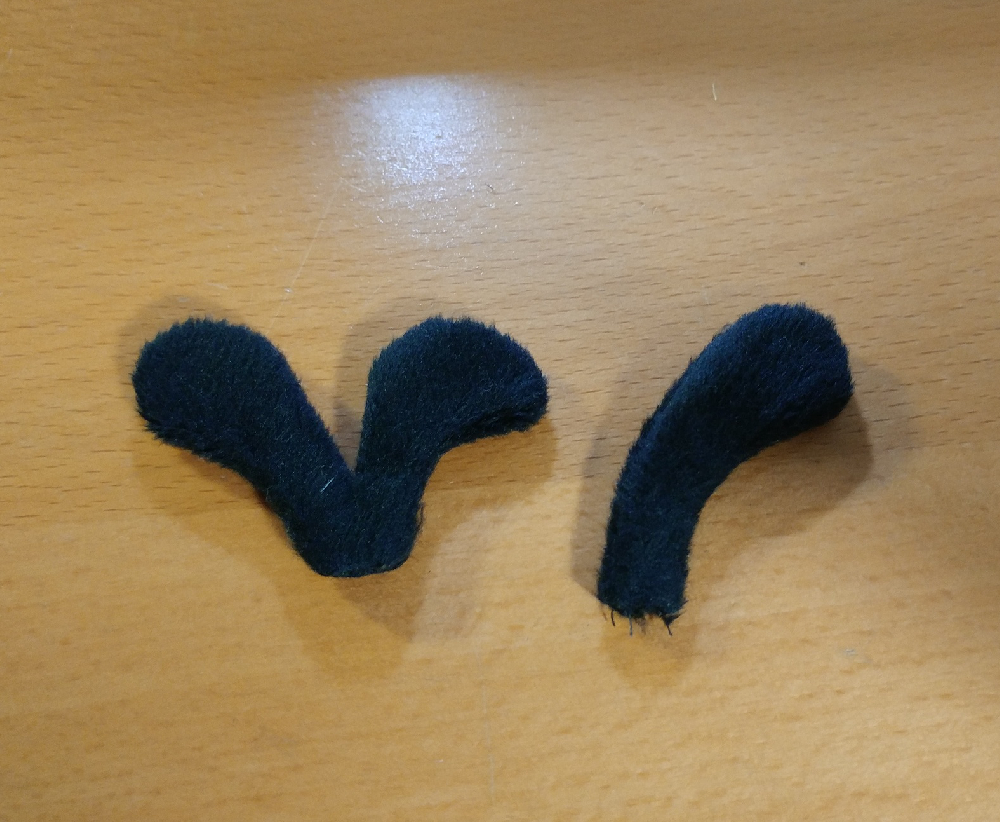
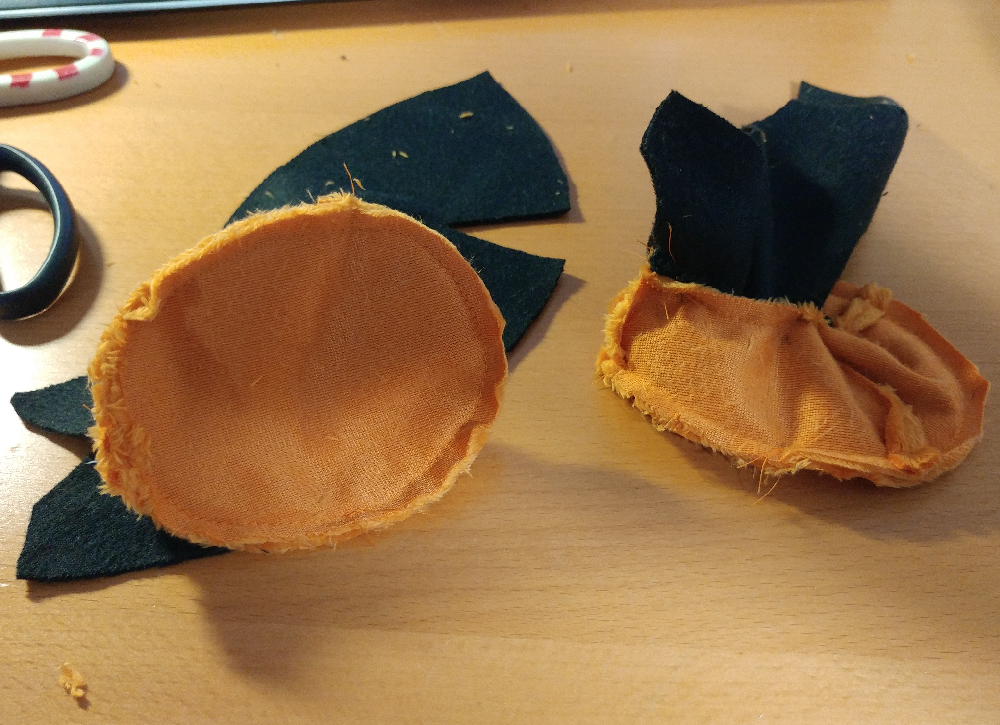
Use the opening at the Hair bottoms to turn them inside out.
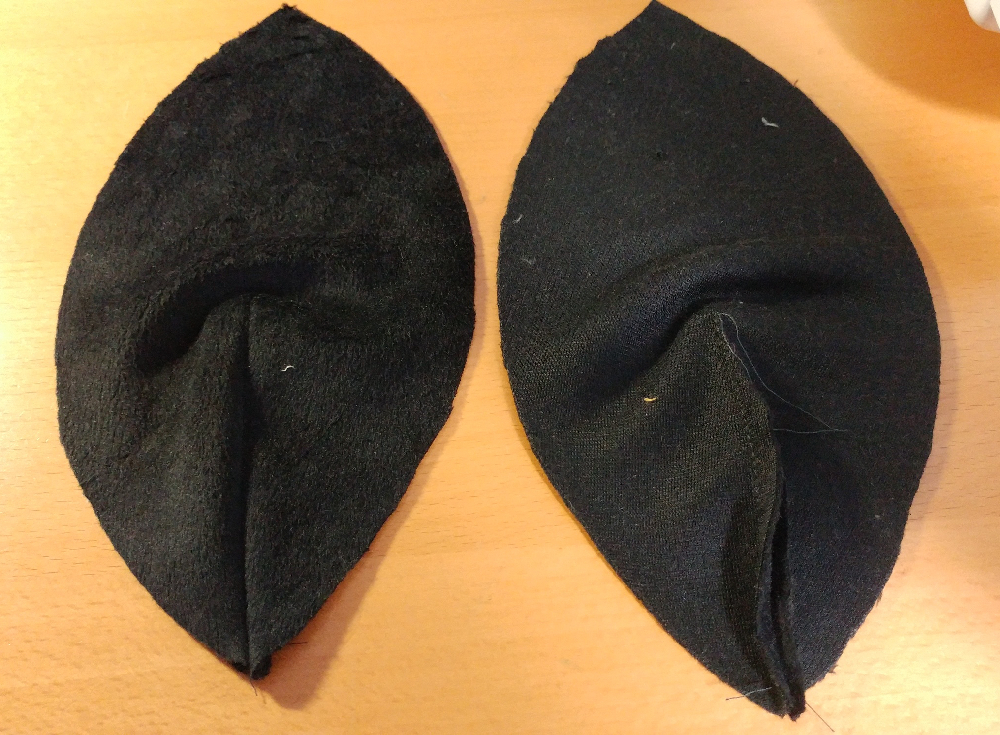
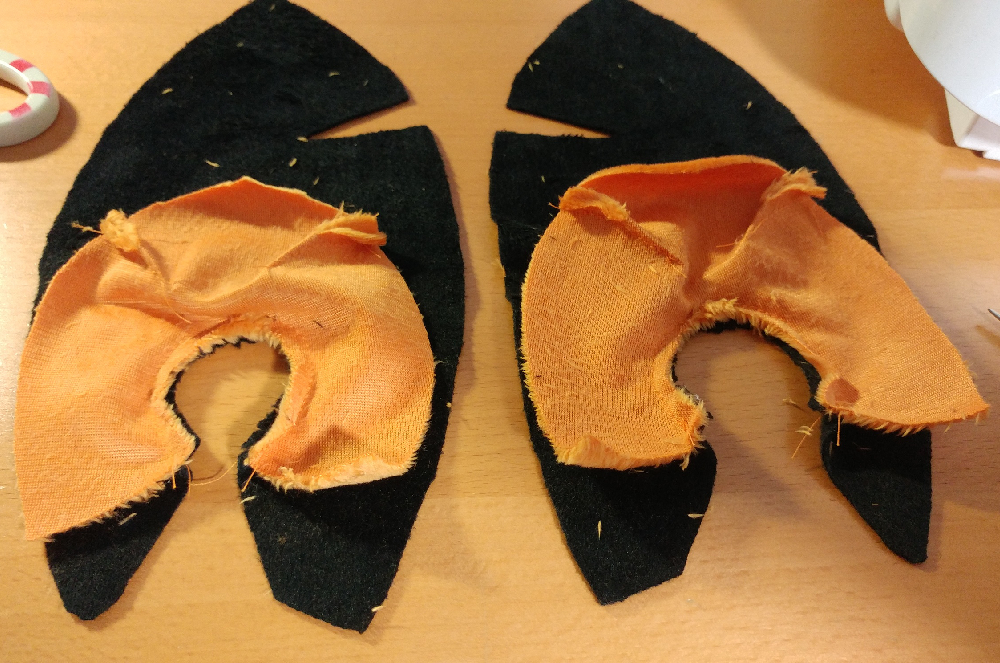
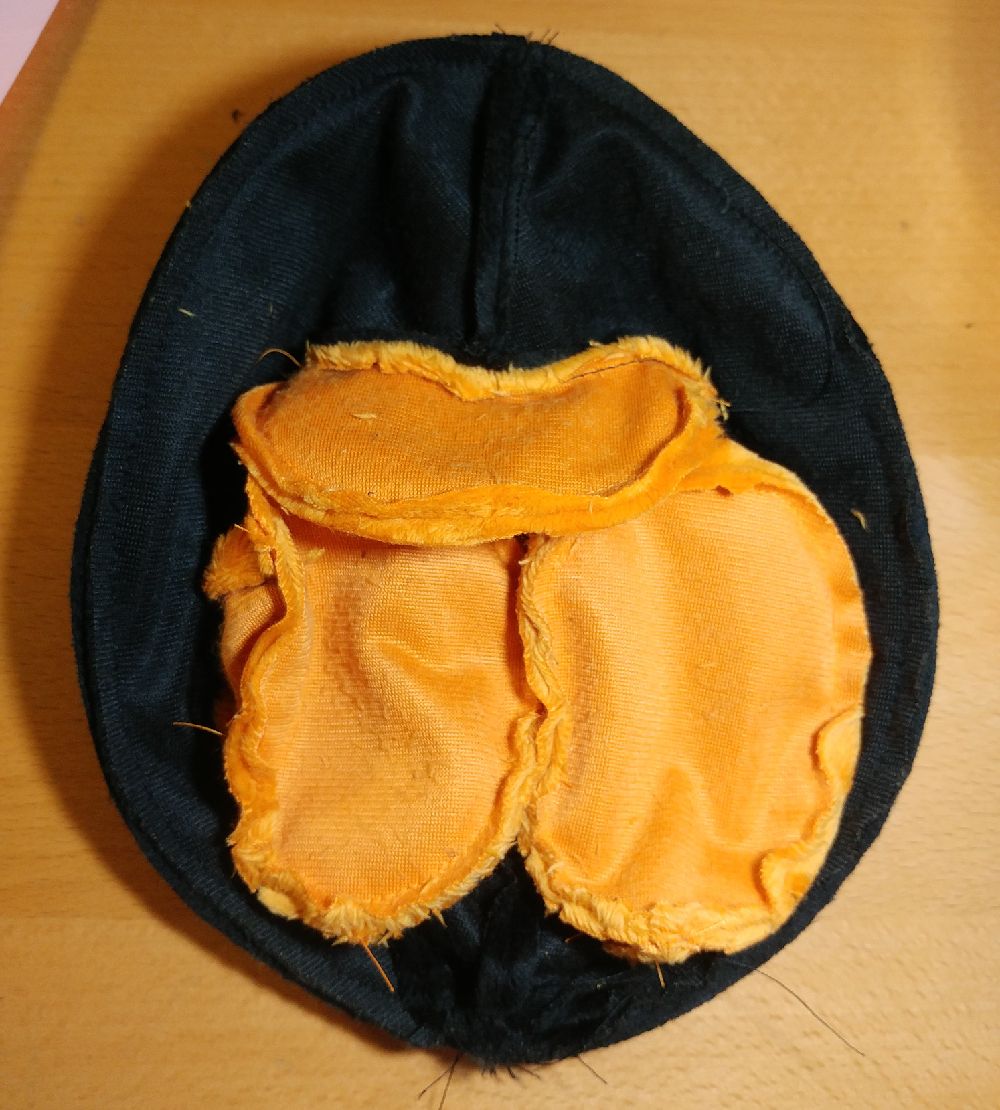
Fold the two Back pieces in half, then sew up the dart on each of them.
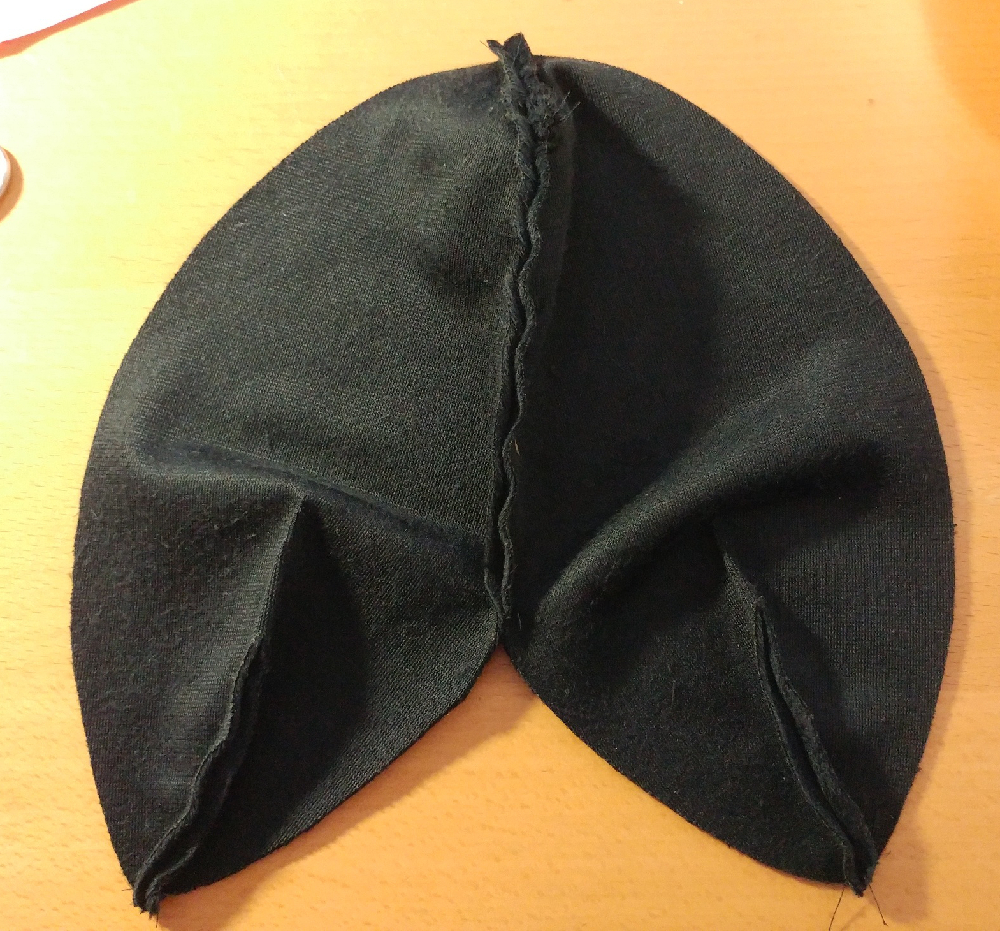
Match the Back pieces together. Using the tabs near the top of the Back to position them, sandwich Hair 1 and 2 such that Hair 2 in the middle of Hair 1. Sew down one side of the back, but leave about 2.5 inches or 6 cm unsewn at the bottom.
But! At the veeery bottom of the Back pieces, sew a small section up from the tip, about 0.5 inches or 1cm. See how my finger pokes out the unsewn area of the Back? Also take note of how the Hair pieces should look now that they're sewn into the Back.
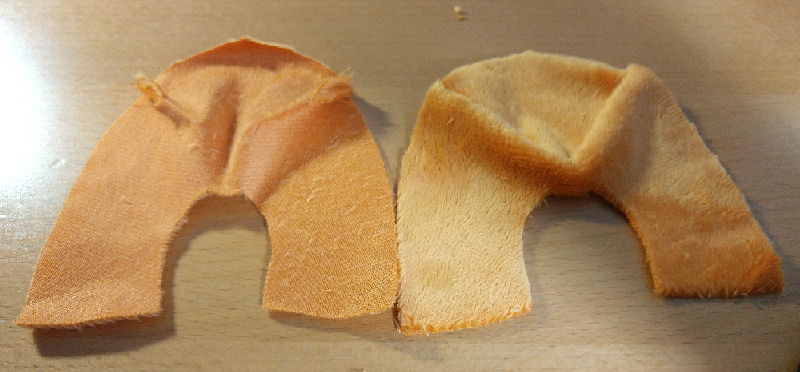
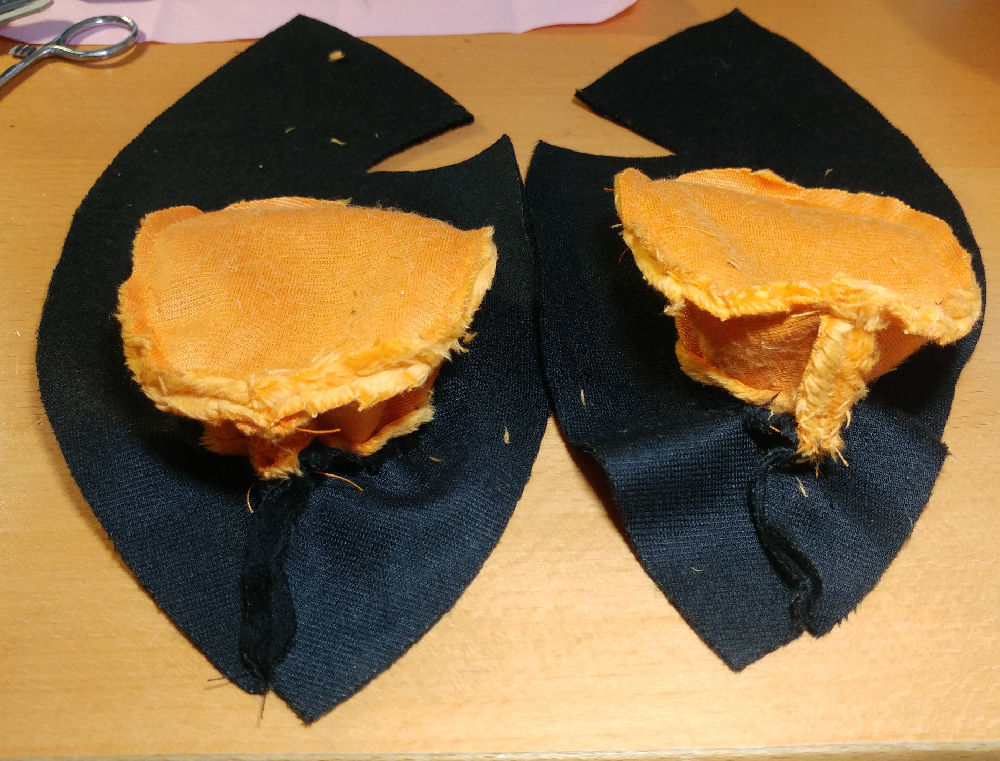
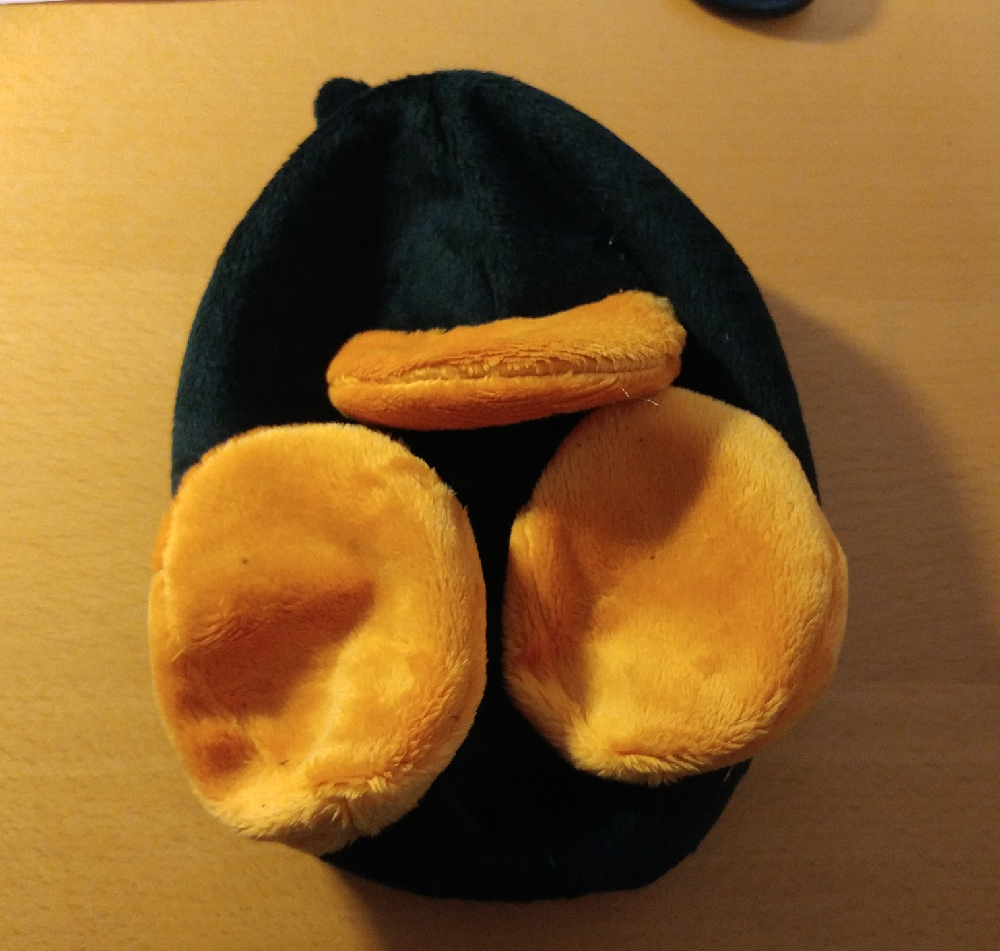
Fold the Foot pieces along their darts and give them a little sew to close them up.
Match the Foot pieces to the hole at the bottom of the Front pieces. You'll have an easier time doing this if you clip into the seam allowance of the Front piece so the hole can be easily pulled to fit the inner curve of the Foot.
Sew up the back of the Foot.
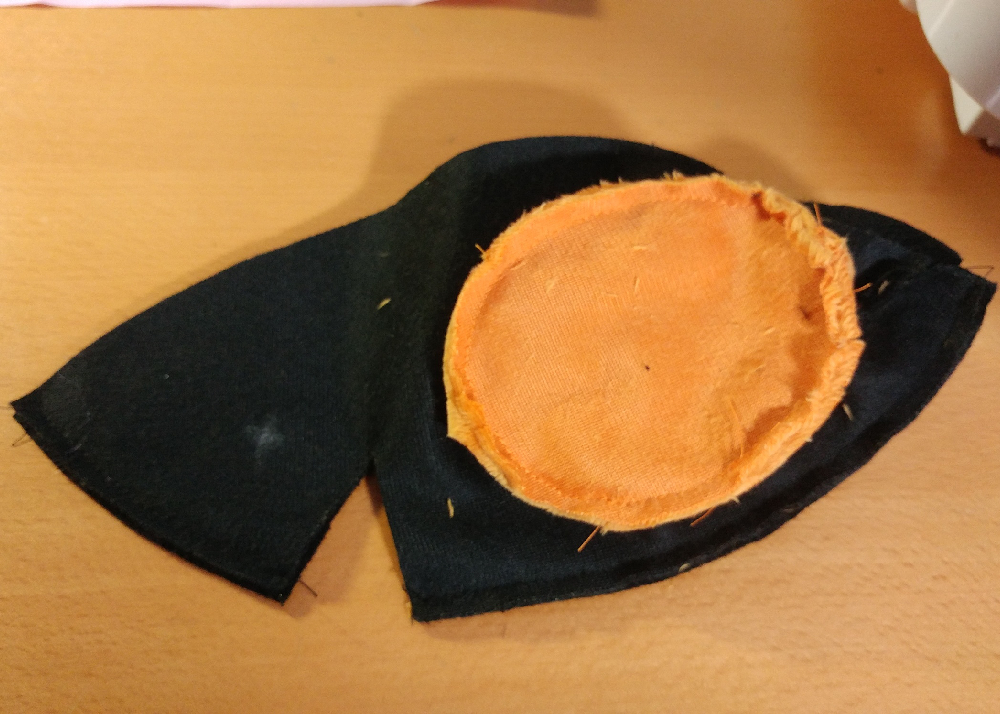
Sew the Foot Bottom to the bottom of the Foot pieces, using the tabs to align them properly.
Now sew the area of the Front above the 'heel' of the Foot.
Sew the Front pieces together down one side, leaving the opening for the Beak open.
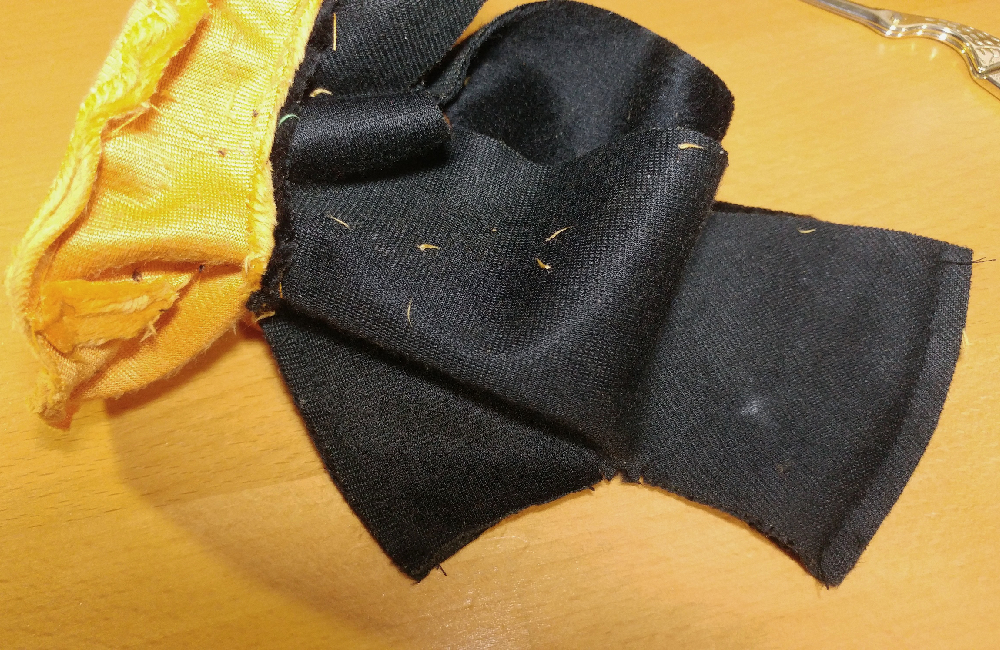
This part is a bit tricky; you'll want to prepare the opening for the Beak to be inserted. Start by cutting into the seam allowance at the edge of the opening a few times. See how I've done it? Now the opening can be spread wider.
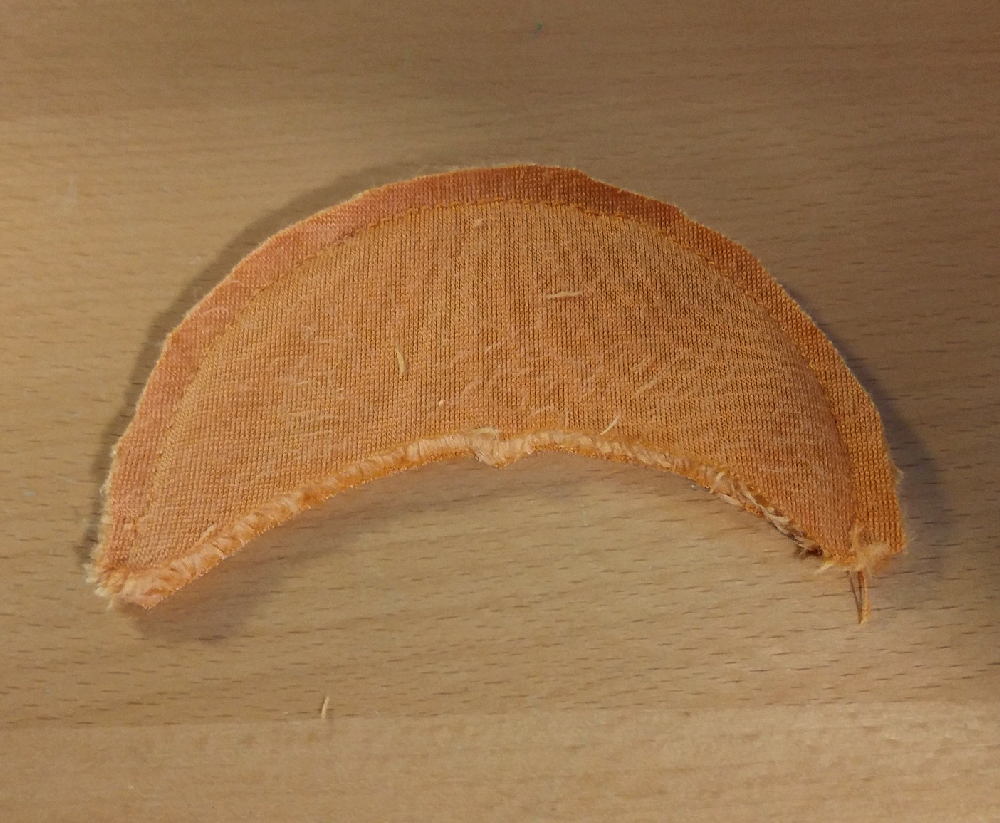
Match the Beak pieces together and sew along the longest curved side.
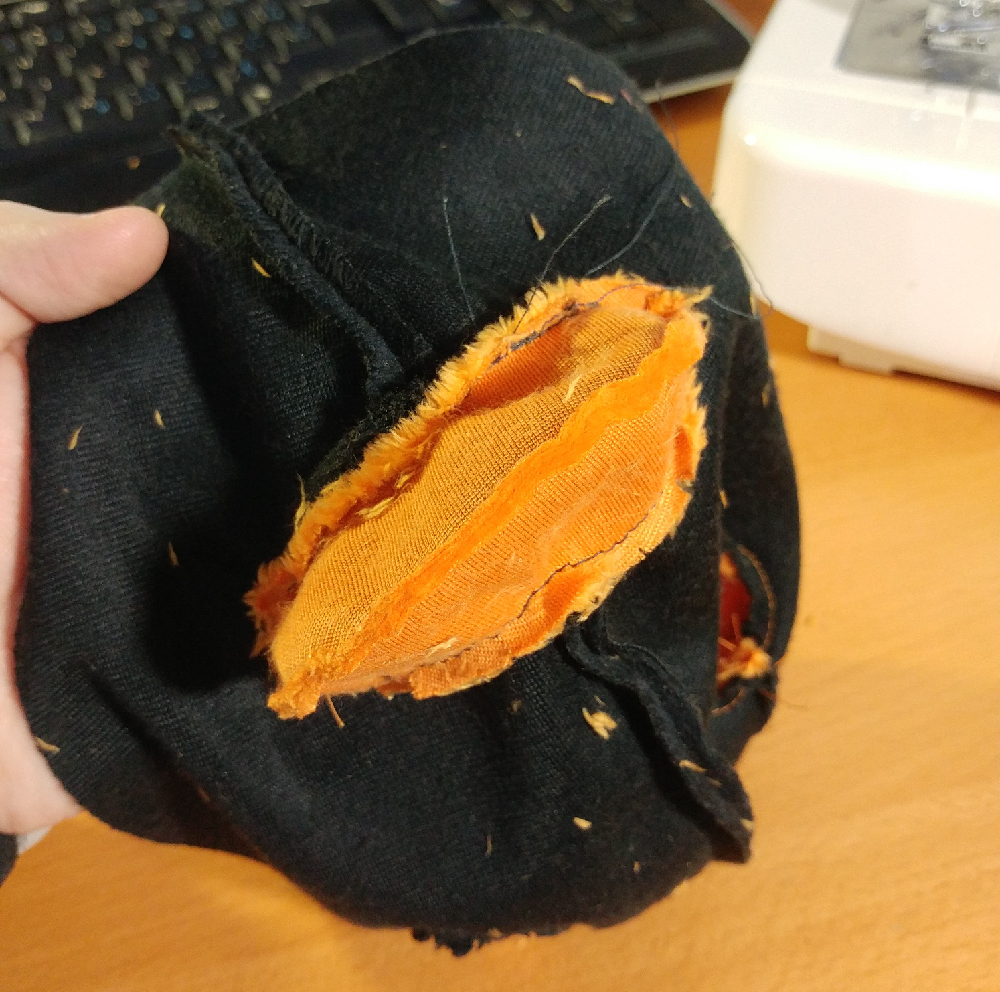
Sew the Beak into the opening at the Front. Use the tabs on the Beak to line it up with the seams on the Front, and try your best to really spread the edges of the opening so you can fit the edges of the Beak in there.
Now you can sew the entire Front to the Back.
Trim any excess seam allowances, especially on the curved parts of the Beak, the curved parts around the Foot, and the 'ankle' where the Foot connects to the Front. Now bag out (turn inside-out) Raphael. Look at how cute he already is!
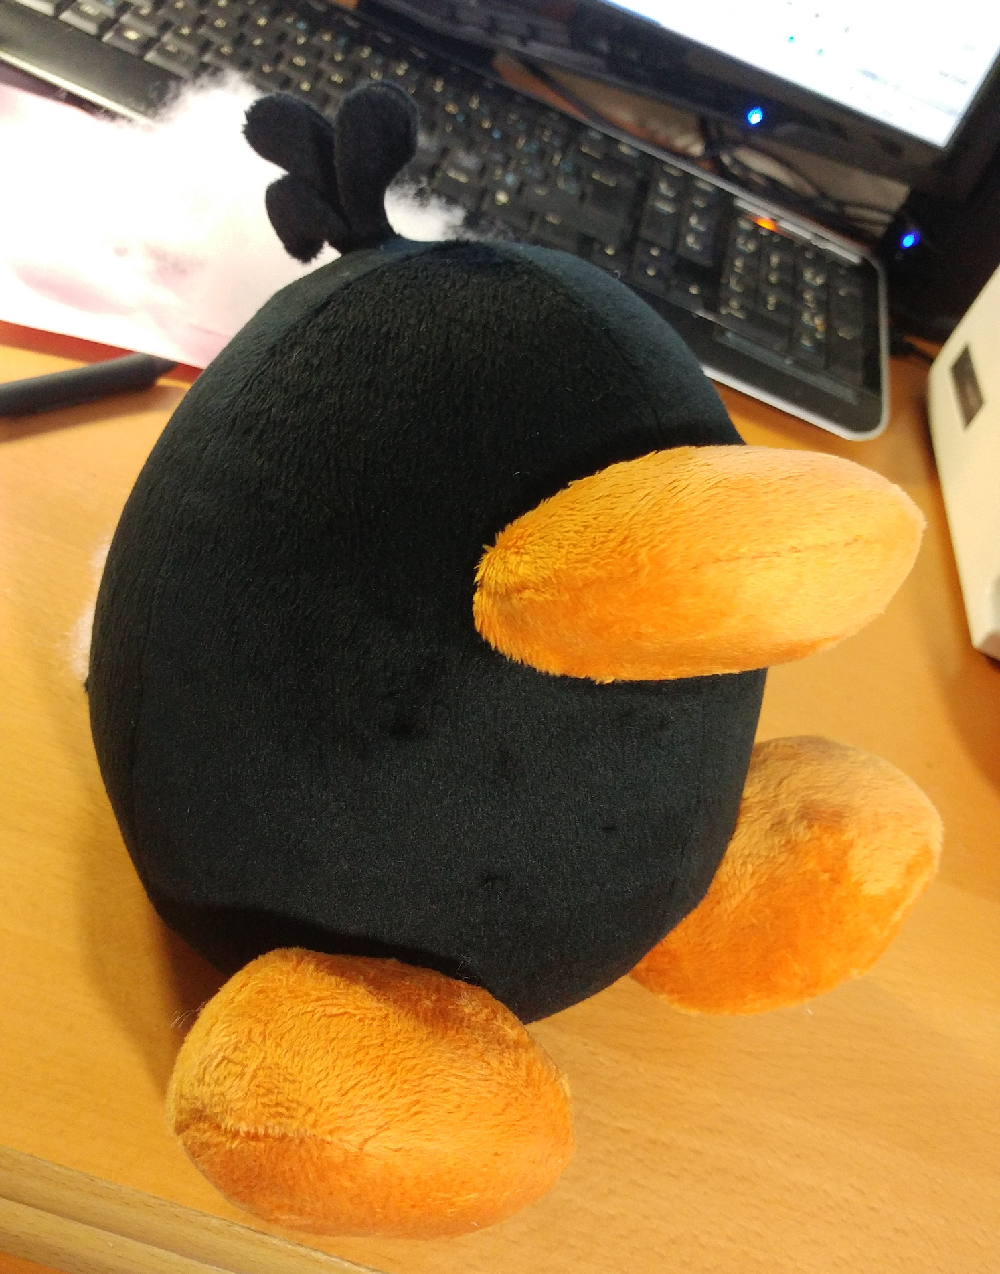
Give him a good stuffing. If you want to add weighted pellets, leave a bit of space at the bottom, add the pellets, then stuff him some more to plug him up.
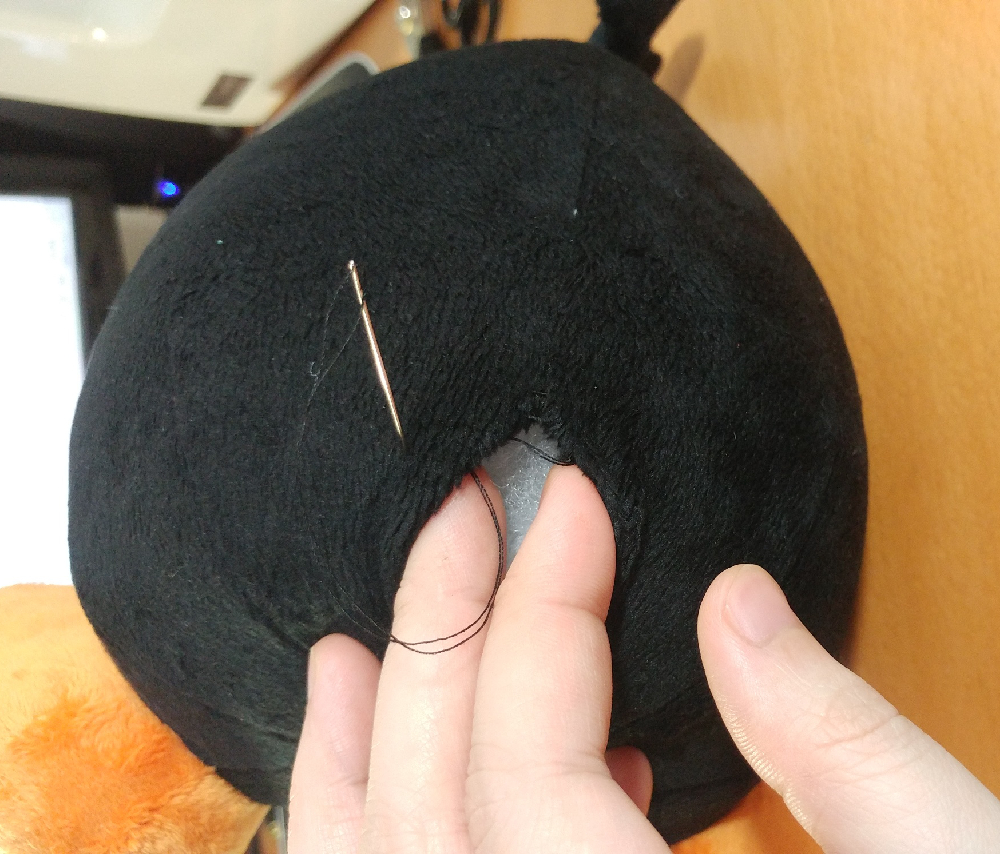
Sew up the hole at the Back using a ladder stitch, adding stuffing as needed, then tie off your thread.
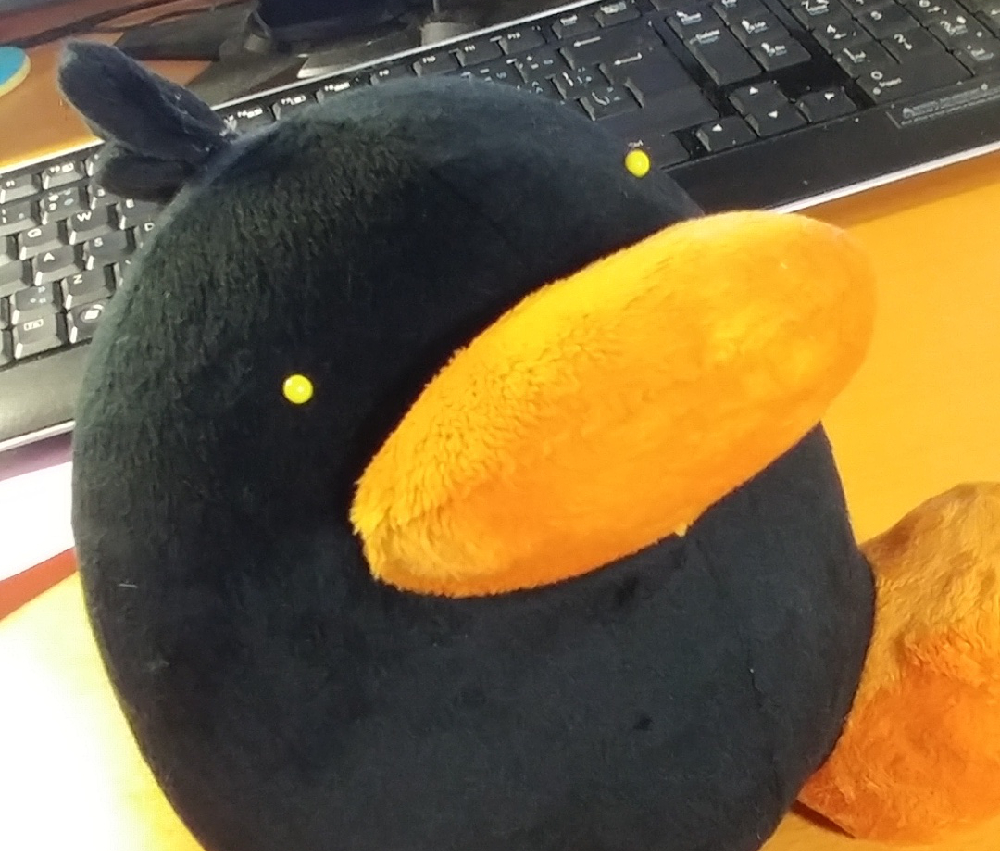
It's time to attach the eyes. I marked on my pattern where the eyes should be positioned, and I like to put pins on the plushie once it's stuffed so I can get a sense of what they'll look like.
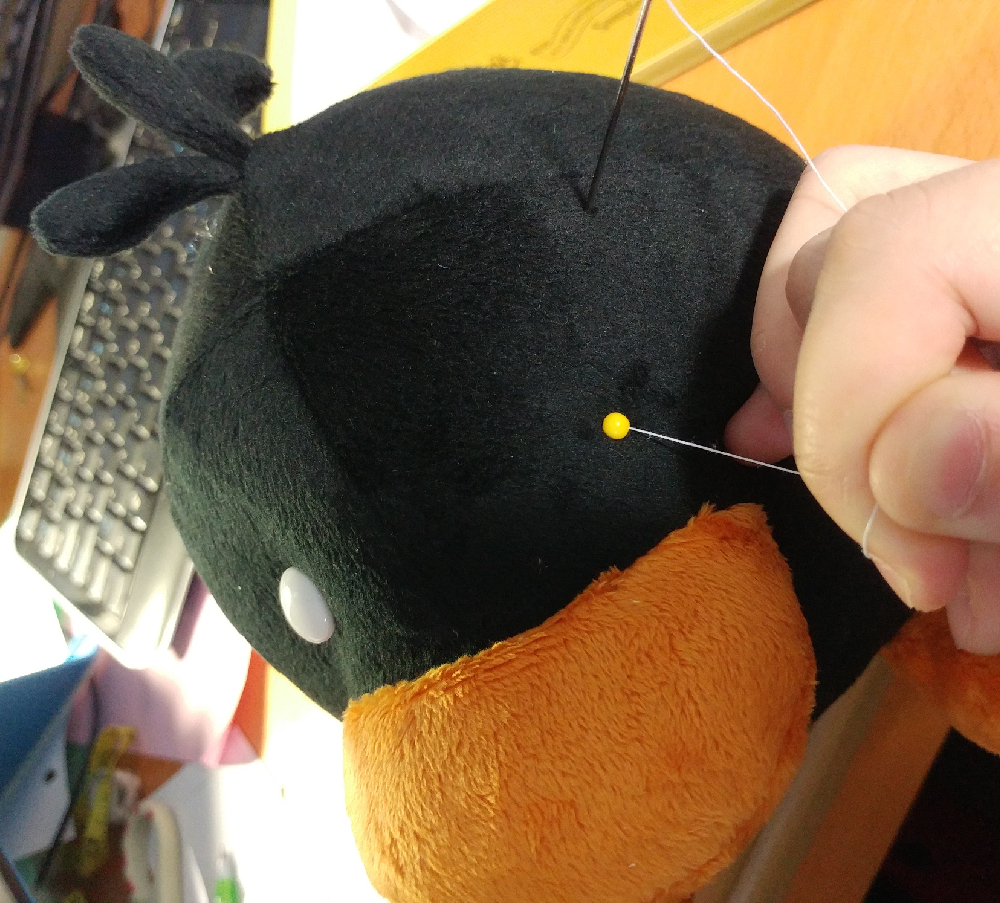
Sew on one eye using the longest needle you have. Then, without cutting the thread, poke your needle across the face to where the other eye will be. See how I'm pulling my thread? It gives some tension to the eye you just sewed. Try to maintain that tension as you sew on your second eye. Then poke your needle back to the first eye, still pulling to give your eyes tension. Go back and forth a few times until both eyes are securely and adorably sunk into the head.
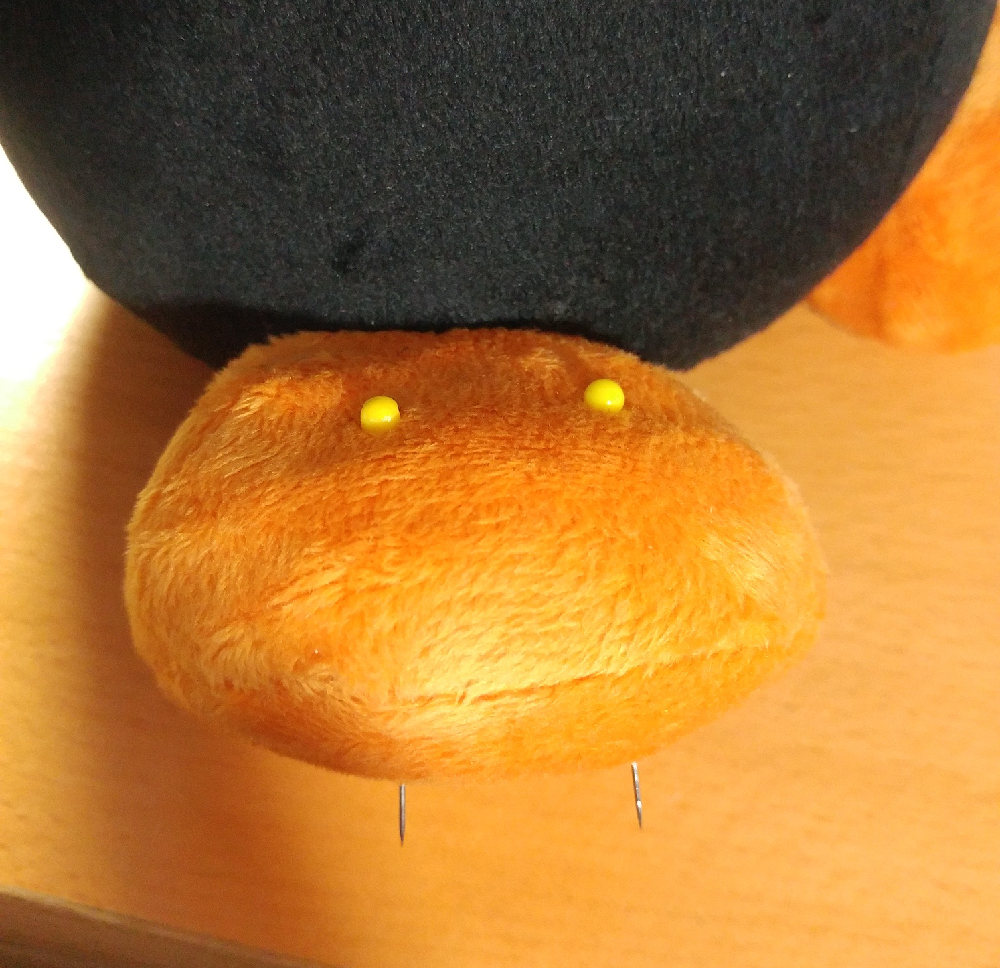
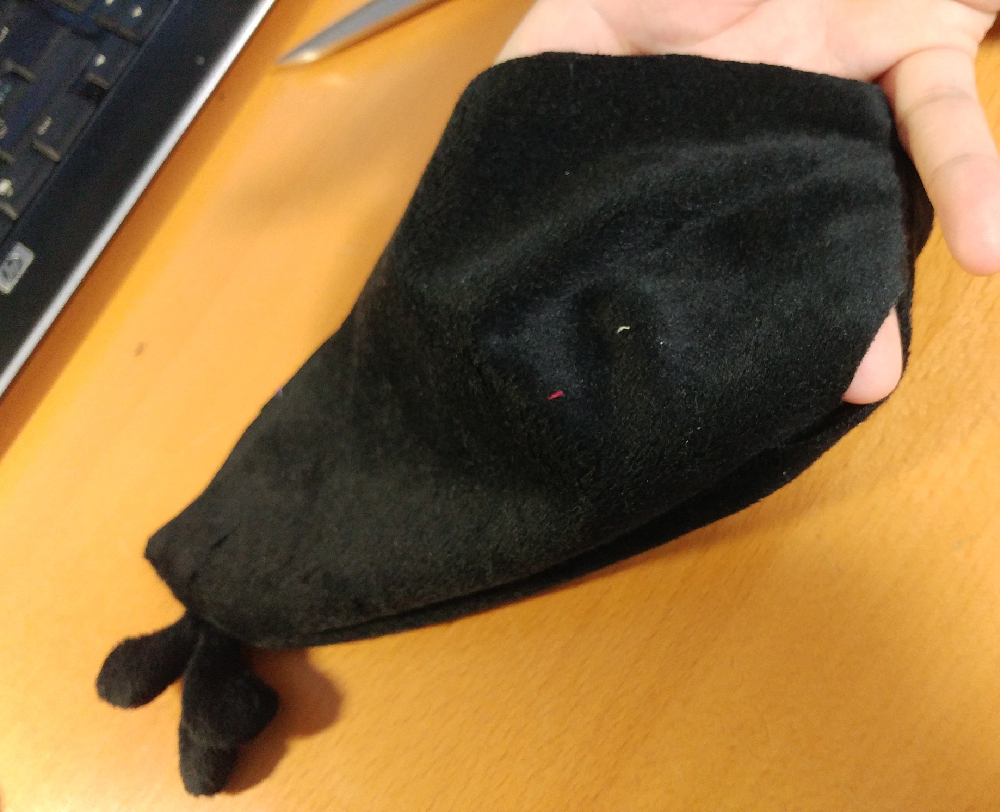
To define Raphael's toes, I once again use pins as markers, positioning them so the crevices between each toe are even on both the top side and under side of the foot.
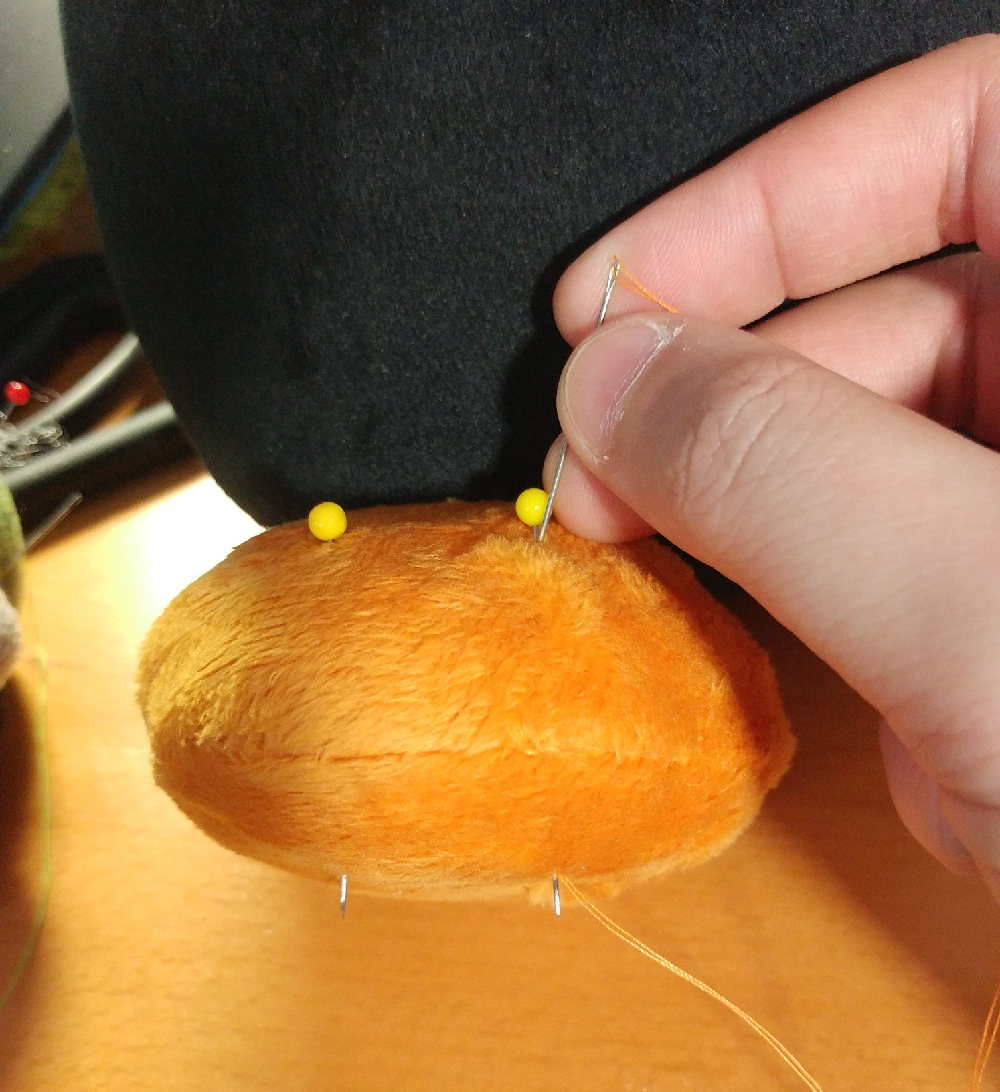
With a long orange thread and your long needle, poke through the Foot from the top to the bottom. Then wrap the thread around and poke through from the top to the bottom again. Give your thread a pull.
Now your thread has pulled the Foot inwards, making a division between two toes. Wrap the thread around a few times to make sure the toes are secure.
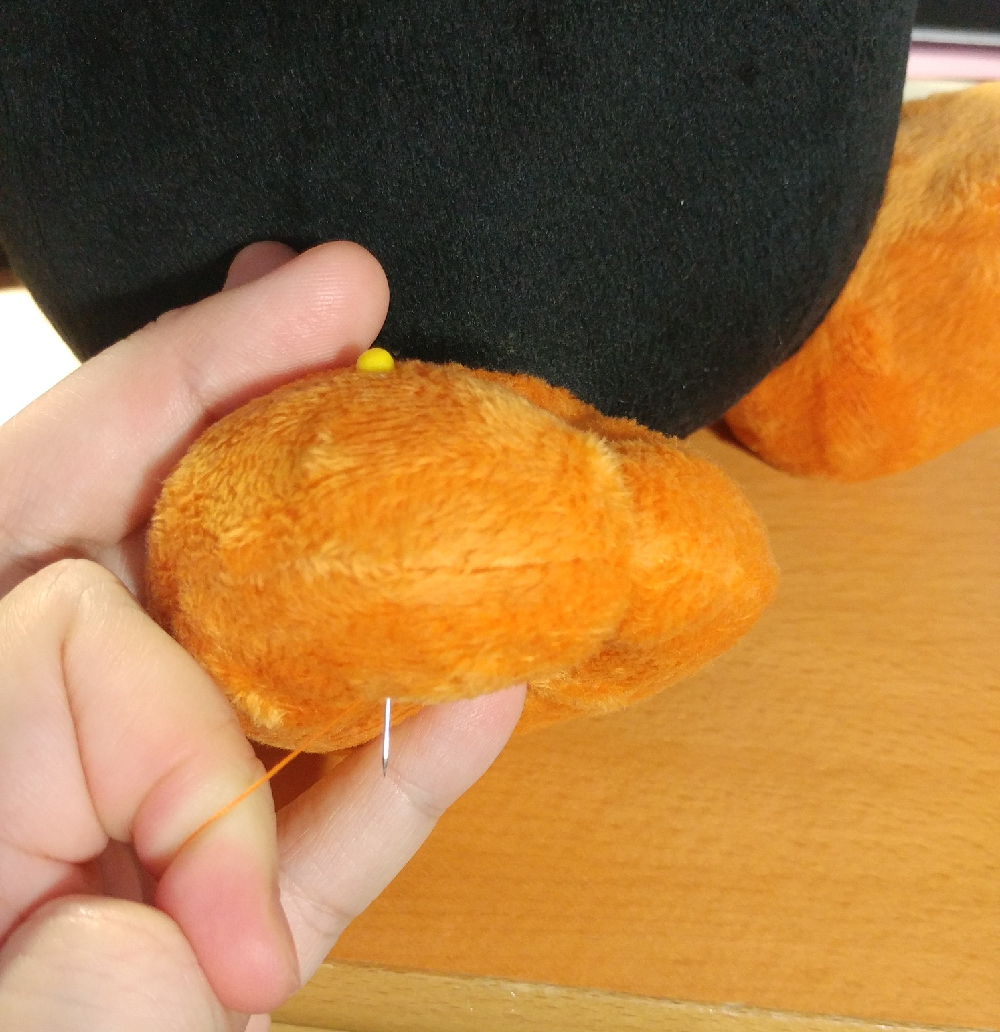
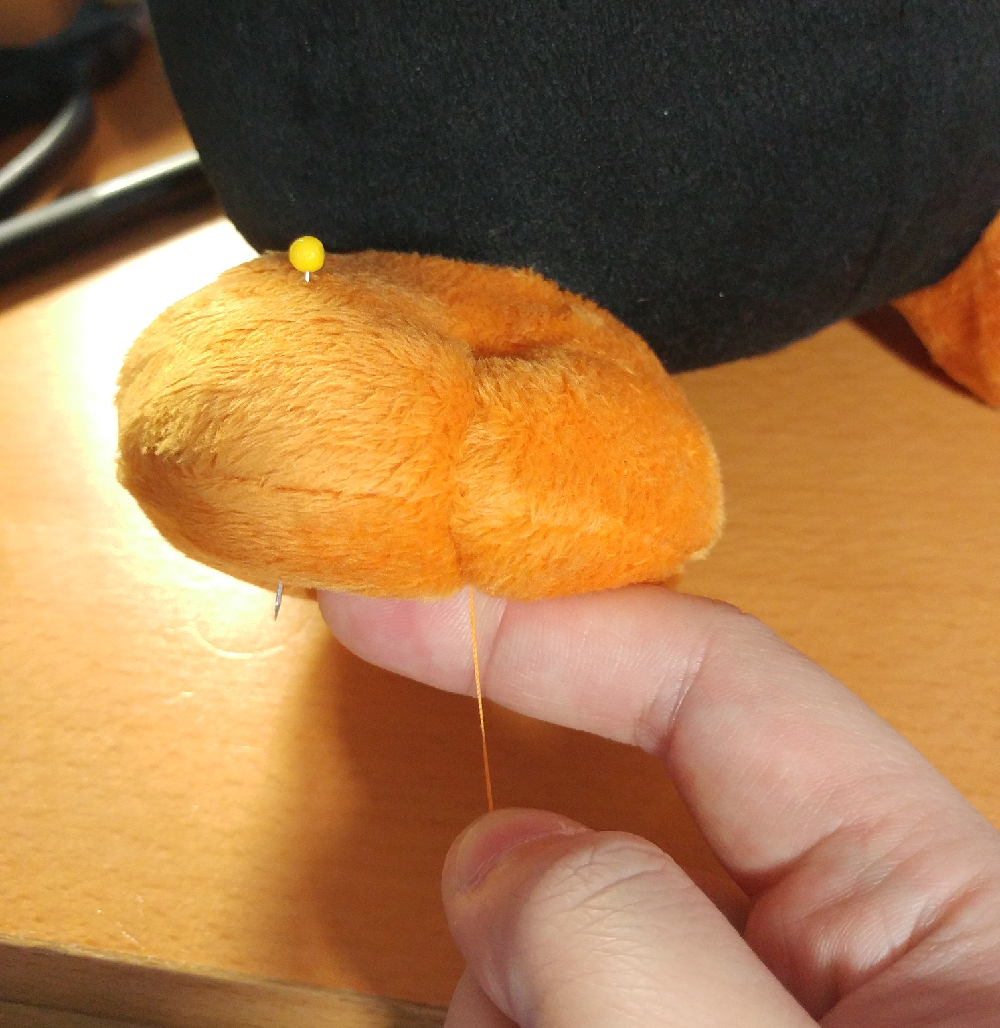
Now you can move on to the second toe crevice.
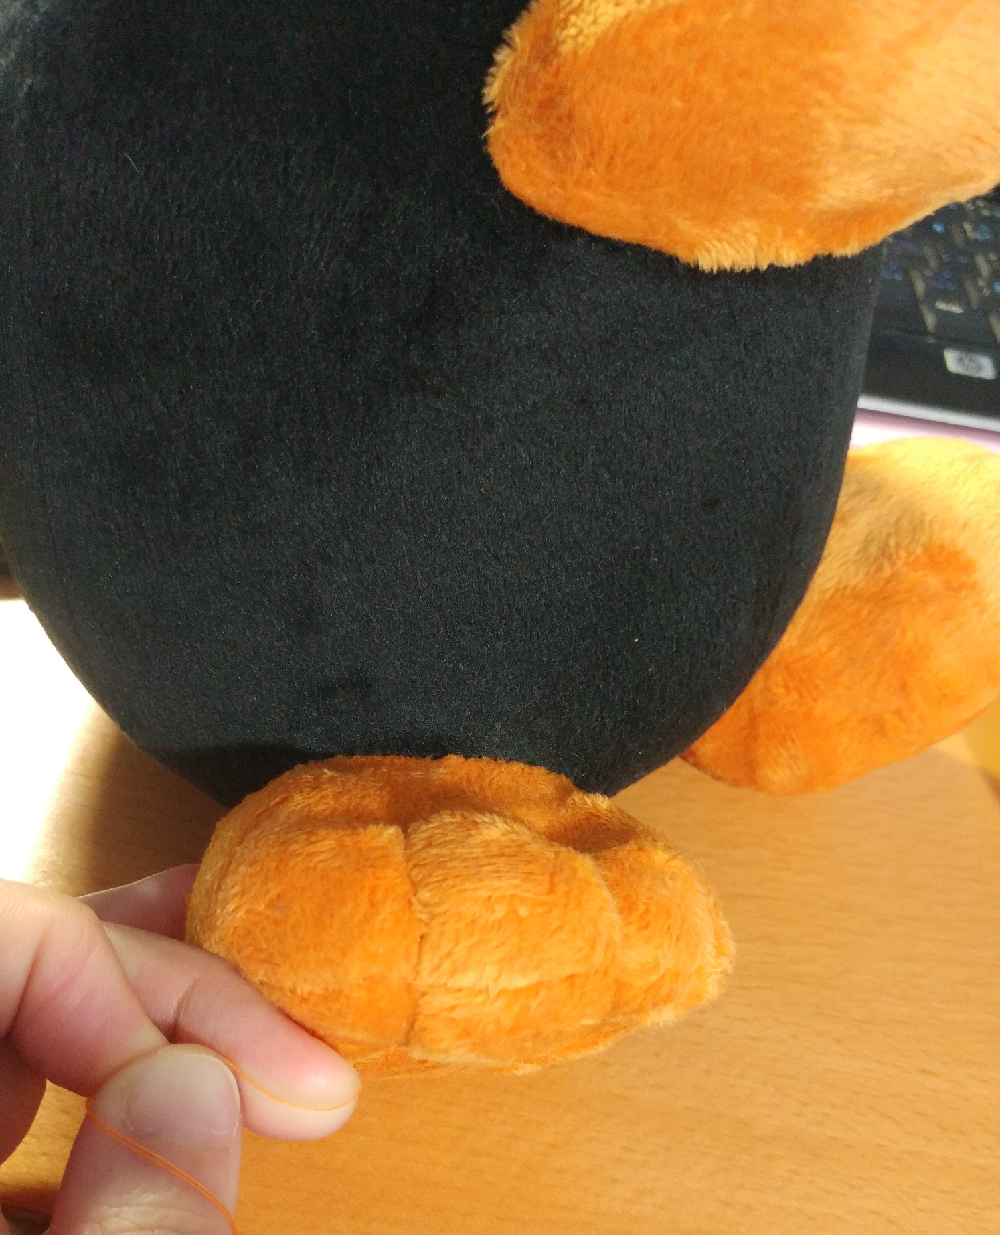
Wrap the thread around a few times again and now you have three toes. Tie off your thread and get going on making toes for the second foot!
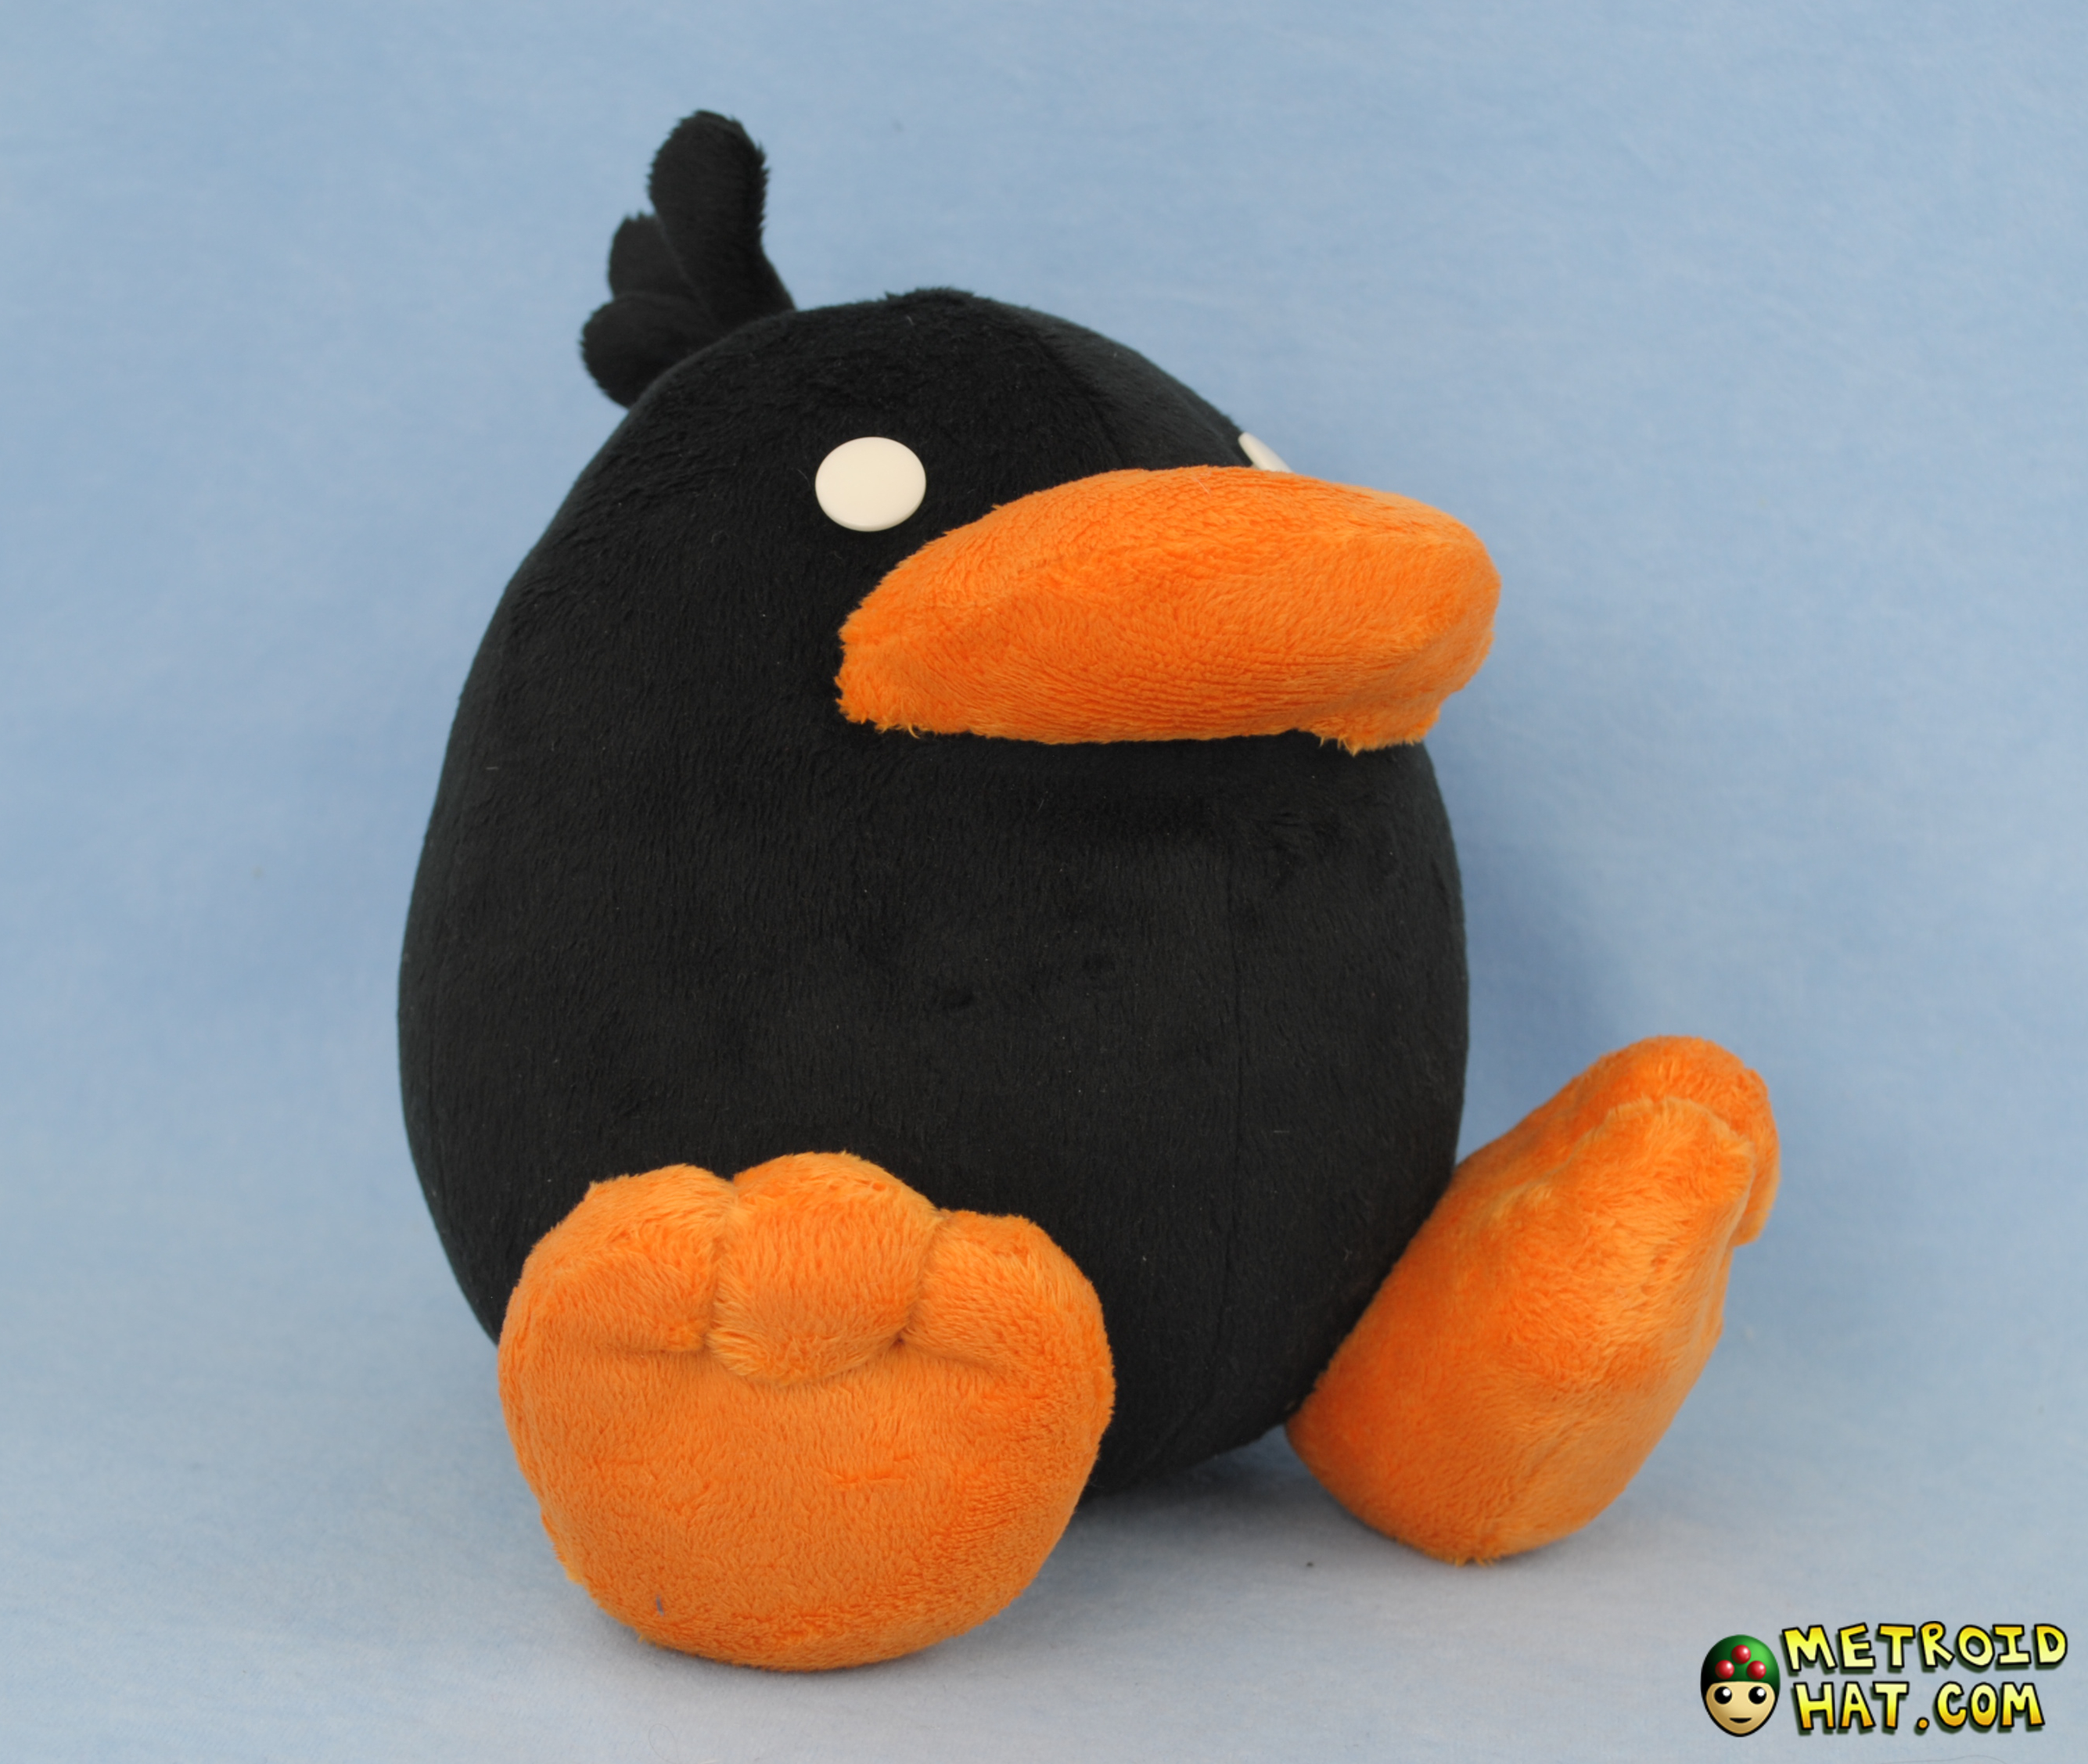
Congrats, you're done! If you had fun making Raphael, consider letting me know how he turned out! I'd appreciate comments and pictures through Twitter or email (eyes5_5eyes(AT)hotmail(DOT)com). Or if you want, a donation would be nice!
