Crocomire Plushie Tutorial Part 1

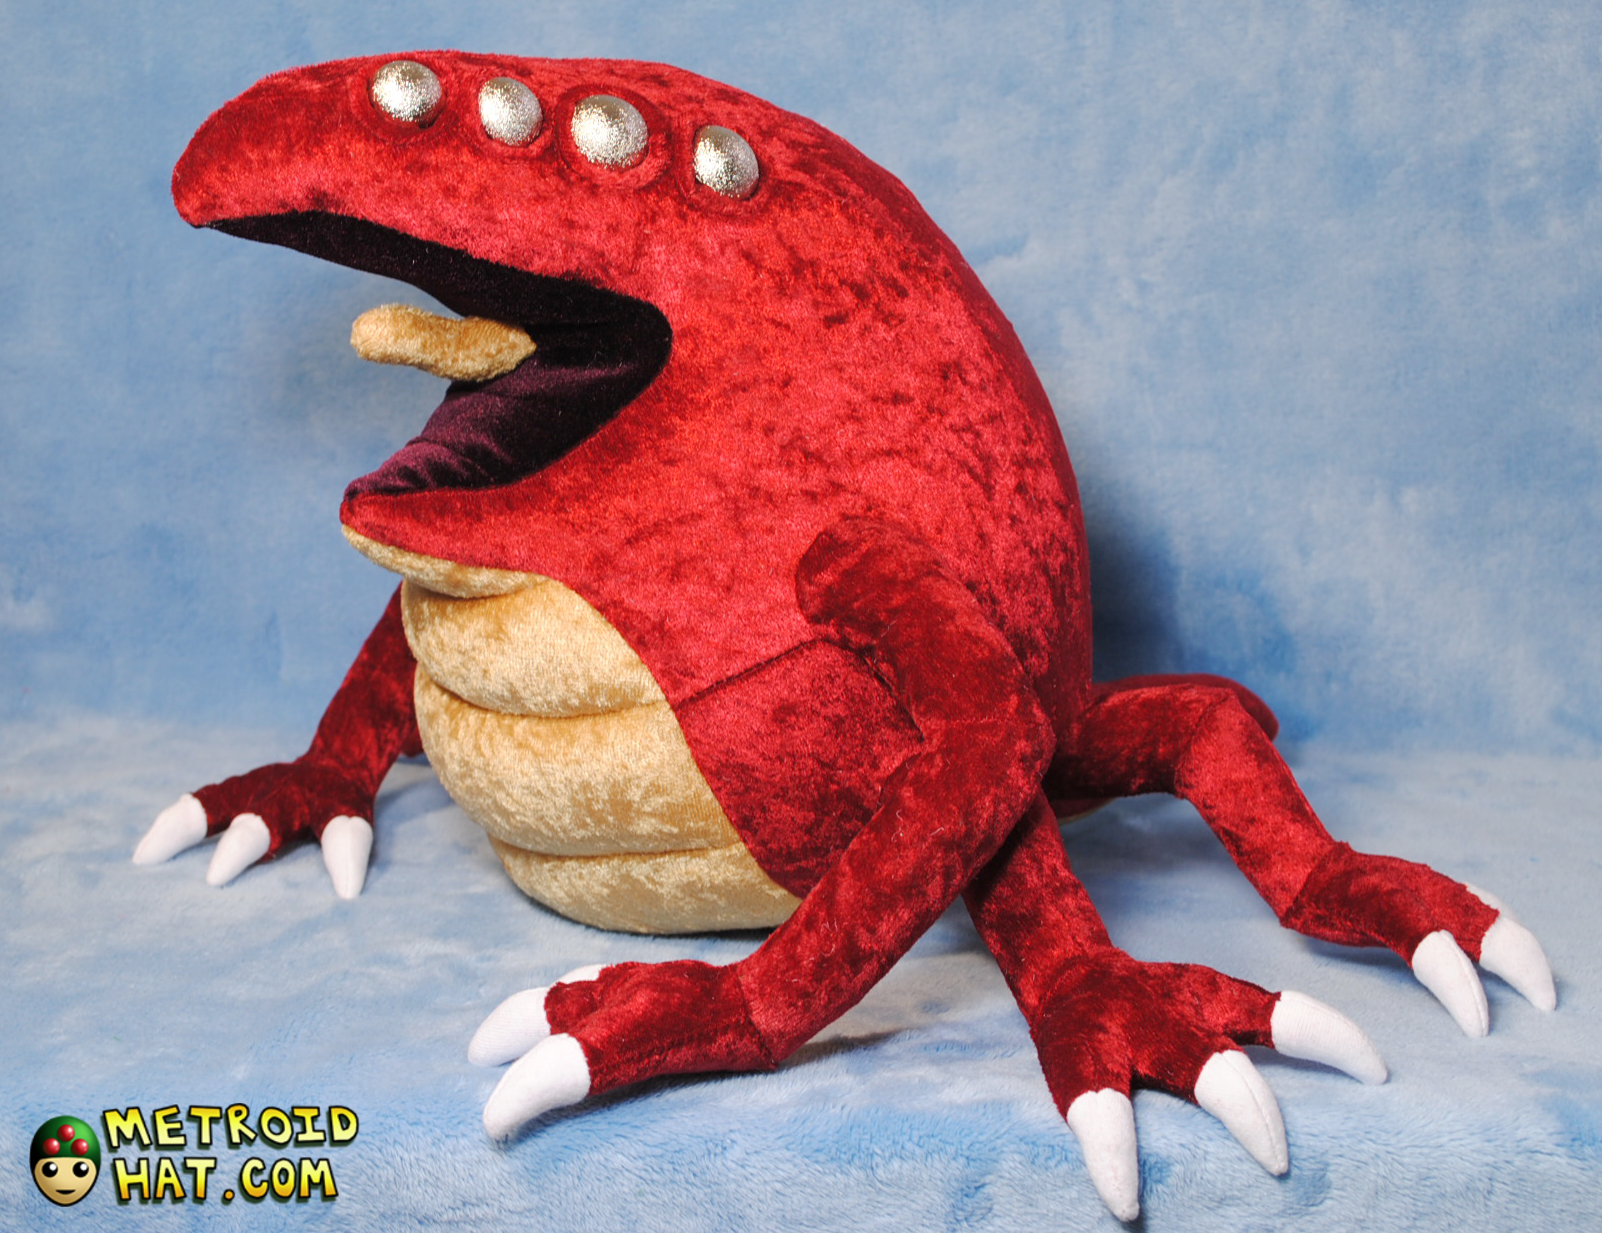
For the Awesome Games Done Quick 2019 charity marathon, I made a Crocomire plushie as a prize for their donation raffle. You know, Crocomire, the chubby lizardy guy in Super Metroid who was minding his own business when some marauding bounty hunter came along and made him realize that structural integrity is a serious consideration when developing real estate on property with questionable tectonic activity.
Anyways, here's a tutorial on how to make your own Crocomire!
A few things before we get started...
I'd like to emphasize that this is an ADVANCED tutorial. The fabric is difficult to sew and there are many small fiddly parts. I recommend that you have experienced making a few plushies before you try to make Crocomire and that you know how to use a sewing machine. But hey, if you have gumption and patience even though you're a beginner, feel free to tackle this big boi!
Either way, it's a good idea to check out my Sewing Materials and Techniques page for an introduction or refresher on the basics of sewing.
Pattern
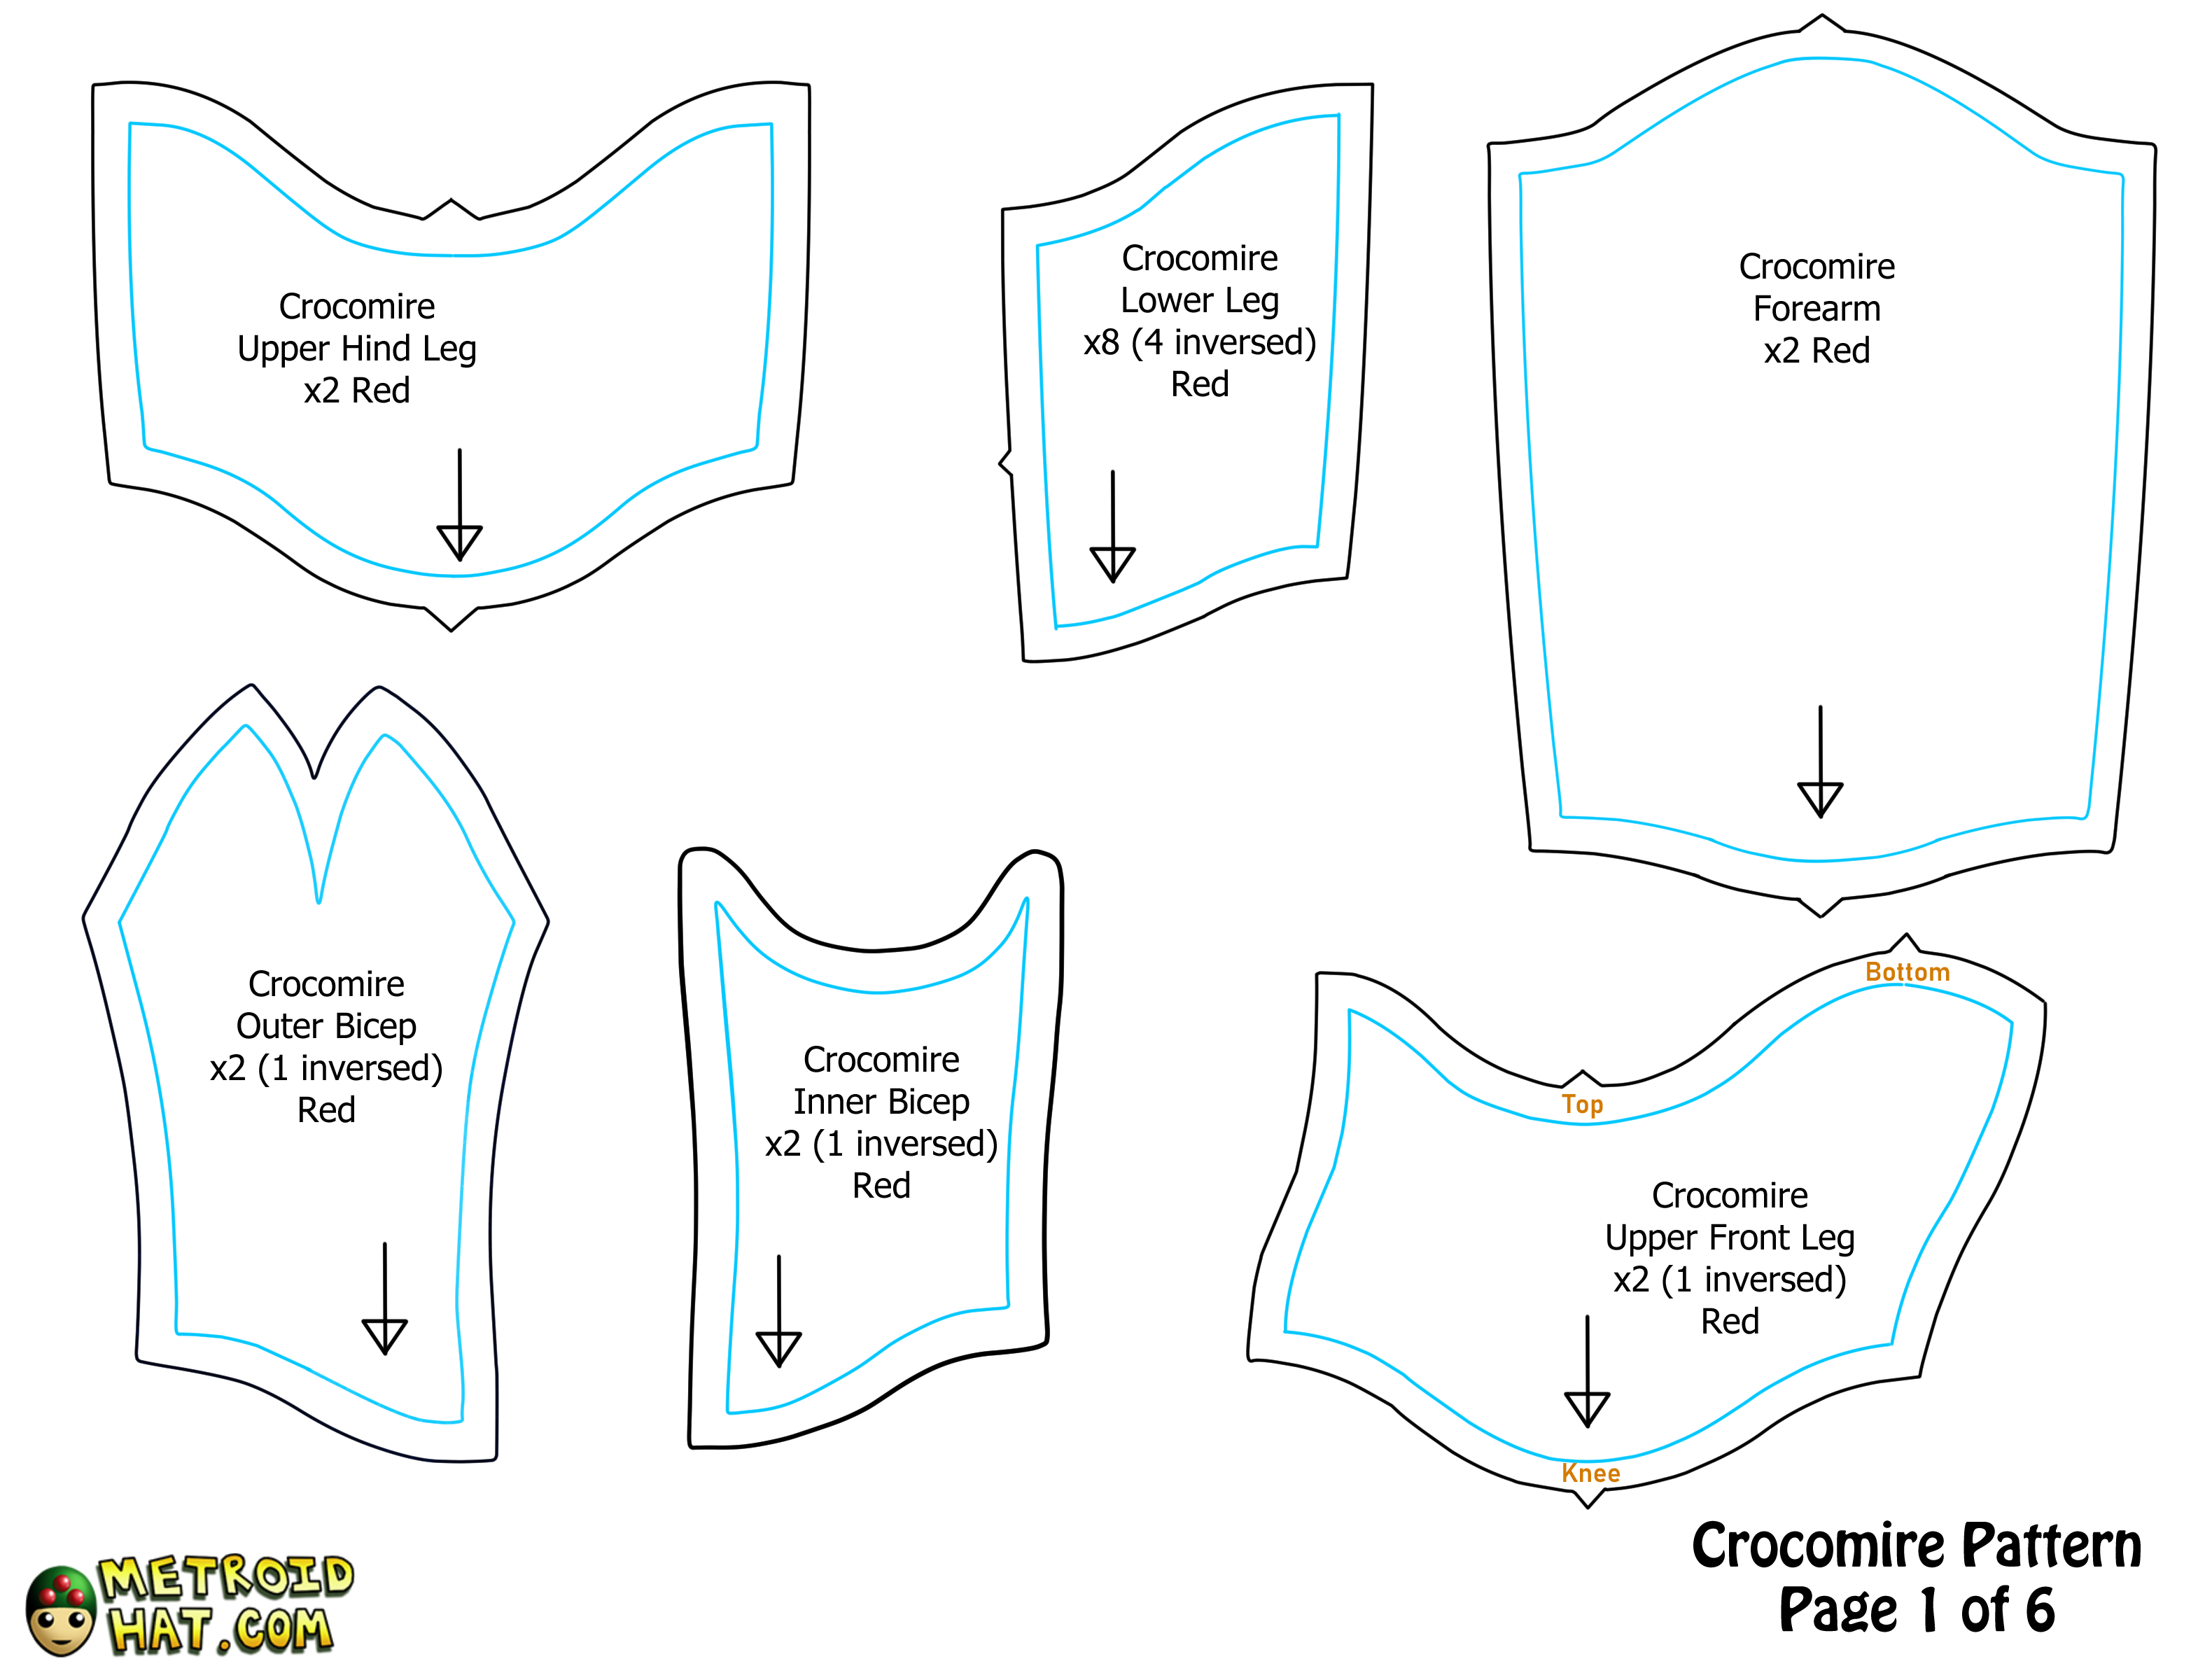
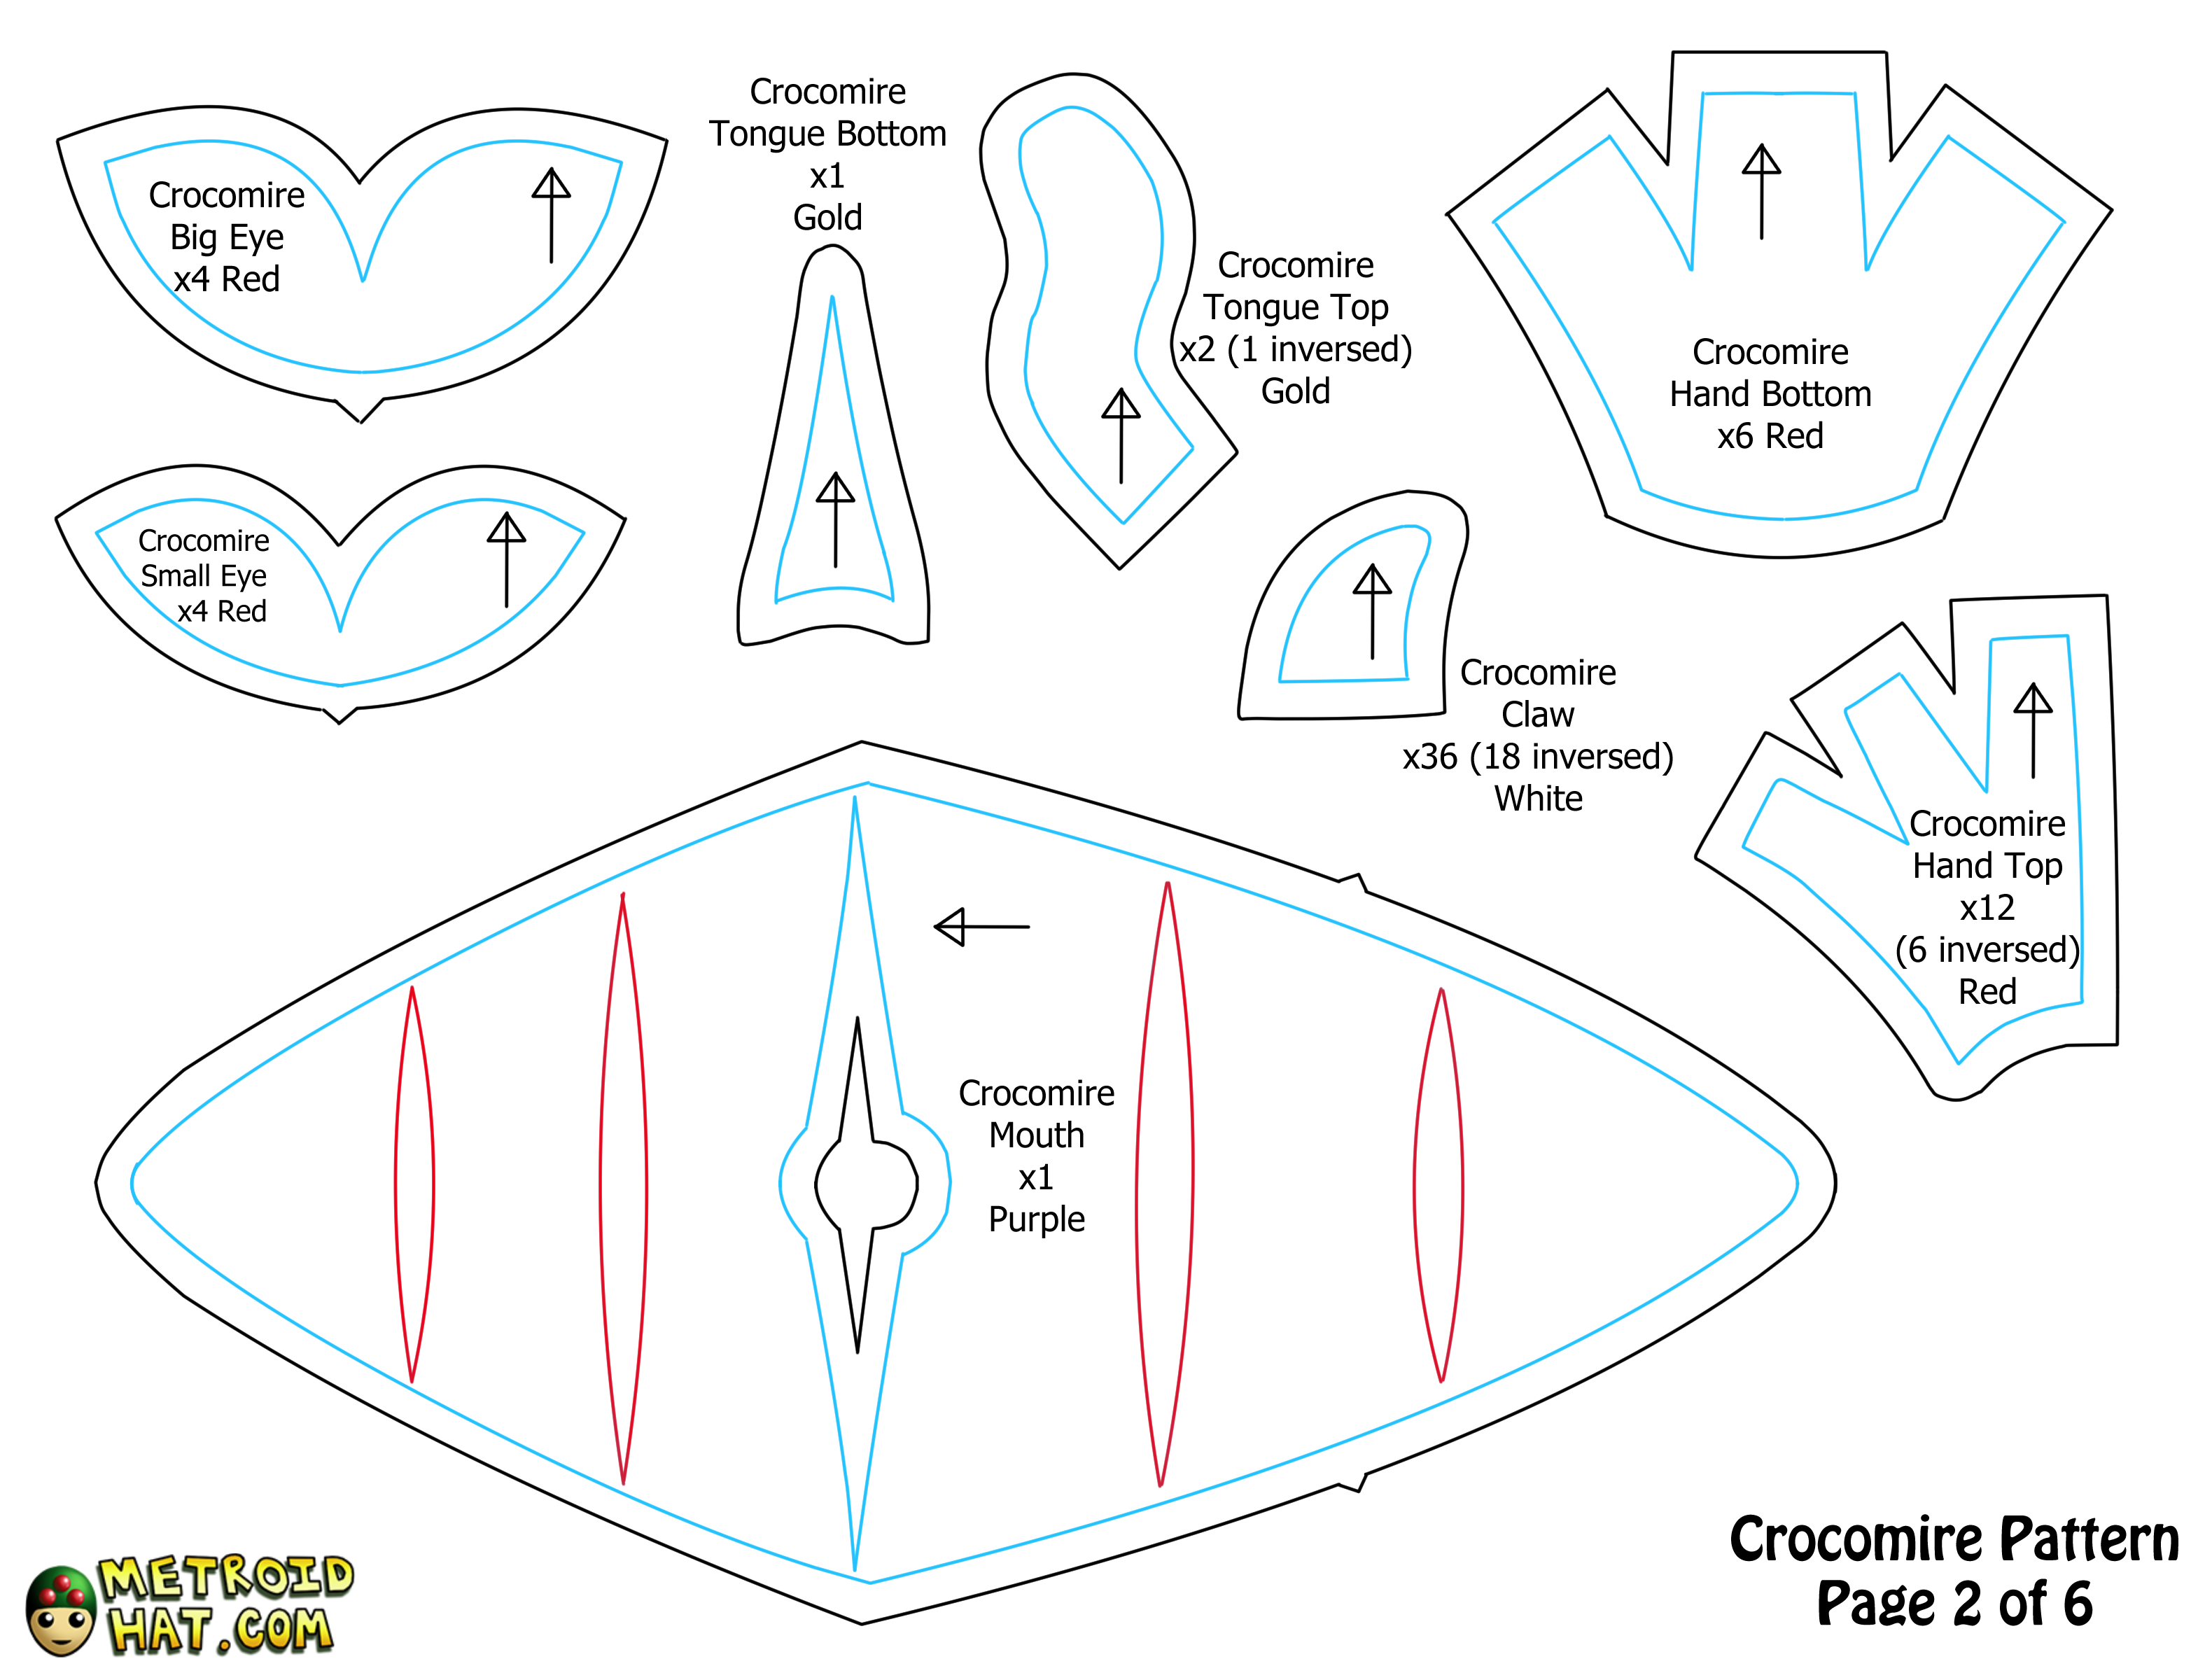
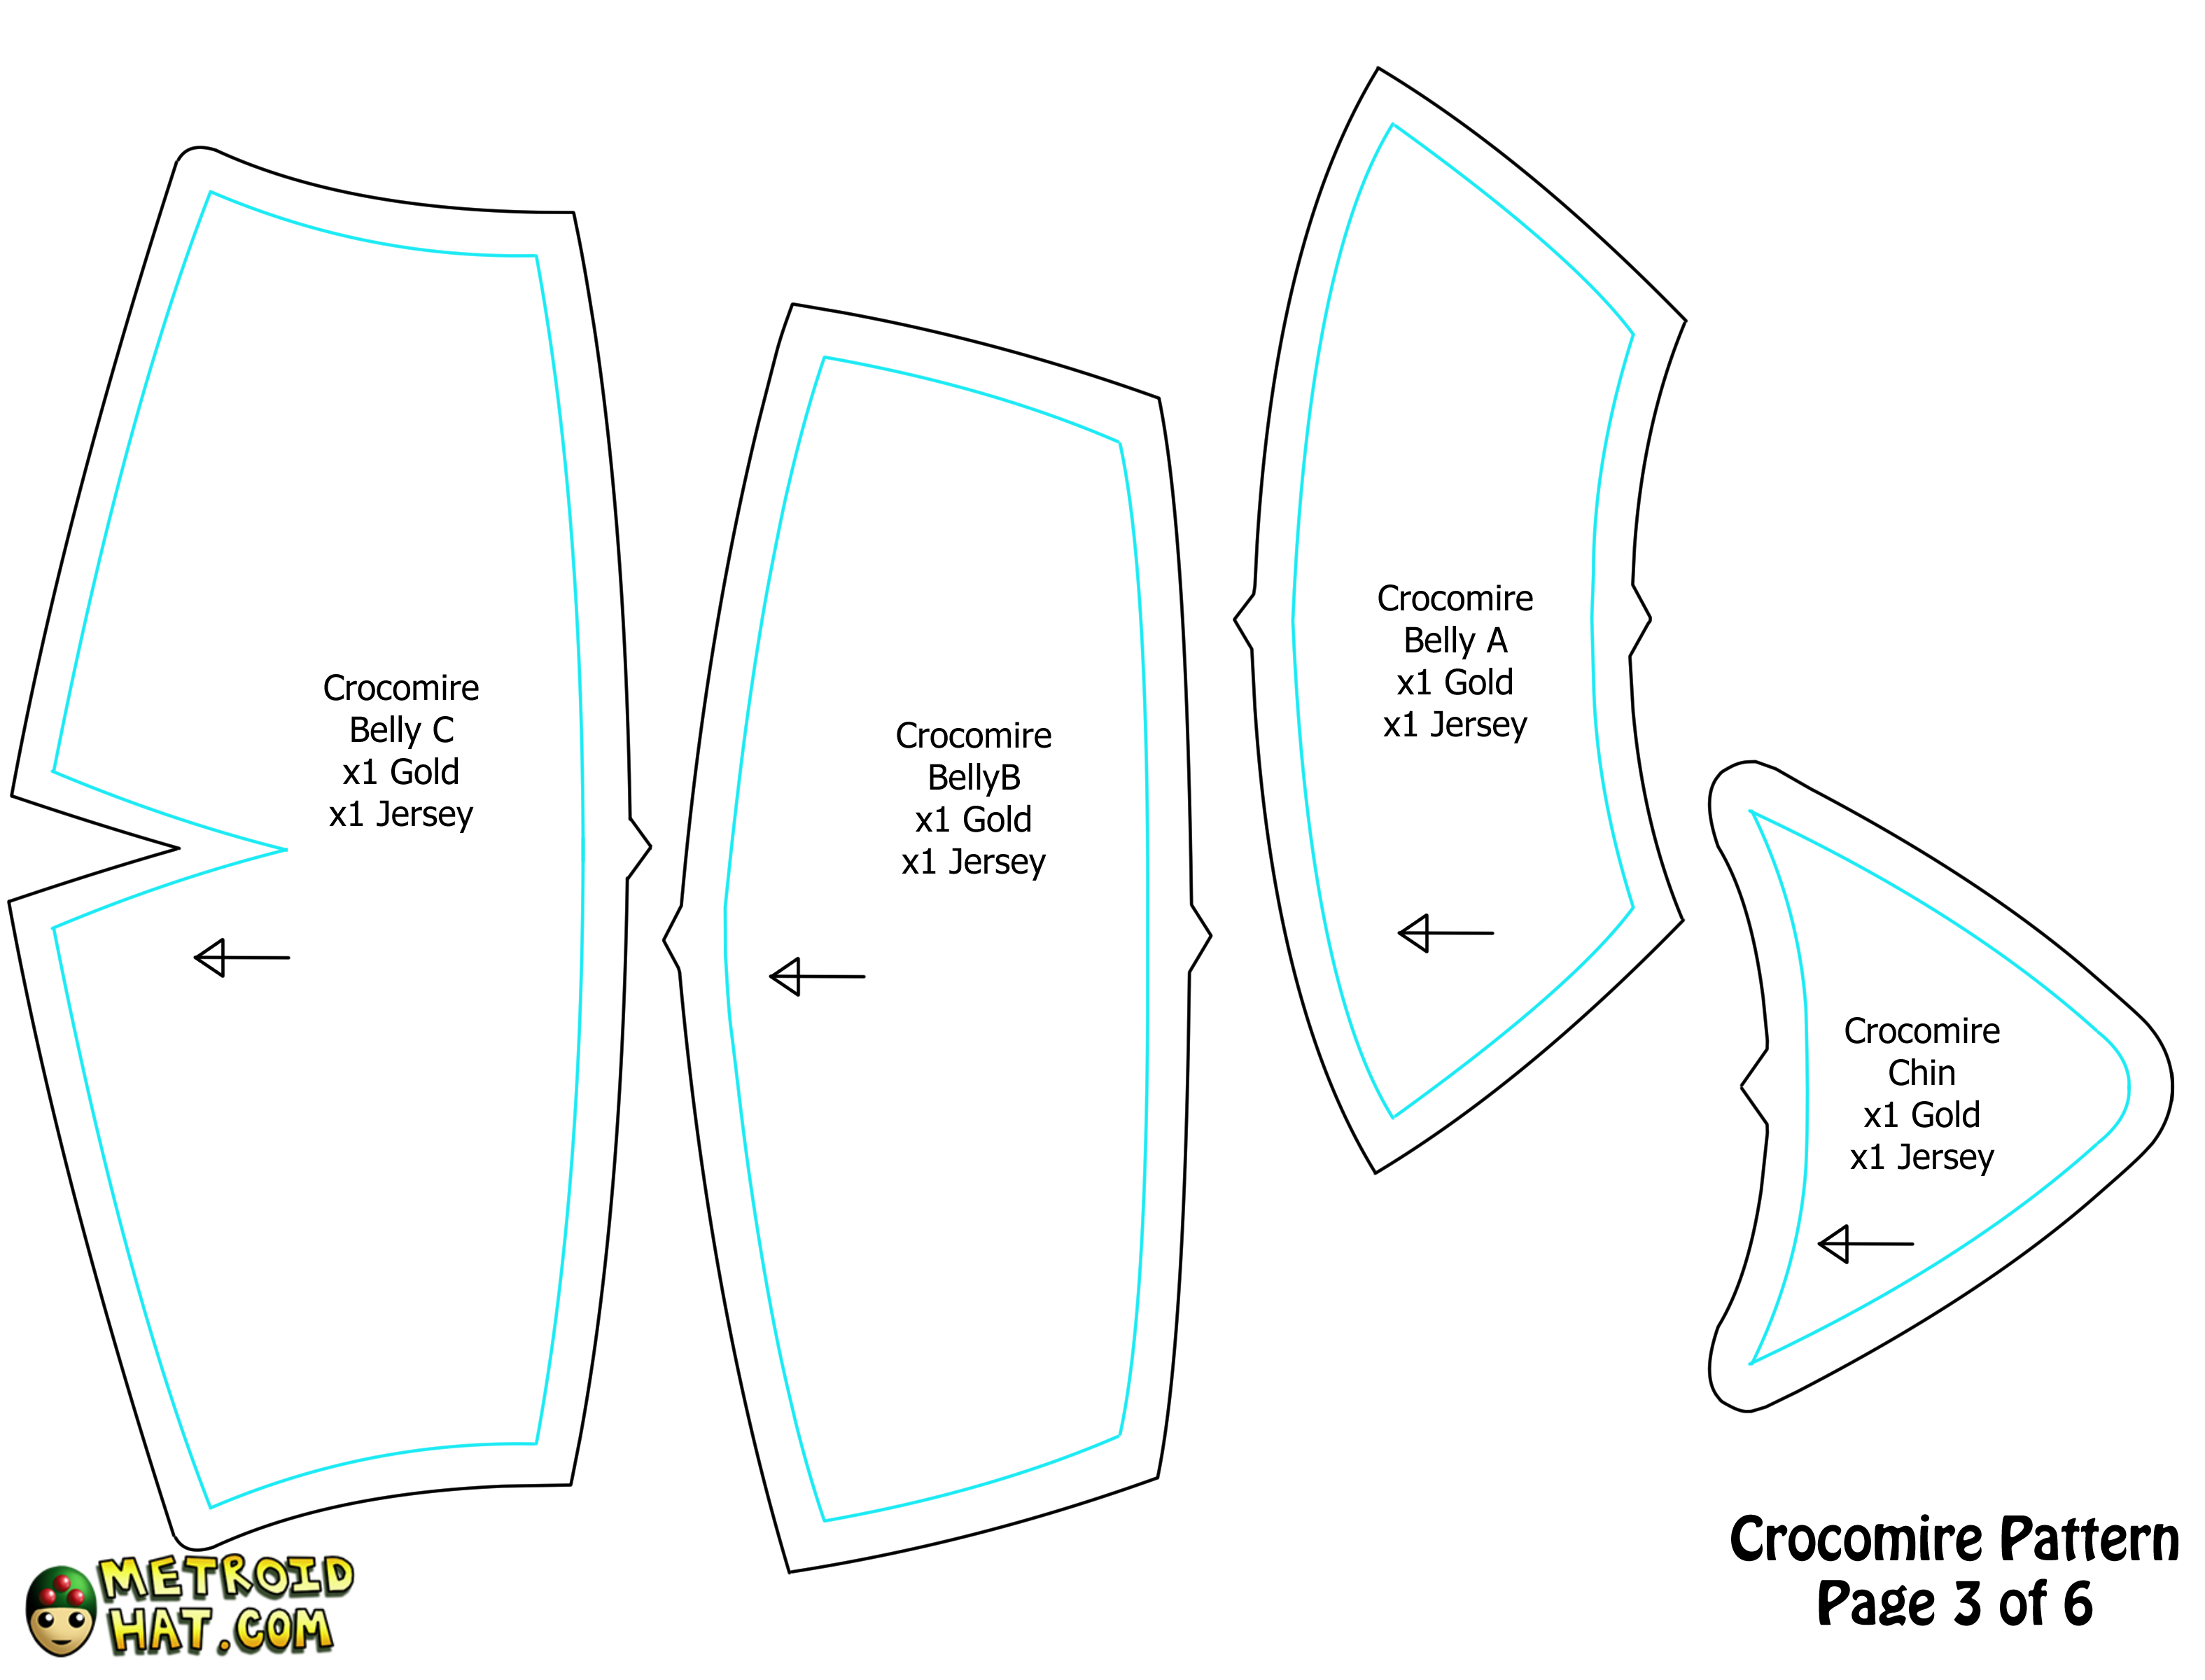
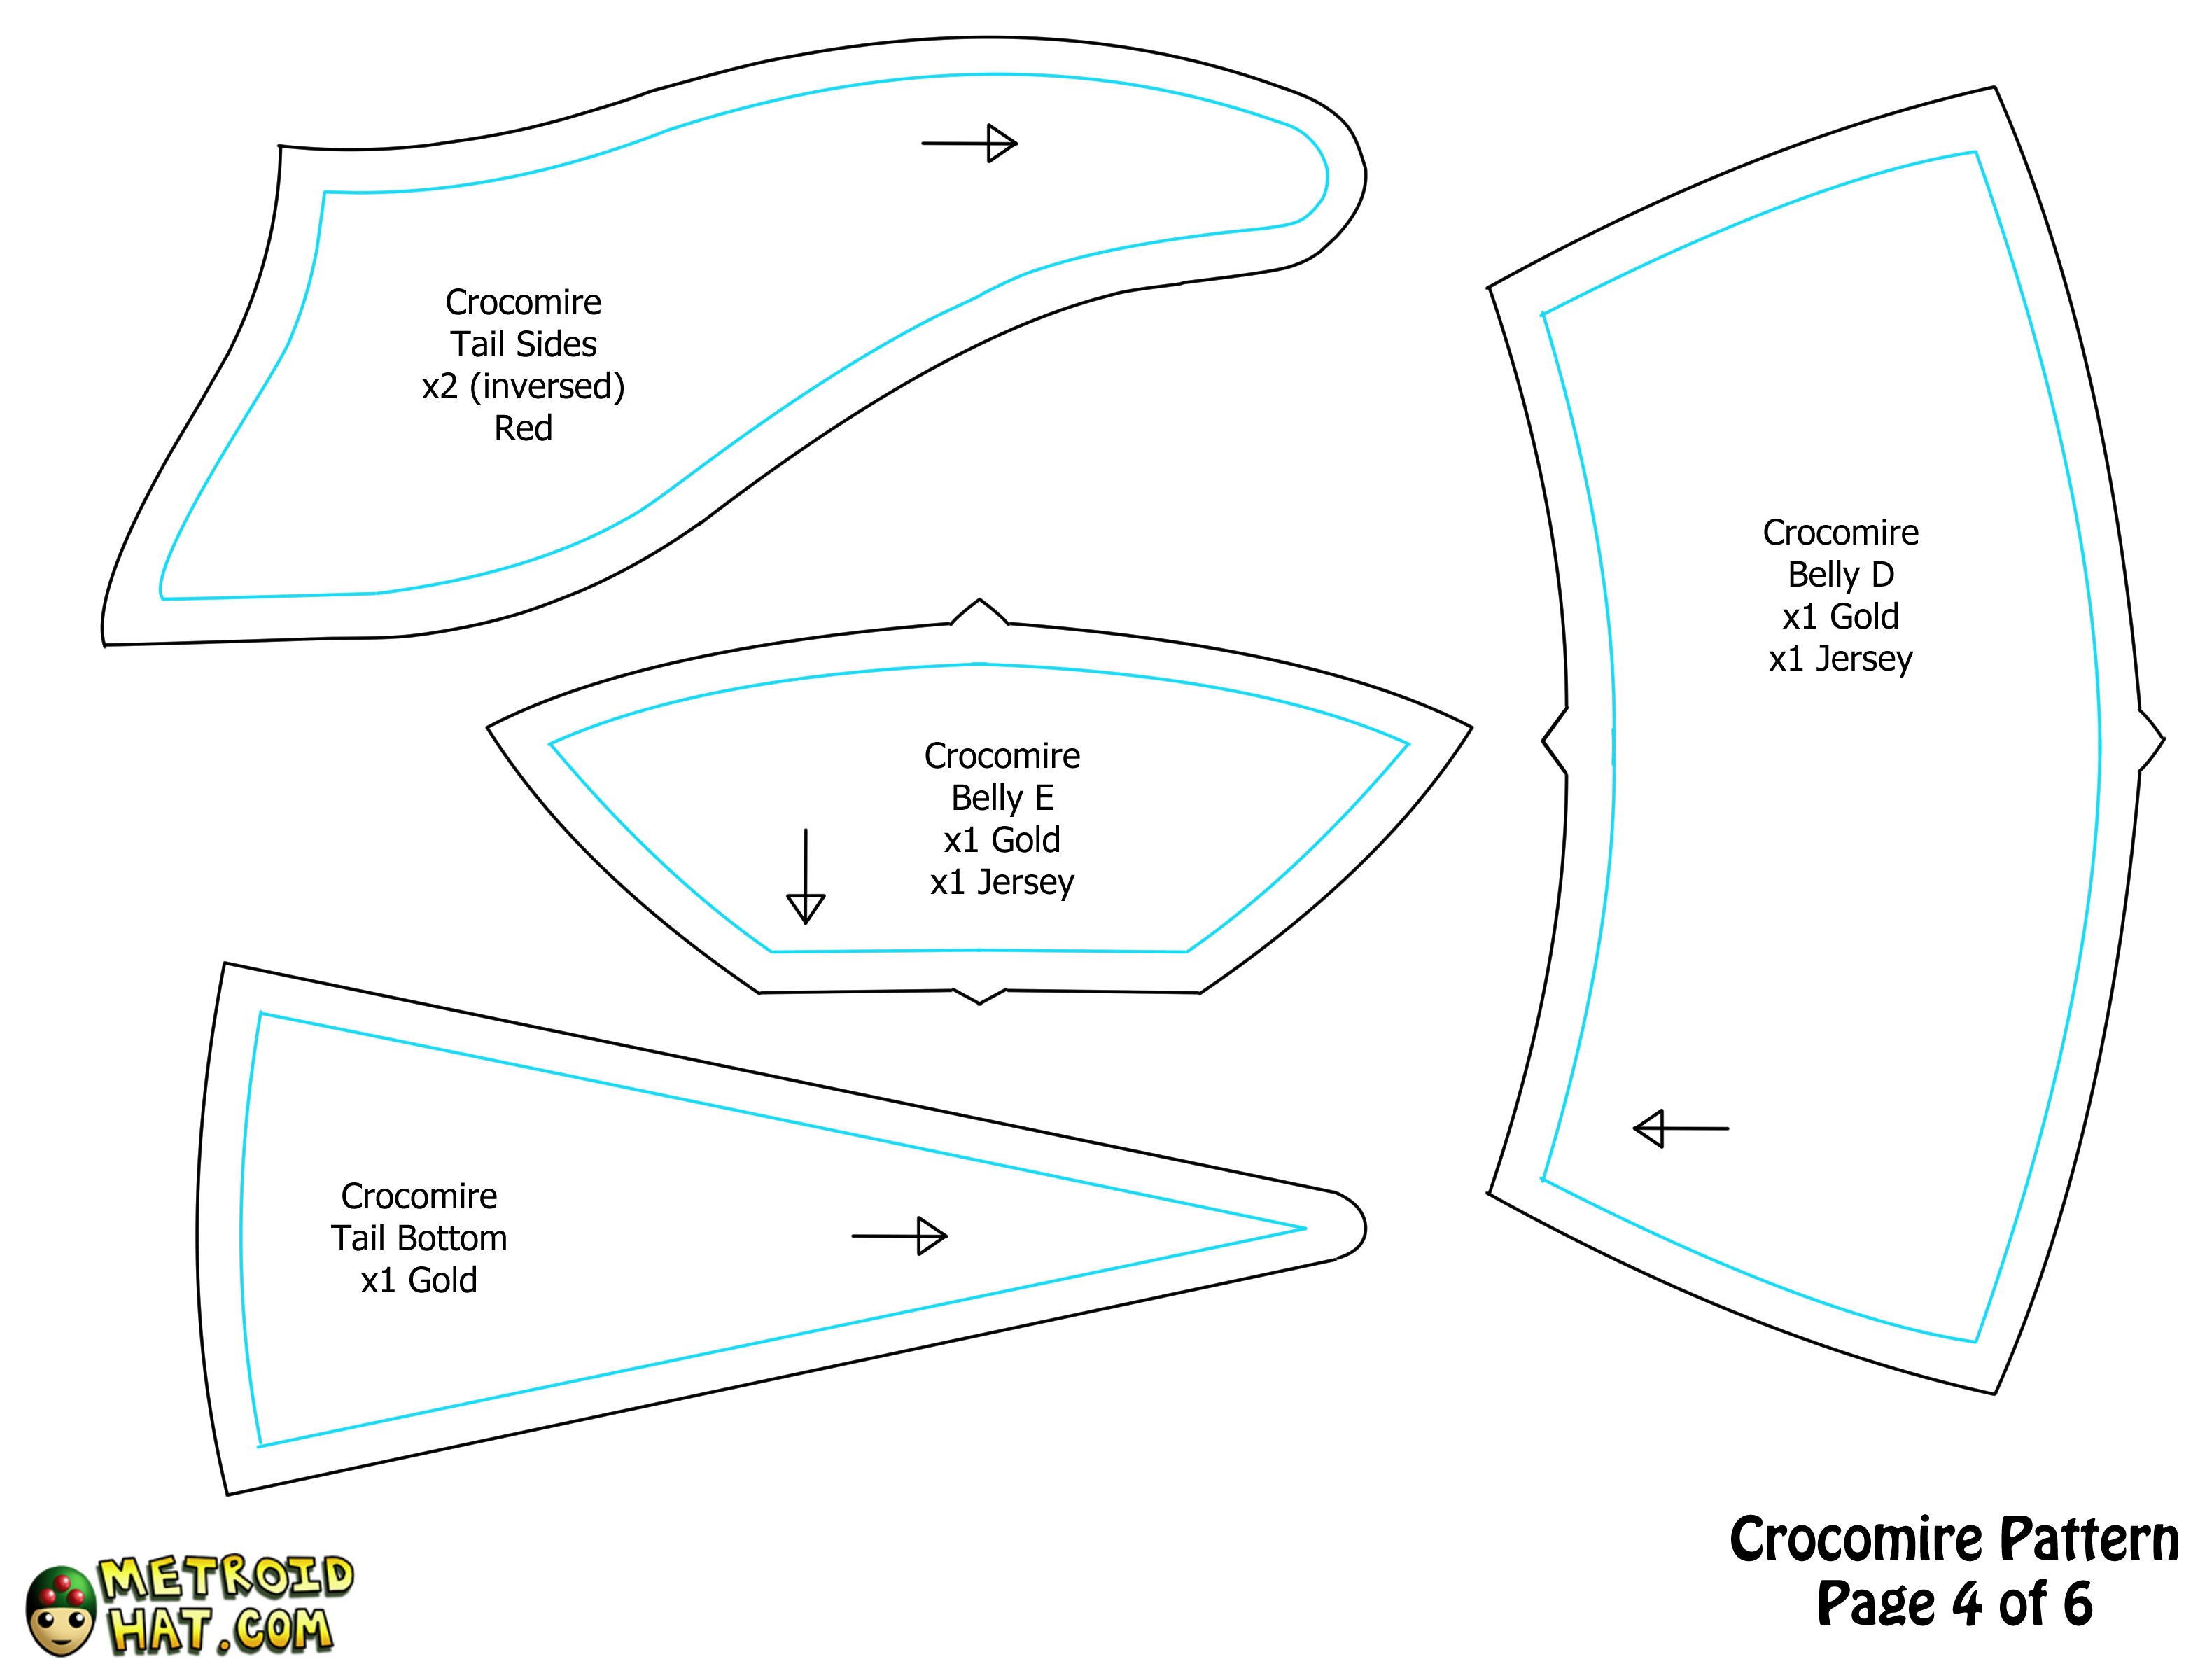
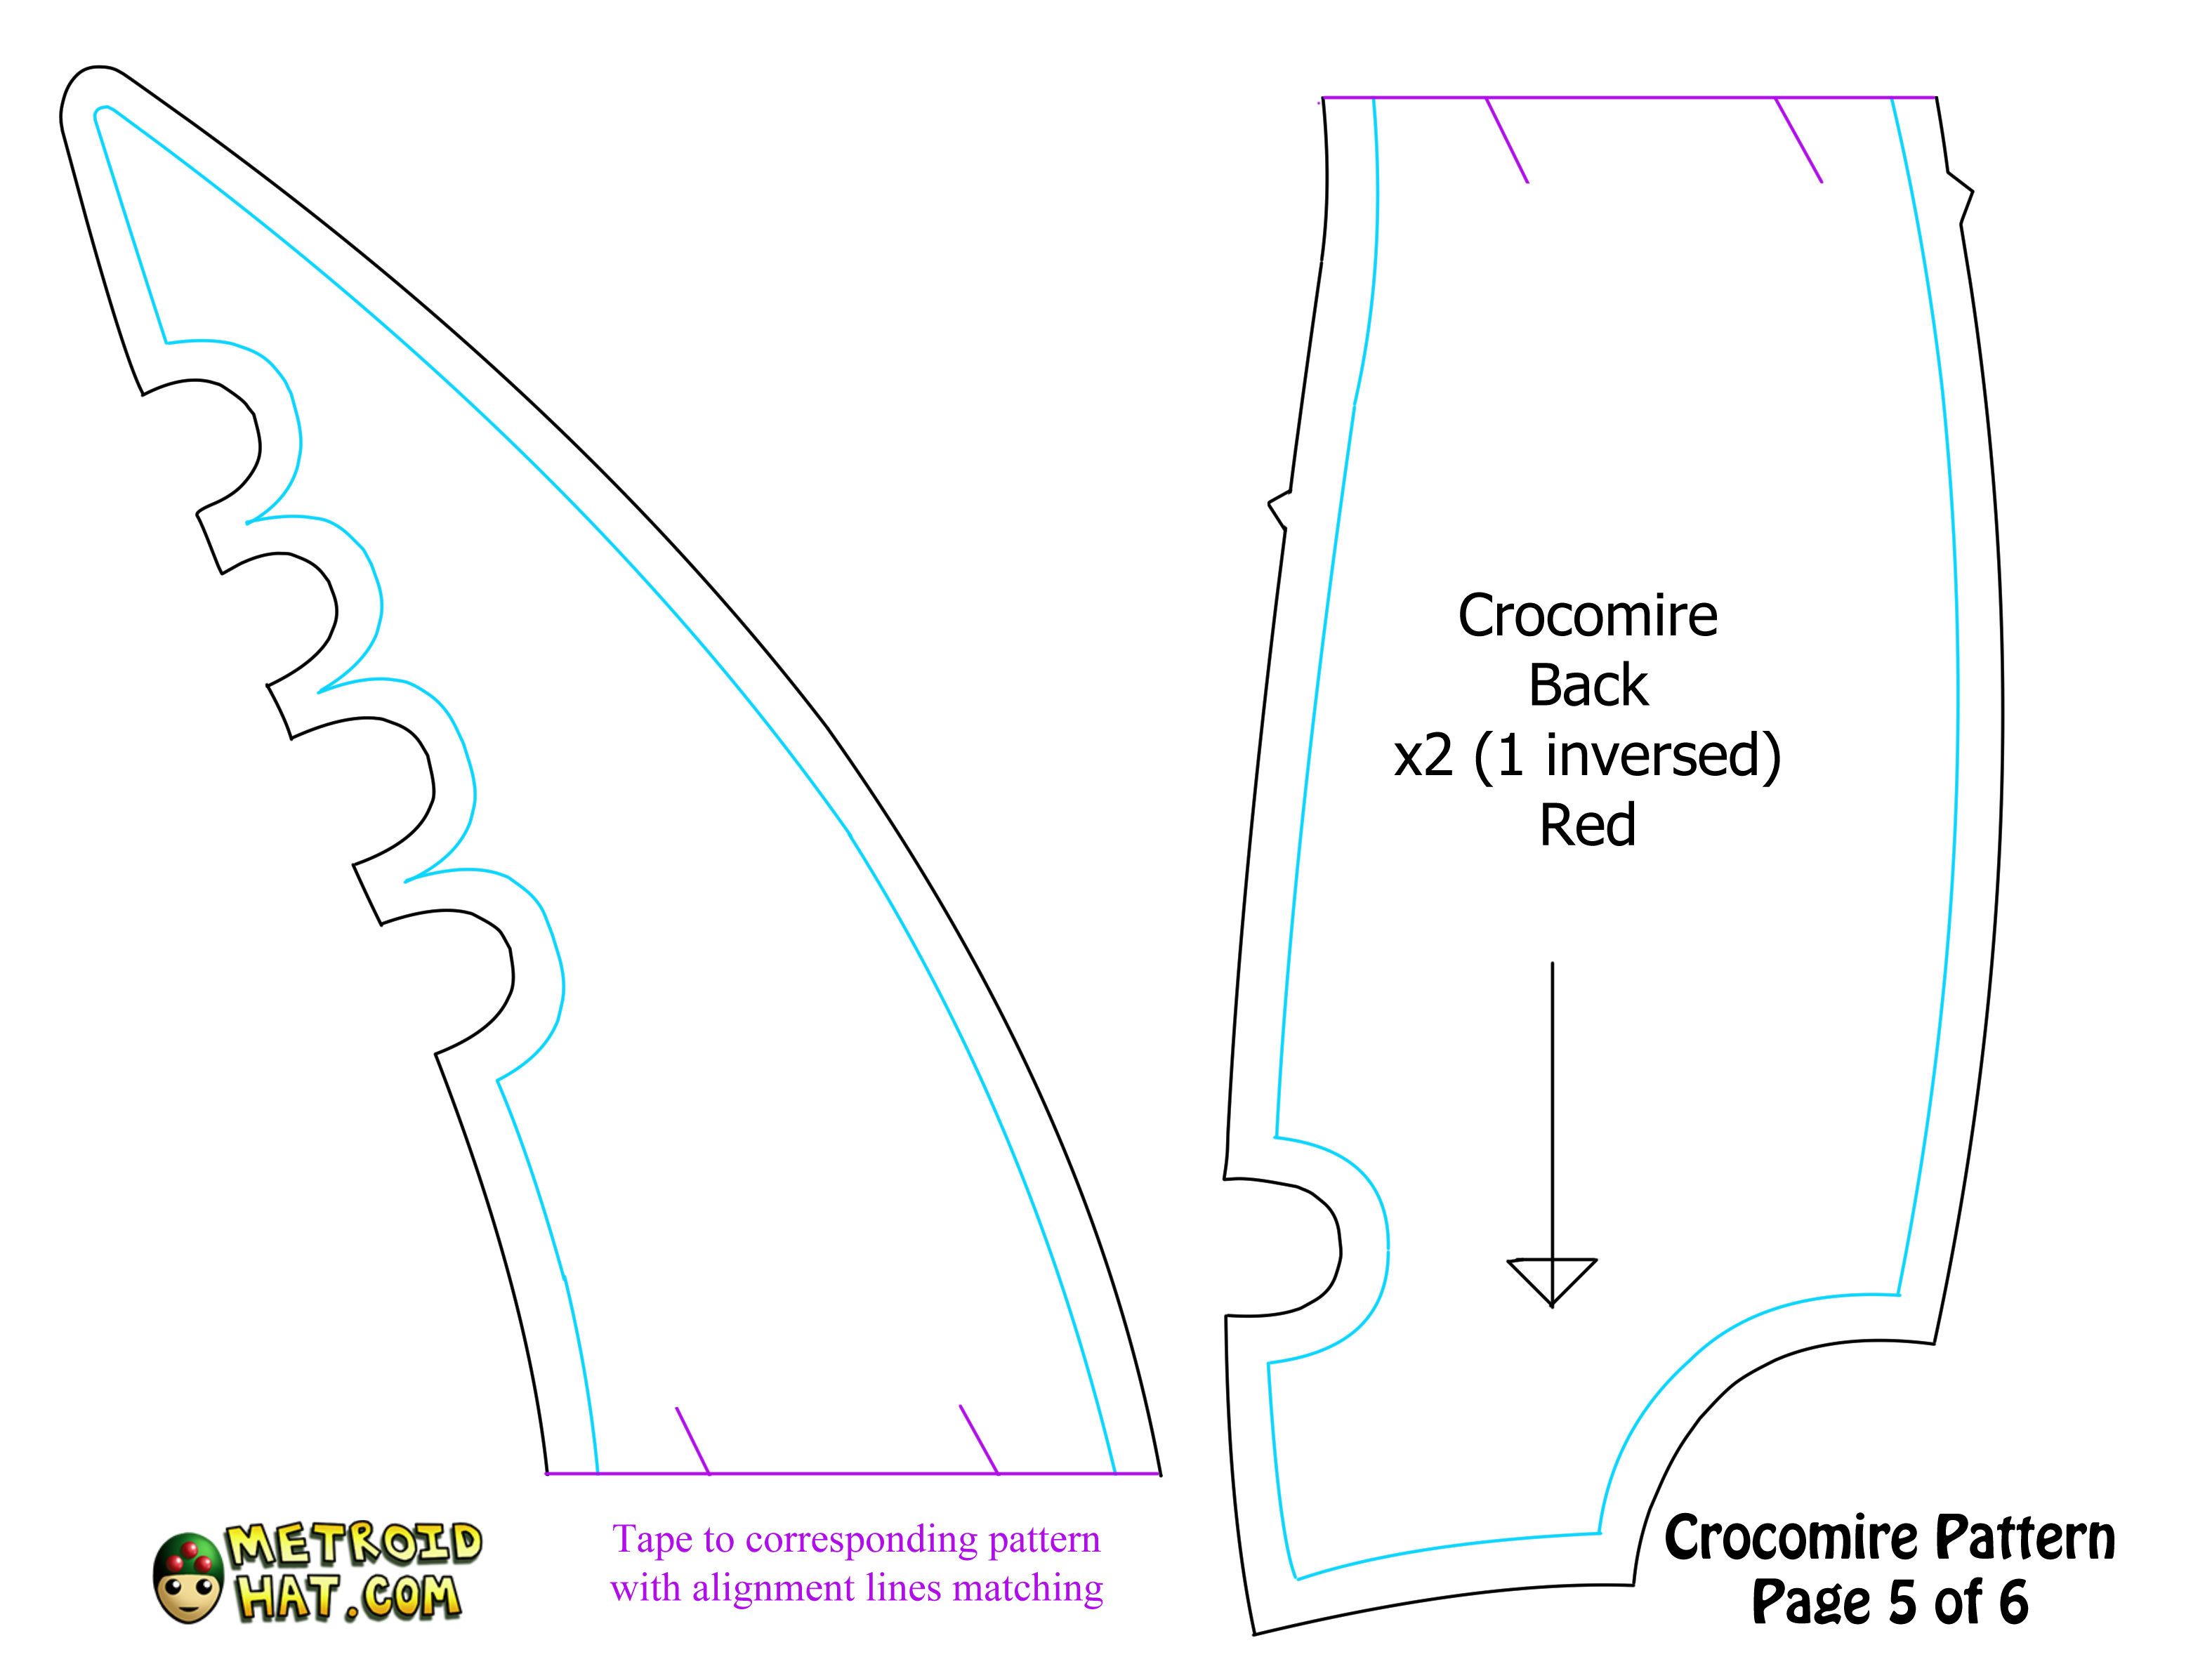
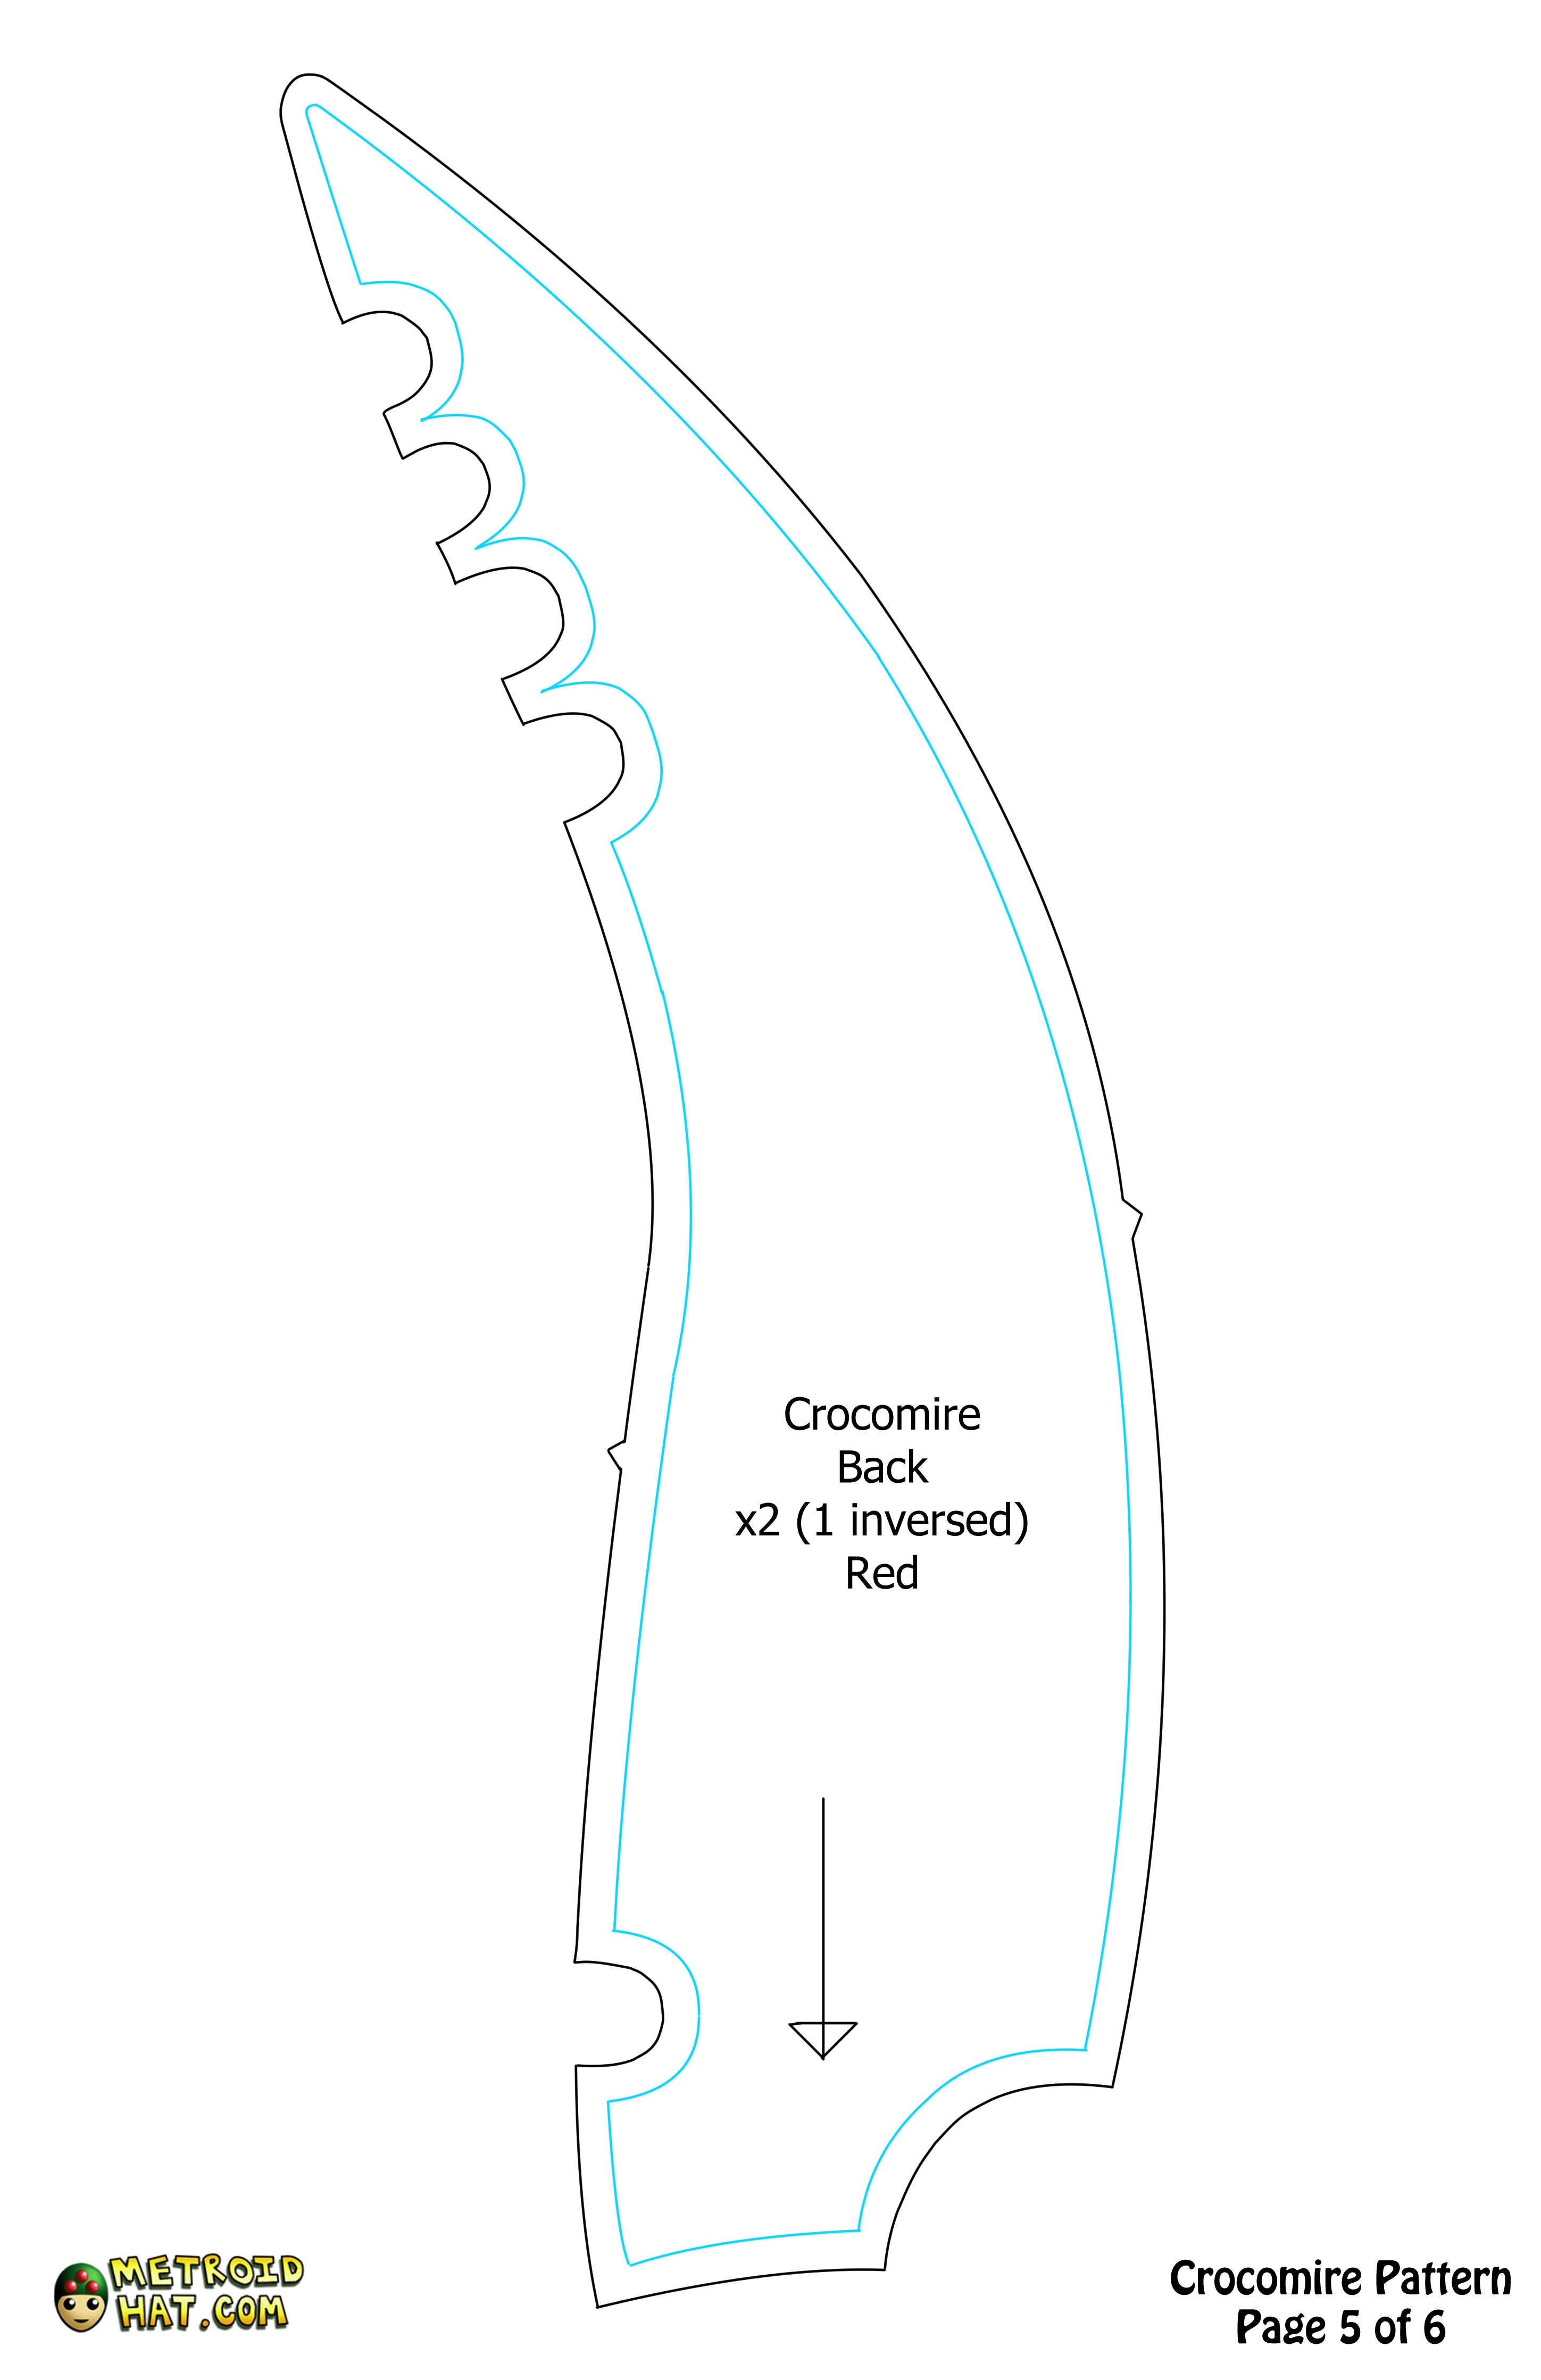
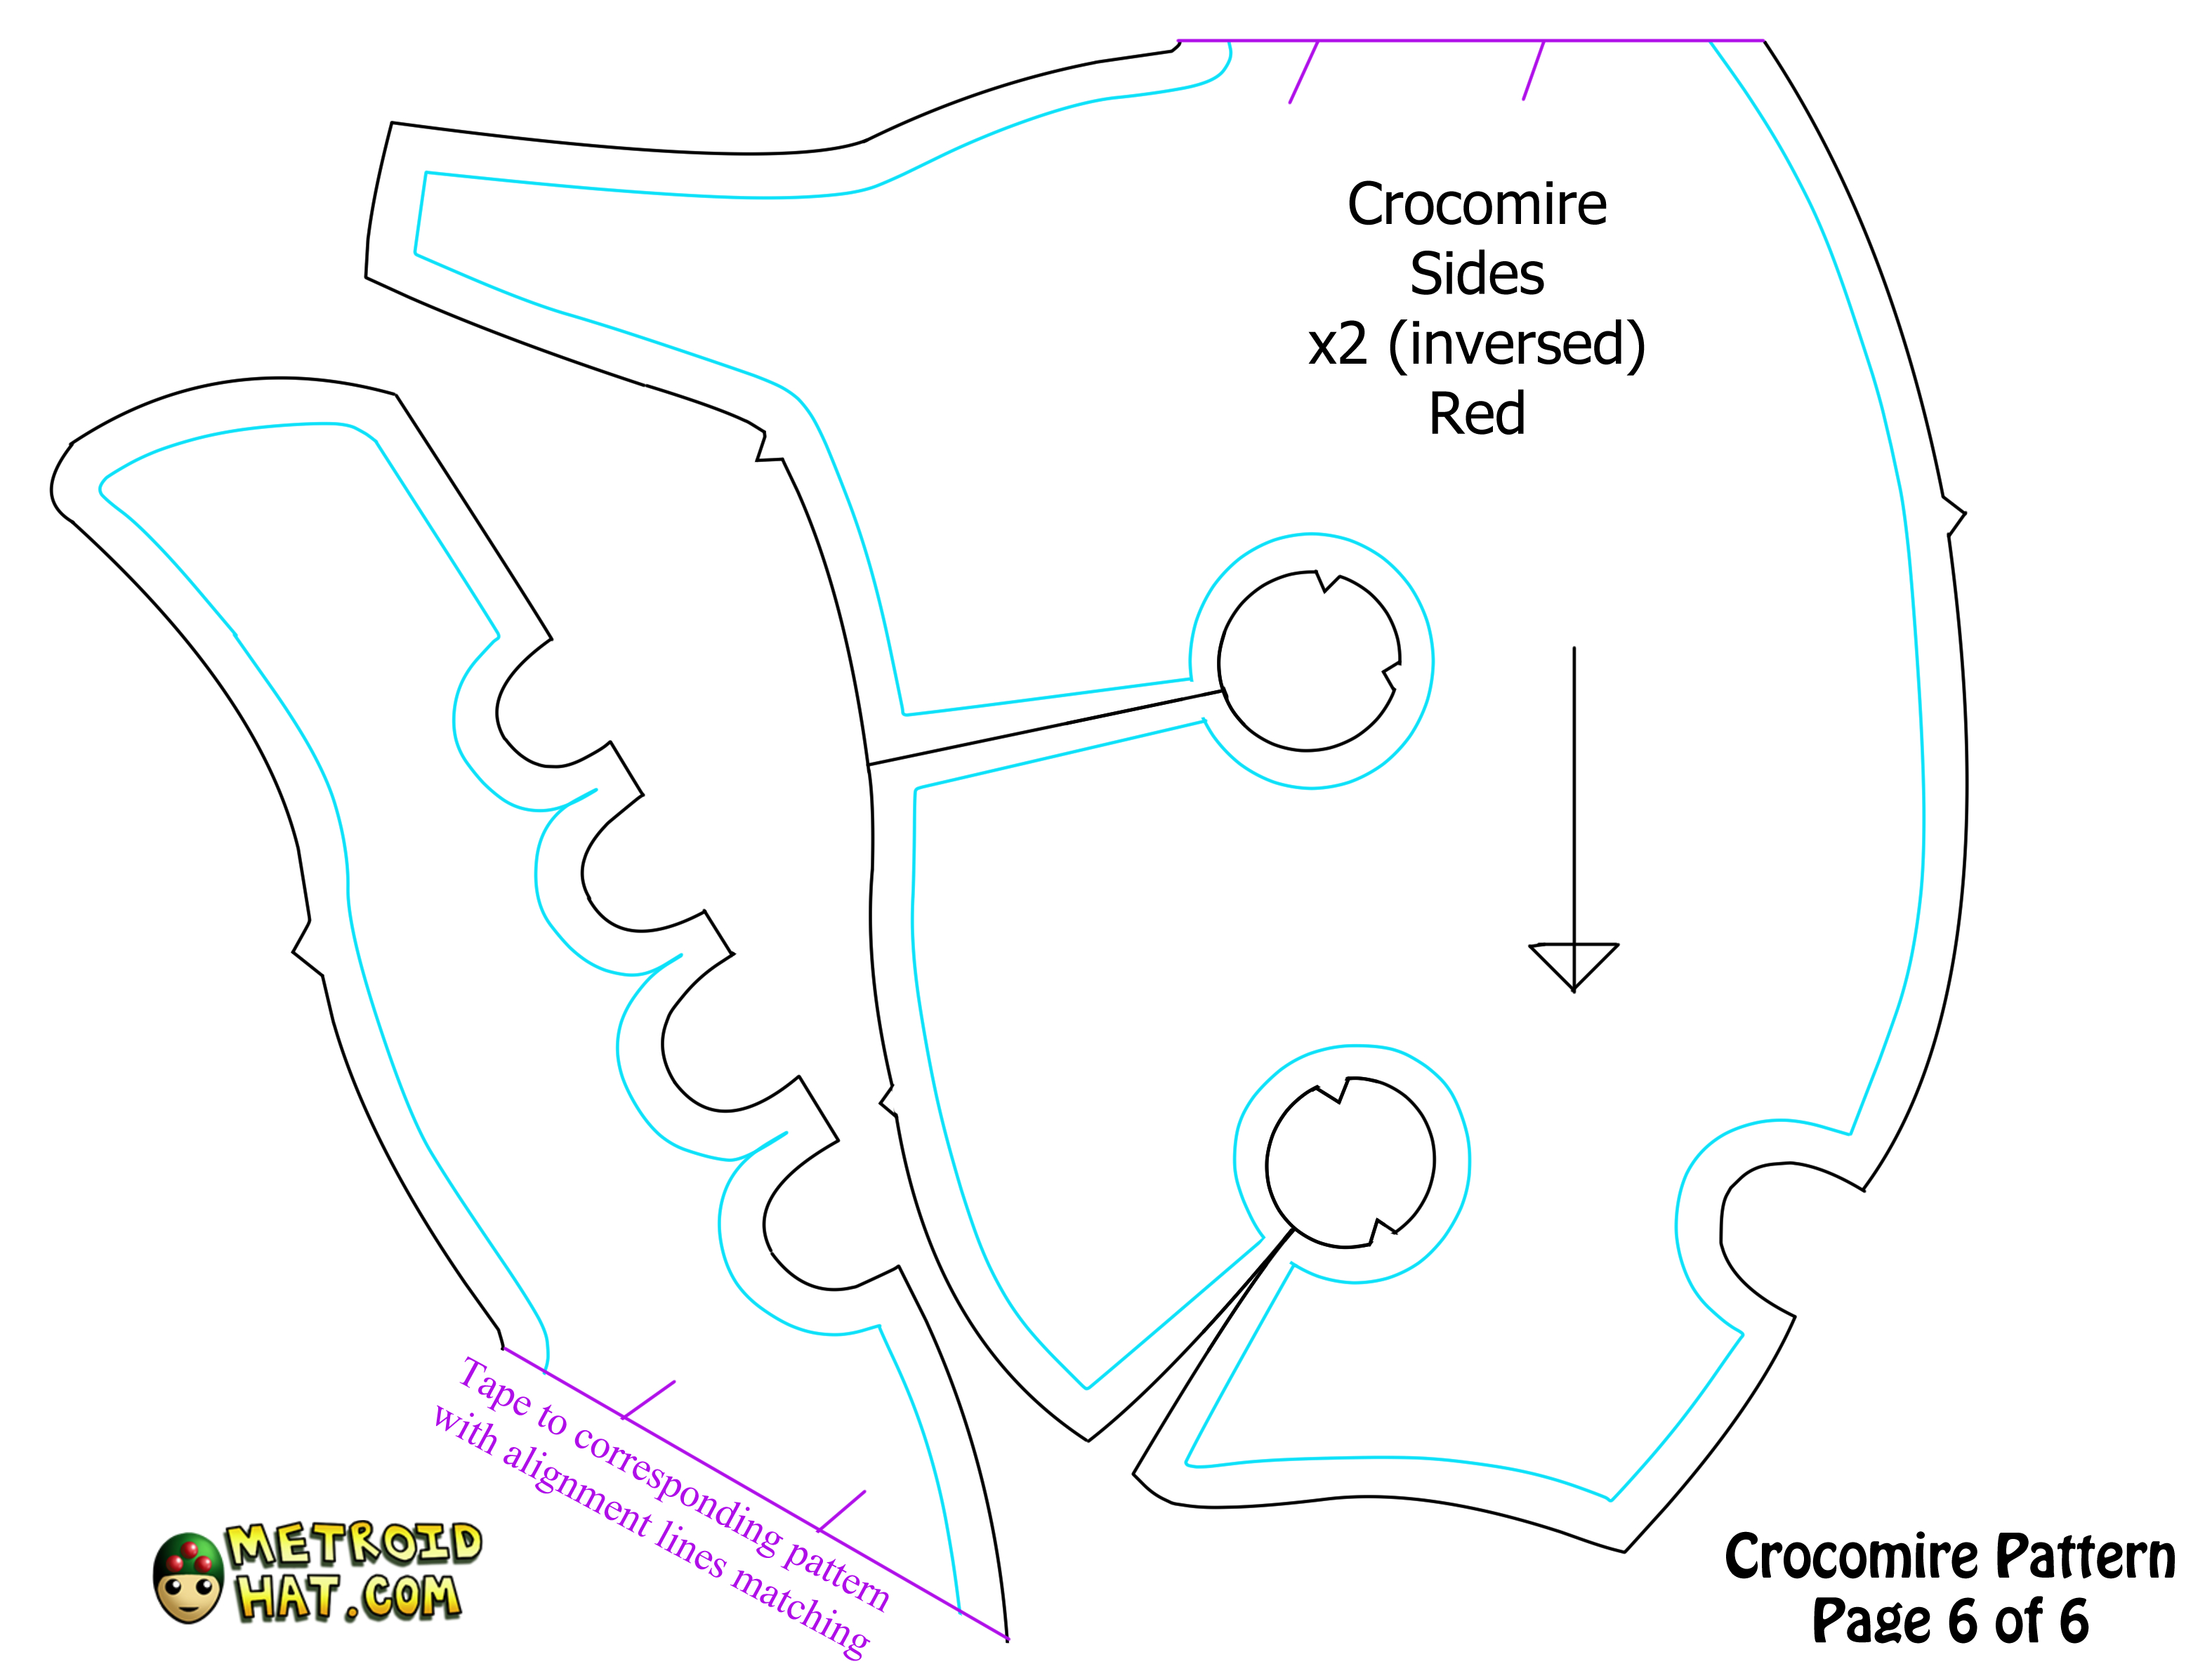
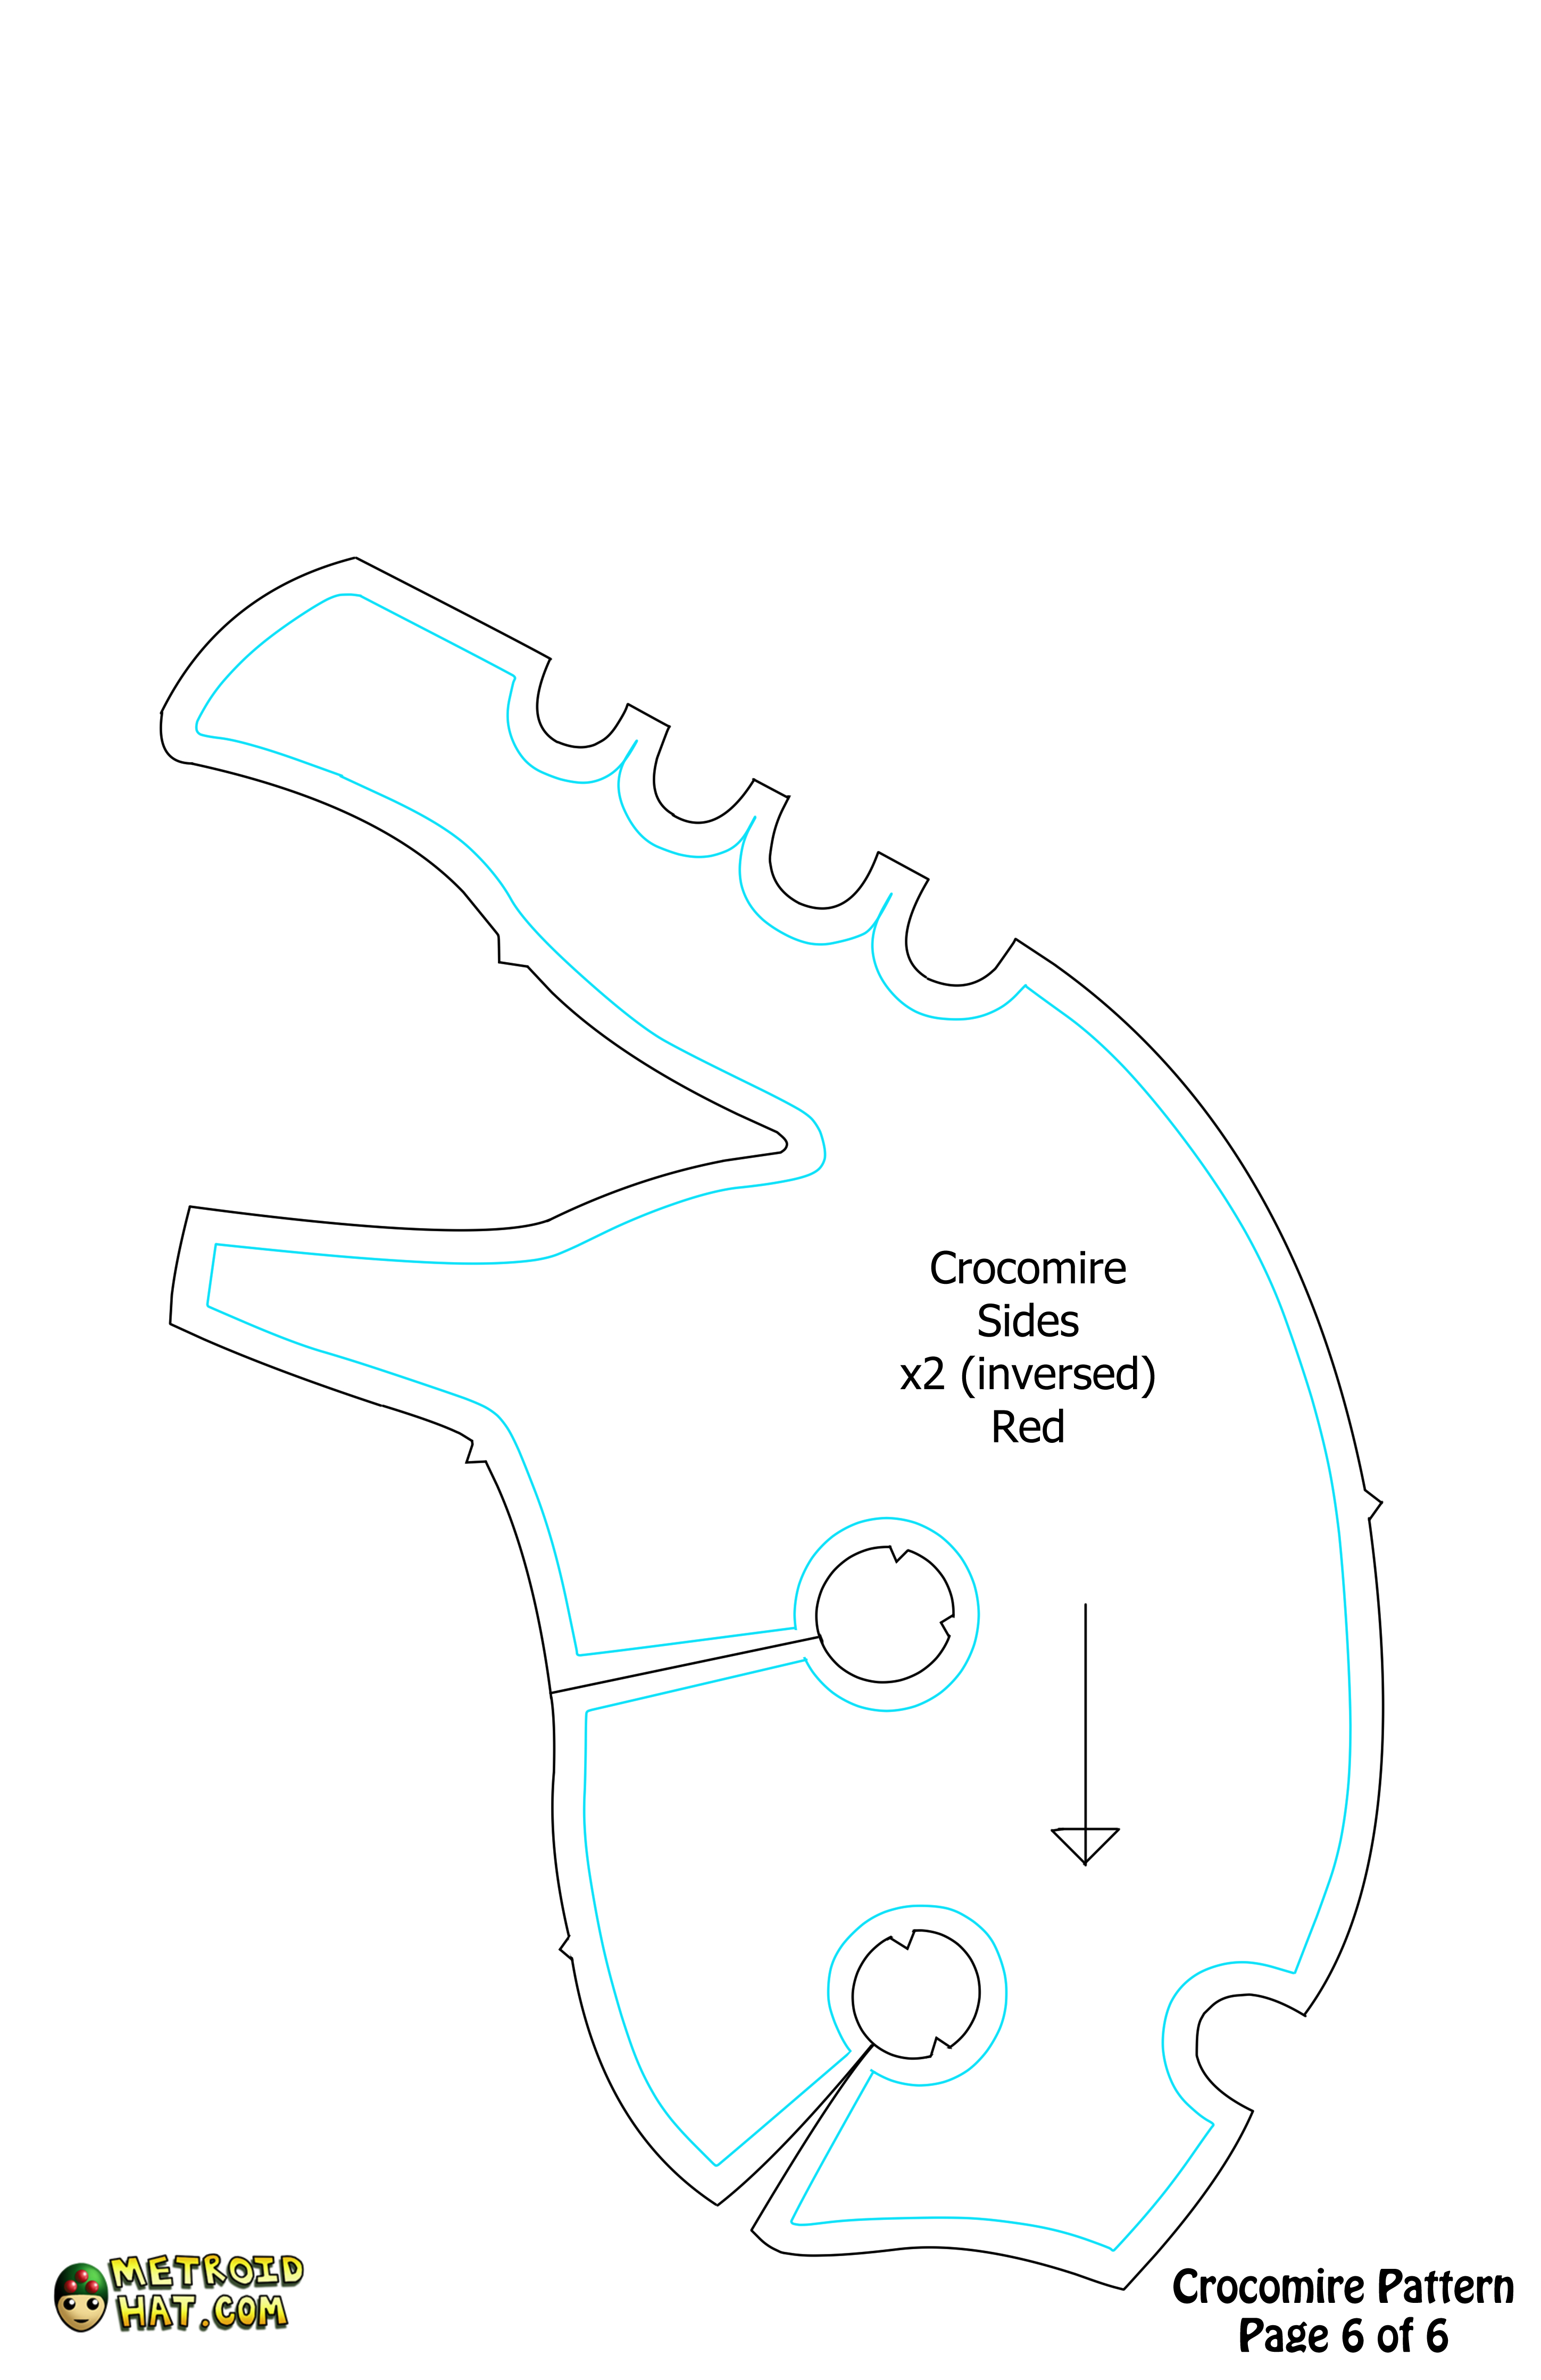
Pattern pages 1-4 were designed to be printed out on normal 8.5x11 paper in landscape mode. The patterns on pages 5 and 6 need to be cut out and taped together, making sure the purple alignment markings match. Alternatively, you can print out the 11x17 versions on a single sheet of 11x17 paper. Just make sure nothing gets resized in the process. The seam allowance on this pattern is 1/4 inch or 1/2 cm in most places.
Page 1
Page 2
Page 3
Page 4
Page 5 or Page 5 11x17 version
Page 6 or Page 6 11x17 version
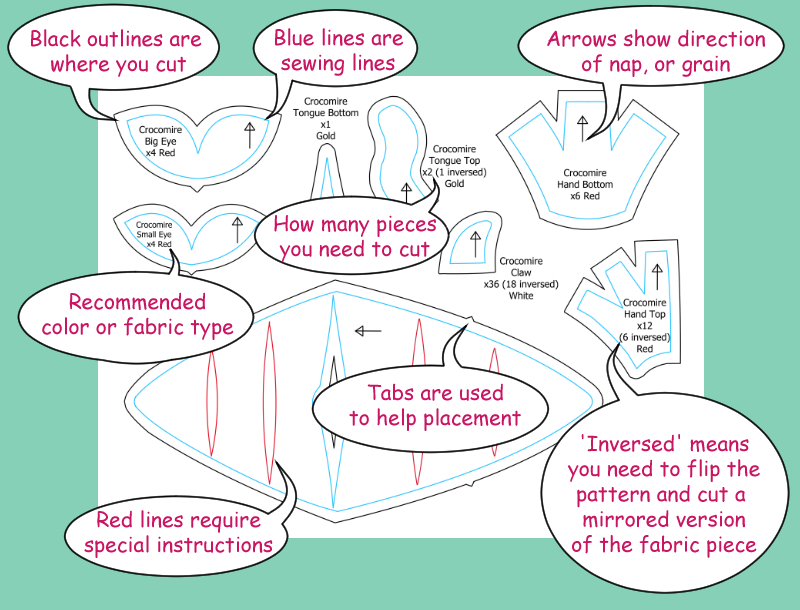
Here's a handy guide on how to read my patterns:
Materials
Materials list:
-Red crushed panne fabric, 1/2 yard or 1/2 meter length
-Gold crushed panne fabric, 1/6 yard or 20 cm length
-Purple velvet or crushed panne, just a bit, like 8 inches or 20 cm square
-Smooth white jersey fabric, 1/6 yard or 20 cm length
-Scrap jersey fabric. It can be one of the above fabrics or something else, so long as it's thin and stretchy
-8 eyeball-looking shank buttons in 2 sizes
-Stuffing
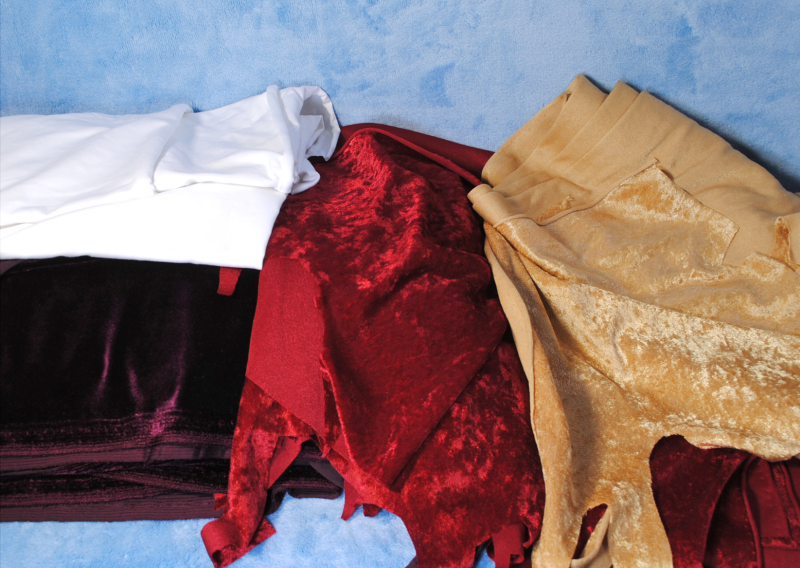
The recommended material for Crocomire is mostly crushed panne velvet, which is a shiny, dappled fabric that approximates Crocomire's bubbly skin. However, it is thin, slippery, napped, and stretchy, which can make for a challenging sewing experience. Feel free to use other fabric if you want, but this tutorial is optimized for crushed panne. For the claws, a white light-medium weight jersey fabric is used, which is about the consistency of T-shirt fabric. There is also a hidden layer of fabric that can be any kind of cheap stretchy jersey material. It could very well be more white jersey fabric if you have some to spare.
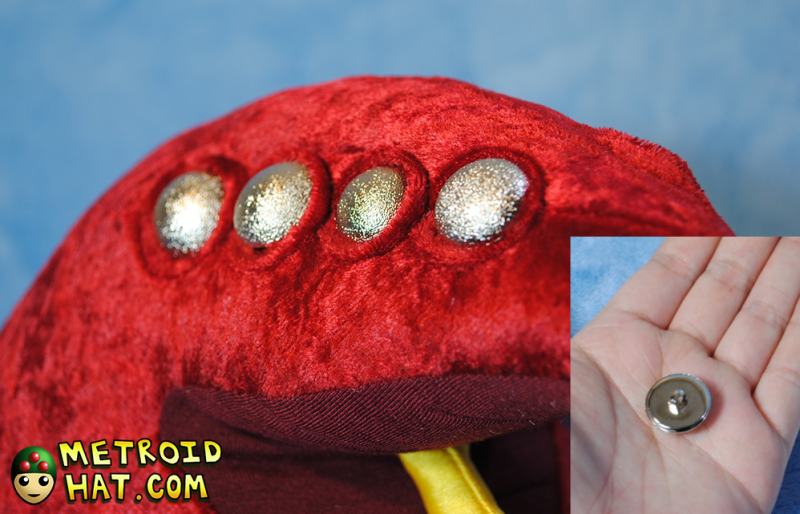
For Croc's eyes, you will need eight matching shank buttons that look eyeball-ish. Four at 18mm or 11/16 inches in diameter, and four at 22mm or 7/8 inches in diameter. Shank buttons are the kind with a hollow protrusion in the back for thread to pass through.
Tools
You'll need your typical gamut of sewing supplies, such as:
-Scissors
-Pins
-Sewing machine
-Hand sewing needles
-Thread in colors corresponding to the fabric
-Seam ripper
There's also a few optional tools that will make your life soooo much easier. You can probably struggle through without them, but I wouldn't want to!

Lint brushes and dust brushes-People who work with fabric have a high occurrence of respiratory problems due to the particles in the air from all the fabric they're cutting. Velvet and panne is especially bad. So after you cut fabric, shake it out carefully over a desk and use a lint brush to clean it up. Constantly dust using a dust brush. Use a mask if you can, and if you have one, use an air purifier. If you're working with fabric a lot, I recommend you invest in one for your own health.
Red heavy duty or button thread-For sewing the eyes on. It's much easier than using all-purpose thread in that it's stronger and you don't have to double-up on it and so you can get greater length without it tangling.
Long needle- This is actually pretty essential for needle sculpting the eyes. You can find these needles in craft and fabric stores often near the doll sections.
Hemostats-There is nothing better for bagging out and stuffing plushies, especially for something with such long and narrow parts like Crocomire's hands. You can manage with a chopstick, but it will be a longer process.
Okay whatever, let's get started making something!
Onwards to Part 2: Assembling the Limbs
Or perhaps, to Part 3?: Body and Mouth
Whoa, slow down! Part 4!: Belly and Eyes
