Ridley Plushie Bloggy Blog Part 1: Research and Tail
I was asked by Edobean, friend to Starmen.net and Games Done Quick, to make a special plushie prize for AGDQ 2015. What is AGDQ? It is a week-long event in which speedrunners plow through various games at warp speeds and broadcast it over the internets. And also accept donations for charity while raffling off prizes. It is always an exciting event, full of surprising shortcuts and cheats for your favorite games, a great sense of community among gamers, and a showcase of artwork. I've been wanting to donate a prize to this endeavor for some time, and now I'm finally doing it!
It didn't take me long to decide to make a Ridley plushie. You know, Ridley, from the Metroid series. It is more than likely that there will be a Metroid game happening during the marathon. And I wanted it to be elaborate, more impressive than most of the things I've done before. And I thought I'd record my progress to show how I go through my design process and to generate a bit of excitement for this plushie. This is not a tutorial, so don't expect step-by-step instructions. If you donate to AGDQ, maybe this Ridley will be yours to own!
Part 1: Research and Tail
Part 2: Lower Torso and Legs
Part 3: Upper Torso and Wings
Part 4: Putting stuff together and Hands
Part 5: Head and Closeups
Ridley Gallery
Sept. 21, 2014
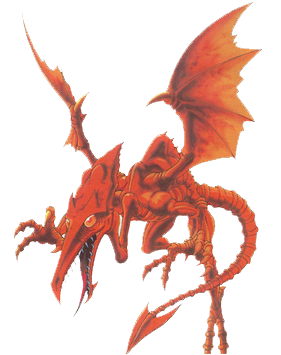
So now that I've decided on Ridley, the question is: what iteration shall I make of him? He's taken on a few different forms over the years. The one that appeals to me most is the Super Smash Bros Brawl version. Mostly.
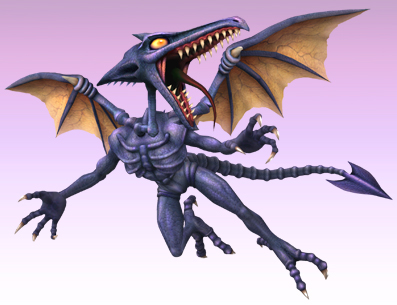
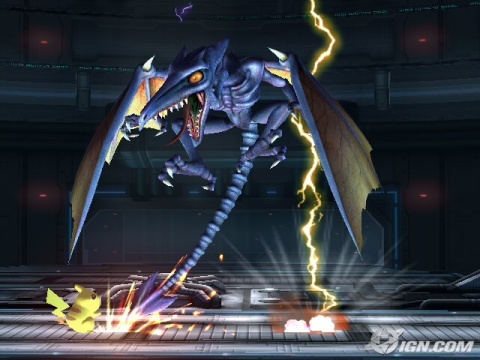
These are some great research pictures.
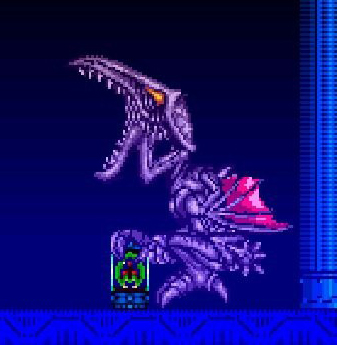
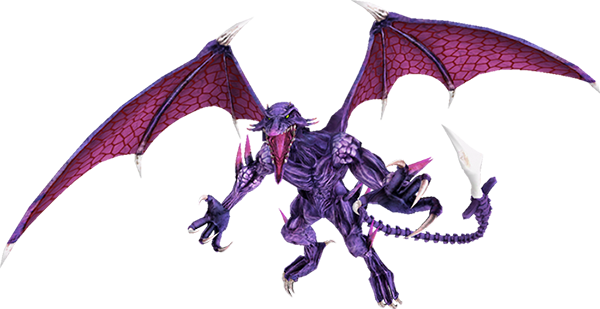
I wanted a Ridley with a purple body and red wings, such as these examples in Super Metroid and Other M. I am most fond of that pallet for some reason. And I found this amazing fabric for the wings!
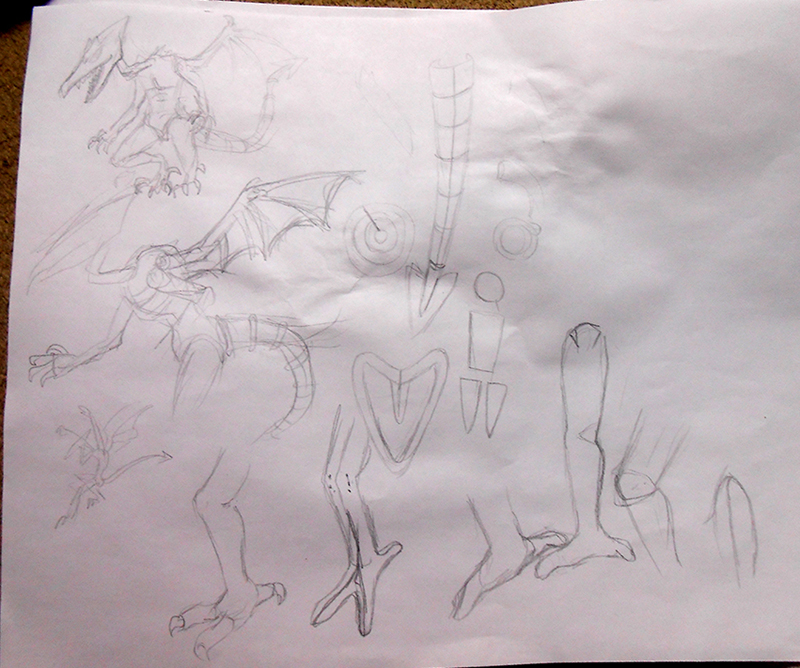
The first thing I always do when designing a plushie is to make a bunch of sketches. It helps me wrap my head around the anatomy and proportions of my subject. For example, in the image above, I made note that Ridley's tail sticks out of his back at an almost perpendicular angle and that there is a hump on his back where his wings emerge from.
Another thing I sketch out are potential pattern shapes, trying to mentally figure out if they will work when translated into a 3D shape. It's a bit of a mental exercise. The rings on the tail are looking to be a substantial challenge. My first idea was to treat the rings like they're basically pintucks, but then I came to the realization that I need the outside of the ring to be smaller than the inside of the ring. How about if I make some donut shapes? Donuts are definitely bigger on the outside. But they will be a pain in the butt to sew onto the tail because the parts are so small and also because sewing something curved onto something straight requires some fancy manipulating. What if I use a bias piping technique? Hmmm that might work!
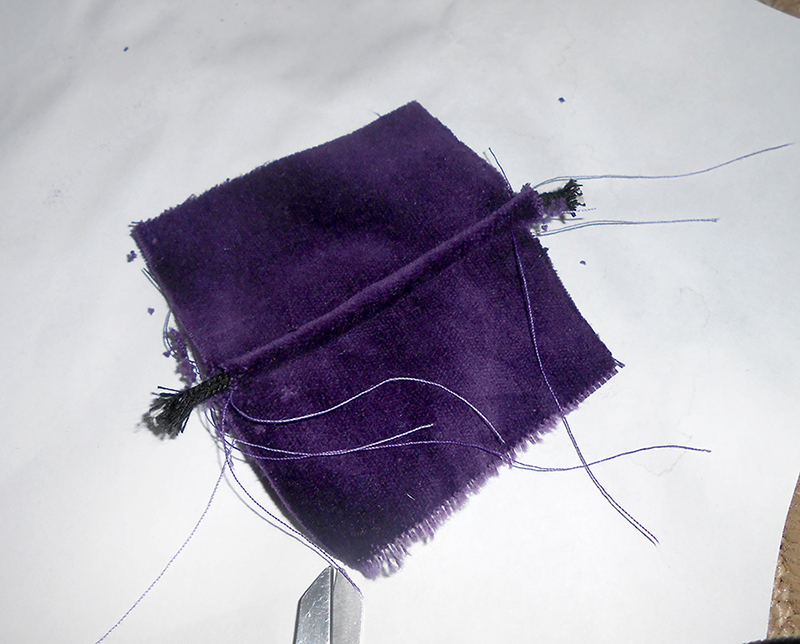
So what is bias piping? Bias refers to cutting woven fabric at a 45 degree angle so it will have some stretch to it. Piping is to sew a piece of cord in fabric to make a kinda pipe. Here's a sample of bias piping embedded between two fabric pieces. It's a good idea to make samples of techniques and fabrics you aren't familiar with.
That little sample looked fine when it was laying flat, but once it was rolled into a tube, the pipe started cinching in the rest of the fabric. Hmm, so the bias piping wasn't stretchy enough to stretch around the tail. I tried taking out the inside cord, but that still doesn't look very nice.
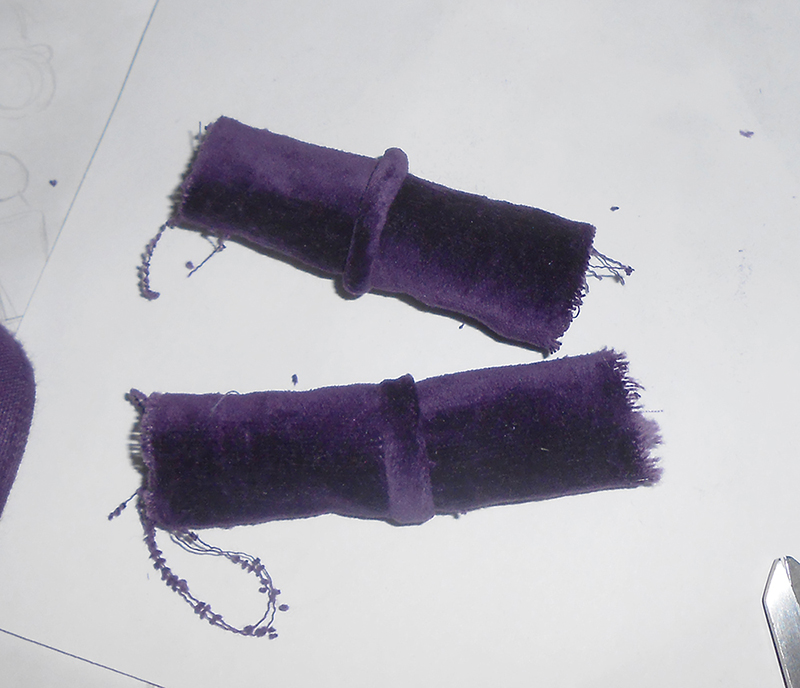
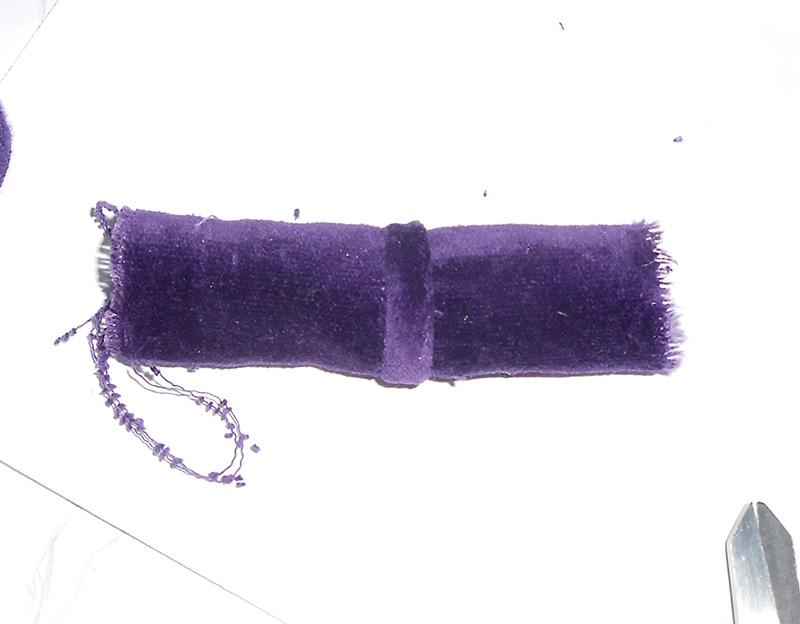
What if I... gather the inner edge of the piping? If I do that, I shrink the inside, making the outside larger. I made a second sample, and this time it worked! In the image above, look at how nice the top sample looks compared to the bottom one.
The way I'm making this plushie is by using a method that I have never tried before, but I think I have a pretty good grasp of how it works. I am going to make the body out of muslin and cover it with the fashion fabric separately, like a skin. The advantage of this is that I can let the muslin control the stuffing without worrying about how it looks. I can drape the fashion fabric over the muslin body to achieve a more elegant pattern. I can needlesculpt wrinkles onto Ridley's face. Lots of fun options!
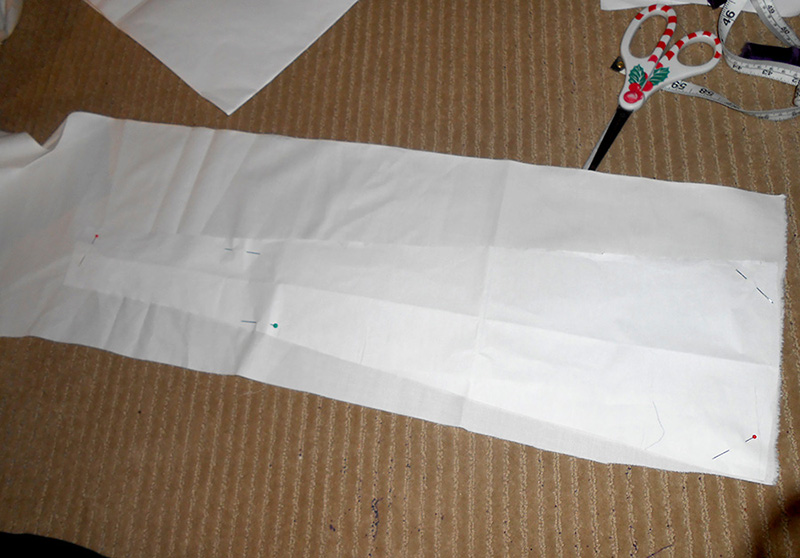
So for this next step, I'm making the muslin tail, which is a simple long cone with a single seam. I'm making the tail first because of how complicated it is and how important it is in deciding the proportions of the rest of the body. The head is pretty important too, but it's kind of detatched from the rest of the body so I'm comfortable making it last.
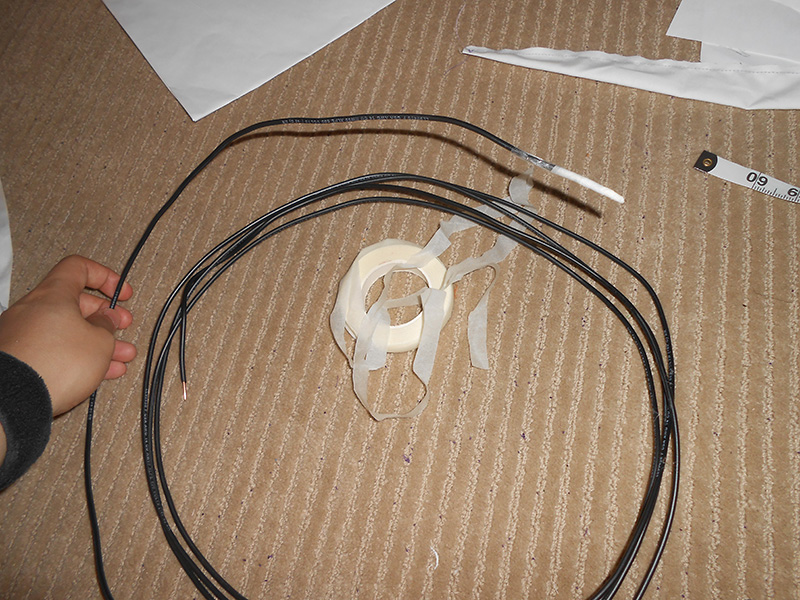
I will be running a wire through Ridley's body to make it posable. I got some kind of electrical wire from Home Depot which I like the strength and flexibility of. I wrap tape around one end so it doesn't get too pokey.
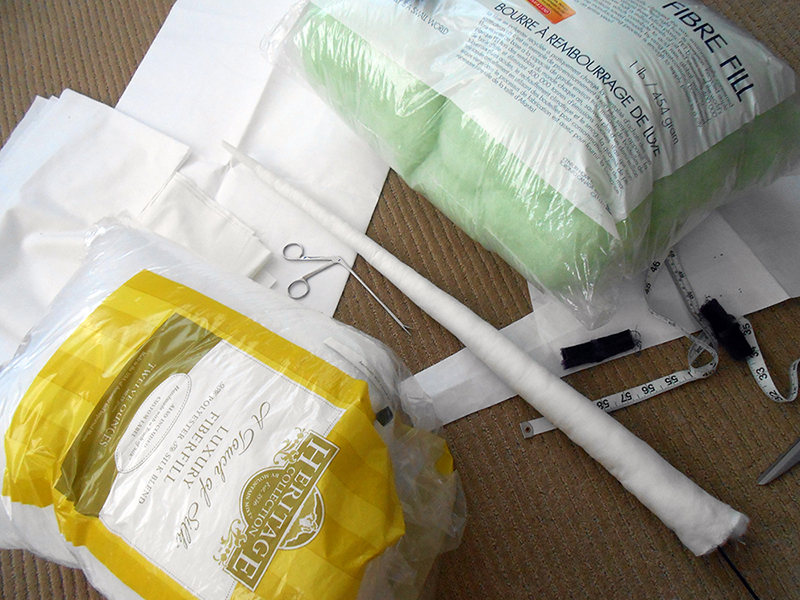
So I sewed the muslin tail and started stuffing it with my skinny alligator hemostats. Even the stuffing requires some consideration: I started with this green stuffing at first, but it bunches and doesn't condense very well. So I went with this softer variety that doesn't bunch but takes much longer to fill up.
Sept. 23, 2014
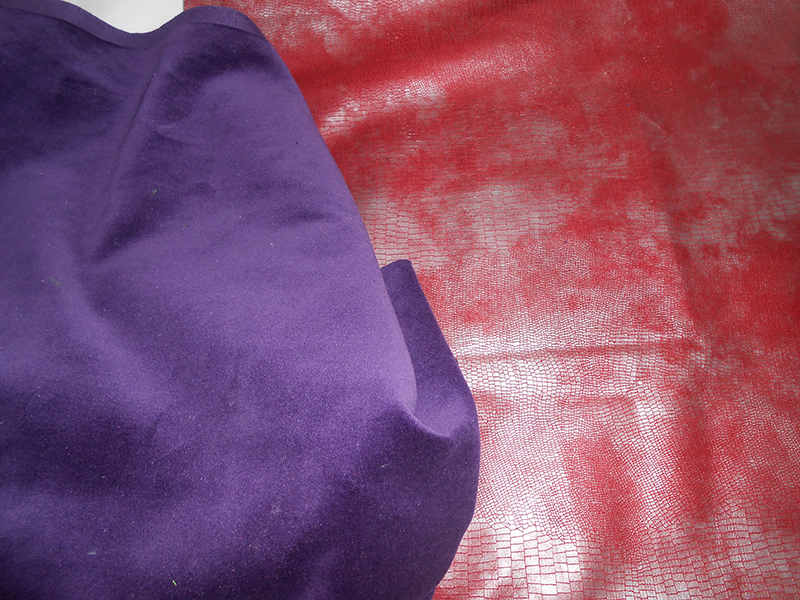
Lemme talk a bit about my fabric choices. I wanted something with texture and without stretch for Ridley's skin. I thought about using suedecloth, but I came across this cotton velvet that seemed perfect! Velvet can be ridiculously hard to work on, but it has a low pile and faint nap, which should make things managable. I actually got a different fabric for the wings at first, but then I came across this one with a snakeskin motiff and it's perfect! It's a thin vinyl or something, I don't even care.
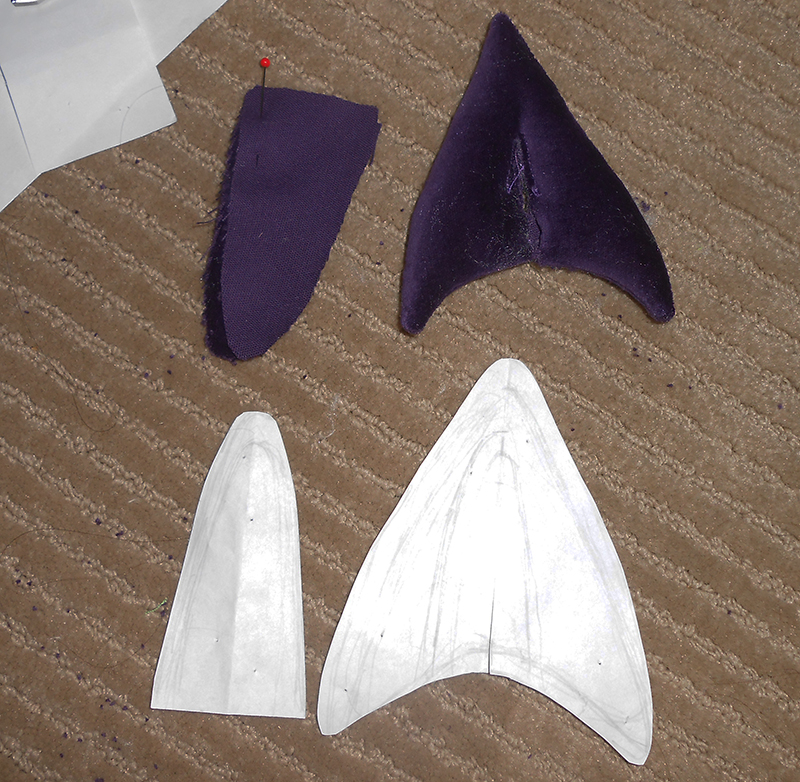
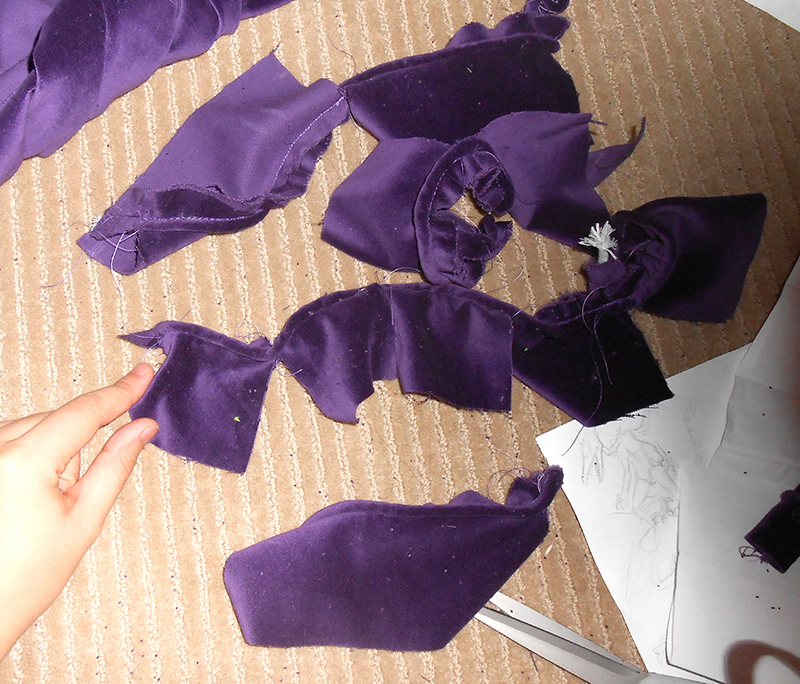
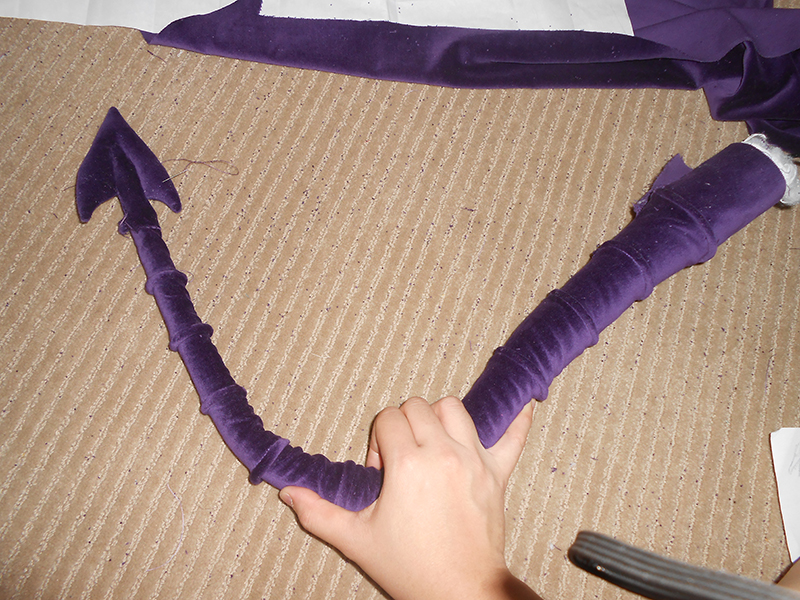
Time to work on the tail tip. I knew from my sketches that it can be a bit of a bear. The part that connects to the arrowhead tip comes in two pieces while the bulk of the tail is a single piece with a single seam. Also, connecting the arrowhead to the tail is really awkward to do by machine. But I'll give it a try...!
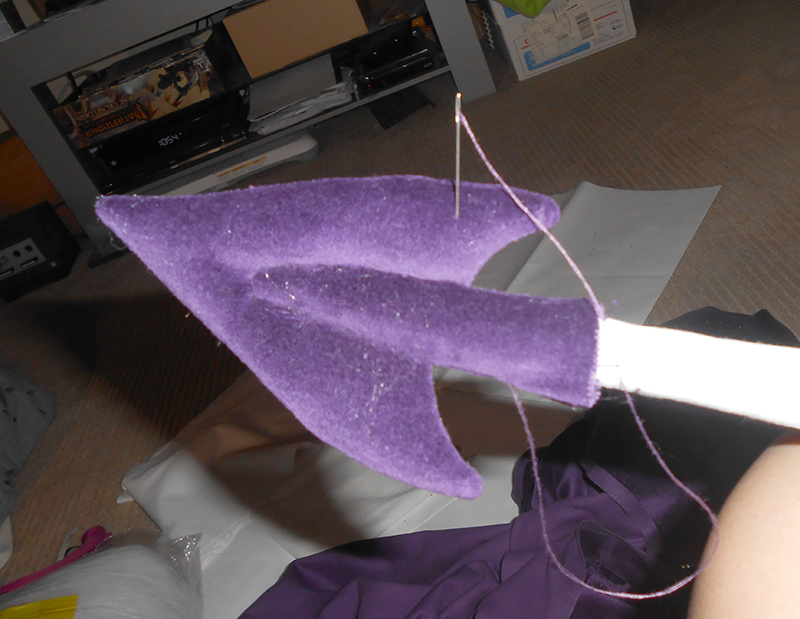
That was kind of a bad idea. I had to do part of the sewing by hand anyways because I was too demanding of the fabric and sewing machine. If I had done the whole thing by hand, I would have had more control. But I was afraid that going backwards would damage the delicate velvet. Oh well. While kind of crooked, the tail tip looks fine from a distance.
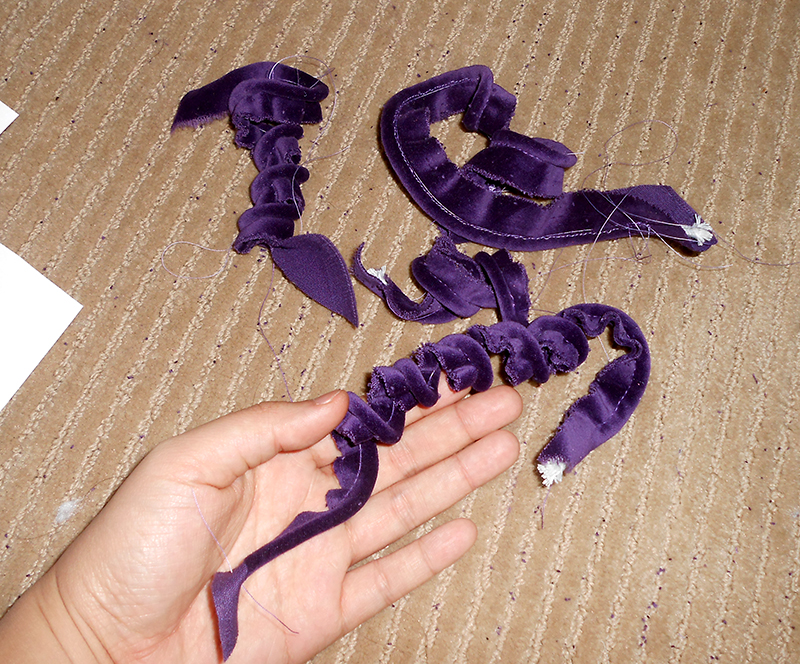
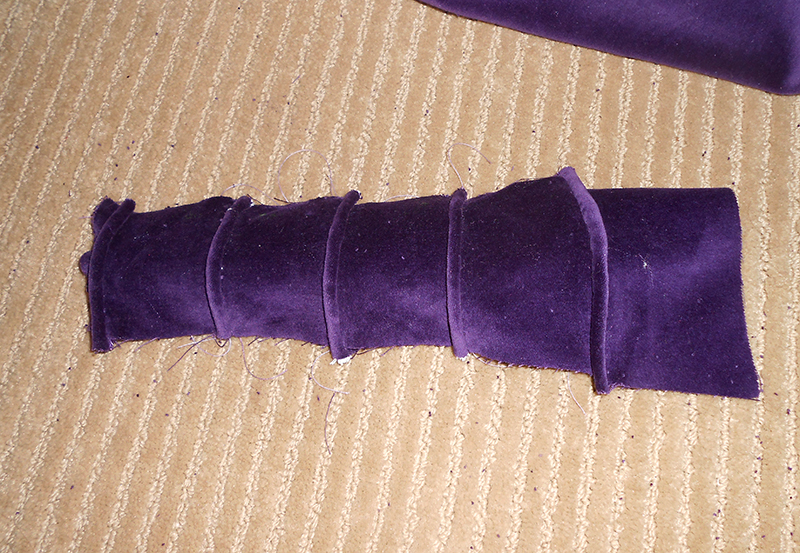
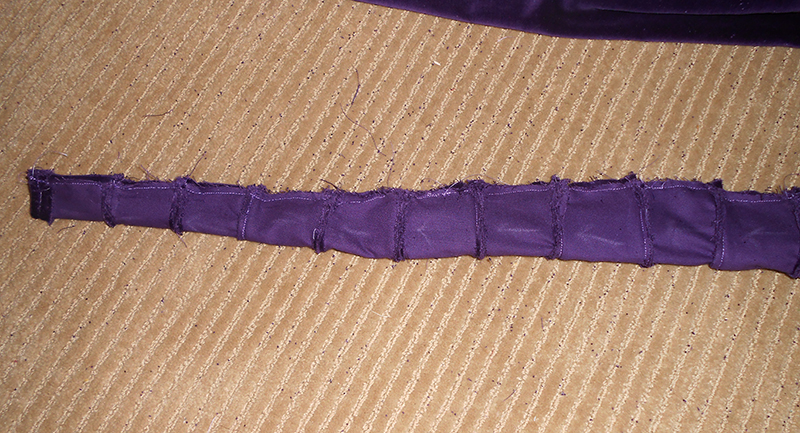
Onto the rest of the tail! Here's a bunch of piping that have been pre-gathered. How I gather it is when I sew the piping, I use a long stitch length and mess up the tension. Then I take one of the threads and pull on it, gathering the piping.
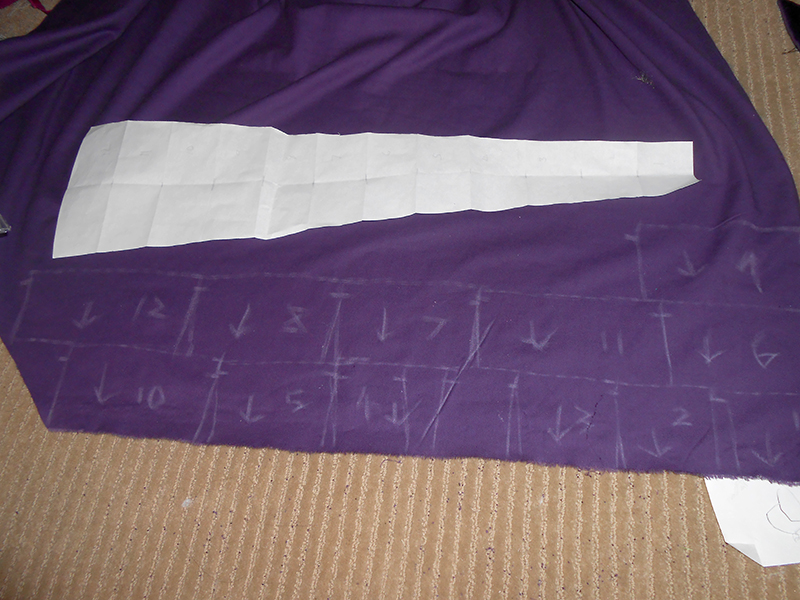
I folded the paper pattern I made for the muslin tail into 12 even pieces to make patterns for the tail segments. Each one needs to be numbered, and they all need to face the same direction. That's because velvet is a directional fabric in that it will reflect light differently depending on how the fabric is oriented.
Sewing the tail segments to the piping...
Sewing the piped segments together...! Starting to look great!
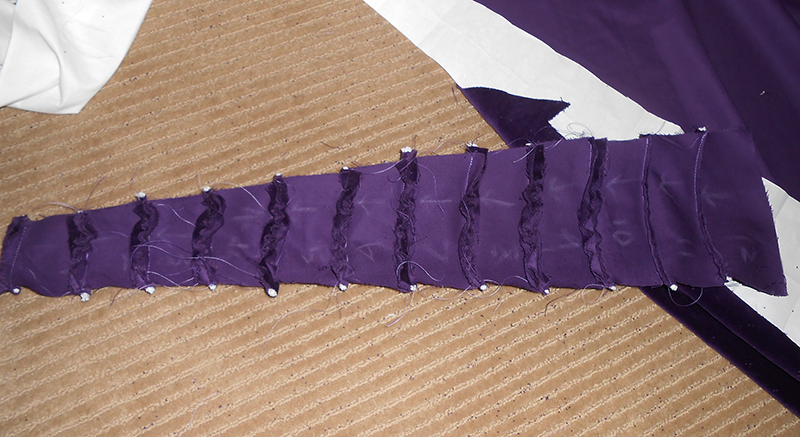
Here's all the segments put together from behind. And I've started trimming down the seam allowance of the piping to remove some of the bulk.
Oh man. That was stupid to sew. Going through all the thickness of the piping was hard on my poor machine. And I'm also discovering that trimming down the seam allowances so much was a bad idea. The fabric is easy to fray and will tear right out of the seams. Eek...
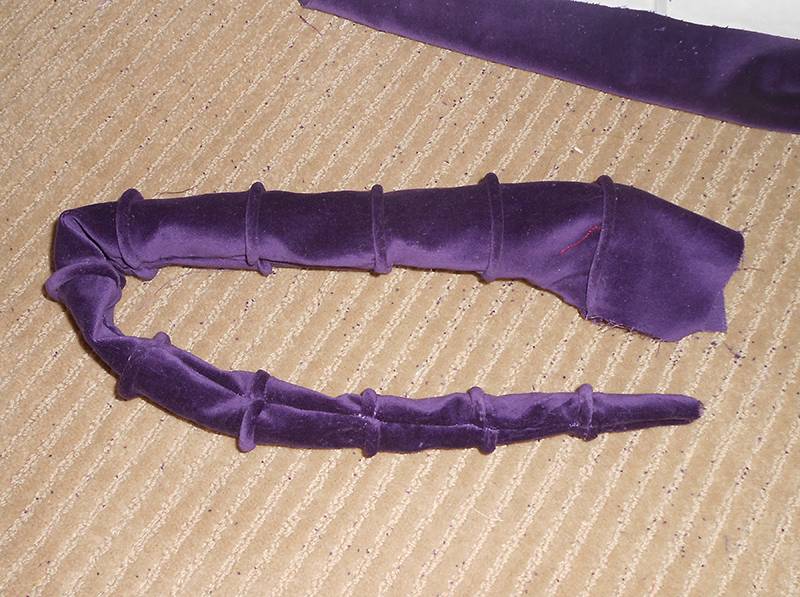
Turning the tail inside out is kinda rough. I have to be careful not to crush the velvet too much. The smallest ring tore away from the tail, which is not the worst thing. I can reattach it later. As long as it wasn't one of the middle rings that fell off. It makes me nervous about the tail's durability. I may have to treat the seams with some fray-check to hopefully prevent them from tearing in the future.
Now to slip the tail skin onto the muslin tail. Oh it looks beautiful!
Part 2: Lower Torso and Legs
