Ridley Plushie Bloggy Blog Part 5: Head and Closeups
Jan 3, 2014
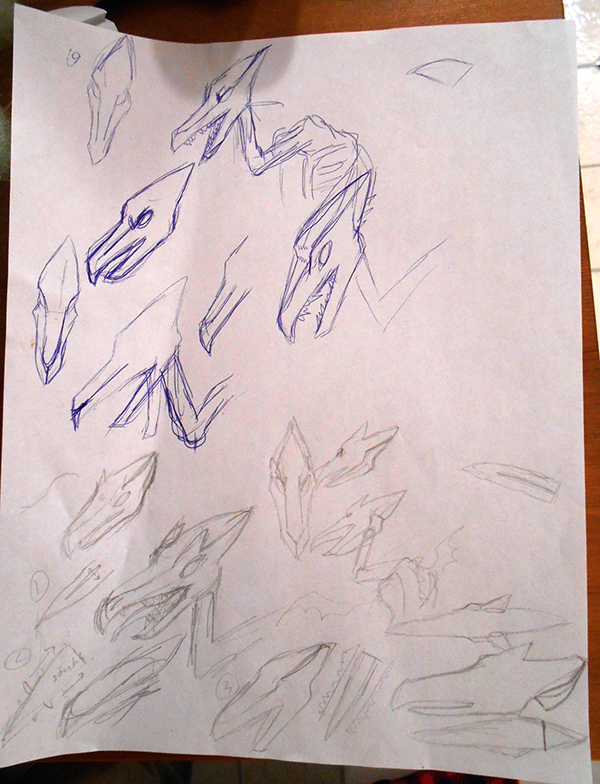
Will the sketches never end? In some ways, coming up with the head pattern was quite straightforward. There's just four main pieces: the top, bottom, and two sides. The front and back taper to points, which can be a bit tricky, but is no biggie for me.
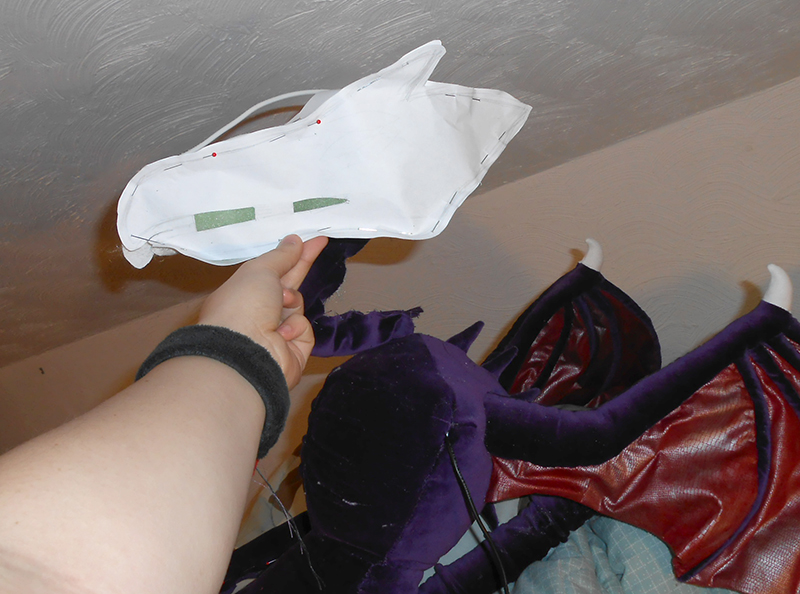
A little bit of manipulation for the eyebrow spikes, jawbones, and hook of the beak, and then I can focus on the mouth. It can sometimes be tough to make plushie mouths because when you stuff them, their throat can invert. I'm not too worried about that because Ridley's mouth is long and thin. The inverting will be minimal. Here I have pinned the pattern pieces together and placed them against the body to check the proportions.
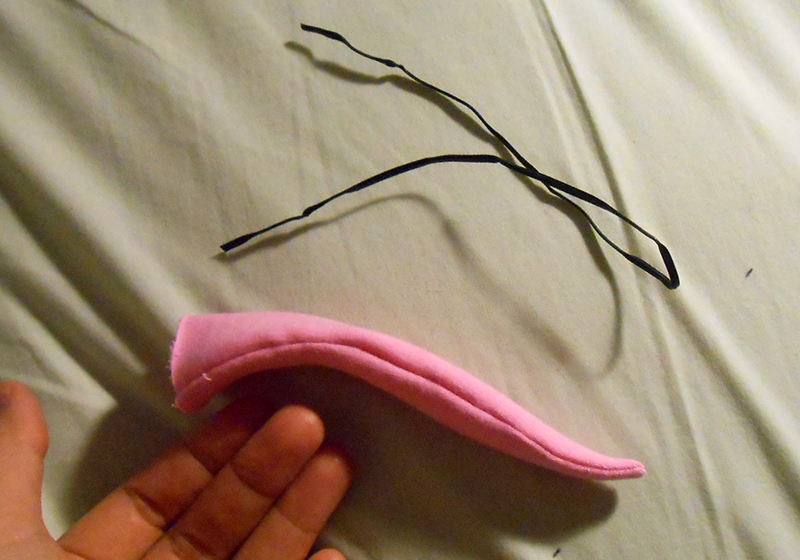
The tongue should be fun to make. I made it out of jersey and by stretching it in specific places, I gave it a pleasant curve. But I also want it to be posable. The wires I brought with me on my vacation were too stiff, unfortunately. But I found this twist tie that should work perfectly!
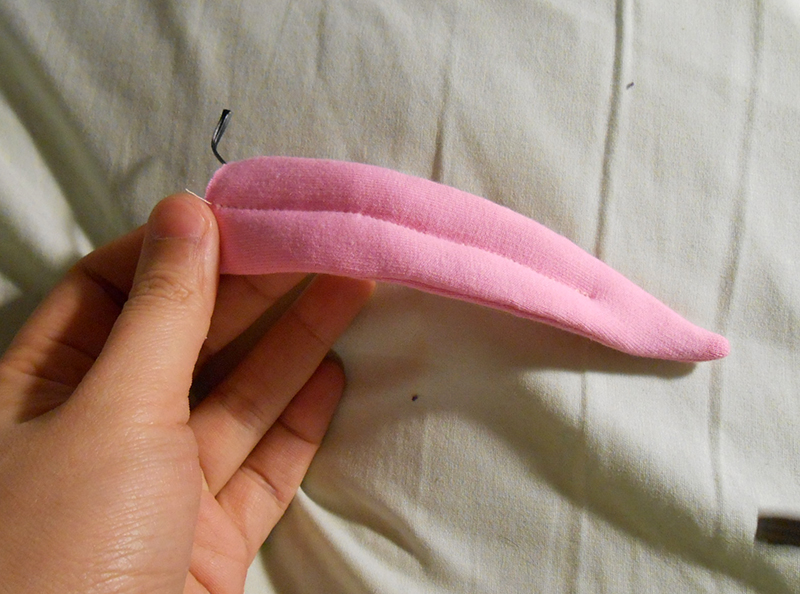
I stuffed the tongue gently and sewed in the twist tie.
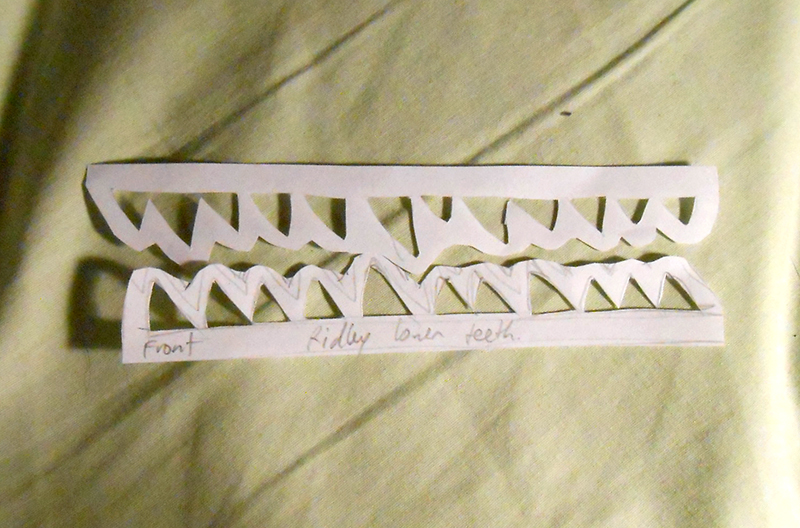
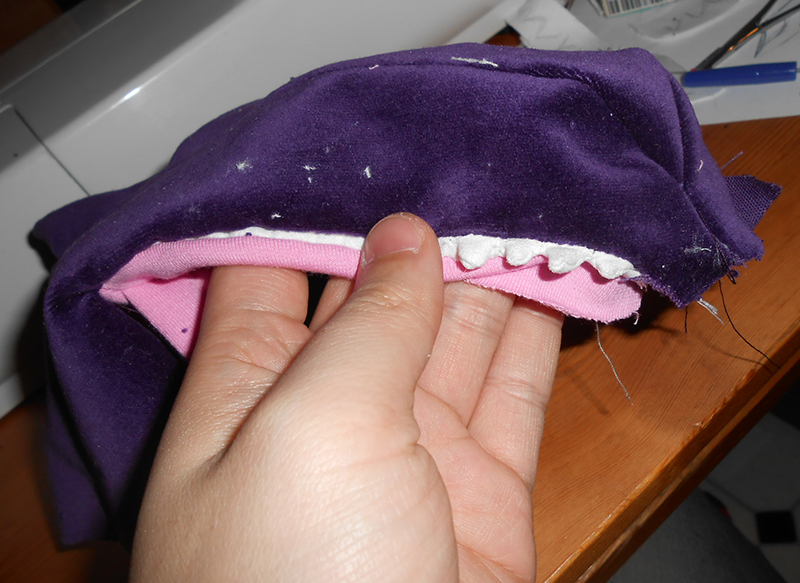
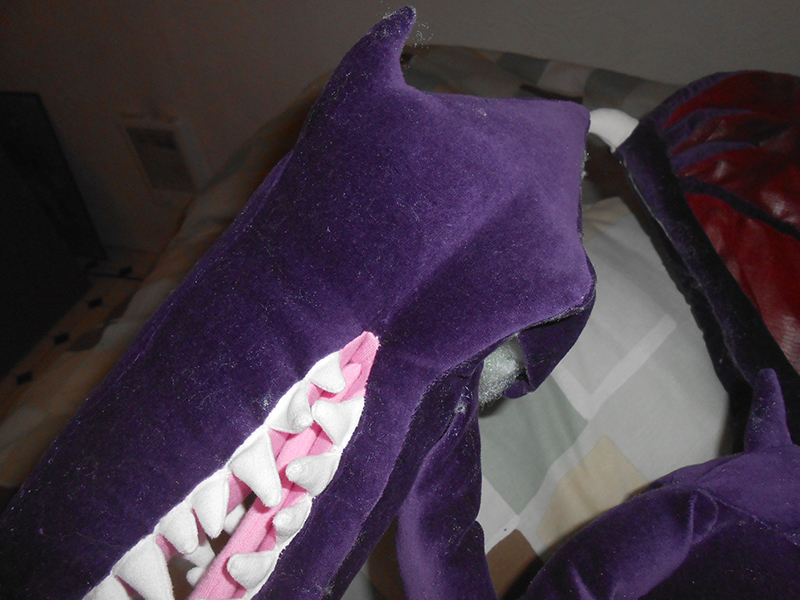
For the teeth, I designed the top and bottom rows such that they will interlock when the jaw is closed. I will also sew the two layers of each row of teeth separately to the outside and the inside of the mouth, and then sew them together. This is more difficult than the typical way of making plushie teeth, which is to sew the teeth separately before inserting it into the jaws.
I sewed one row of teeth and... hmmmmmmmmmm... Nope, this is not acceptable. I simply made the teeth too small. However, I knew that aside from that, my techinque for making teeth works. Time to painstakingly pick out the stitches and redo the teeth pattern.
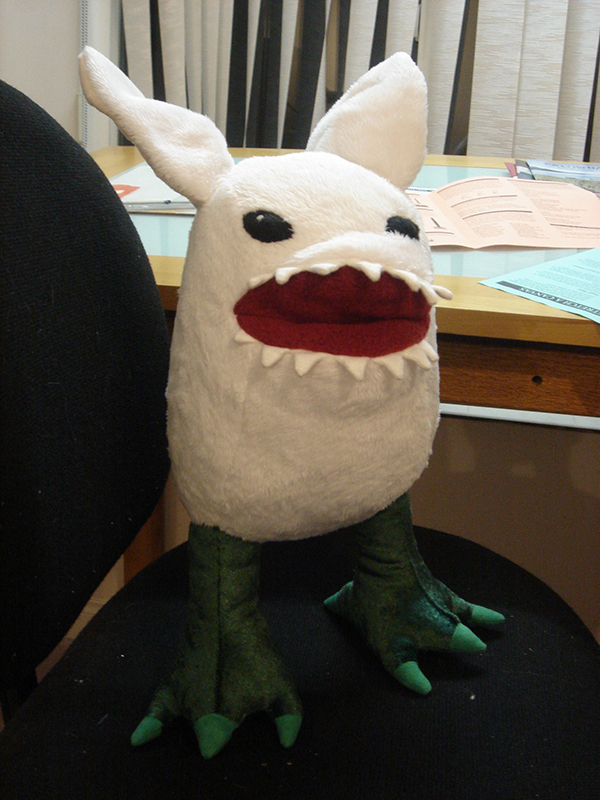
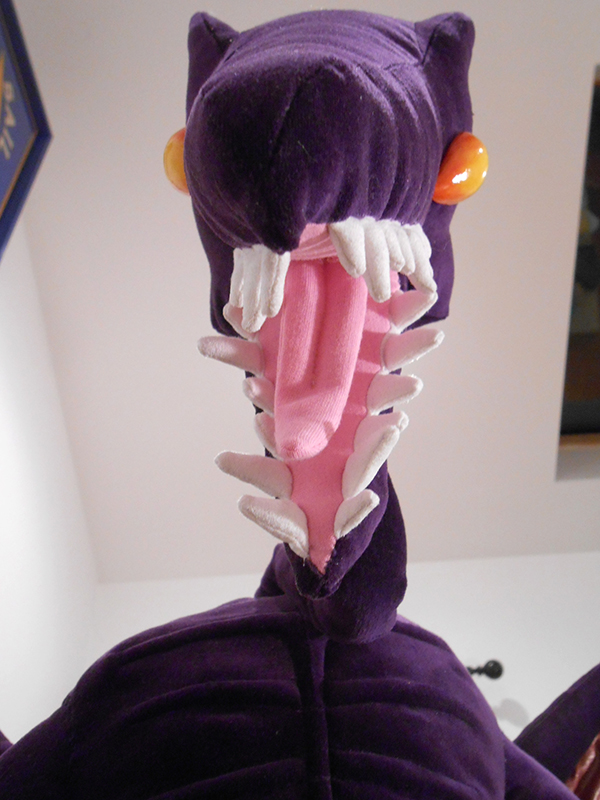
The reason I'm using a more difficult method of inserting teeth is because if I were to use the simple method, the teeth will jut out at an angle. And it will appear flat; real teeth have some dimension and are nestled by the gums. Little Birdie here has flat, angled-teeth syndrome. (Although he does have angled teeth in the game, so it's okay) He also has the inverted throat I was talking about earlier because his mouth is so shallow and wide.
This size of teeth is more like it! The inside of Ridley's mouth is jersey and is cut smaller than what would geometrically fit into the perimeter of his mouth. I will be deliberately stretching the jersey to fit inside the mouth and it is my hope that it will bring in the teeth towards the center, preventing them from sticking out at an angle.
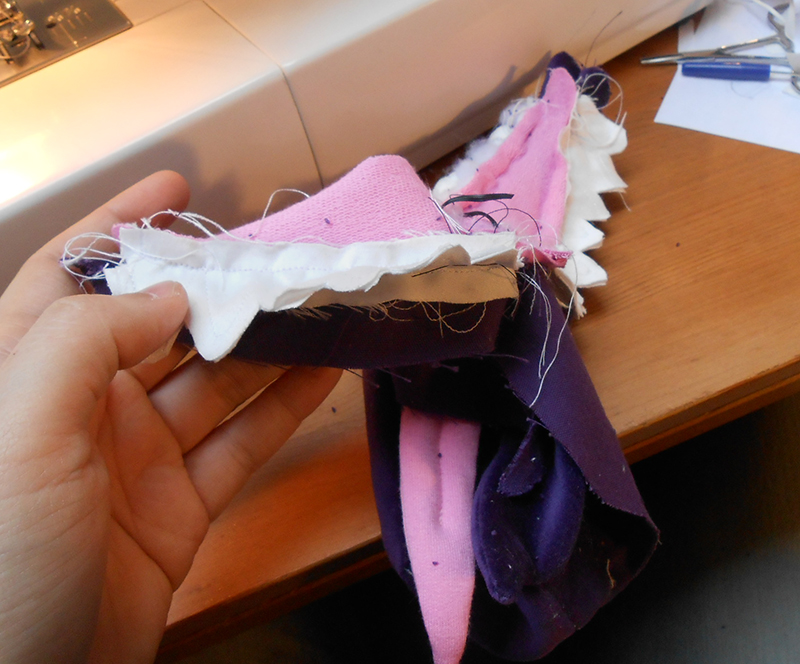
Sewing all the teeth. Once sewn, the seam allowance of each tooth has to be trimmed carefully and then it has to be stuffed firmly.
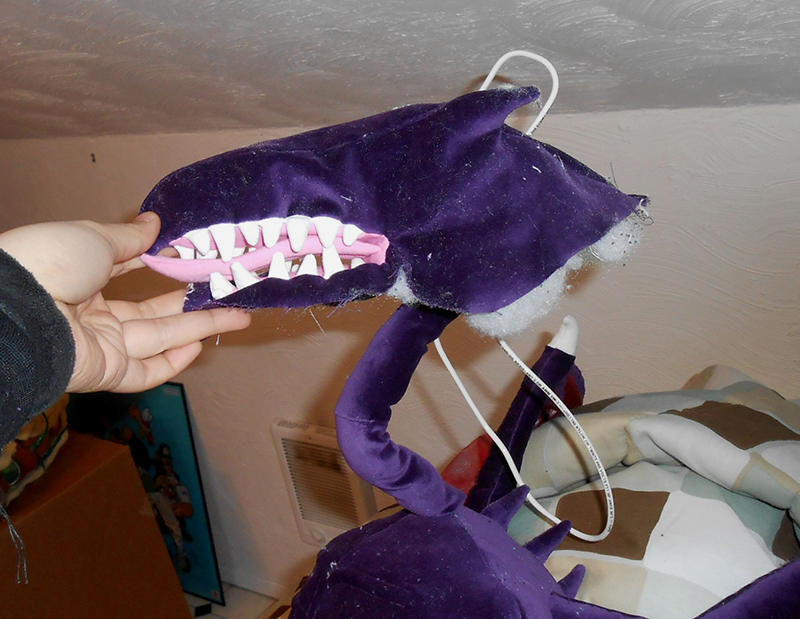
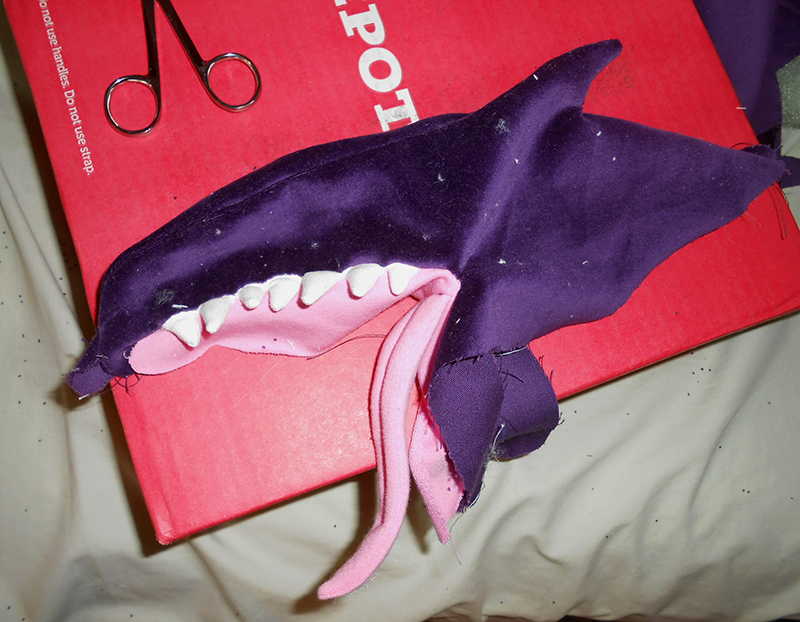
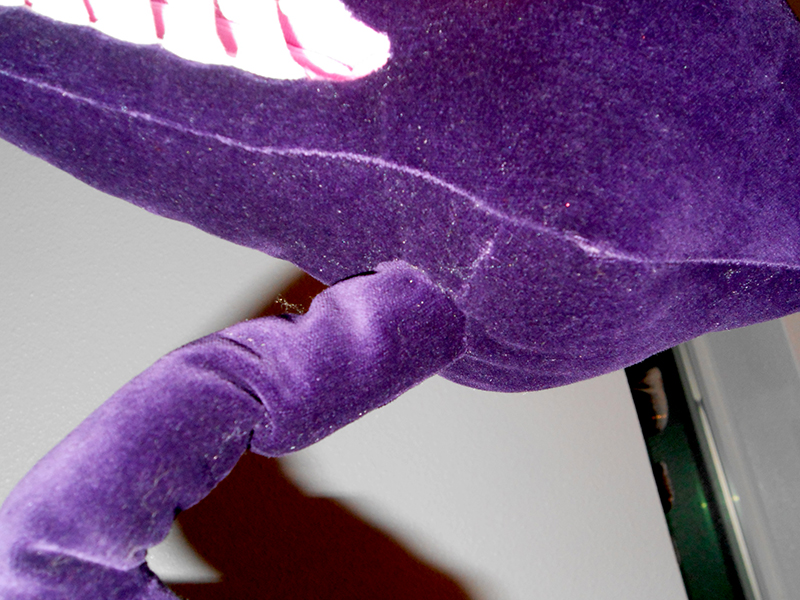
Haha so awesome. Sometimes Ridley is depicted with a lolling tongue, but it looks a bit silly so I decided to shorten it. You might notice that the neck is finished. It's simply a tube with a bit of definition to his mighty hinged jugular. It is lightly stuffed and kept loose so that the neck can move easily.
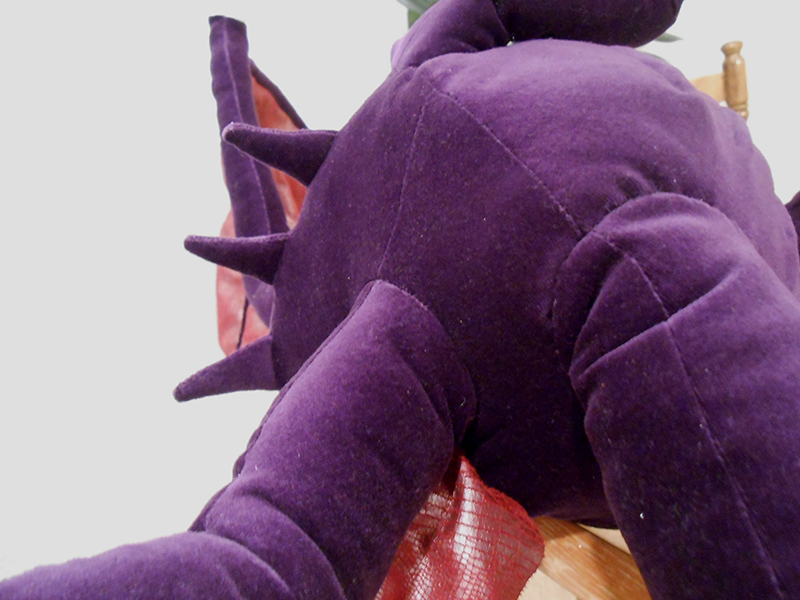
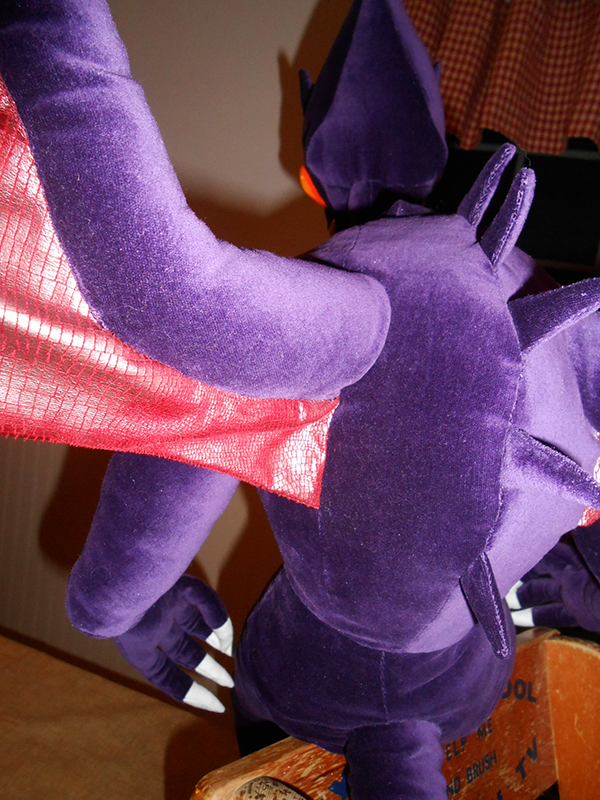
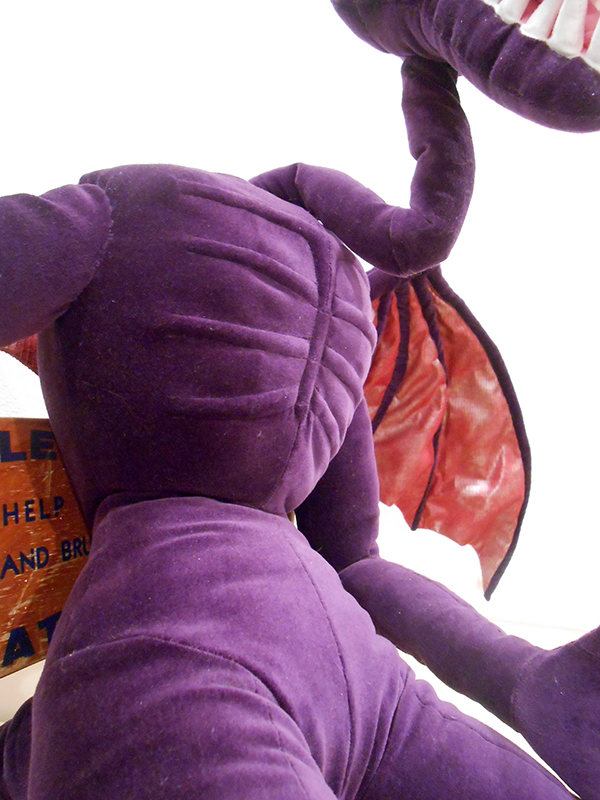
You might notice that in most of the pictures so far, the velvet has white specks all over it and the area around is littered with purple specks. The velvet sheds its fuzz like whoa and is also super grabby of the silky stuffing and any hair lying around. No point in cleaning it all up quite yet, but I will brush down everything with a lint brush once I'm done.

Yesssss
Jan 4, 2014
I considered a few different eye designs before going for a simple teardrop shape. That would make it easy to make two identical eyeballs. I'm sticking a paper eye pattern to the head to see how I like the size.
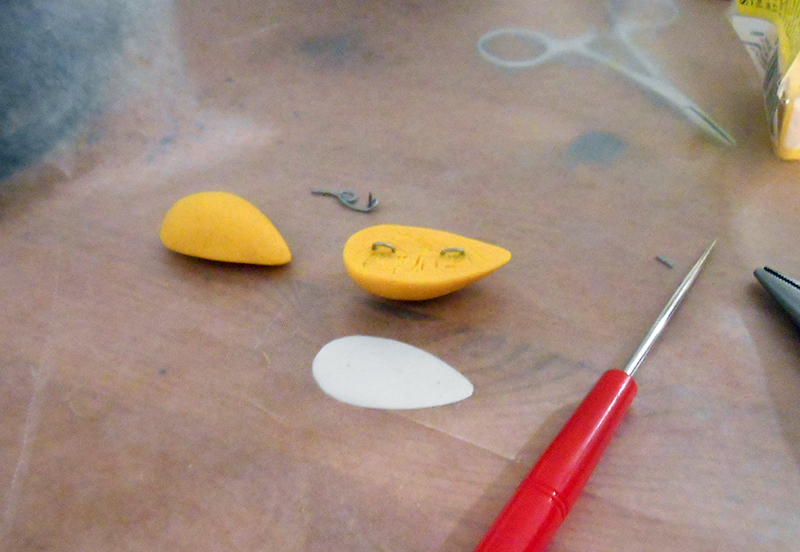
The eyes are made out of Sculpey, which is a bakeable polymer clay. I inserted a few loops of wire into the back so I can sew the eyes on. I also roughed up the back a bit so glue will have something to grab onto.
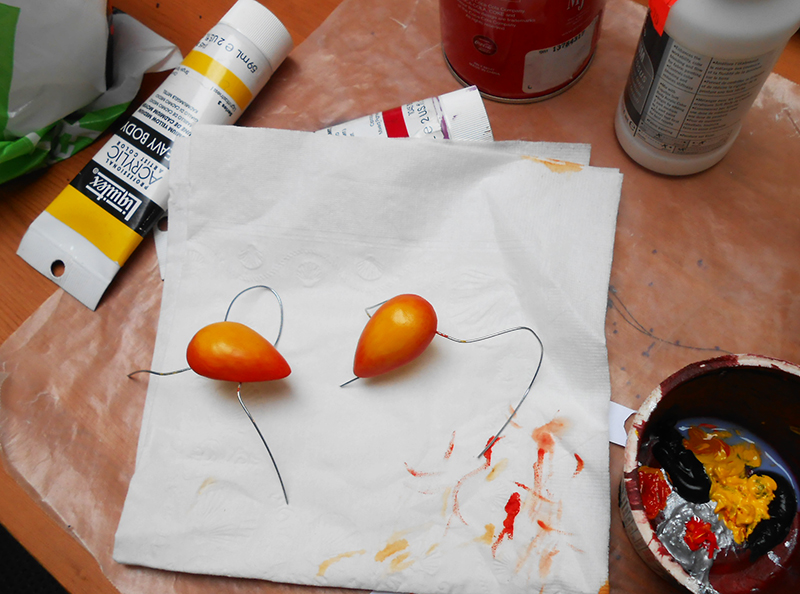
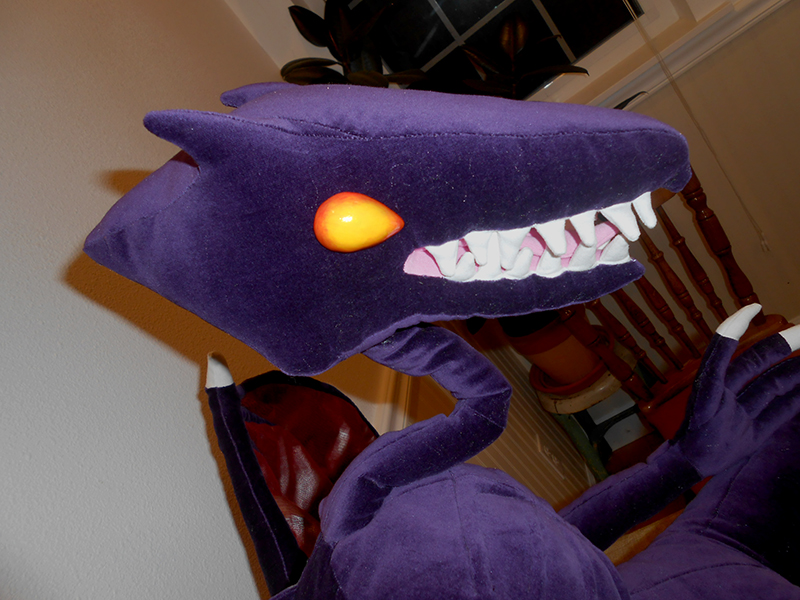
Once the Sculpey is baked into hardness, I sand it as smooth as I can, then carefully paint an orange glow around the eyes. I considered giving Ridley pupils like in Smash Bros. Brawl, but pupil-less Super Metroid Ridley is more iconic. Once painted, I'll cover the eyes with gloss medium, let it dry, then add another layer. And another and another, as many as time will allow. The more layers I add, the more vibrant the eyes will be.
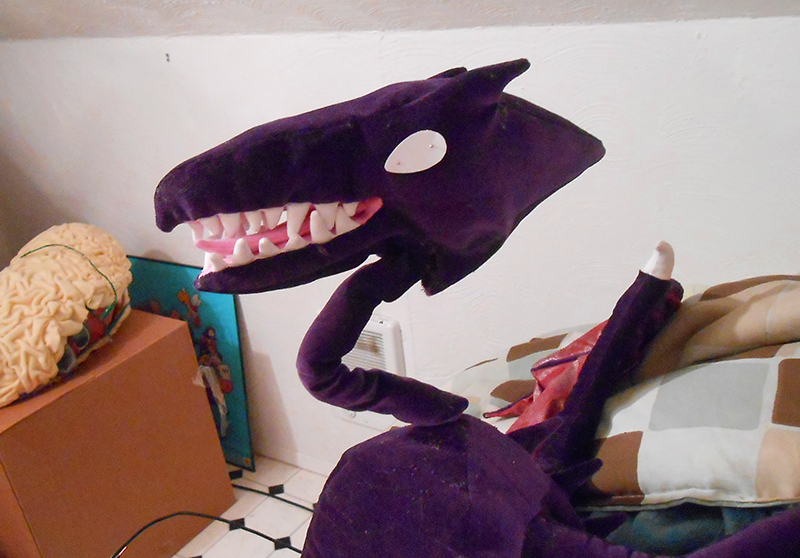
Oh no, I made an oversight! Because the jersey is stretchy, it will expand as it is stuffed. But when you sew it, it gets stabilized. So where I sewed the tongue, the jersey will not stretch. As a result of this, the corner of the mouth is dimpled and there is a big wrinkle along the cheek. There are also small wrinkles on the face where the jersey is pulling unevenly between the teeth. There are ways of sewing jersey to preserve its stretch. Next time, Gadget, next time.
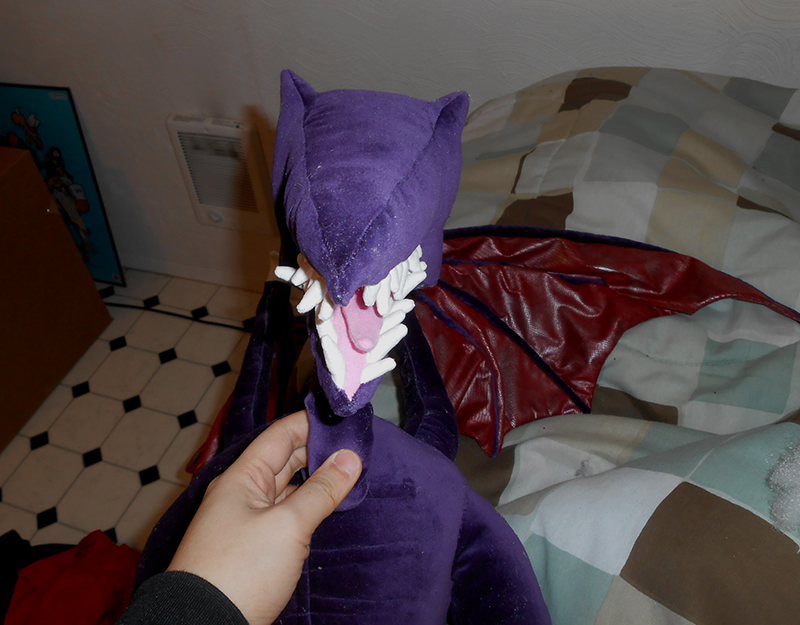
Haha Ridley always looks so dopey from the front. And you can see my attempt to keep the teeth from angling wasn't entirely successful. The stuffing in the teeth tends to escape. Yet another thing to fix in the future.
Aw jeeze, I didn't bring my long doll needles. I had intended to sew the two eyes to each other from the inside and apply some tension, thus embedding the eyes in the face. But my normal needles are too short to pierce both sides of the face at once. Oh well. I sewed the eyes to the face and used glue to hold them right against the fabric.
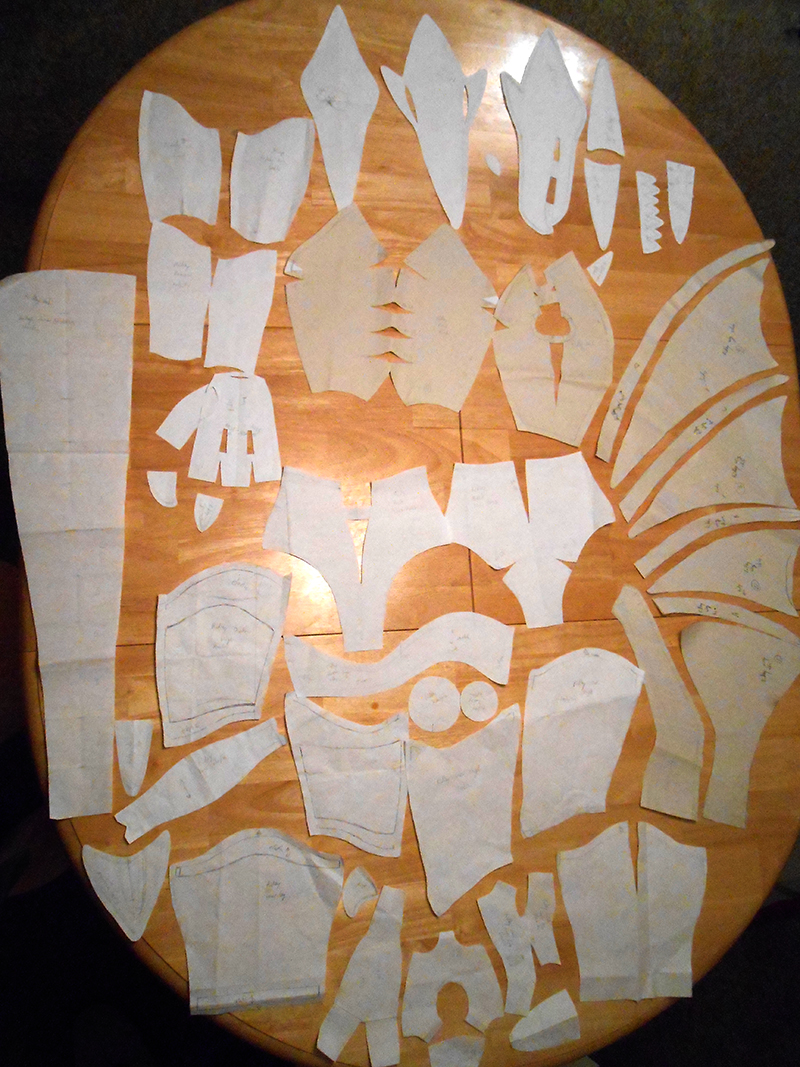
And... That's it! Ridley is done! Here are all the pattern pieces I used. Many of them had to be cut more than once and none of my experimental patterns are in this picture. This plushie has caused me a good amount of time, stress, and effort, but it was definitely worth it. I have an excellent gallery piece to show off, Ridley's final owner is going to be very happy, and AGDQ will rake in tons of donations for the Prevent Cancer Foundation. Horray!
More closeups are below. Photos of the finished Ridley are in the Gallery. I hope you had fun looking at this blog-thing!


To Ridley Gallery
Back to Part 4: Putting stuff together and Hands
