Ridley Plushie Bloggy Blog Part 2: Lower Torso and Legs
Sept. 30, 2014
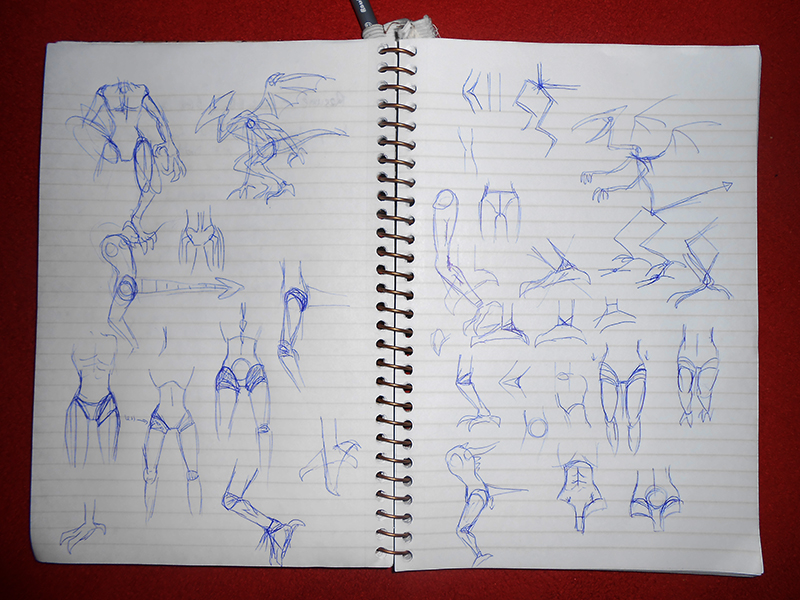
More sketches, especially of Ridley's voluptuous feminine hips. I want to make his body posable to some degree, but not use any joint techniques such as cotter pins or button joints. Those will result in visual breaks along his body that I do not want. The wire should be enough to pose him with and I plan to add jersey material around his joints to make them more flexible. The hips, knees and ankles will require that flexibility.
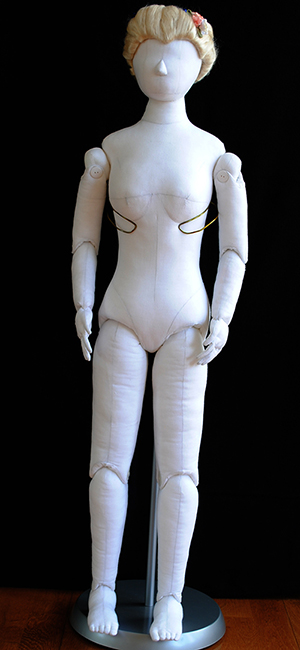
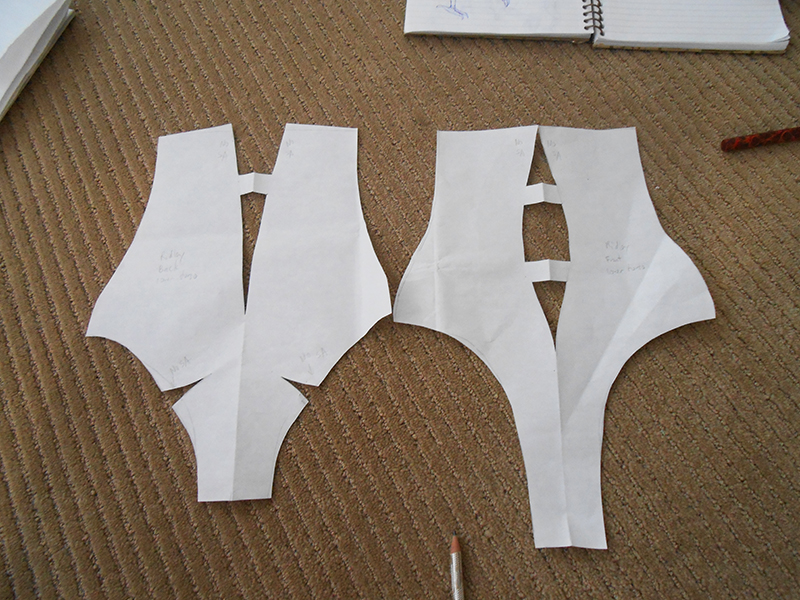
As for the actual shape of Ridley's lower torso, I referred back to a 1/2 scale woman plushie I made a while ago. You can see how she has button joints hinging her ankles, knees, wrists, and elbows, and even kind of a ball joint on her shoulders for a greater range of movement.
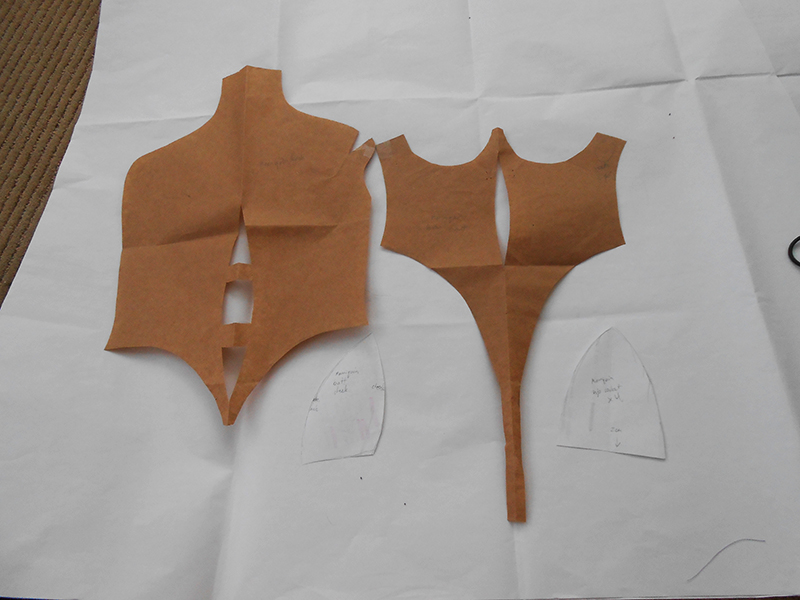
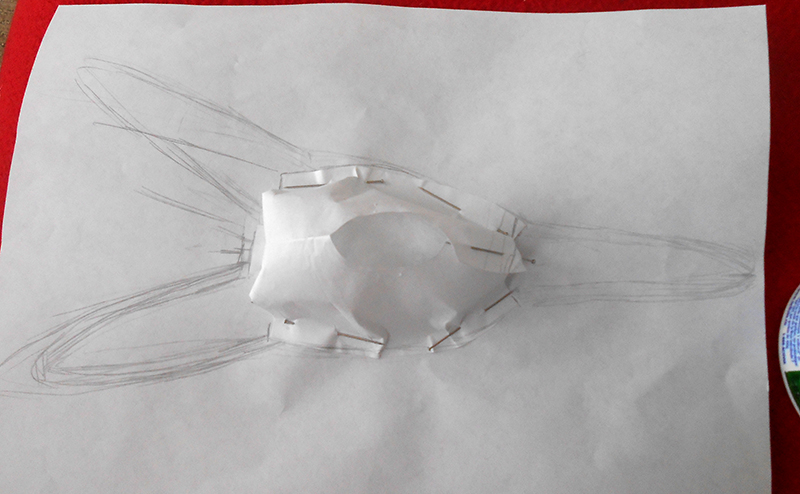
Here is the pattern of her lower torso.
Back to Ridley. I now want to get some idea of proportions. I start off pinning together a scrap of fabric and stuffing it, moving the pins where I feel it can use adjustments in shape and size. The tail is nearby, so I can refer back to it and make sure it torso looks alright proportionally. Then I transfer this loose pattern to paper.
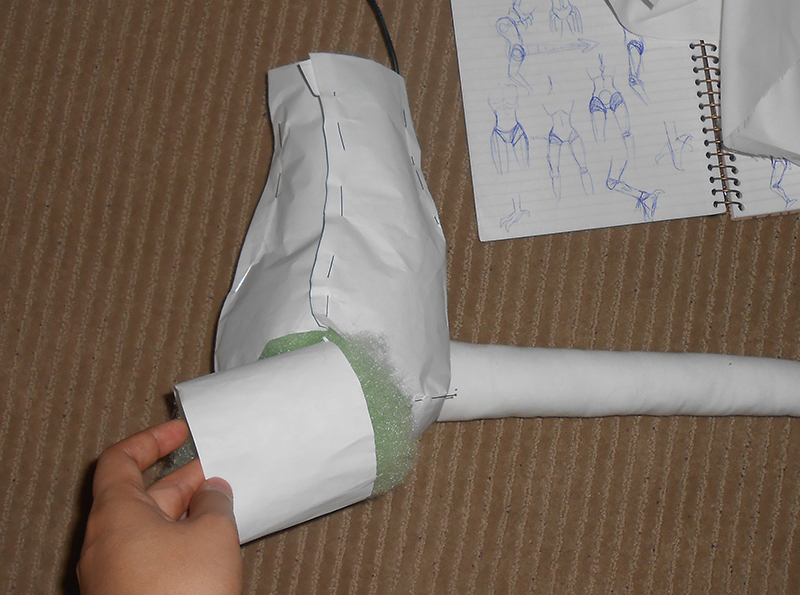
I pin the paper pattern together and stuff it, getting an even better idea of the torso's final shape. Further adjustments are made, such as to tuck in the back of the leg hole slightly to make a bit of a bum. I also manipulated the darts such that Ridley will appear somewhat hunched. The leg hole is kind of large for the leg, but I realized that if I stick the legs in at an angle, they don't need to be so thick.
Yet another paper pattern of the torso is made with further adjustments. I think I'm ready to cut into fabric using this pattern. The torso is outrageously long on purpose and will likely be covered or shortened later. Those weird bars in the middle of the darts simply keep the paper from flopping around and are not part of the actual pattern.
Oct. 8, 2014
Here be the fabric version of the torso plus a the beginnings of the leg pattern, currently in paper.
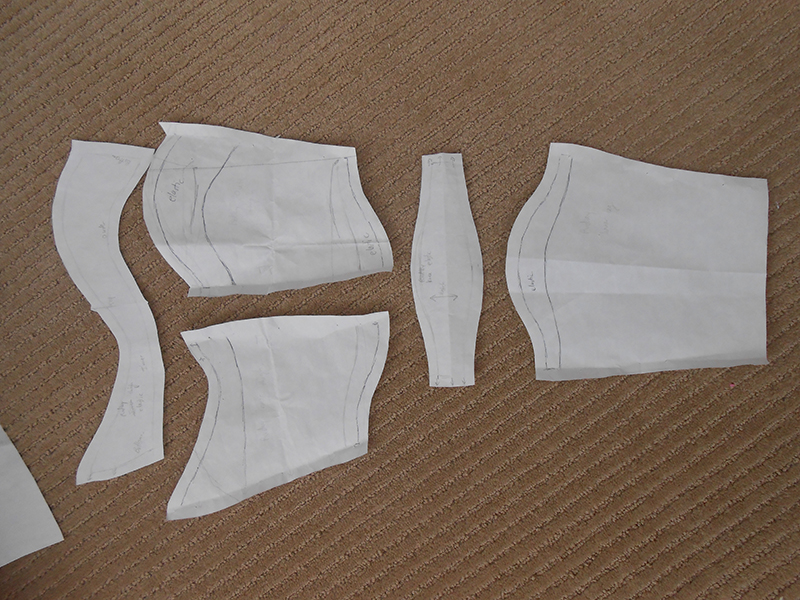
The basic thigh and lower leg patterns are completed, and then I went about making sections that will have jersey. I have to make sure the jersey has 2-way stretch and the stretch goes up-and-down when I cut the fabric. If the jersey has 4 way stretch or if the stretch is running horizontally, then those areas will look swollen once the leg is stuffed. You might notice that the front of the knee is designed to have a lot more fabric to it. That will result in the knee being able to bend backwards more than it bends forwards, which is perfect. There's a little bit of that kind of consideration in the upper thigh as well.
Stuffed leg! And the stretch actually works beautifully to aid the bending of the joints exactly like it's designed to do!
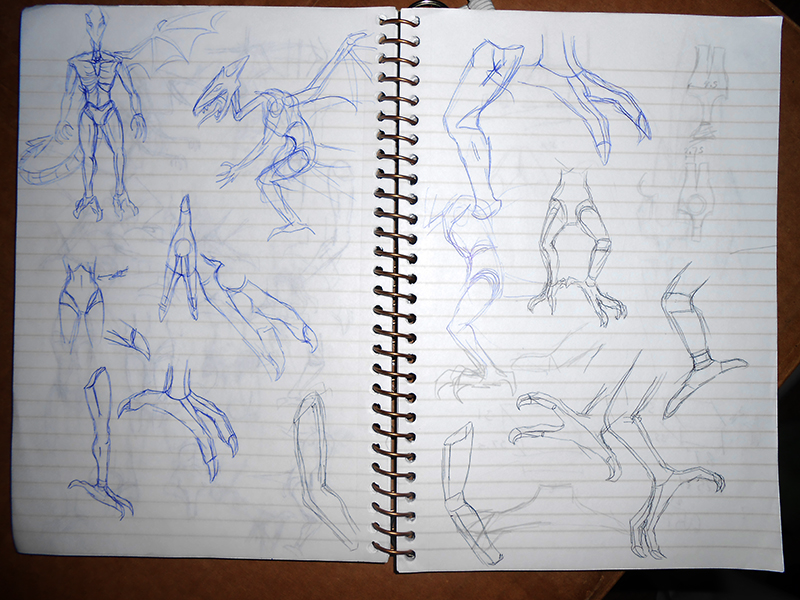
At first, I wanted Ridley's feet to have a pattern that involves a lot of seams going down each toe, as you can see in the sketches. That will give me a lot of control over the shape of the foot. But I started falling in love with the method of using jersey to aid in movement, and having so many seams will add bulk and stiffness. Which is bad for toes.
So I start approaching the feet differently, resulting in a pattern that is both simpler and more complicated. There are fewer pieces, but that means I have a harder time doing pattern manipulations to get the shape I want. The main foot section is especially puzzling. I know more or less what the bottom of the feet will look like, so part of my process involves pinning the main foot to the bottom and manipulating it from there.
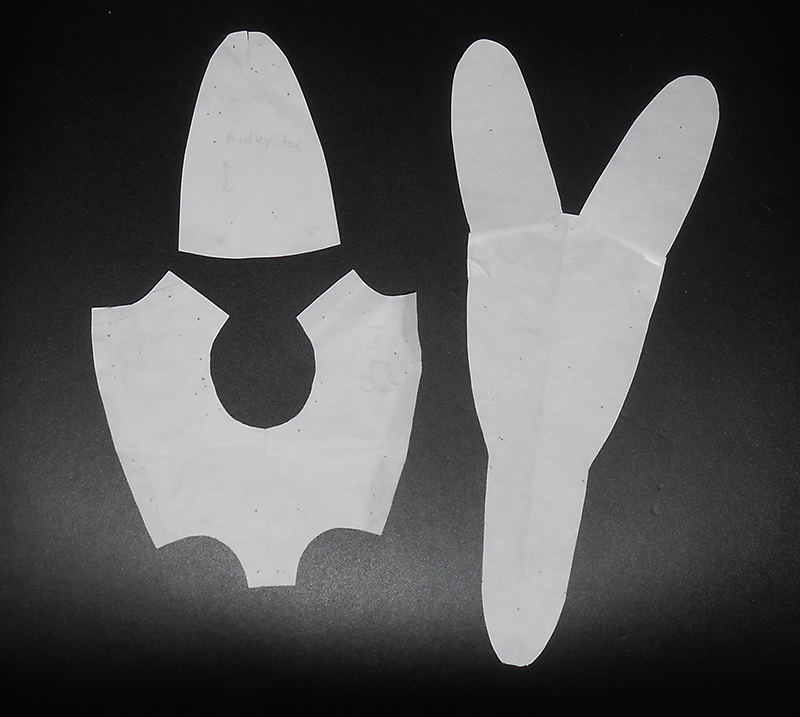
This is what the final foot pattern looks like. The three toes use the same pattern piece and will be made of jersey. That'll let them bend downwards easier than upwards.
Sewing the toes and ankle to the main foot is tricky! Sewing small curves together is always tricky.
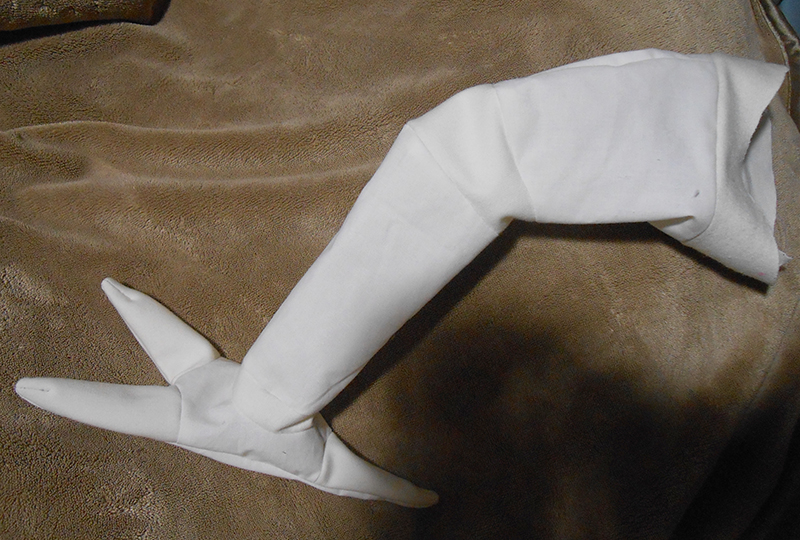
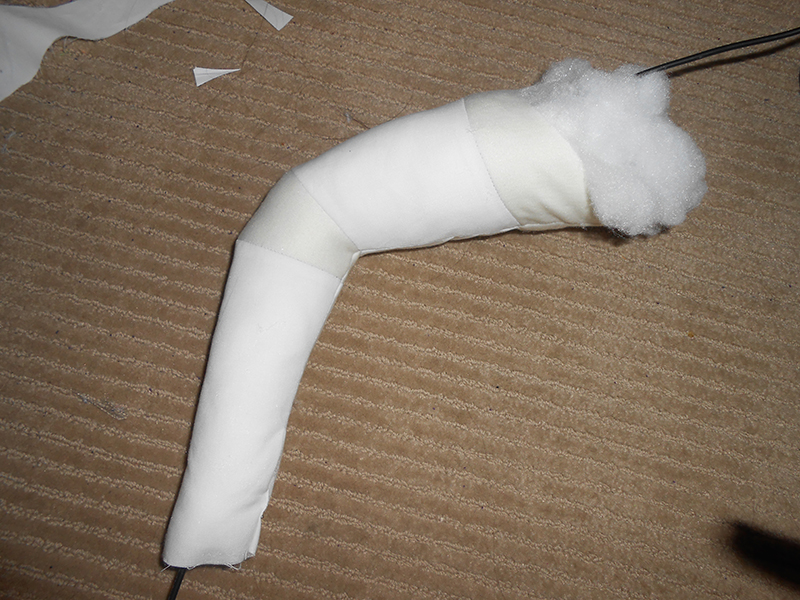
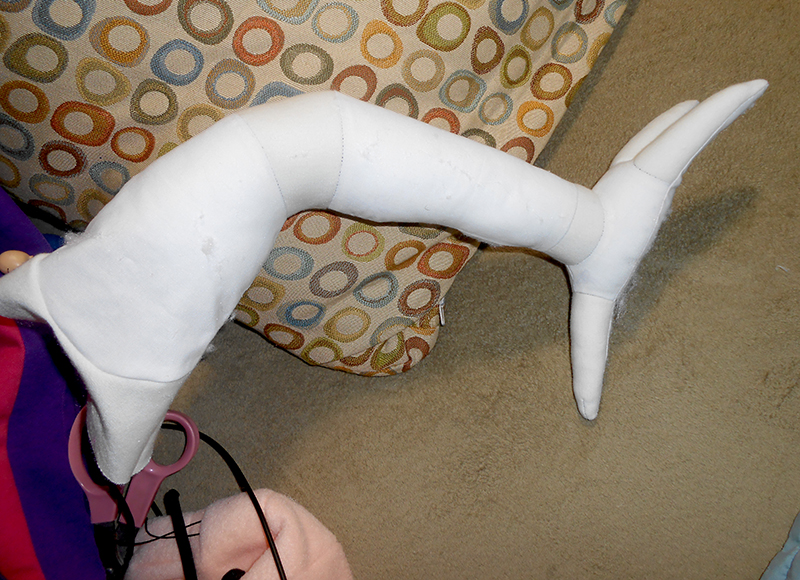
Leg!
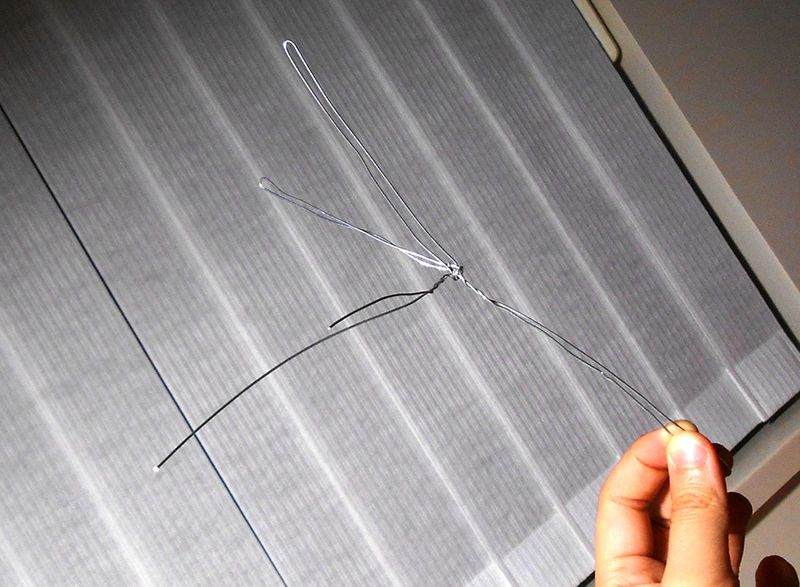
The wire for the feet. Unlike other plushies with wire armature on the inside, I'm making the wire after I've established the plushie form and inserting it in pieces. I feel like this is the best way to go for this plushie, with its crazy complicated parts.
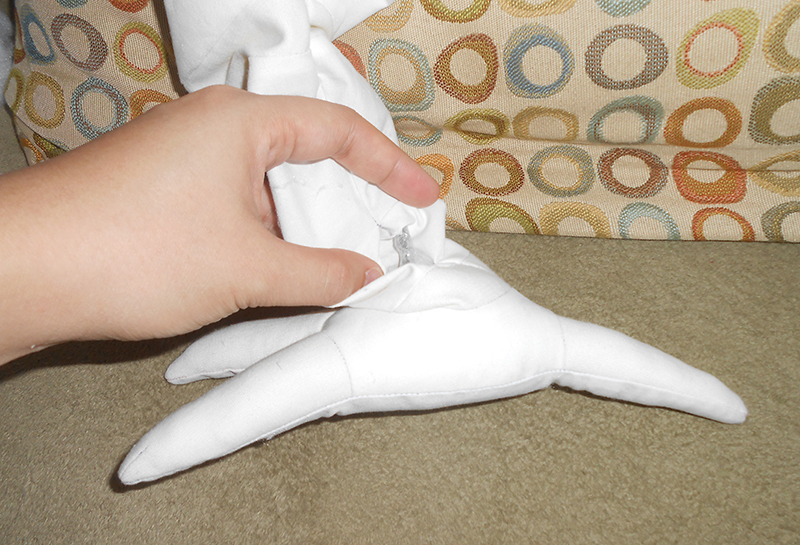
I've left a hole at the back of the leg for the purpose of joining the thinner foot wire to the thicker leg wire. You can kind of see the wires here, twisted together and wrapped in tape.
Leg!
Dec. 28, 2014
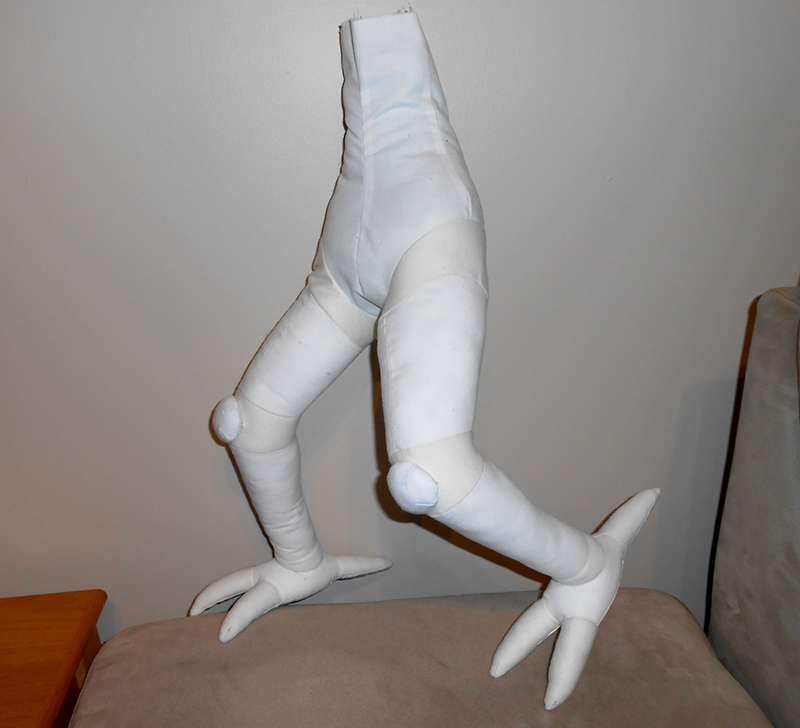
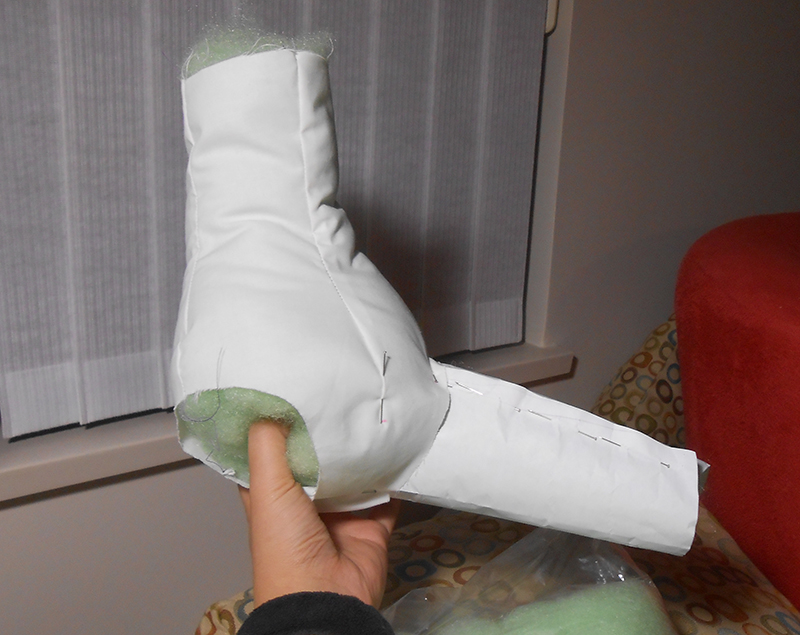
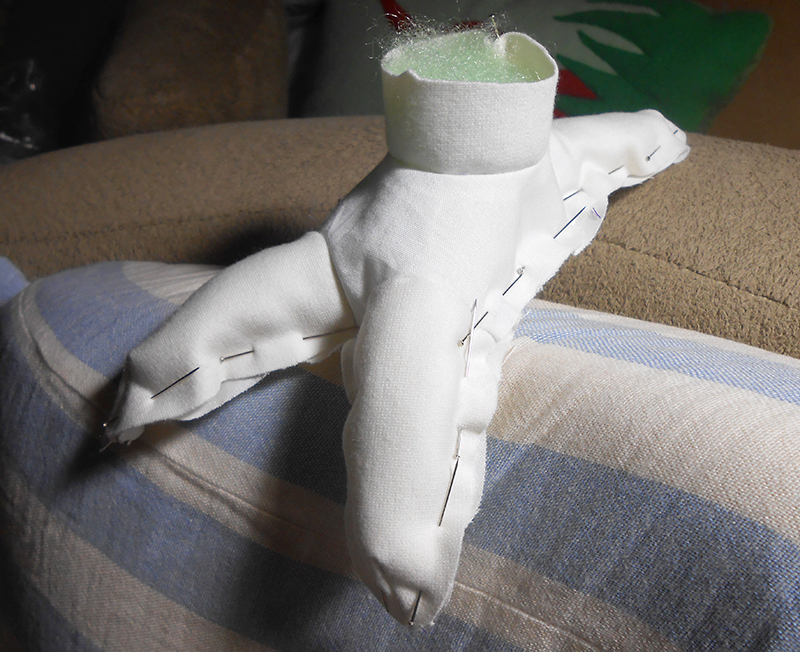
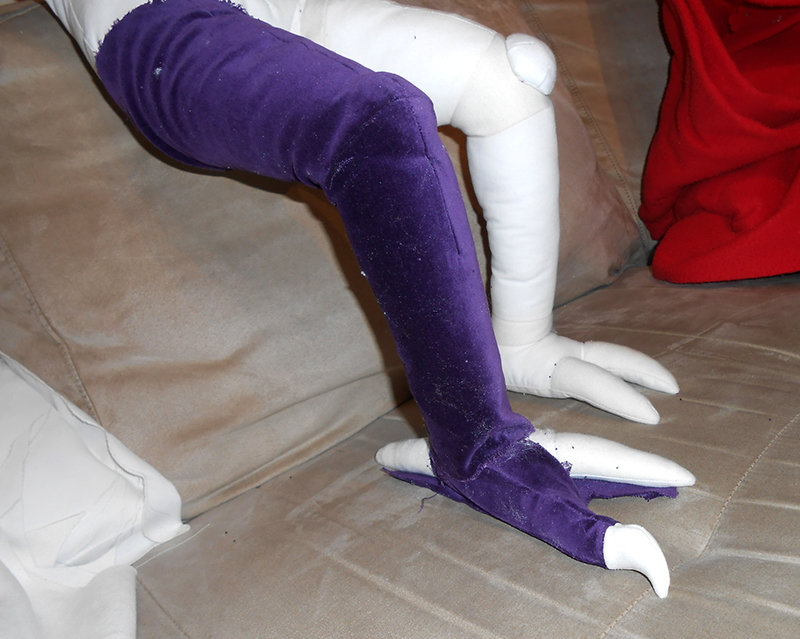
Whoa now the legs are attached, stuffed, and wired! And if you notice, I've added kneecaps. I took away some of the knee's "sharpness" when I incorprated the band of stretchy jersey across the knee, and now I'm bringing it back. Plus, having the kneecap be a separate piece would make it behave more like a real kneecap. Hopefully.
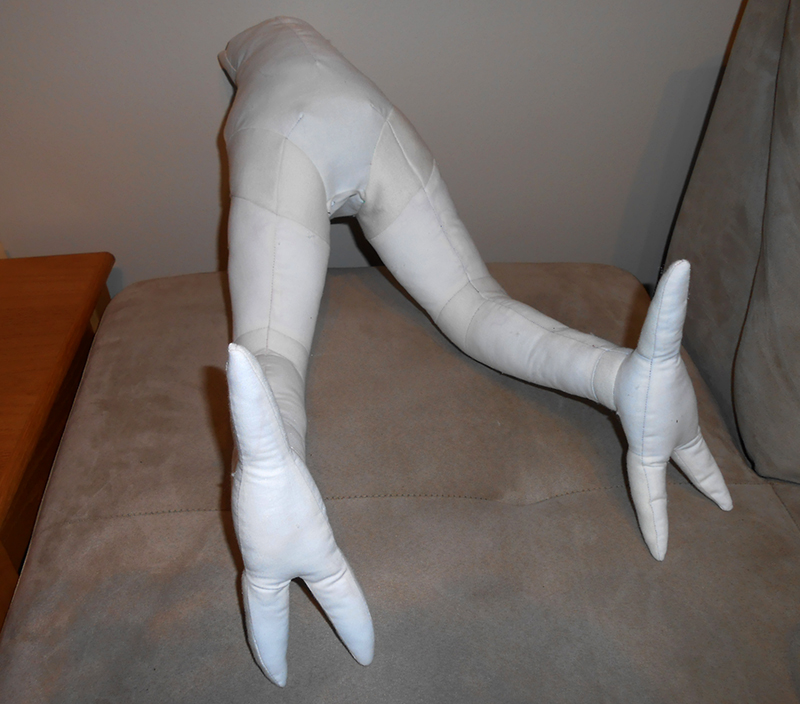
Ridley's got a hint of booty. His legs' pose is a bit weird, kind of halfway between standing straight and sitting. That's so the jersey will not be unduly strained if it were to bend forward or backward, allowing equal stretch in both directions. His tail will be attached later, probably entirely by hand stitching.
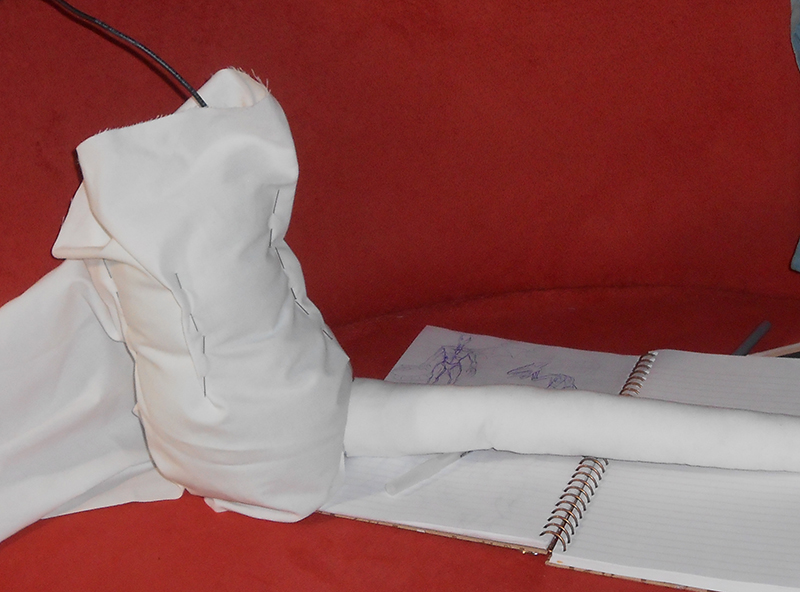
I started on the outer layer of the leg. The back is all pinned together for the moment.
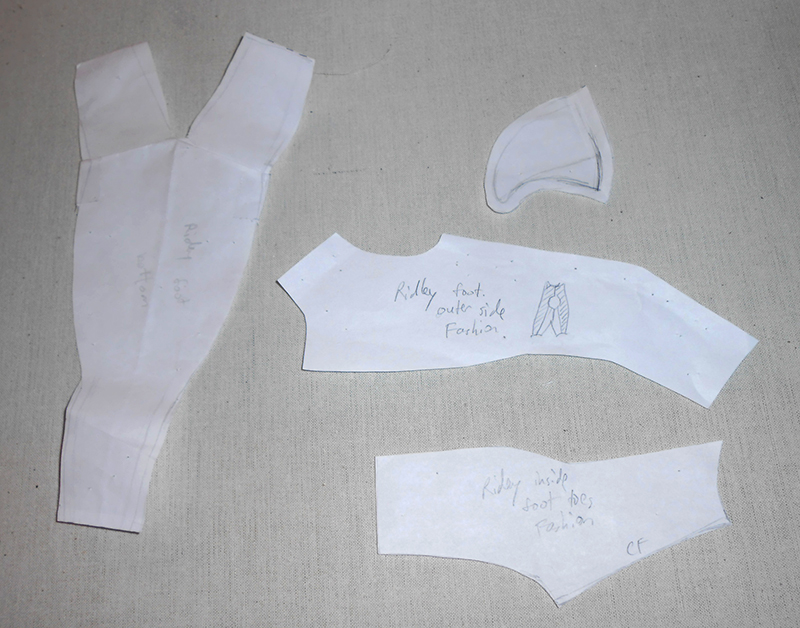
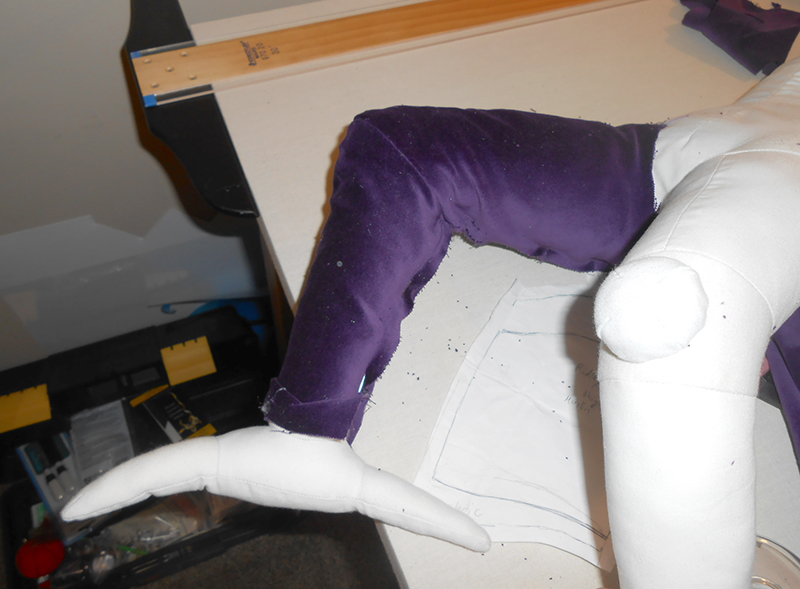
And here are some of the pattern pieces of the outer layer of the foot. Look at all those stupid subtle angles. They are all so important, but so so stupid to conceive of. And the pattern is very different than the inner layers of the foot. That's it. When I make the arms and stuff, they're gonna have the same pattern inside and out. They're thinner appendages, so they won't need the inner jersey for stretch.
This is a test of the pattern using velvet, so only one toe is needed. The pattern works and looks great, at least. Something I'm noting for the next time I make Ridley (if there is a next time!) is that I should have used a stretchy velvet fabric after all. This technique of putting a layer over a stuffed form seems to suffer a bit from using a non-stretchy fabric. It looks more like 'clothes' than like 'skin'. Oh well!
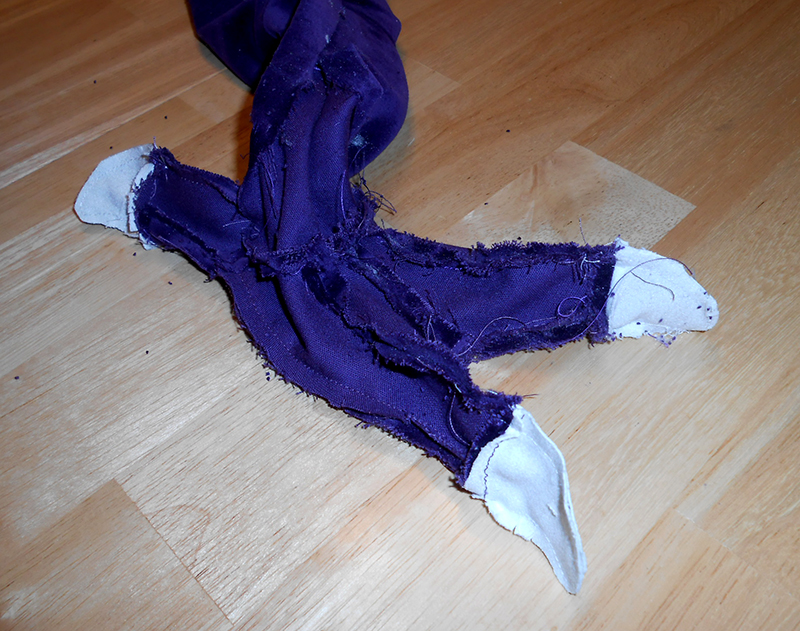
What a messy mess when inside out.
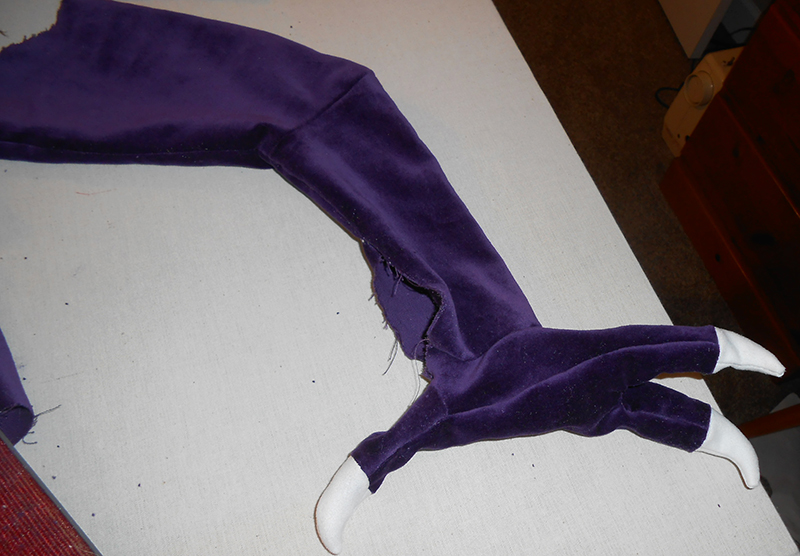
But turned to the right side, it looks great. Notice how the back of the heel is left open? Kind of like how high boots need zippers or laces at the ankles, Ridley's thin ankle needs to be open in order for his big feet to fit. It will be hand sewn later, once the feet are shoved in. It will also be useful for adding in extra stuffing to the tips of the toes, because the outer layer of fabric has a different shape than the stuffed muslin layer.
To Part 3: Upper Torso and Wings
Back to Part 1: Research and Tail
